> ## Documentation Index
> Fetch the complete documentation index at: https://docs.orq.ai/llms.txt
> Use this file to discover all available pages before exploring further.
# Create Playgrounds
> Test LLM prompts in an interactive environment. Compare models side-by-side, adjust parameters, and iterate on prompts before deploying to production.
Use **Playgrounds** to:
Test [Prompts](/docs/ai-studio/prompts/prompts) in an easy-to-use interactive environment before deploying to production.
Run the same prompt across multiple models simultaneously and compare outputs directly.
Try existing use cases and prompts against new models without touching your production configuration.
Adjust temperature, top-p, max tokens, and other parameters to tune model behavior.
Provide feedback on responses to create curated datasets for future fine-tuning.
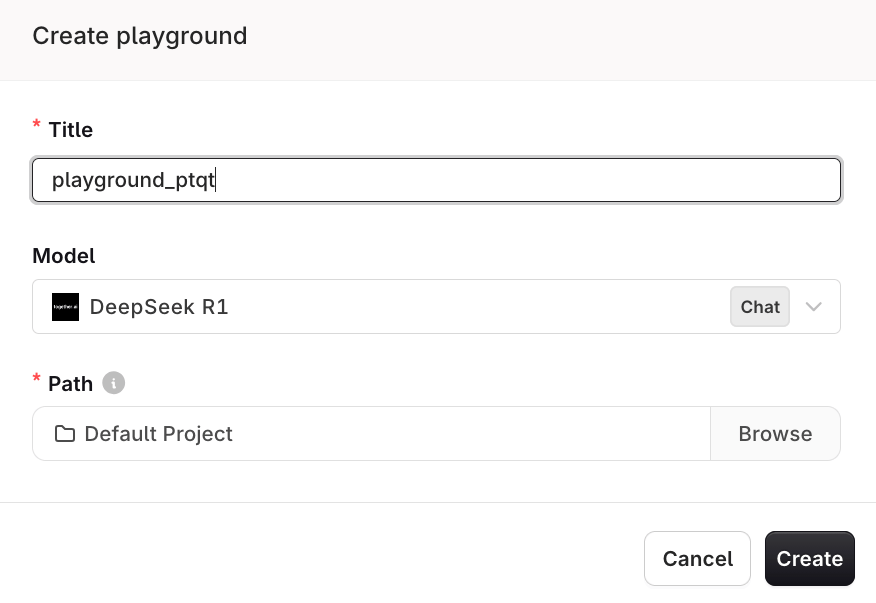
## Create a Playground
Head to the AI Studio, choose a [Project](/docs/ai-studio/get-started/projects), and use the `+` button to select **Playground**.
The following modal opens:
After which, the Playground can be configured:
## Layout
The Playground is split into two panels:
* **Left panel**: Parameters, Prompt template, Knowledge Bases, and Tools configuration.
* **Right panel**: Chat and generation area where responses appear.
The top-right toolbar contains **Add model**, **Variables**, and **Blocks**.
Use the **Logs** tab to view call logs for this Playground. See [Logs](/docs/ai-studio/observability/logs) for details.
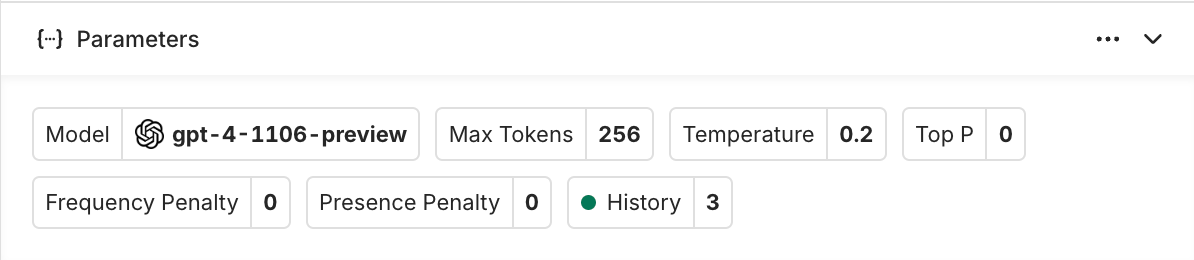
## Parameters
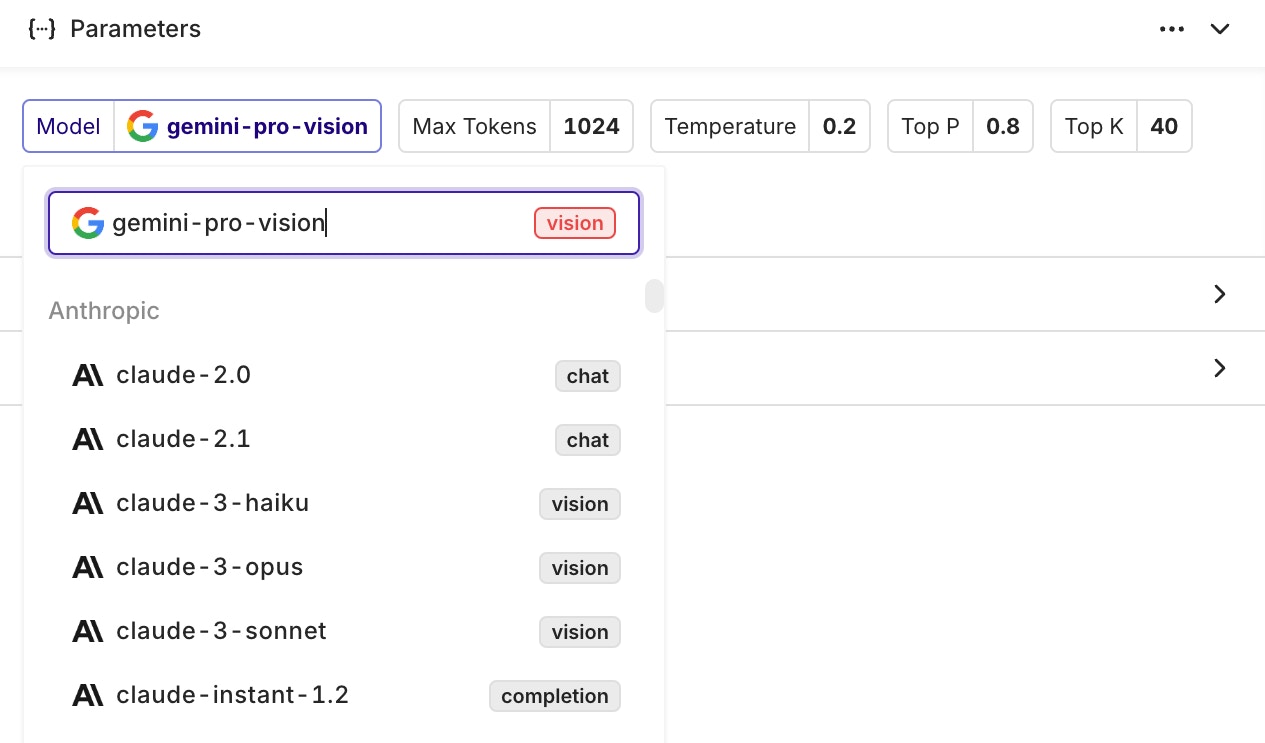
The **Parameters** block at the top of the left panel controls the model and its settings. Click the chevron to collapse or expand it.
Available parameters include: Model, Max Tokens, Temperature, Top P, Top K, and Response Format.
To change the model, click the model name to open the list of available models.
See which models are available in the [AI Gateway](/docs/ai-studio/ai-gateway/add-models).
In the Playground, you can test all available models through the **Orq.ai** API key without setting up your own API keys.
The **Max Tokens** parameter is especially important: make sure the model has enough tokens allocated for the expected output.
To learn more about the most common model parameters, see [Model Parameters](/docs/ai-studio/prompts/prompts#model-parameters).
## Prompt Template
Define the prompt in the **Prompt template** block. Use the **Import prompt** button to load an existing prompt from your project.
Use `{{variable_key}}` syntax in the prompt message to define variables. The **Variables** button in the top toolbar lists all variables defined in the current prompt and lets you set their values before generating.
To learn how to set up your Prompt and Messages, see [Creating a Prompt](/docs/ai-studio/prompts/prompts).
## Knowledge Bases
Attach a [Knowledge Base](/docs/ai-studio/ai-engineering/knowledge-bases-memory-stores) to the Playground using the **Add Knowledge Base** button in the **Knowledge Bases** section. The Knowledge Base content is included in the prompt context when generating.
## Tools
Add tools to the Playground using the **Add Tool** or **Import Tool** buttons in the **Tools** section. Tools extend what the model can do during generation.
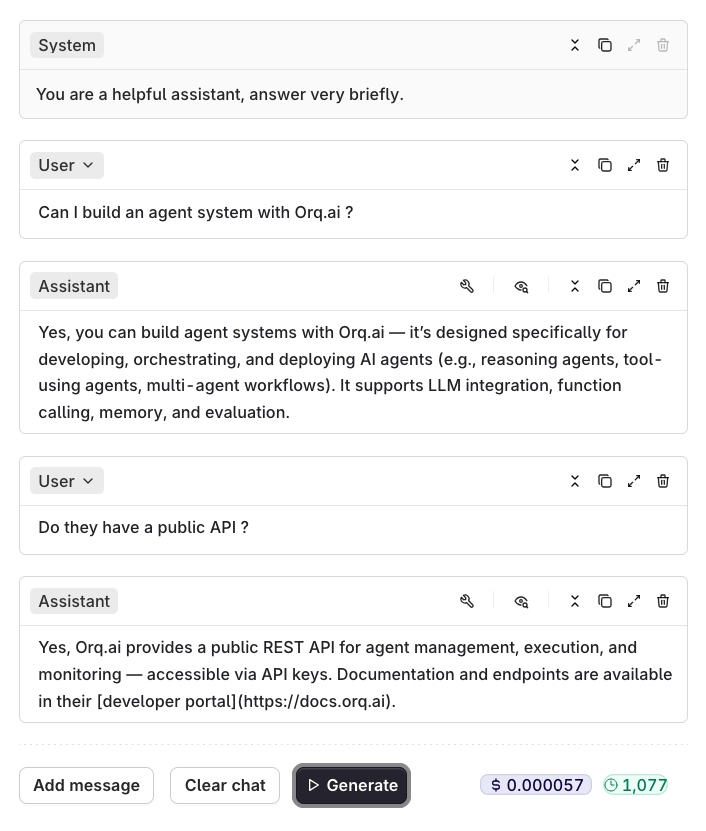
## Generation
Once the prompt template is ready, click Generate to produce a response.
Use **Add message** to append messages before generating. Use **Clear chat** to reset the conversation while keeping the prompt template.
Cost and token count for the latest generation are shown at the bottom-right of the panel.
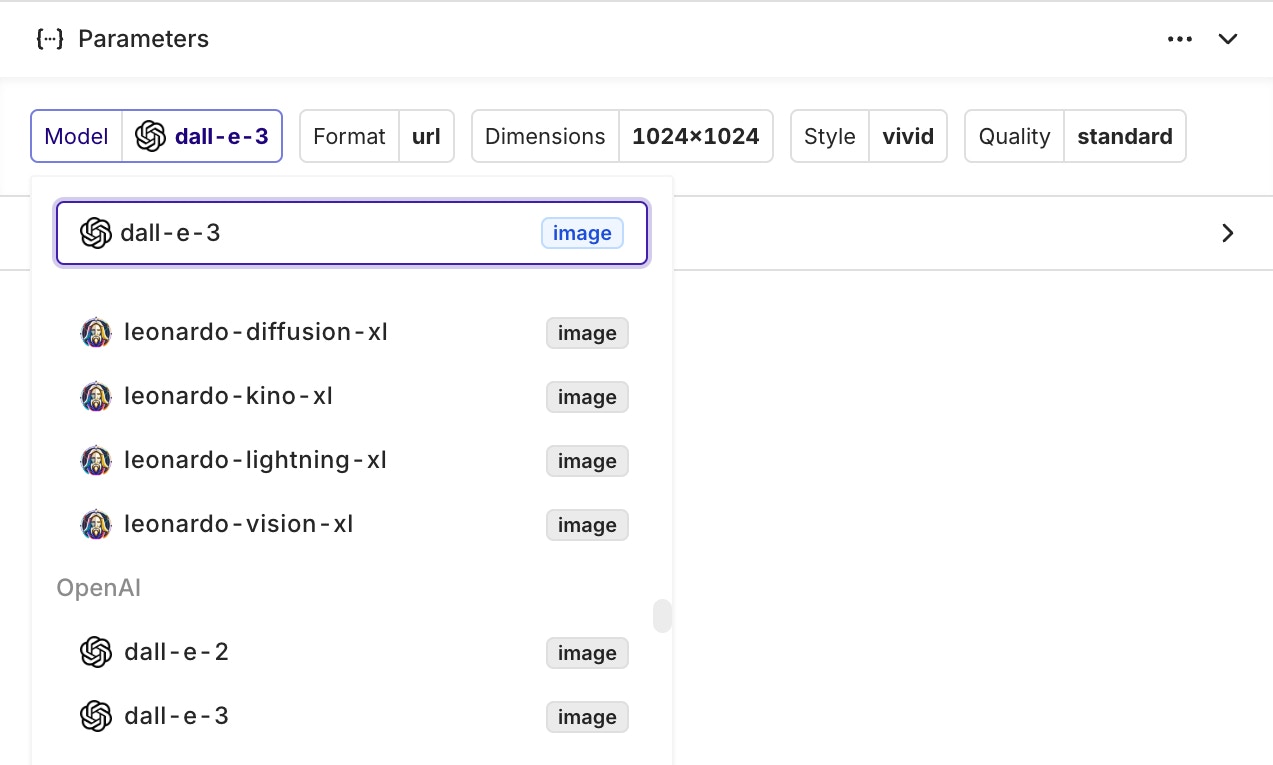
## Image Generation
Image generation models create images from text descriptions. Select a model with an `image` tag in the model picker.
**Selecting an Image Generation Model**
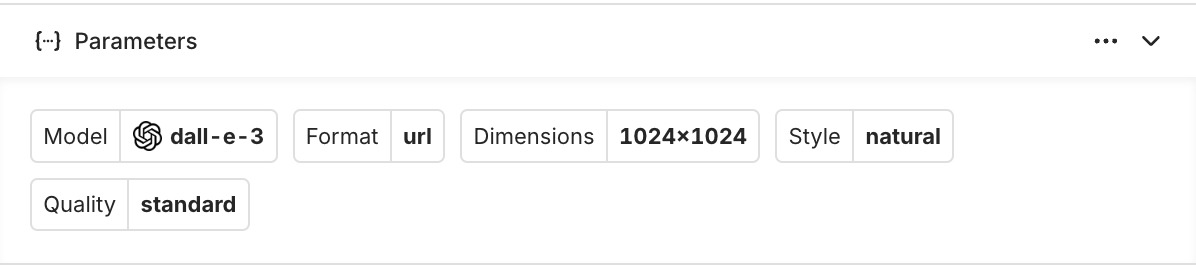
**Configuring Parameters for Image Models**
Image generation models have different parameters compared to chat models. Parameters vary per model and affect the generated output.
**Generating Images**
Use image models in the Playground like any other model. Generated images appear as regular messages and can be viewed fullscreen.
**Use Cases**
* **Creative Content**: Generate artwork, illustrations, and visual content for marketing materials
* **Product Design**: Create mockups and visual prototypes based on descriptions
* **Content Creation**: Generate images for blogs, social media, and presentations
* **Concept Visualization**: Turn abstract ideas into visual representations
**Best Practices**
* **Be Specific**: Provide detailed descriptions for better results
* **Style Guidelines**: Include artistic style, mood, and visual elements in the prompt
* **Parameter Tuning**: Experiment with model-specific parameters to achieve desired output quality
* **Iterative Refinement**: Use generated images as starting points for further refinement
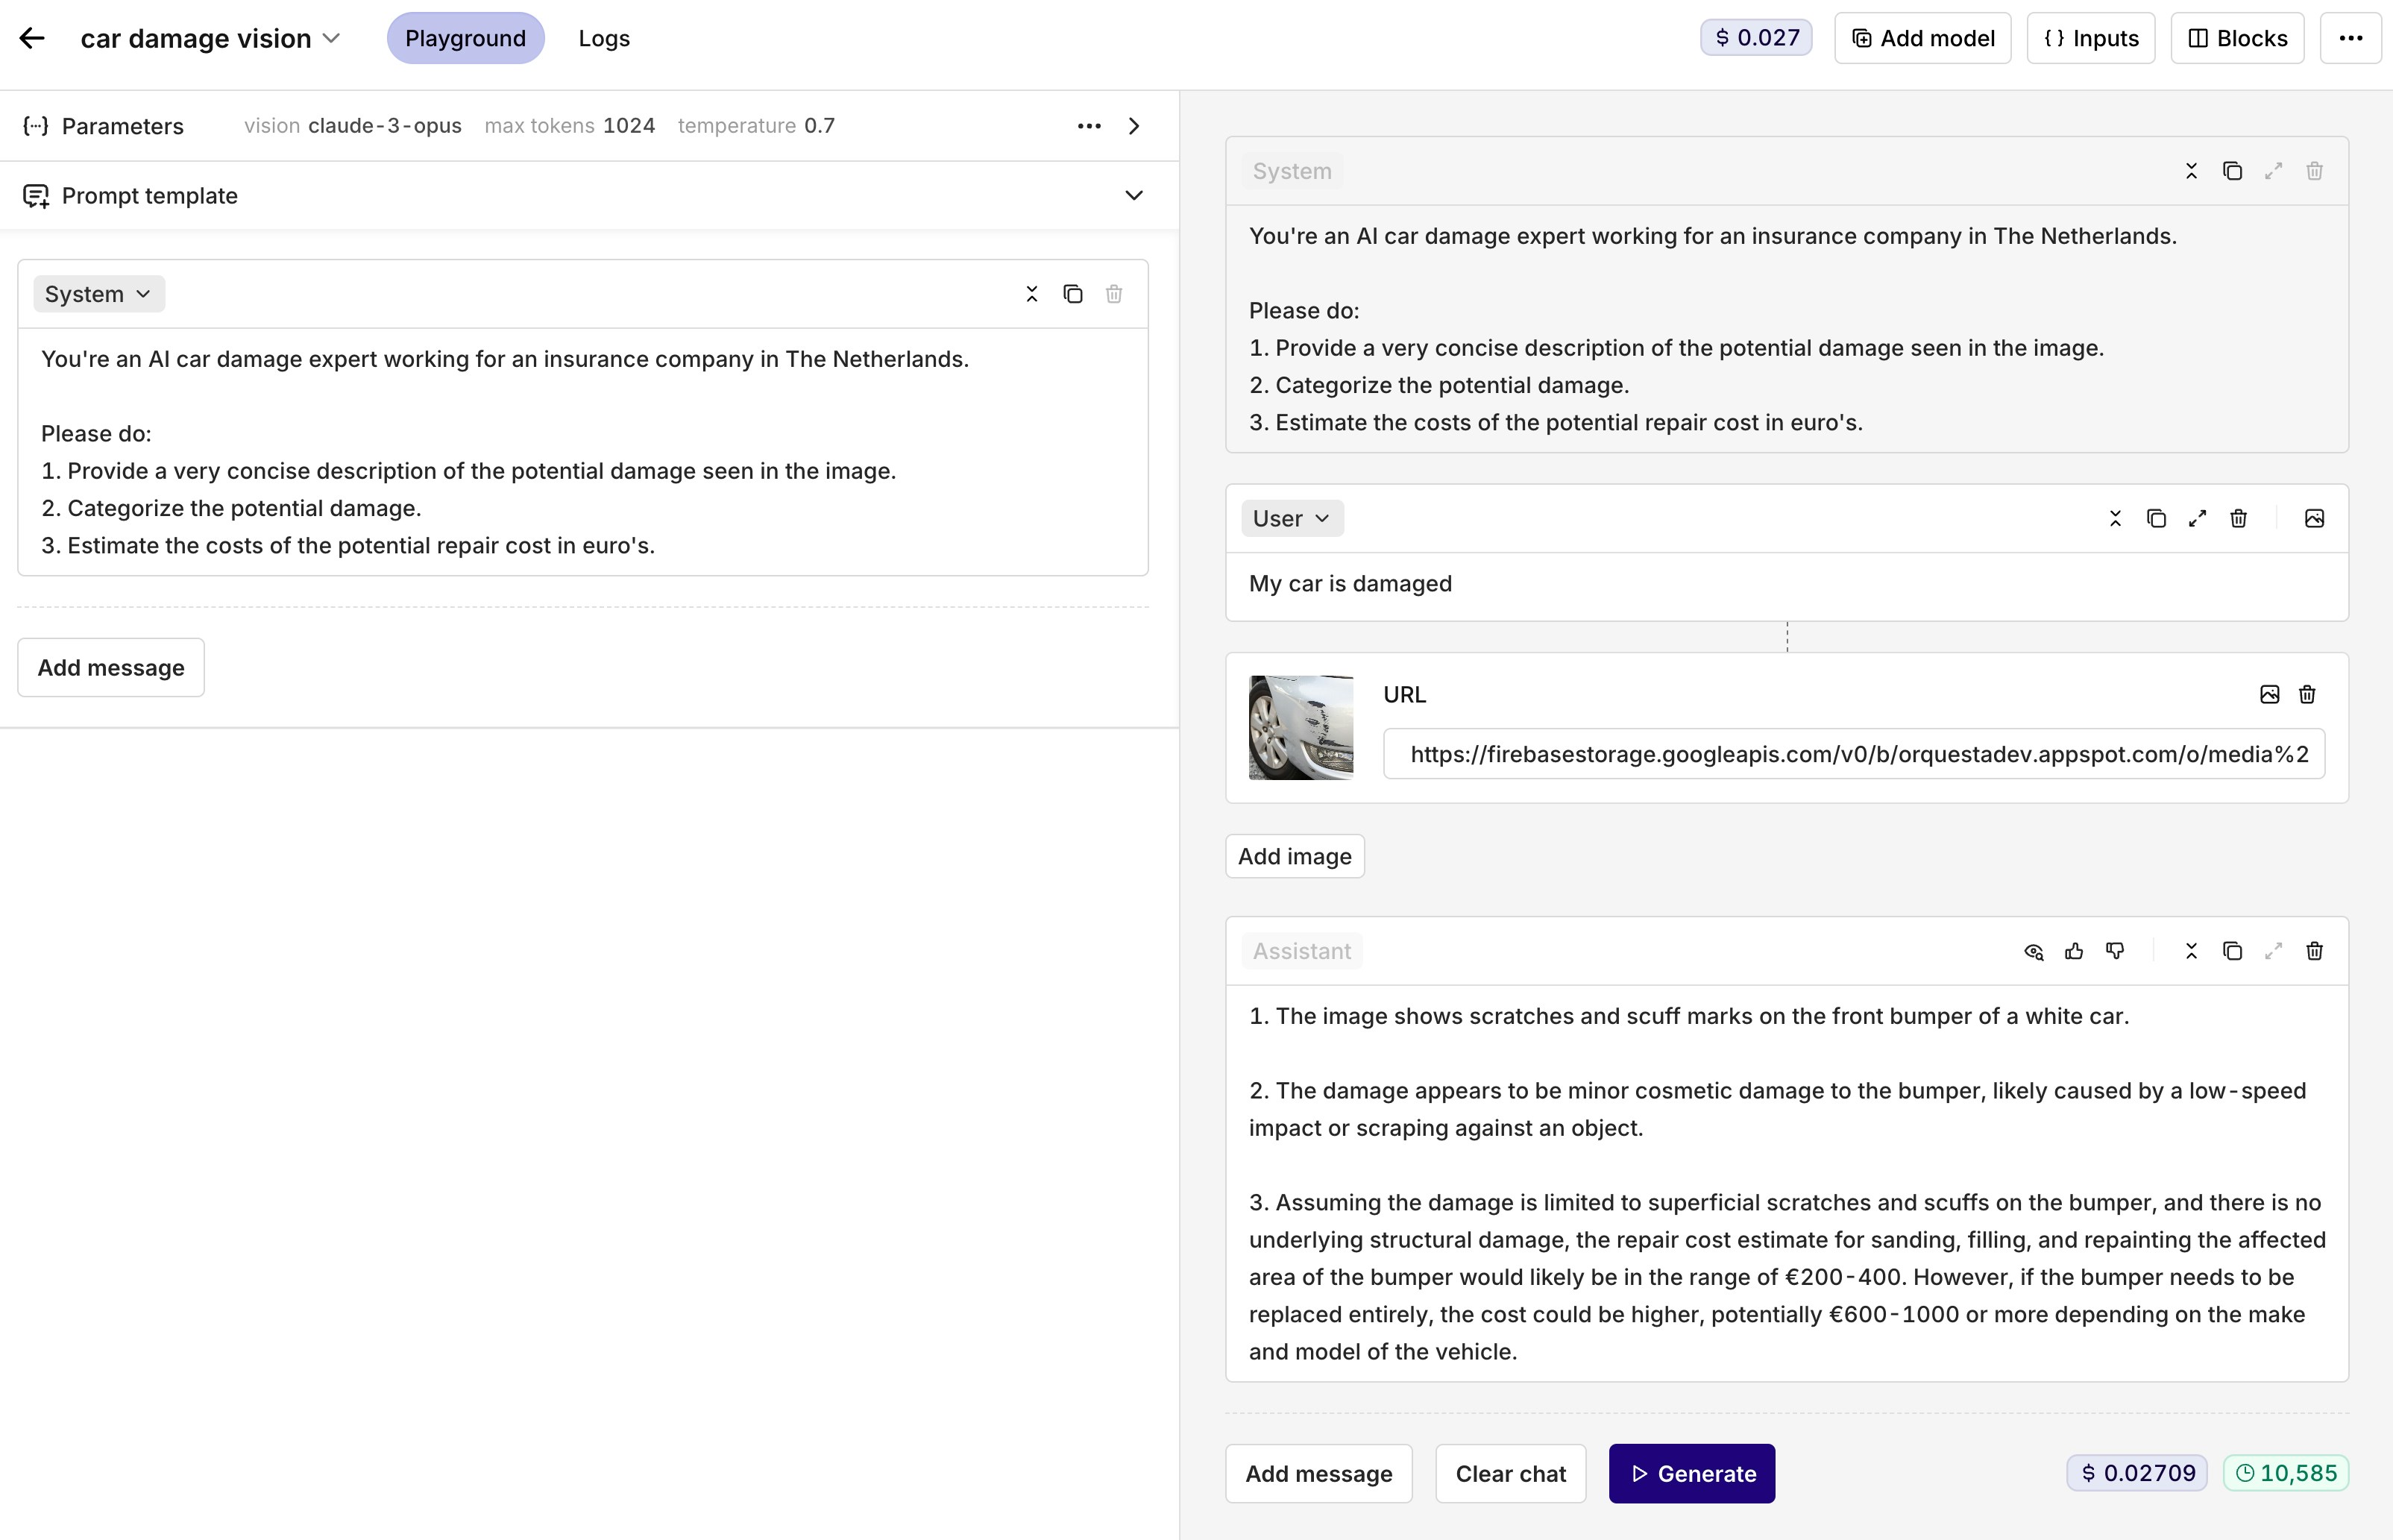
## Vision
Vision models analyze and interpret images. Select a model with a `vision` tag in the model picker.
To include an image as input, click the **image icon** at the top-right of the message. Share a link or upload a file to pass to the model.
To send images or files to a model via the API in production, see [Attach Files](/docs/ai-studio/ai-engineering/deployments#attach-files) in Deployments.
**Use Cases**
* **Document Processing**: Extract text and information from scanned documents and forms
* **Visual Quality Control**: Analyze product images for defects or compliance
* **Content Moderation**: Automatically review images for inappropriate content
* **Medical Imaging**: Analyze medical scans and diagnostic images (with appropriate models)
* **Insurance Claims**: Process damage assessment photos and documentation
**Best Practices**
* **Image Quality**: Ensure images are clear and well-lit for best analysis results
* **Specific Questions**: Ask focused questions about the information to extract or understand
* **Context Provision**: Provide context about what the image represents for better interpretation
* **Multiple Angles**: For complex analysis, consider providing multiple views of the same subject
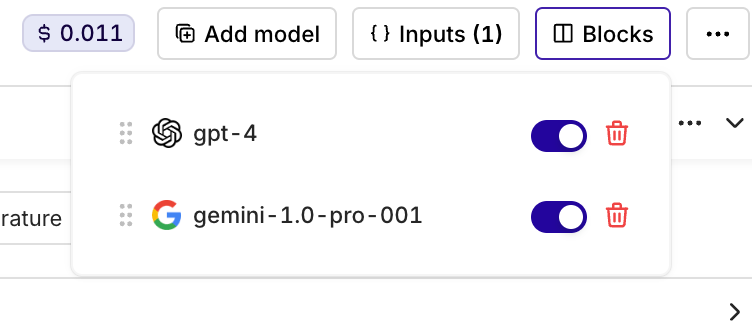
## Comparing Multiple Models
Click **Add model** in the top toolbar to add a second model block. Each model gets its own block, allowing side-by-side comparison with the same prompt.
### Copying and Duplicating Models
Use the menu at the top-right of any model block to:
* **Copy Prompt Template**: copy the template to one or all other model blocks.
* **Duplicate Block**: create a copy of the block including its configuration.
### Blocks
Use the **Blocks** button in the top toolbar to toggle which model blocks are visible or delete blocks you no longer need.
 After which, the Playground can be configured:
 ## Layout
The Playground is split into two panels:
* **Left panel**: Parameters, Prompt template, Knowledge Bases, and Tools configuration.
* **Right panel**: Chat and generation area where responses appear.
The top-right toolbar contains **Add model**, **Variables**, and **Blocks**.
Use the **Logs** tab to view call logs for this Playground. See [Logs](/docs/ai-studio/observability/logs) for details.
## Parameters
The **Parameters** block at the top of the left panel controls the model and its settings. Click the chevron to collapse or expand it.
Available parameters include: Model, Max Tokens, Temperature, Top P, Top K, and Response Format.
To change the model, click the model name to open the list of available models.
## Layout
The Playground is split into two panels:
* **Left panel**: Parameters, Prompt template, Knowledge Bases, and Tools configuration.
* **Right panel**: Chat and generation area where responses appear.
The top-right toolbar contains **Add model**, **Variables**, and **Blocks**.
Use the **Logs** tab to view call logs for this Playground. See [Logs](/docs/ai-studio/observability/logs) for details.
## Parameters
The **Parameters** block at the top of the left panel controls the model and its settings. Click the chevron to collapse or expand it.
Available parameters include: Model, Max Tokens, Temperature, Top P, Top K, and Response Format.
To change the model, click the model name to open the list of available models.
 The **Max Tokens** parameter is especially important: make sure the model has enough tokens allocated for the expected output.
 Cost and token count for the latest generation are shown at the bottom-right of the panel.
## Image Generation
Image generation models create images from text descriptions. Select a model with an `image` tag in the model picker.
**Selecting an Image Generation Model**
Cost and token count for the latest generation are shown at the bottom-right of the panel.
## Image Generation
Image generation models create images from text descriptions. Select a model with an `image` tag in the model picker.
**Selecting an Image Generation Model**
 **Configuring Parameters for Image Models**
Image generation models have different parameters compared to chat models. Parameters vary per model and affect the generated output.
**Configuring Parameters for Image Models**
Image generation models have different parameters compared to chat models. Parameters vary per model and affect the generated output.
 **Generating Images**
Use image models in the Playground like any other model. Generated images appear as regular messages and can be viewed fullscreen.
**Generating Images**
Use image models in the Playground like any other model. Generated images appear as regular messages and can be viewed fullscreen.
 **Use Cases**
* **Creative Content**: Generate artwork, illustrations, and visual content for marketing materials
* **Product Design**: Create mockups and visual prototypes based on descriptions
* **Content Creation**: Generate images for blogs, social media, and presentations
* **Concept Visualization**: Turn abstract ideas into visual representations
**Best Practices**
* **Be Specific**: Provide detailed descriptions for better results
* **Style Guidelines**: Include artistic style, mood, and visual elements in the prompt
* **Parameter Tuning**: Experiment with model-specific parameters to achieve desired output quality
* **Iterative Refinement**: Use generated images as starting points for further refinement
## Vision
Vision models analyze and interpret images. Select a model with a `vision` tag in the model picker.
**Use Cases**
* **Creative Content**: Generate artwork, illustrations, and visual content for marketing materials
* **Product Design**: Create mockups and visual prototypes based on descriptions
* **Content Creation**: Generate images for blogs, social media, and presentations
* **Concept Visualization**: Turn abstract ideas into visual representations
**Best Practices**
* **Be Specific**: Provide detailed descriptions for better results
* **Style Guidelines**: Include artistic style, mood, and visual elements in the prompt
* **Parameter Tuning**: Experiment with model-specific parameters to achieve desired output quality
* **Iterative Refinement**: Use generated images as starting points for further refinement
## Vision
Vision models analyze and interpret images. Select a model with a `vision` tag in the model picker.
 To include an image as input, click the **image icon** at the top-right of the message. Share a link or upload a file to pass to the model.