> ## Documentation Index
> Fetch the complete documentation index at: https://docs.orq.ai/llms.txt
> Use this file to discover all available pages before exploring further.
# Simple deployment pattern
> Implement simple deployment architecture for LLM applications. Quick-start pattern for straightforward AI integration with minimal configuration overhead.
## Objective
The Simple Deployment architecture provides the most straightforward way to integrate Orq.ai into your application as an AI Gateway. This pattern serves as the primary entry point for routing LLM calls through the Orq.ai platform, enabling you to benefit from unified routing, monitoring, and security features while maintaining a clean separation between your application logic and AI model configurations.
To orchestrate multiple Deployments in application code, see [Chaining Deployments](/docs/tutorials/chaining-deployments).
## Use Case
Simple Deployment is ideal for applications that need:
* **Single Model Integration**: Applications requiring one primary LLM interaction pattern.
* **Straightforward AI Features**: Chat interfaces, content generation, text processing workflows, and classification tasks.
* **Rapid Prototyping**: Quick integration for testing AI capabilities in existing systems.
* **Centralized Management**: Teams wanting to manage AI configurations outside of application code.
## Prerequisites
Before configuring a Simple Deployment, ensure you have:
* **Orq.ai Account**: Active workspace in the [AI Studio](https://my.orq.ai/auth/signup).
* **API Access**: Valid API key from [Workspace Settings > API Keys](/docs/ai-studio/organization/api-keys).
* **Model Access**: At least one model enabled in the [AI Gateway](/docs/ai-studio/ai-gateway/add-models), see [Using the AI Gateway](/docs/ai-studio/ai-gateway/add-models).
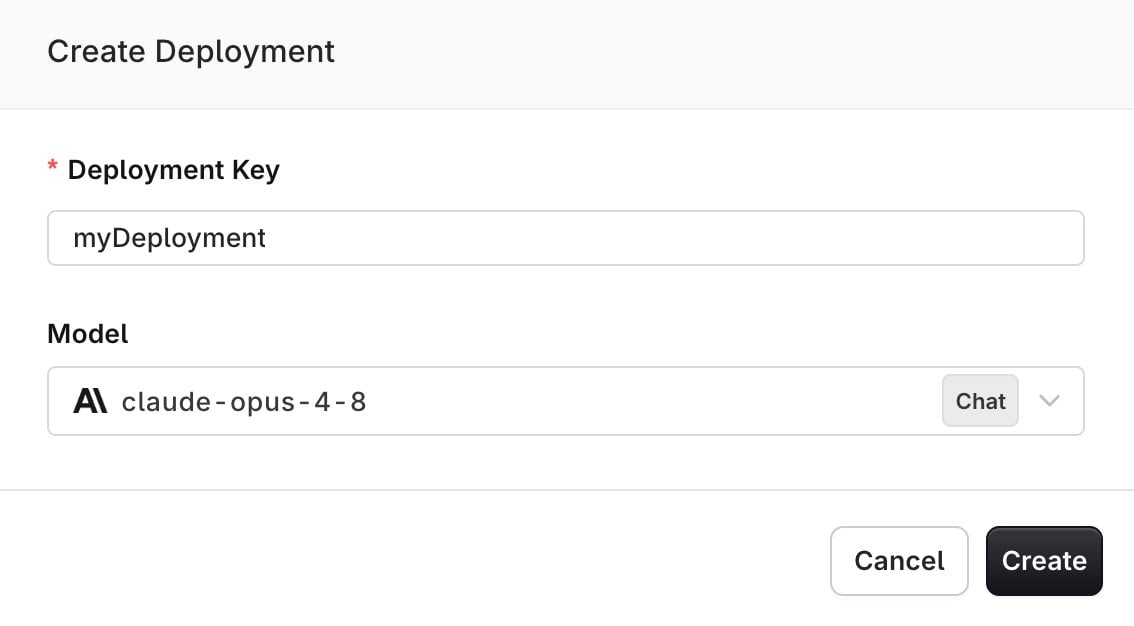
## Configuring a Deployment
To create a [Deployment](/docs/deployments/overview), head to the AI Studio:
* Choose a [Project](/docs/ai-studio/get-started/projects) and Folder and select the button.
* Choose Deployment.
You should see a modal to configure your initial deployment where you can:
 ## Prompting
Configure the Deployment using the [Prompt](/docs/ai-studio/prompts/prompts) template, or type a prompt directly into the Deployment.
There are three message types:
* **System**: Defines what the LLM does, setting its rules and persona.
* **User**: What the user asks the LLM to do, usually a question.
* **Assistant**: The LLM's response.
Most models require a user message but treat the system message as optional. You can call them with just a user message, but not with a system message alone. The Anthropic and Google models used in this cookbook both follow this pattern. OpenAI models can be called with only a system message.
To learn how to write good prompts, see [Prompting](/docs/ai-studio/prompts/prompt-engineering-guide).
## Prompting
Configure the Deployment using the [Prompt](/docs/ai-studio/prompts/prompts) template, or type a prompt directly into the Deployment.
There are three message types:
* **System**: Defines what the LLM does, setting its rules and persona.
* **User**: What the user asks the LLM to do, usually a question.
* **Assistant**: The LLM's response.
Most models require a user message but treat the system message as optional. You can call them with just a user message, but not with a system message alone. The Anthropic and Google models used in this cookbook both follow this pattern. OpenAI models can be called with only a system message.
To learn how to write good prompts, see [Prompting](/docs/ai-studio/prompts/prompt-engineering-guide).
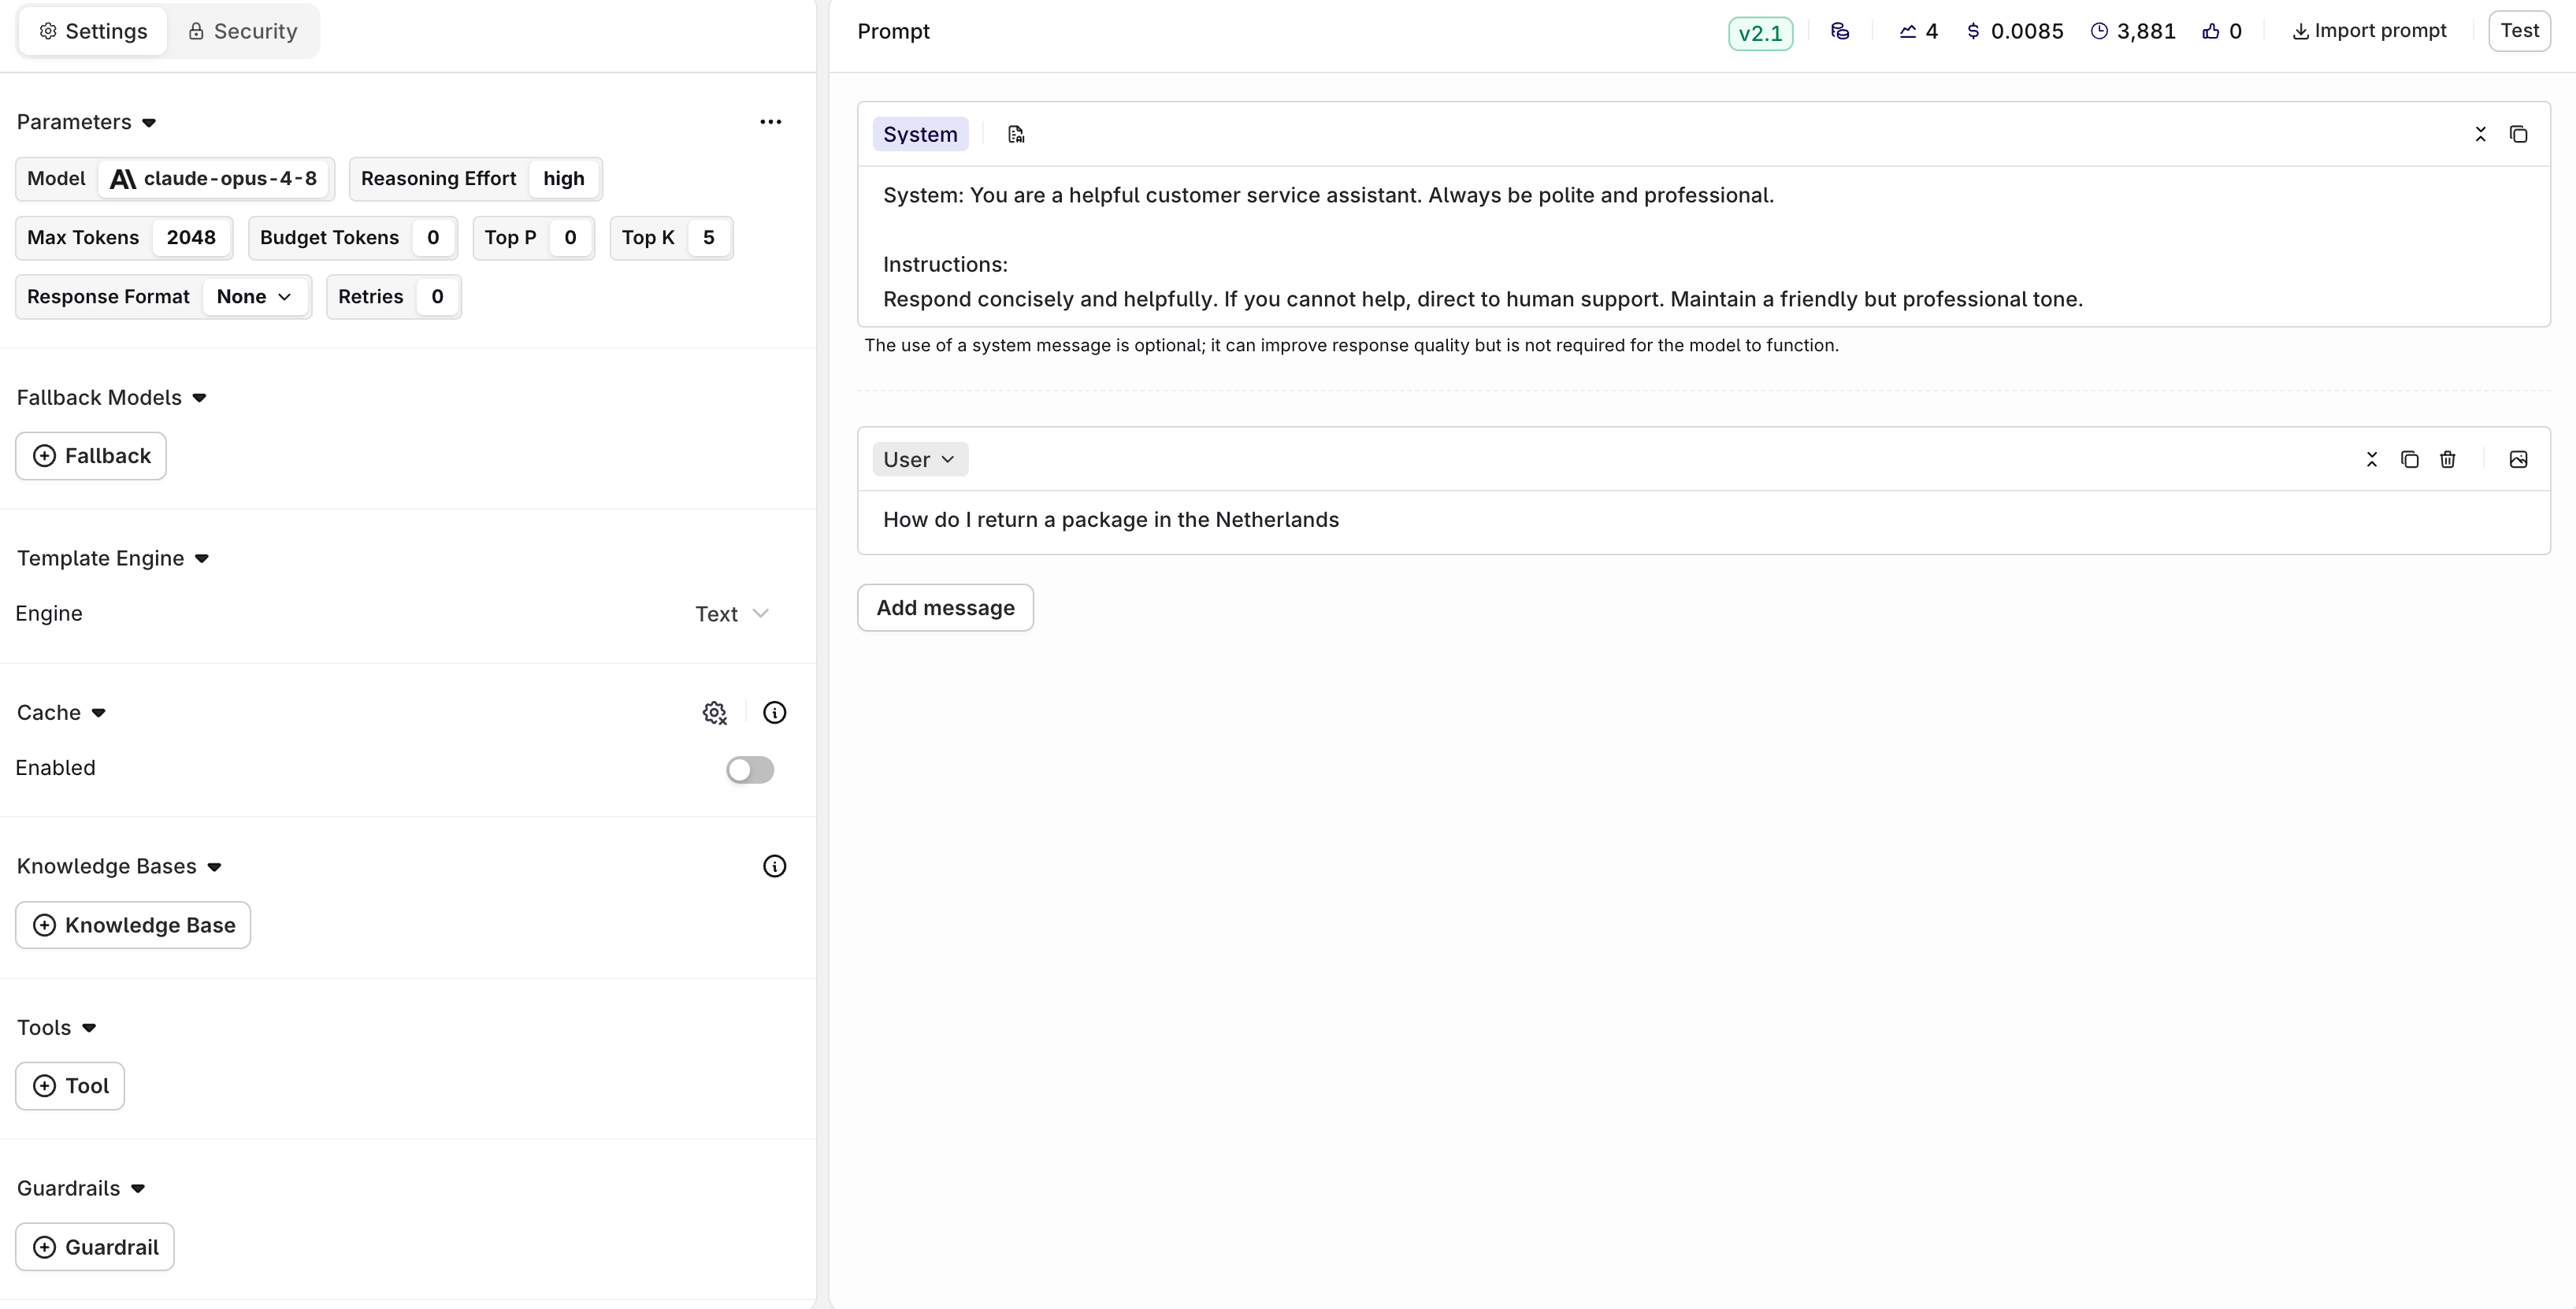 Multiple parameters are available for your model, to learn more, see [Model Parameters](/docs/ai-studio/prompts/prompts#model-parameters).
Learn more about the possibilities of Prompts in Orq.ai, see [Creating a Prompt](/docs/ai-studio/prompts/prompts).
Choose **Deploy** once ready, this will make your newly created [Deployment](/docs/deployments/overview) available through the API.
## Integrating with the SDK
Choose your preferred programming language and install the corresponding SDK:
```bash Bash theme={"theme":{"light":"github-light","dark":"github-dark"}}
# pip
pip install orq-ai-sdk
```
```bash Bash theme={"theme":{"light":"github-light","dark":"github-dark"}}
# npm
npm install @orq-ai/node
```
Get your integration ready by initializing the SDK as follows:
```python Python theme={"theme":{"light":"github-light","dark":"github-dark"}}
import os
from orq_ai_sdk import Orq
client = Orq(
api_key=os.environ.get("ORQ_API_KEY", "__API_KEY__"),
)
```
```typescript TypeScript theme={"theme":{"light":"github-light","dark":"github-dark"}}
const deployment = await client.deployments.invoke({
key: "myDeployment",
context: {
environments: ["production"]
},
metadata: {
"custom-field-name": "custom-metadata-value"
}
});
```
## Calling the Deployment
To call the [Deployment](/docs/deployments/overview) within your integration, use the following calls:
```python Python theme={"theme":{"light":"github-light","dark":"github-dark"}}
generation = client.deployments.invoke(
key="myDeployment",
context={
"environments": ["production"]
},
metadata={
"custom-field-name": "custom-metadata-value"
},
identity={
"id": "contact_01ARZ3NDEKTSV4RRFFQ69G5FAV",
"display_name": "Jane Doe",
"email": "jane.doe@example.com",
}
)
print(generation.choices[0].message.content)
```
```typescript TypeScript theme={"theme":{"light":"github-light","dark":"github-dark"}}
const deployment = await client.deployments.invoke({
key: "myDeployment",
context: {
environments: ["production"]
},
metadata: {
"custom-field-name": "custom-metadata-value"
},
identity: {
id: "contact_01ARZ3NDEKTSV4RRFFQ69G5FAV",
displayName: "Jane Doe",
email: "jane.doe@example.com",
}
});
```
To pass messages at request time rather than relying only on the prompt configured in the AI Studio, include the optional `messages` parameter in `invoke`.
To learn more about **Identities** see [Track usage by identity](/docs/analytics/identity).
## Viewing Traces
Go to Observability > Traces to see every call made through the **Deployment**. Click a trace to inspect its span breakdown, including the input, model output, latency, tokens, and cost.
Multiple parameters are available for your model, to learn more, see [Model Parameters](/docs/ai-studio/prompts/prompts#model-parameters).
Learn more about the possibilities of Prompts in Orq.ai, see [Creating a Prompt](/docs/ai-studio/prompts/prompts).
Choose **Deploy** once ready, this will make your newly created [Deployment](/docs/deployments/overview) available through the API.
## Integrating with the SDK
Choose your preferred programming language and install the corresponding SDK:
```bash Bash theme={"theme":{"light":"github-light","dark":"github-dark"}}
# pip
pip install orq-ai-sdk
```
```bash Bash theme={"theme":{"light":"github-light","dark":"github-dark"}}
# npm
npm install @orq-ai/node
```
Get your integration ready by initializing the SDK as follows:
```python Python theme={"theme":{"light":"github-light","dark":"github-dark"}}
import os
from orq_ai_sdk import Orq
client = Orq(
api_key=os.environ.get("ORQ_API_KEY", "__API_KEY__"),
)
```
```typescript TypeScript theme={"theme":{"light":"github-light","dark":"github-dark"}}
const deployment = await client.deployments.invoke({
key: "myDeployment",
context: {
environments: ["production"]
},
metadata: {
"custom-field-name": "custom-metadata-value"
}
});
```
## Calling the Deployment
To call the [Deployment](/docs/deployments/overview) within your integration, use the following calls:
```python Python theme={"theme":{"light":"github-light","dark":"github-dark"}}
generation = client.deployments.invoke(
key="myDeployment",
context={
"environments": ["production"]
},
metadata={
"custom-field-name": "custom-metadata-value"
},
identity={
"id": "contact_01ARZ3NDEKTSV4RRFFQ69G5FAV",
"display_name": "Jane Doe",
"email": "jane.doe@example.com",
}
)
print(generation.choices[0].message.content)
```
```typescript TypeScript theme={"theme":{"light":"github-light","dark":"github-dark"}}
const deployment = await client.deployments.invoke({
key: "myDeployment",
context: {
environments: ["production"]
},
metadata: {
"custom-field-name": "custom-metadata-value"
},
identity: {
id: "contact_01ARZ3NDEKTSV4RRFFQ69G5FAV",
displayName: "Jane Doe",
email: "jane.doe@example.com",
}
});
```
To pass messages at request time rather than relying only on the prompt configured in the AI Studio, include the optional `messages` parameter in `invoke`.
To learn more about **Identities** see [Track usage by identity](/docs/analytics/identity).
## Viewing Traces
Go to Observability > Traces to see every call made through the **Deployment**. Click a trace to inspect its span breakdown, including the input, model output, latency, tokens, and cost.
 To learn more about traces, see [Traces](/docs/observability/traces).
You completed basic common architecture for a Simple Deployment, explore more of our other Architectures to see more complex architectures.
To learn more about traces, see [Traces](/docs/observability/traces).
You completed basic common architecture for a Simple Deployment, explore more of our other Architectures to see more complex architectures.