

What We Will Build
Architecture flow- A user sends a message in the Lovable chat UI.
- The frontend calls a Supabase Edge Function.
- The edge function calls the AI Gateway at
https://my.orq.ai/v3/router/responseswith"model": "agent/<agent_key>", sending the API key it holds. - The response returns through the edge function and renders in the chat.
Step 1: Set Up Orq.ai
Three settings cause most failed first calls, so do them first. Create an API key. Open Settings > API Keys and create a key for the project the chatbot belongs to. Copy it from the dialog that appears once, and treat it as a server-side secret from then on. See API Keys. Enable a model. Open AI Gateway > Model List and switch the model on with the Status toggle. A disabled model is rejected even with a valid key. The model ID sits in the Name column and takes theprovider/model form, for example openai/gpt-5.6-sol. See Supported Models for the catalog.
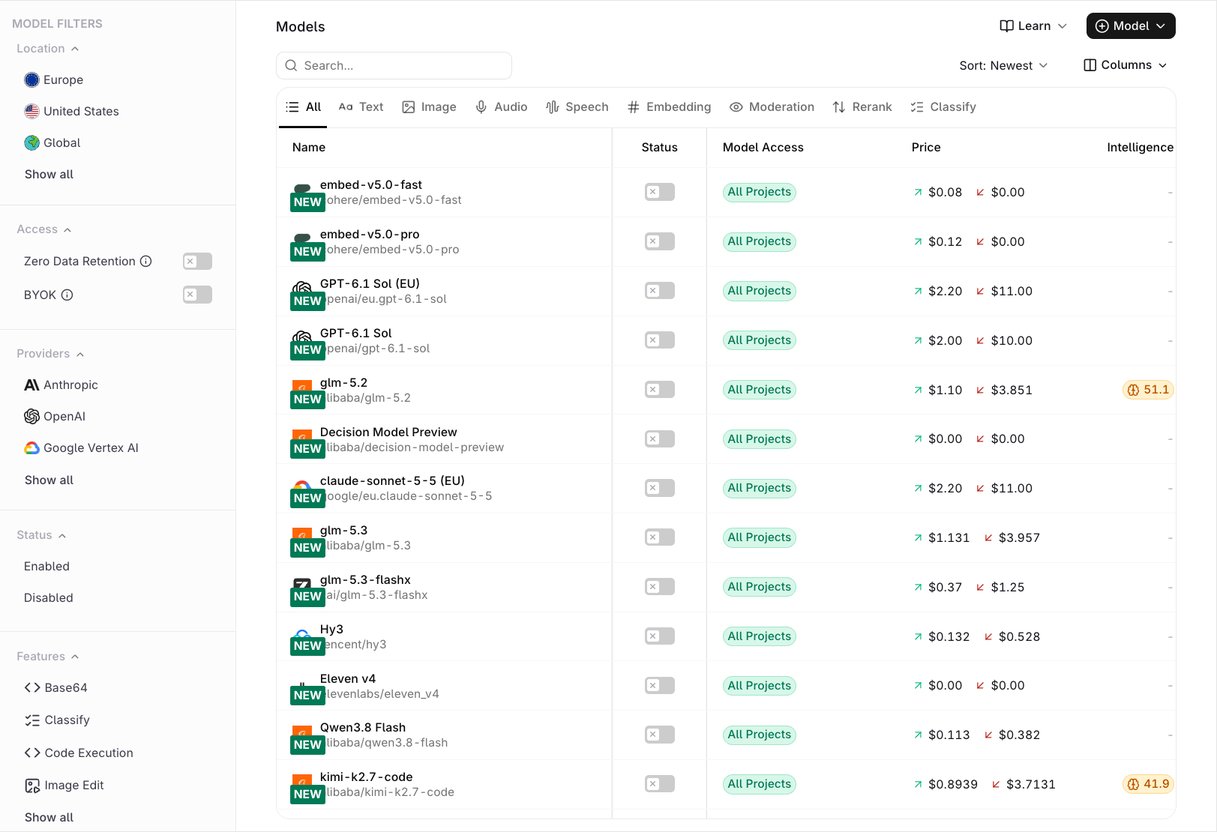
The Model List, where the Status toggle enables a model.
faq-bot. Give it the model enabled above and instructions for the FAQ chatbot. The app calls the agent rather than the model, so this key is what the edge function sends. See Build Agents.
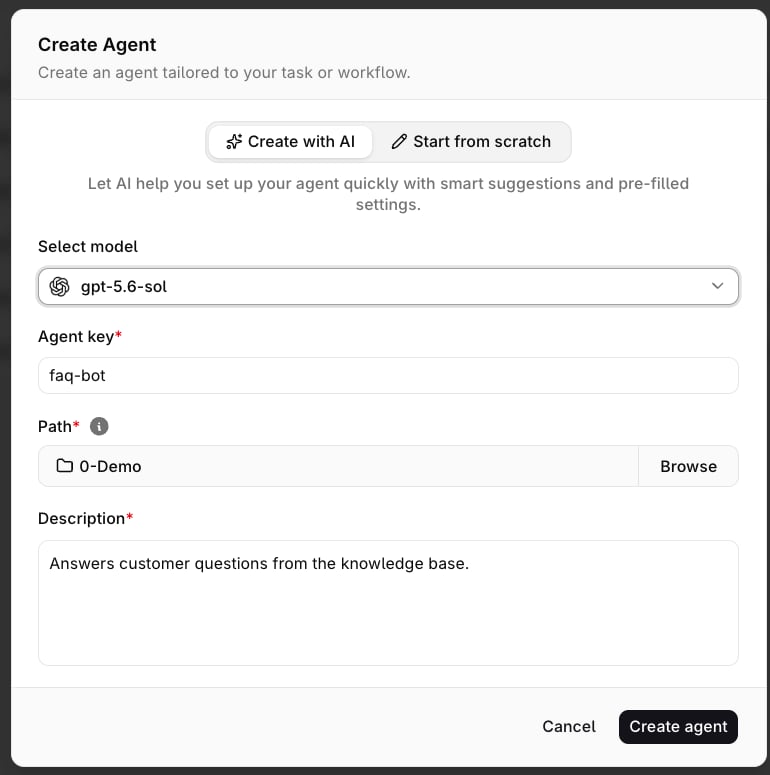
The Create Agent dialog, with the model, Agent Key and description set.
Step 2: Add the AGENTS.md Snippet
Lovable’s documentation states that root-levelAGENTS.md files are always read by the Lovable agent, while skills load only when a request matches their description. The always-read file is therefore the reliable place for the facts the builder must not invent.
Create AGENTS.md in the project root and paste:
Step 3: Build the Interface With One Prompt
With the snippet in place, one prompt builds the chat UI and wires it to the Gateway:Step 4: Store the Key in a Supabase Edge Function
If the project has no Supabase connection yet, click the Supabase icon in the Lovable sidebar and go through the steps it presents. Then open the Lovable chat and prompt: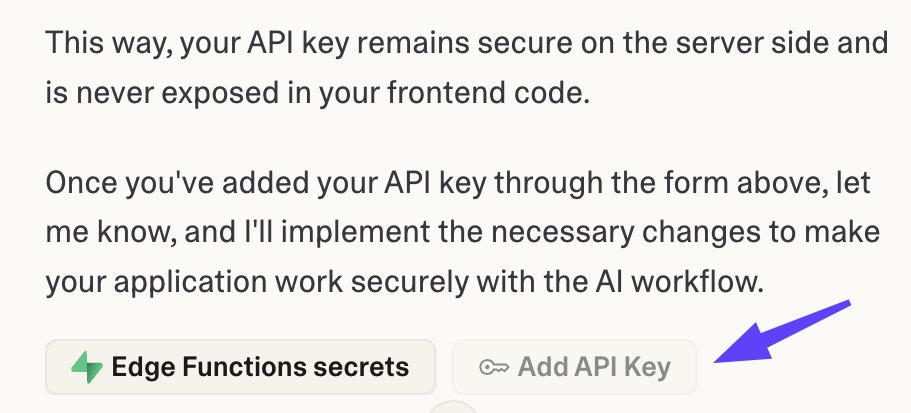
Supabase edge function secrets, where the Orq.ai API key is entered outside the chat.
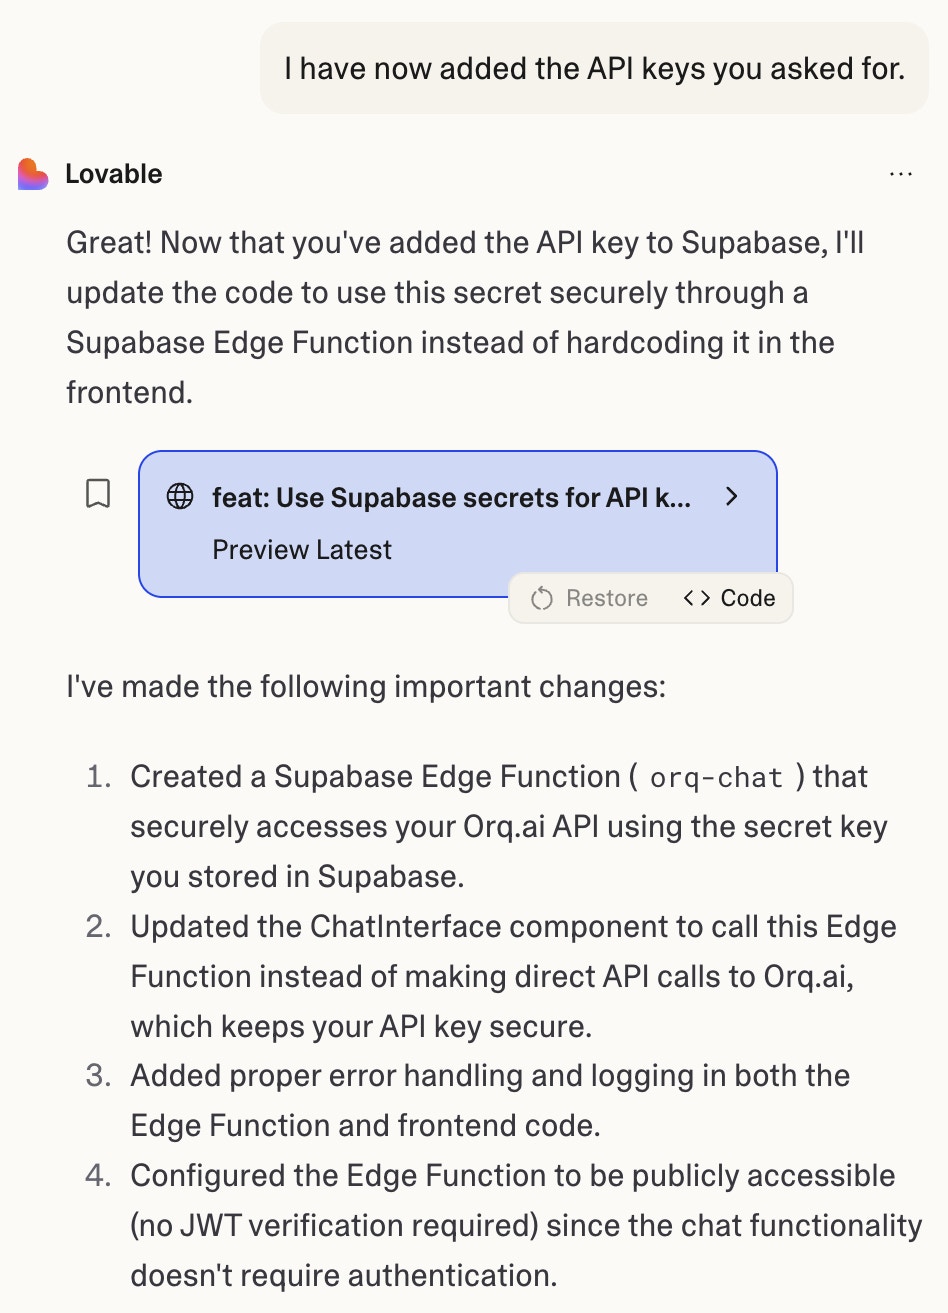
Lovable updating the project once the secret is stored in the edge function.
Step 5: Ground Answers in a Knowledge Base
The agent answers from the model’s own knowledge until a knowledge base is attached. Attaching it does not change the request, so the architecture from Step 3 does not change.- Open Knowledge Bases under Managed Agents in the sidebar and create one. See Knowledge Bases for the datasource and chunking options.
- Add the source documents with Add datasource. Orq.ai splits each file into chunks and processes them, and the processed chunk count appears next to the file.
- Open the agent, click Add context in the Settings panel, and select the knowledge base. The
query_knowledge_baseandretrieve_knowledge_basestools are added to the agent automatically, and the agent queries the knowledge base during a conversation when it needs it. Write an explicit description on the knowledge base: the agent reads that description to decide when to query it. See Build Agents.
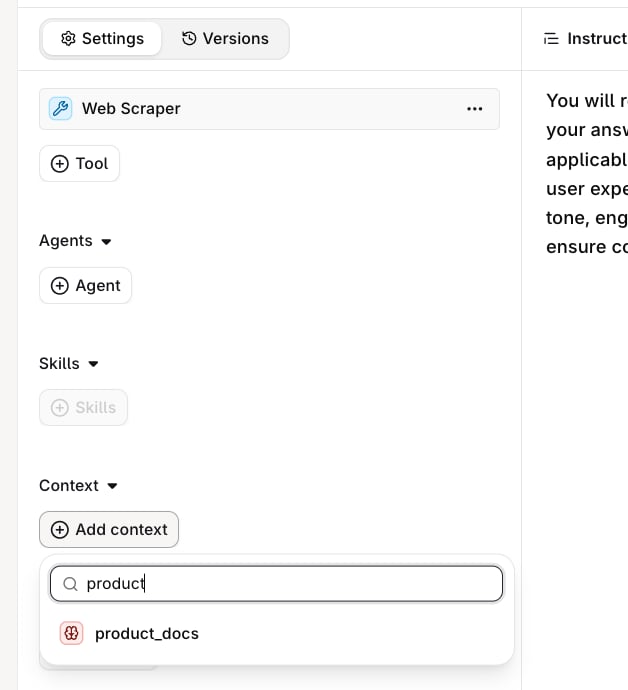
Select the knowledge base from Add context in the agent's Settings panel.
Step 6: Test and Iterate
Run a few conversations and confirm the answers arrive. Then verify the key stays server-side:- Open the browser developer tools, go to the Network tab, and send a message. The request goes to the Supabase Edge Function; no request carries the Orq.ai API key, and no request goes to
my.orq.ai. - Open Traces in Orq.ai and confirm the call appears there, which proves it reached the Gateway with a valid key.
Feedback Collection (Optional)
Feedback in Orq.ai helps track response quality and identify areas for improvement. Collect user ratings, defect classifications, and corrections to continuously enhance the application. Provide feedback through the AI Studio:- Go to Logs in your workspace
- Find the specific invocation
- Use the feedback interface to rate responses
- Add defect classifications or corrections as needed
You can also collect feedback programmatically via the API if needed.