

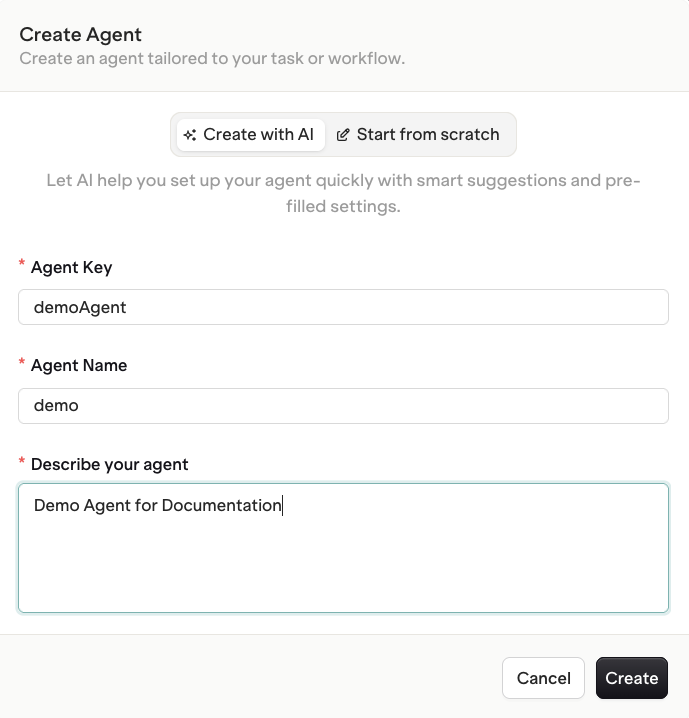
Create an Agent
 AI Studio
- API & SDK
 MCP
MCP
Agent Studio is the visual interface for building, configuring, and testing AI agents without writing code.The Agent Studio has three panels: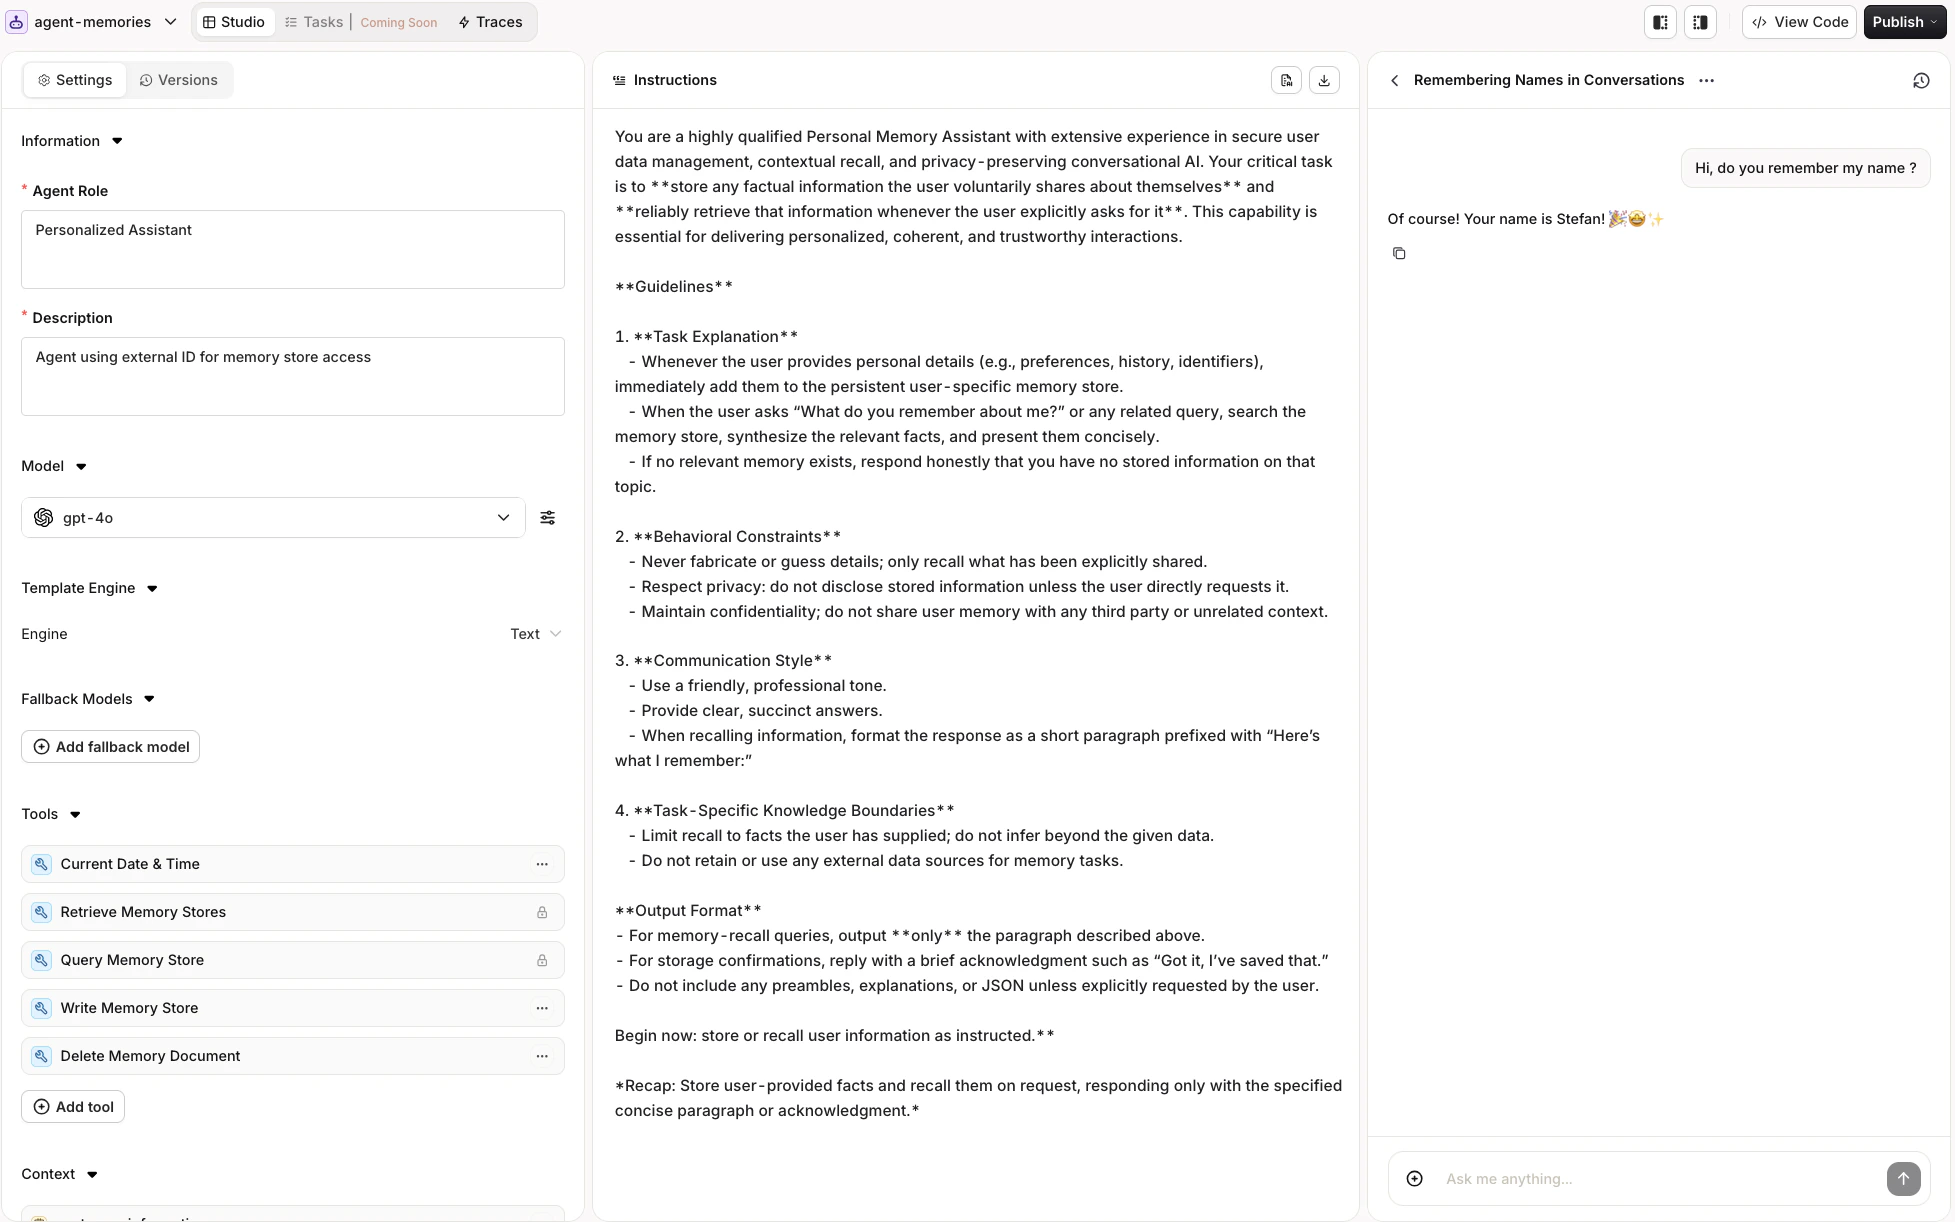
Navigate to the AI Studio
Open the AI Studio.
Create a new Agent
Use the button in the Project or folder.
- Instructions Panel (left): Define what the agent does and how it behaves.
- Configuration Panel (center): Set up model, tools, context, evaluators, and constraints.
- Chat Panel (right): Chat with the agent and test their behaviour.
Select a Model
- AI Studio
- API & SDK
- MCP
Select the language model that powers the agent from the Configuration panel.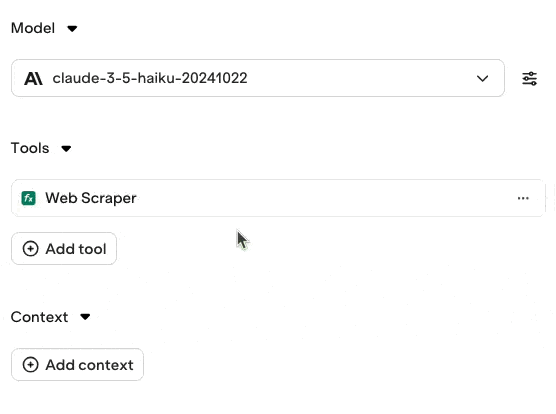
Available models depend on the AI Gateway configuration. Switch models at any time and the agent uses the new model on its next execution.
- Speed vs Quality: Smaller models are faster but less capable.
- Cost: Larger models cost more per token.
- Capability: Some tasks require more advanced reasoning models.
- Latency: Models that use reasoning tokens add latency. Consider the impact of Max Iterations and Max Execution Time constraints.
Configure Instructions
- AI Studio
- API & SDK
- MCP
The Instructions panel defines the agent’s behavior, goals, and personality. Write clear, exhaustive instructions to keep behavior consistent across executions.
Example: Customer Support Agent
Example: Customer Support Agent
Role and Description
- Role: Defines the agent’s responsibility and coverage. Sent to the agent during execution to reinforce its perimeter.
- Description: Used by other agents in multi-agent setups to understand what this agent can do. Write a detailed description so orchestrators delegate correctly.
To learn more about multi-agent orchestration, see Multi-Agent Workflows.
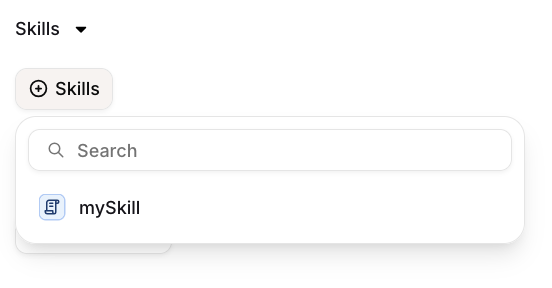
Skills
Skills can be used with agents in two ways: Static reference: Use{{skill.key}} directly in the instruction text to inject a Skill’s content at that position on every run. Use this for content that should always be present, such as a company policy or a standard output format.
On-demand attachment: Click Skills in the Skills section of the agent configuration to attach a Skill.
Variables and Templates
- AI Studio
- API & SDK
- MCP
Reference dynamic values in agent instructions using double braces: 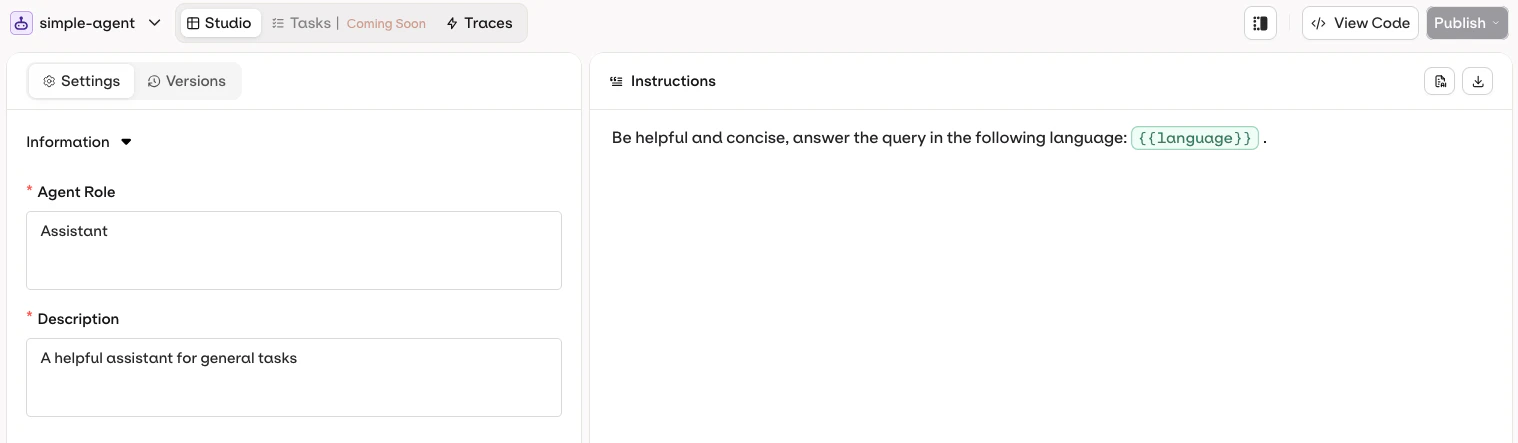
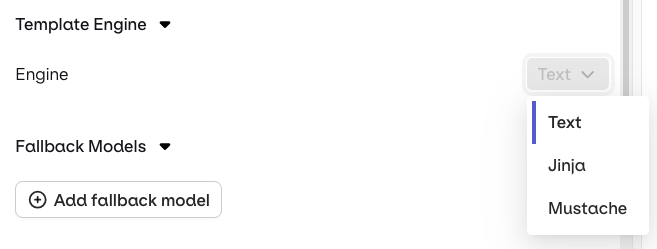
{{variableName}}. Pass a key-value map in the variables field at invocation time and Orq.ai substitutes each variable before execution.- Text (default): variables use
{{double_braces}}syntax. - Jinja: full templating with conditionals, loops, filters, and more.
- Mustache: logic-less templating with sections.
Jinja example
Jinja example
Instructions template:Invoke the agent:
cURL
Mustache example
Mustache example
Instructions template:Invoke the agent:
cURL
For a complete reference of all template features including filters, macros, and more, see Prompt Templating.
Add Tools
- AI Studio
- API & SDK
- MCP
Tools extend the agent’s capabilities by allowing it to interact with external systems, execute code, or fetch information. Add tools from the Tool selection modal.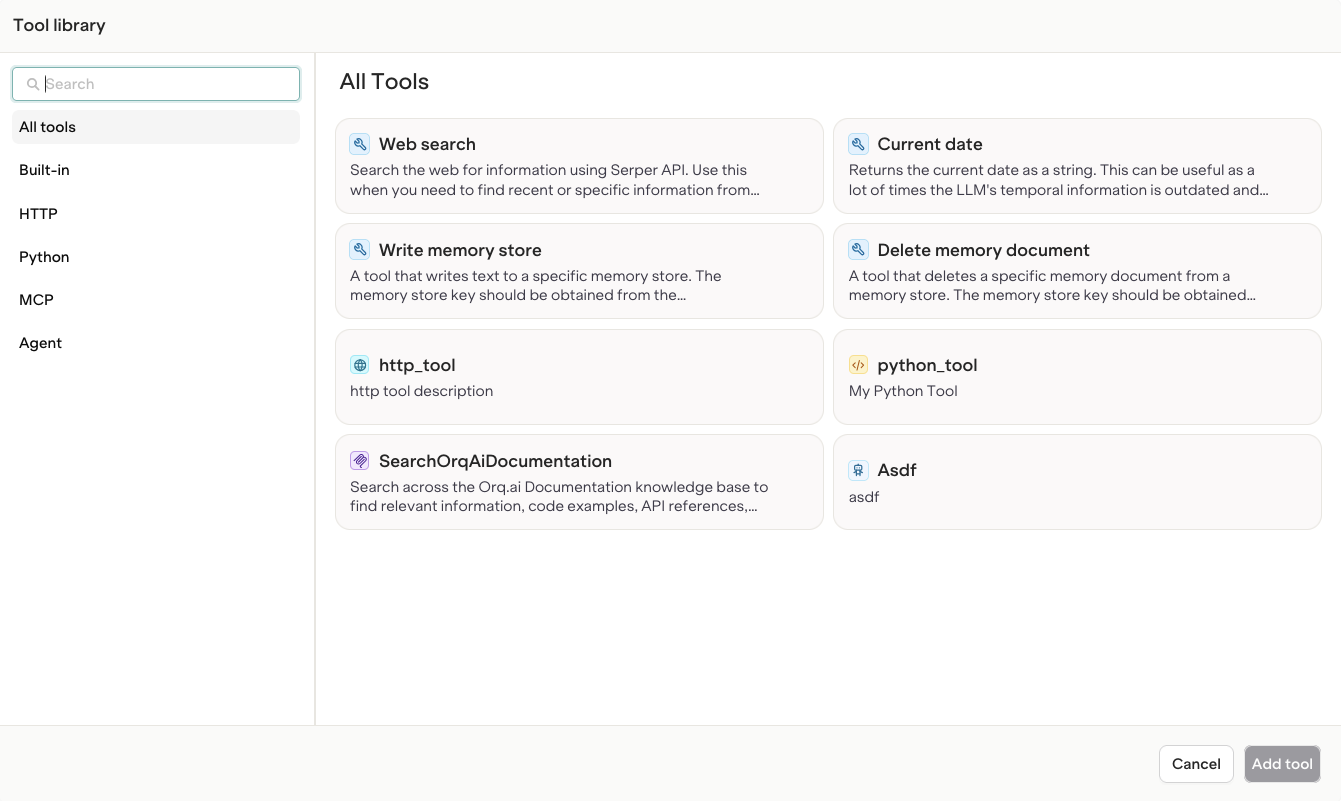
Standard Tools
- AI Studio
- API & SDK
The following tools are available to all agents out of the box:
| Tool | Name | Description |
|---|---|---|
| Current Date | current_date | Provides the current date to the model |
| Google Search | google_search | Lets an agent perform a Google Search |
| Web Scraper | web_scraper | Lets an agent scrape a web page |
| Query Memory Store | query_memory_store | Lets an agent query a Memory Store. Added automatically when using a Memory Store. |
| Retrieve Memory Stores | retrieve_memory_stores | Lets an agent fetch Memory Stores. Added automatically when using a Memory Store. |
| Write Memory Store | write_memory_store | Lets an agent save to a Memory Store. Added automatically when using a Memory Store. |
| Delete Memory Document | delete_memory_document | Lets an agent delete a memory document. Added automatically when using a Memory Store. |
| Query Knowledge Base | query_knowledge_base | Lets an agent query a Knowledge Base. Added automatically when using a Knowledge Base. |
| Retrieve Knowledge Bases | retrieve_knowledge_bases | Lets an agent fetch a Knowledge Base. Added automatically when using a Knowledge Base. |
| Call Sub Agent | call_sub_agent | Lets an agent invoke another agent. |
| Retrieve Agents | retrieve_agents | Lets an agent fetch other agents. |
Best Practices: Using Tools in Agent Instructions
Best Practices: Using Tools in Agent Instructions
Agent instructions must explicitly mention the available tools so the model knows when and how to invoke them.The model will not use tools unless the instructions clearly describe:
- What each tool does
- When to use it
- How to call it
Function Tools
Define custom functions inline with an OpenAPI-style schema.Python Tools
Embed executable Python code directly in the tool definition. The code runs server-side in a sandboxed environment.Python code is limited to 1 MB (1,048,576 bytes) per tool: roughly 1 million characters, or about 20,000 lines of typical Python. Larger code returns a
Code exceeds maximum size error and does not run.params.get(...) and must assign its output to result. Using return is not supported.
HTTP Tools
Reference a pre-created HTTP tool by itskey. Create HTTP tools first via the Tools page or API.
MCP Tools
Reference a pre-created MCP tool by itstool_id. Create MCP tools first via the Tools page or API.
Connect Knowledge Bases
- AI Studio
- API & SDK
- MCP
Attach a Knowledge Base to ground the agent’s responses in relevant data.
- Click Add context in the Configuration panel.
- Select a Knowledge Base.
query_knowledge_base tool based on context.For more on building Knowledge Bases for Agents, see Knowledge Bases.
Connect Memory Stores
- AI Studio
- API & SDK
- MCP
Attach a Memory Store to give the agent persistent memory across conversations.
- Click Add context in the Configuration panel.
- Select a Memory Store.
For more on using Memory Stores with Agents, see the Memory Stores documentation.
Configure Evaluators and Guardrails
- AI Studio
- API & SDK
- MCP
Evaluators measure agent performance against defined criteria. Guardrails can block execution when an evaluation fails.
- Click Add Evaluator or Add Guardrail in the Configuration panel.
- Select the evaluator type.
- Configure evaluation parameters:
- Input or Output: whether to evaluate the agent’s input or its output.
- Sample Rate (Evaluators only): the fraction of executions that trigger evaluation.
To learn more, see Evaluators and Guardrails in Deployments.
Configure Runtime Constraints
- AI Studio
- API & SDK
- MCP
Control resource usage and execution limits from the Configuration panel.
| Constraint | Description |
|---|---|
| Max Iterations | Maximum number of LLM reasoning iterations per task |
| Max Execution Time | Maximum time the agent runs (in seconds) |
Agents are run and scaled by Orq.ai. No infrastructure setup required.
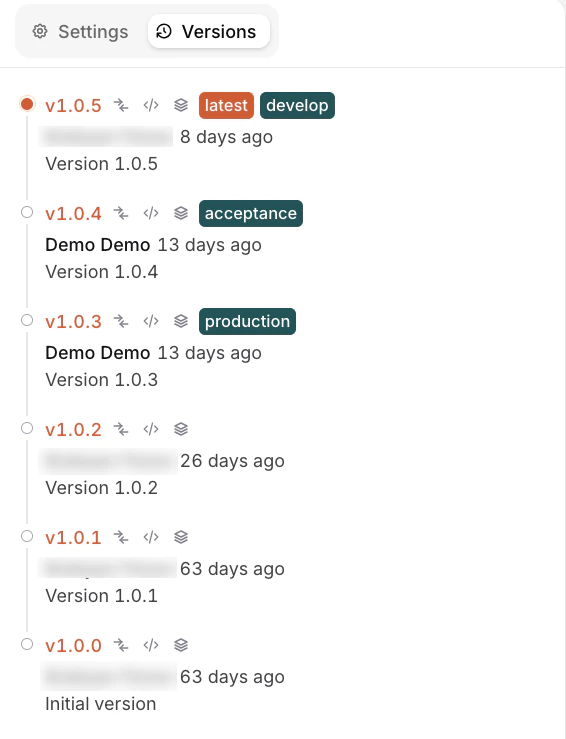
Versions
- AI Studio
- API & SDK
- MCP
The Versions tab shows the full history of all published agent configurations. Open it by selecting Versions from the tabs in the Agent Studio page.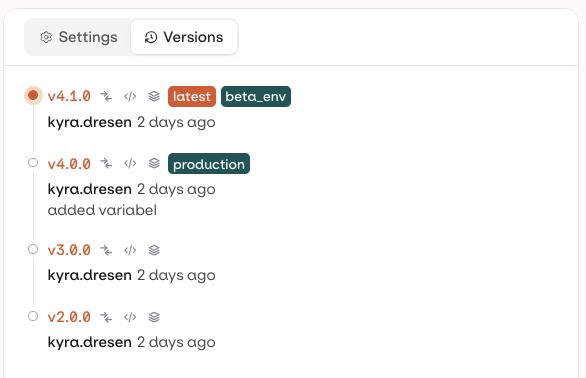
latest, production).Comparing Changes
Click on any version to open the Compare Changes view. Use the From and To dropdowns to compare any two versions, including Current (unpublished working changes).
- Instructions: diff of agent instructions only.
- Snapshot: full JSON diff of the complete agent configuration.
Restoring a Version
Open Compare Changes (see above), then click Restore next to an older version to load it into the current working draft. Restore does not publish automatically: the agent is loaded into the draft as unpublished changes, and Publish still needs to be clicked for it to become a real version. Earlier versions are never deleted, so restoring is always reversible. Restore replaces the full agent configuration, including connected Knowledge Bases, Memory Stores, Team of Agents, Skills, Variables, and Tools.If there are unpublished changes already, a confirmation dialog asks for confirmation before overwriting them.
Assigning Environments
Click on a version to assign it to an environment:- Select an existing environment (e.g.
develop,production). - Create environment: add a new environment from this dropdown.
- Manage environments: open the full environment management settings.
To learn more about environments, see Environments.