Add function calling to LLM applications with tools. Create HTTP, Python, or JSON Schema tools to integrate AI models with external APIs and services.
Tools give models the ability to take action: call an API, run code, or invoke any external service. Tools require a model with function calling support, look for the tools tag in the AI Gateway. For MCP server connections, see MCP Portal.The following Tools are available:
Function Tool
Pass the tool call back to the caller for local execution. Define parameters with JSON Schema.
JSON Schema Tool
Enforce structured output from the model using a full JSON Schema definition.
HTTP Tool
Make a real HTTP request to an external API at runtime. No extra code needed.
MCP Servers
Connect upstream MCP servers. Manage authentication, tool discovery, and exposure from the AI Gateway.
Python Tool
Run arbitrary Python code at runtime. Define logic and parameters directly in the Studio.
Orq.ai executes every tool type except Function: the model calls the tool, the platform runs it, and the run continues without the application being involved. A Function Tool is the one that gets handed back. The platform returns the call and waits for the application to execute it and send the result, which makes it the escape hatch for anything the platform cannot reach on its own.Pick a Function Tool when the code needs the application’s own environment: a database connection, an internal client library, credentials that never leave the application, or logic that no single request can express. An HTTP Tool is less work when the capability is already a REST endpoint, because Orq.ai makes the request. Small self-contained logic can go in a Python Tool, which runs on the platform with no application code at all.
A Function Tool lets the model call custom code that runs in the application invoking the agent, not on the Orq.ai platform. Use it for database queries, internal APIs, or any logic that requires access to the application’s environment.
AI Studio
API & SDK
CLI
Define a callable function using JSON Schema.
1
Add a new Tool
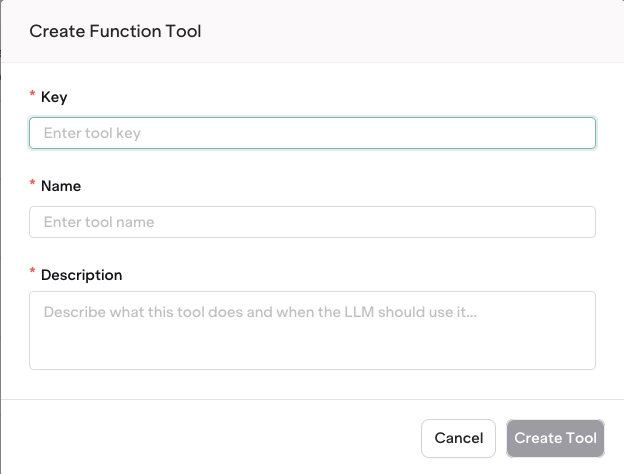
Open Tools in the Managed Agents section, then click Tool.
Select Function Tool
2
Enter Tool Details
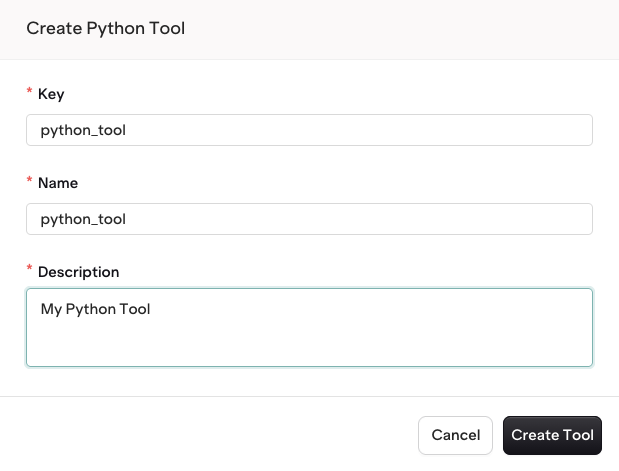
Enter the main details of the tool:
Key, used by models to reference the tool
Name, used in the studio to find the tool
Description (required), used to describe the tool
Path, the project folder that holds the tool; select Browse to place it elsewhere
Make the Description as precise as possible, it is used notably by Agents when looking up relevant tools for their tasks.
Configure all fields
3
Configure your Function Tool
Function Tools are defined using JSON.Here is an example of a JSON schema for a function get_current_weather that declares the fields location (string) and unit (string):
{ "type": "object", "properties": { "unit": { "type": "string", "description": "The temperature unit, e.g. Celsius" }, "location": { "type": "string", "description": "The city and state, e.g. San Francisco, CA" } }, "required": [ "location", "unit" ]}
The object defined here is based on JSON Schema. This framework allows for extensible definition that fits your ideal function definition.
TypeUse here any of the valid JSON types: object, string, integer, number, array, etc. The top-level type will most commonly be an object holding other properties.Learn more about all JSON types in the JSON Schema definition.PropertiesProperties are definitions of fields within an object. Here you can define any new variable. Nested properties are allowed.RequiredThe required array within an object defines which fields must be entered for a JSON payload to be validated.
4
Publish your Tool
Once your tool is configured, click Publish to save a new version. Each published version is immutable and tracked in the version history.
A Function Tool defines a callable function using a JSON Schema parameter definition. The caller executes the function locally and returns the result to the model.
Enforce structured output from the model using a full JSON Schema definition.
1
Add a new Tool
Open Tools in the Managed Agents section, then click Tool.
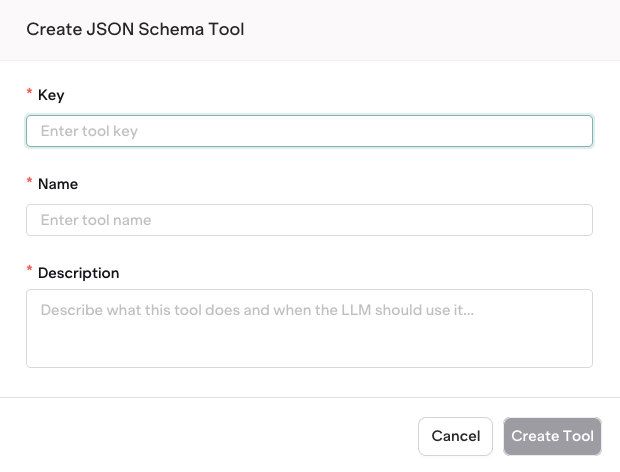
Select JSON Schema Tool
2
Enter Tool Details
Enter the main details of the tool:
Key, used by models to reference the tool
Name, used in the studio to find the tool
Description (required), used to describe the tool
Path, the project folder that holds the tool; select Browse to place it elsewhere
Make the Description as precise as possible, it is used notably by Agents when looking up relevant tools for their tasks.
Configure all fields
3
Configure your JSON Schema Tool
JSON Schema Tools are defined using JSON.Here is an example of a JSON schema for a function get_current_weather that declares the fields location (string) and unit (string):
{ "type": "object", "properties": { "unit": { "type": "string", "description": "The temperature unit, e.g. Celsius" }, "location": { "type": "string", "description": "The city and state, e.g. San Francisco, CA" } }, "required": [ "location", "unit" ]}
The object defined here is based on JSON Schema. This framework allows for extensible definition that fits your ideal function definition.
TypeUse here any of the valid JSON types: object, string, integer, number, array, etc. The top-level type will most commonly be an object holding other properties.Learn more about all JSON types in the JSON Schema definition.PropertiesProperties are definitions of fields within an object. Here you can define any new variable. Nested properties are allowed.RequiredThe required array within an object defines which fields must be entered for a JSON payload to be validated.
4
Publish your Tool
Once your tool is configured, click Publish to save a new version. Each published version is immutable and tracked in the version history.
A JSON Schema Tool enforces structured output from the model using a full JSON Schema definition. Unlike Function Tools, the schema is defined at the top level with a name and description.
Make a real HTTP request to an external API at runtime. Use {{variable}} syntax to inject dynamic values into any field.
1
Add a new Tool
Open Tools in the Managed Agents section, then click Tool.
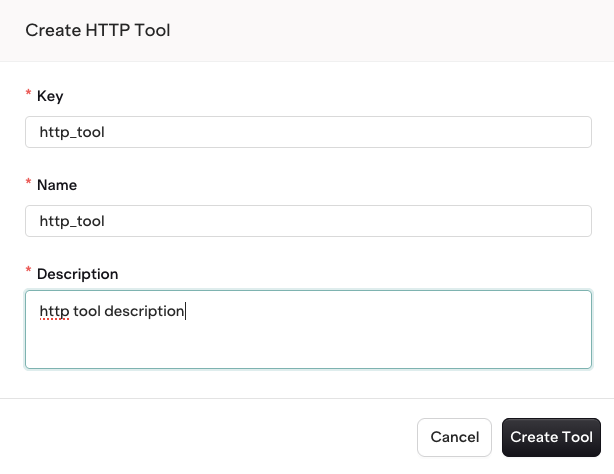
Select HTTP Tool
2
Enter Tool Details
Enter the main details of the tool:
Key, used by models to reference the tool
Name, used in the studio to find the tool
Description (required), used to describe the tool
Path, the project folder that holds the tool; select Browse to place it elsewhere
Make the Description as precise as possible, it is used notably by Agents when looking up relevant tools for their tasks.
Configure all fields
3
Configure your HTTP Tool
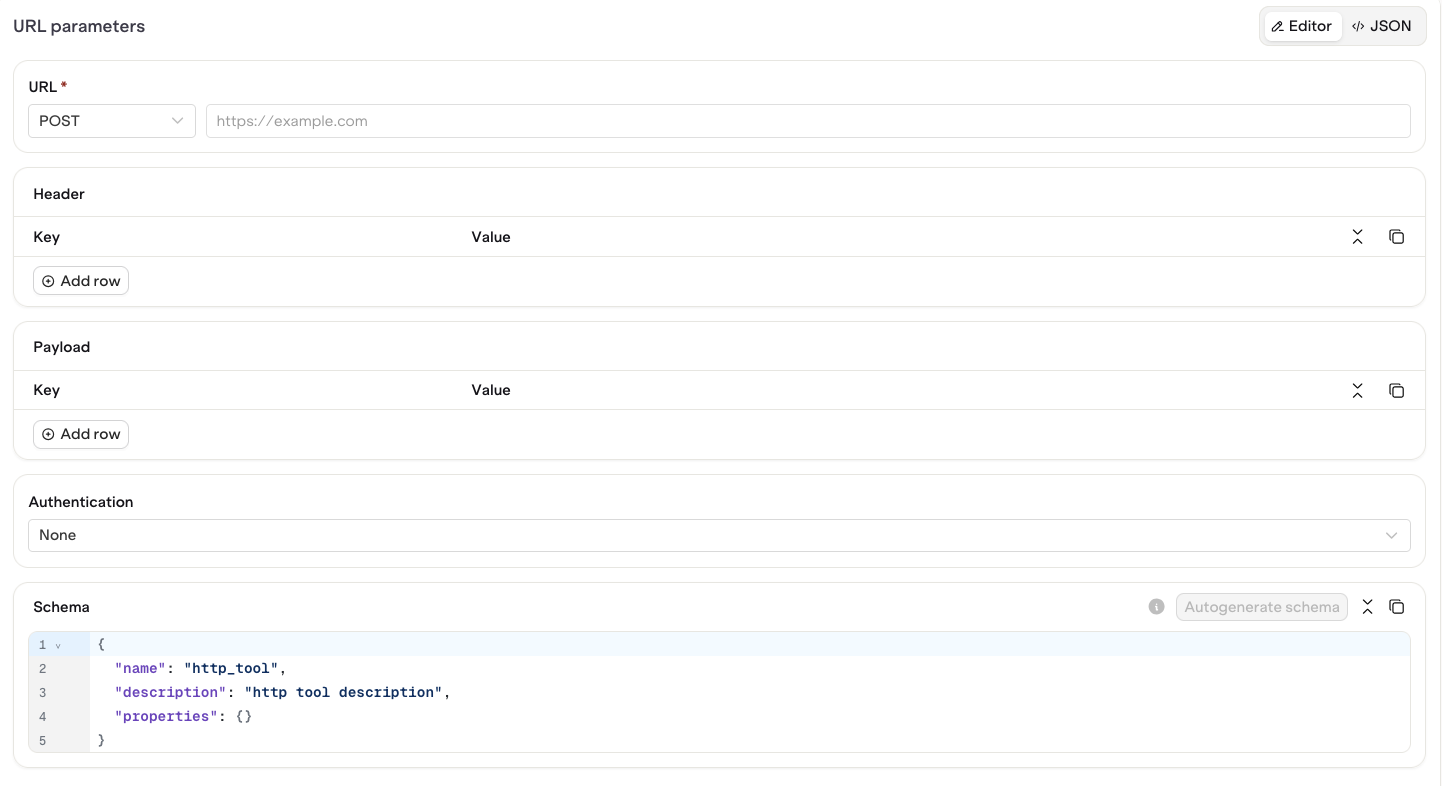
HTTP Tools are defined within the Studio, either using the UI or using JSON (use the toggle to change mode).
Configure your HTTP Tool
Field
Description
URL
Enter the API URL as well as the HTTP Method for the call
Header
Define Request Header Key-value pairs
Payload
Define Request Body Payload Key-value pairs (these are translated to JSON at runtime)
Authentication
Define an optional Bearer Authentication field and Token (Tokens are encrypted when saved in Orq).
You can use Variables with the {{variable}} syntax within any configuration field. The variable will be resolved at runtime when the payload is built for the HTTP call.
Use the Autogenerate Schema when using variables to ensure variable definition is correctly created.
4
Publish your Tool
Once your tool is configured, click Publish to save a new version. Each published version is immutable and tracked in the version history.
An HTTP Tool makes a real HTTP request to an external API at runtime. Use {{variable}} syntax in any field to inject dynamic values.
MCP servers are now managed centrally in the AI Gateway under MCP Portal. Each server registers an upstream MCP endpoint, discovers tools automatically, and exposes them to Agents and Gateways.
MCP tools previously created through this page have been migrated to MCP Portal. Existing connections are now managed under AI Gateway > MCP Portal > MCP Servers. New MCP connections should be created through the MCP Portal instead.
MCP Servers
Connect upstream MCP servers, configure authentication, and manage tool discovery.
MCP Gateways
Bundle multiple servers behind a single gateway endpoint with egress and rate limits.
MCP tool calls appear in traces with server hostname, tool name, arguments, and latency. See MCP Tracing for details.
Python code is limited to 1 MB (1,048,576 bytes) per tool: roughly 1 million characters, or about 20,000 lines of typical Python. Larger code returns a Code exceeds maximum size error and does not run.
AI Studio
API & SDK
CLI
Run arbitrary Python code at runtime. Access parameters via params and store the result in result.
1
Add a new Tool
Open Tools in the Managed Agents section, then click Tool.
Select Python Tool
2
Enter Tool Details
Enter the main details of the tool:
Key, used by models to reference the tool
Name, used in the studio to find the tool
Description (required), used to describe the tool
Path, the project folder that holds the tool; select Browse to place it elsewhere
Make the Description as precise as possible, it is used notably by Agents when looking up relevant tools for their tasks.
Configure all fields
3
Configure your Python Tool
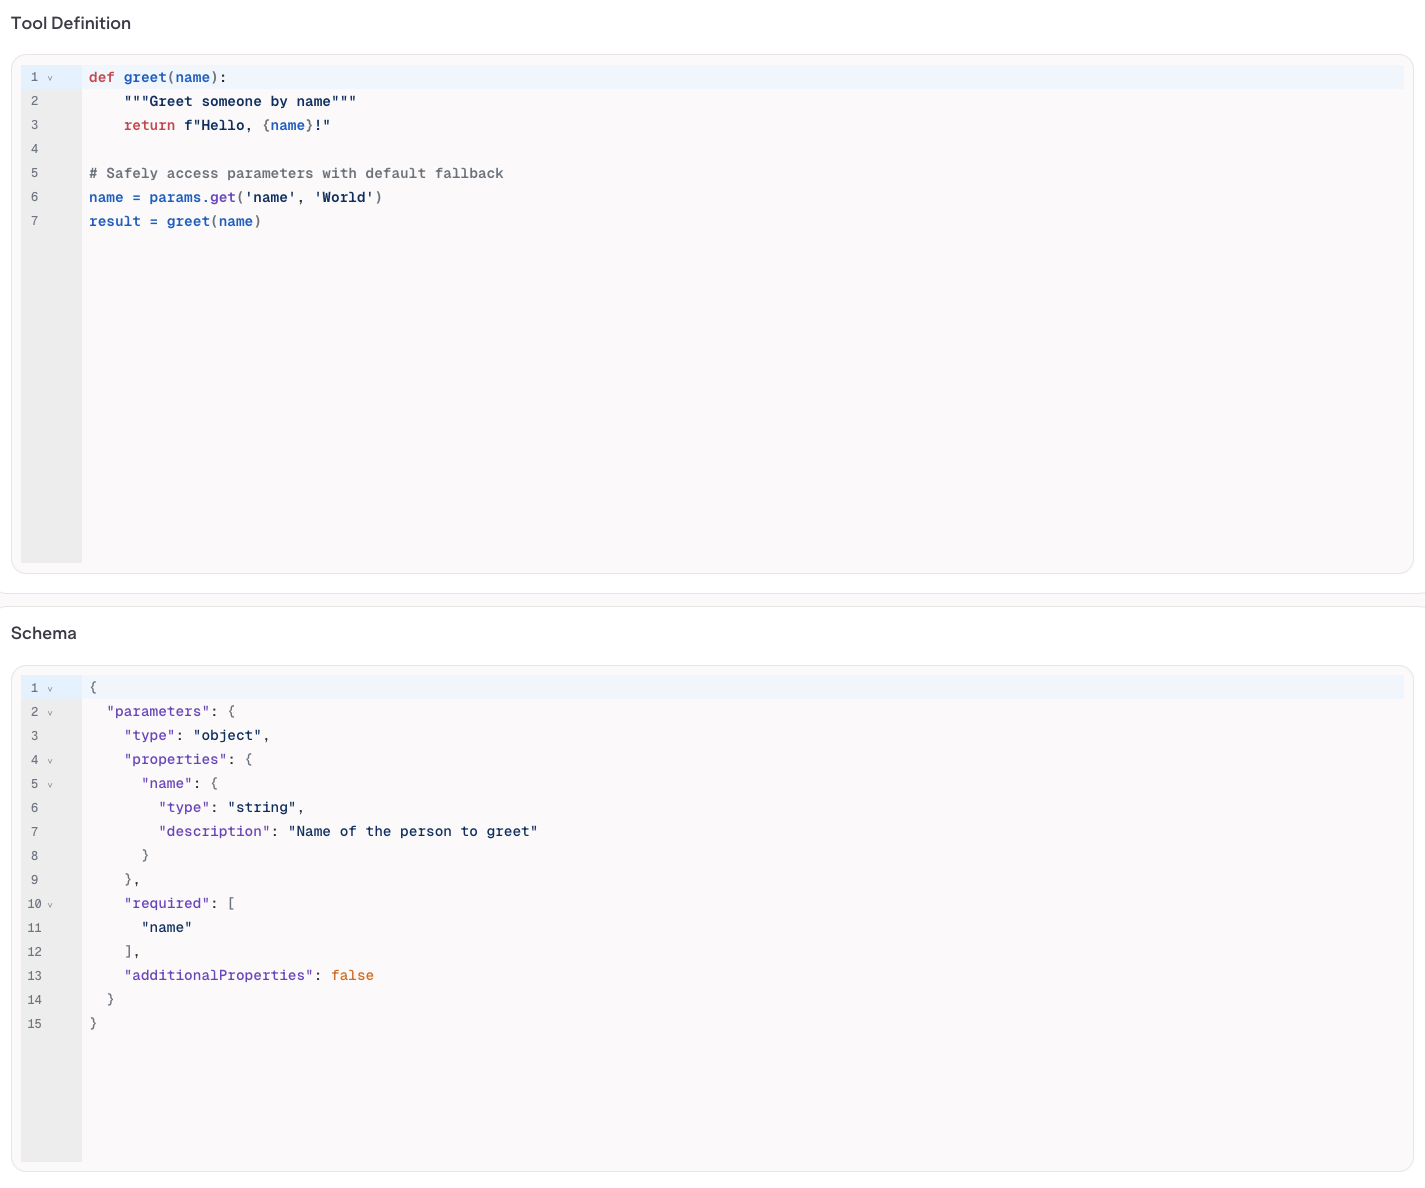
Freely define the code to be run during Tool execution.You can define the JSON Schema for the parameters to be sent into the tool. Here, see the name field defined and then further fetched using params.get('name').Ensure your return value is stored within the result field.
Configure your Python Tool
4
Publish your Tool
Once your tool is configured, click Publish to save a new version. Each published version is immutable and tracked in the version history.
A Python Tool runs Python code at runtime. Define the logic directly in the code field and declare expected parameters using a JSON Schema.
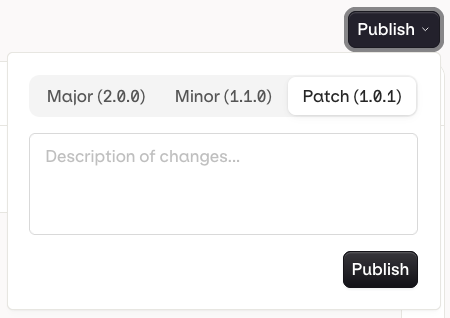
When you are done editing, click Publish to save your changes. You will be prompted to write a commit message and choose a version bump: major, minor, or patch.
Publish a new version of your Tool
Patch (e.g. v1.0.0 to v1.0.1): small fixes, no behavior change
Minor (e.g. v1.0.0 to v1.1.0): new functionality, backwards compatible
Major (e.g. v1.0.0 to v2.0.0): breaking change or significant rework
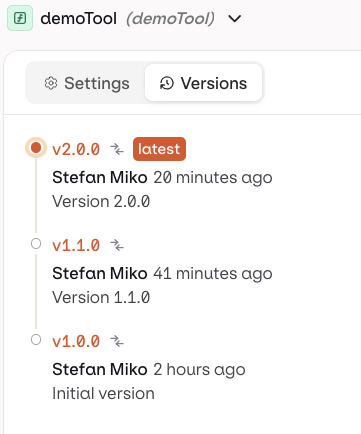
Every time you publish, a new version of the tool is created. The Versions tab shows the full history. Versions are numbered (e.g. v1.0.0, v1.1.0) and each entry shows the author and publish timestamp.
Version history in the Versions tab
Use the Compare button to open a diff view to see what changed between versions.
All tool types are supported. Reference a tool by key in the settings.tools array. Your agent’s instructions must explicitly describe each tool and when to use it.


 AI Studio