

- Optimize for cost: set a high-quality model as your baseline. The Auto Router routes simpler requests to the cheaper model and escalates only when complexity warrants it. You save on the requests that don’t need your most powerful model.
- Optimize for quality: start with a cost-efficient model and let the Auto Router escalate to the more capable model only when the task demands it. Get the best output for every request without overspending.
Use Cases
How It Works
The Auto Router sits between your application and two models you configure: a Strong Model for complex requests and an Economical Model for simpler ones. When a request comes in, it analyzes the task complexity and routes it to the appropriate model based on your profile.Set Up the Auto Router
- Navigate to the AI Gateway section in AI Studio and open the Models page.
- Click Add Model.
- Select Auto Router from the dropdown.
- Fill in the configuration:
- Model ID: a unique identifier for this router (lowercase letters, numbers, and hyphens only).
- Strong Model: the more capable model, used for complex requests.
- Economical Model: the cheaper model, used for simpler requests.
- Profile: choose how aggressively to route between the two models.
- Click Add model.
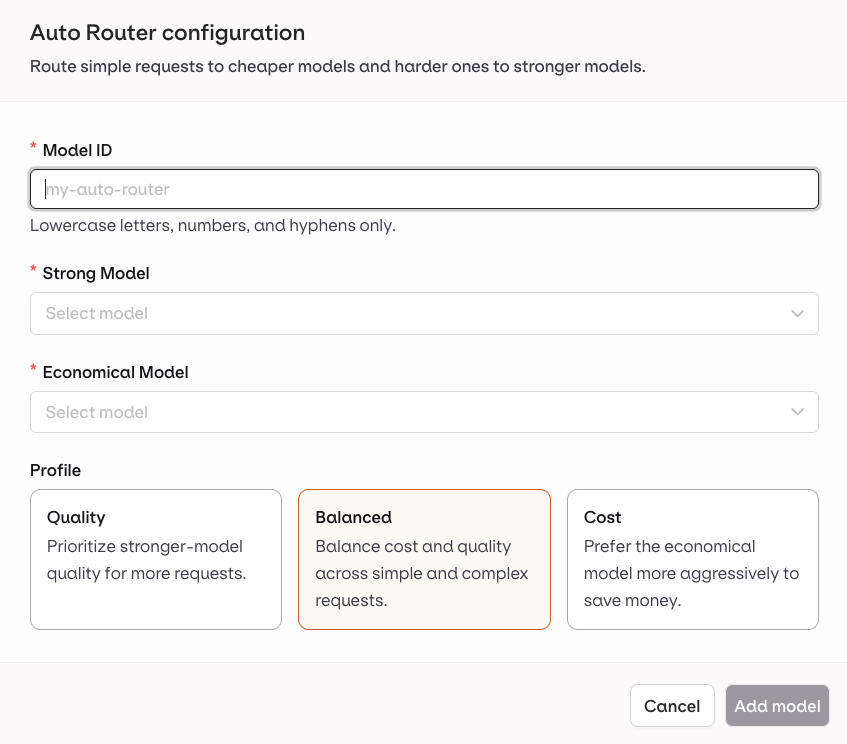
Auto Router configuration form.
Profiles
Recommended model pairs
These pairs combine high routing accuracy with significant cost ratios (over 10x), making them effective starting points.You can combine models from different providers in a single Auto Router configuration.
Use the Auto Router
Once created, the Auto Router appears in your AI Gateway and can be selected anywhere a model is accepted: Deployments, Agents, Playground, and Experiments.Reference in code
When using an Auto Router through the SDKs, API, or Supported Libraries, reference it by the string<workspacename>@orq/<model-id>.
Example: acme@orq/my-auto-router