

- Cap monthly spend per customer or tenant by scoping a budget to an Identity.
- Prevent a staging or CI environment from consuming production credits by scoping a budget to its API Key.
- Limit exposure to an expensive provider or model during evaluation by scoping a budget to a Provider or Model.
- Enforce a hard workspace-wide cost ceiling as a safety net by scoping a budget to the Workspace.
- Control spend for a time-boxed experiment using a One-time reset period with an expiration date.
Overview
The Budgets table lists all budgets in the organization.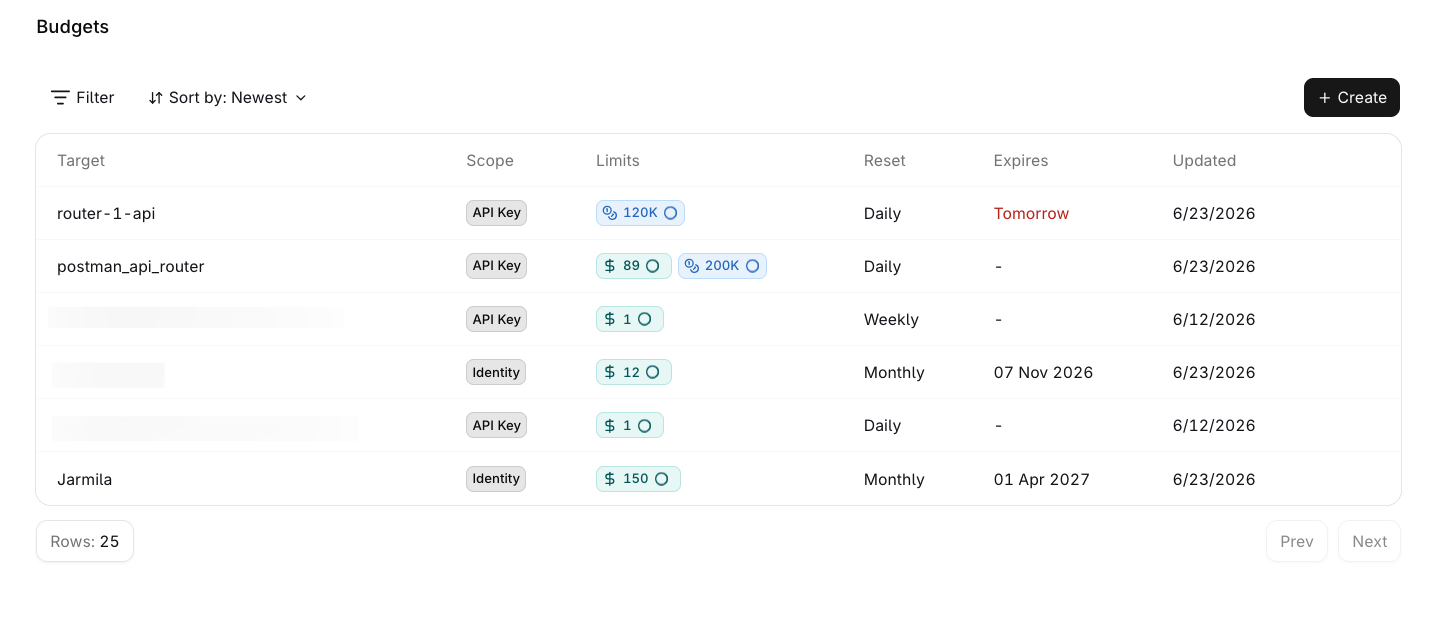
The Budgets overview showing all budgets with their scope, limits, reset period, and expiration status.
Monitor usage
Click a budget row to open its detail page:- A metric card for each configured limit (Total spend, Tokens, Req per minute) shows current usage, a progress bar, and percentage consumed.
- Scope, Resets period, Renews in countdown, and Expires date appear at the top.
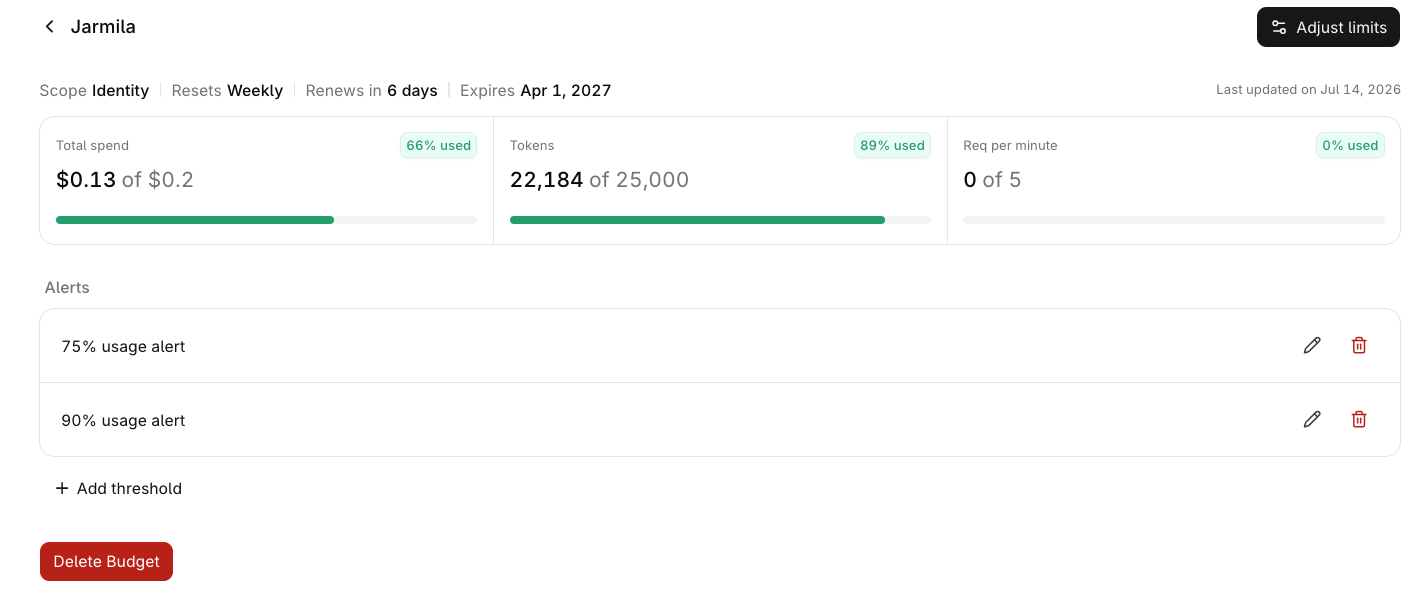
Budget detail page for an Identity-scoped budget, showing Total spend, Tokens, and Req per minute metric cards with progress bars, alongside configured alerts.
- Click Adjust limits to edit the budget’s period limits or expiration date.
- Click Add threshold in the Alerts section to set up an alert.
- Click Delete Budget to permanently remove it. Enforcement stops immediately.
Create a budget
Open the creation dialog
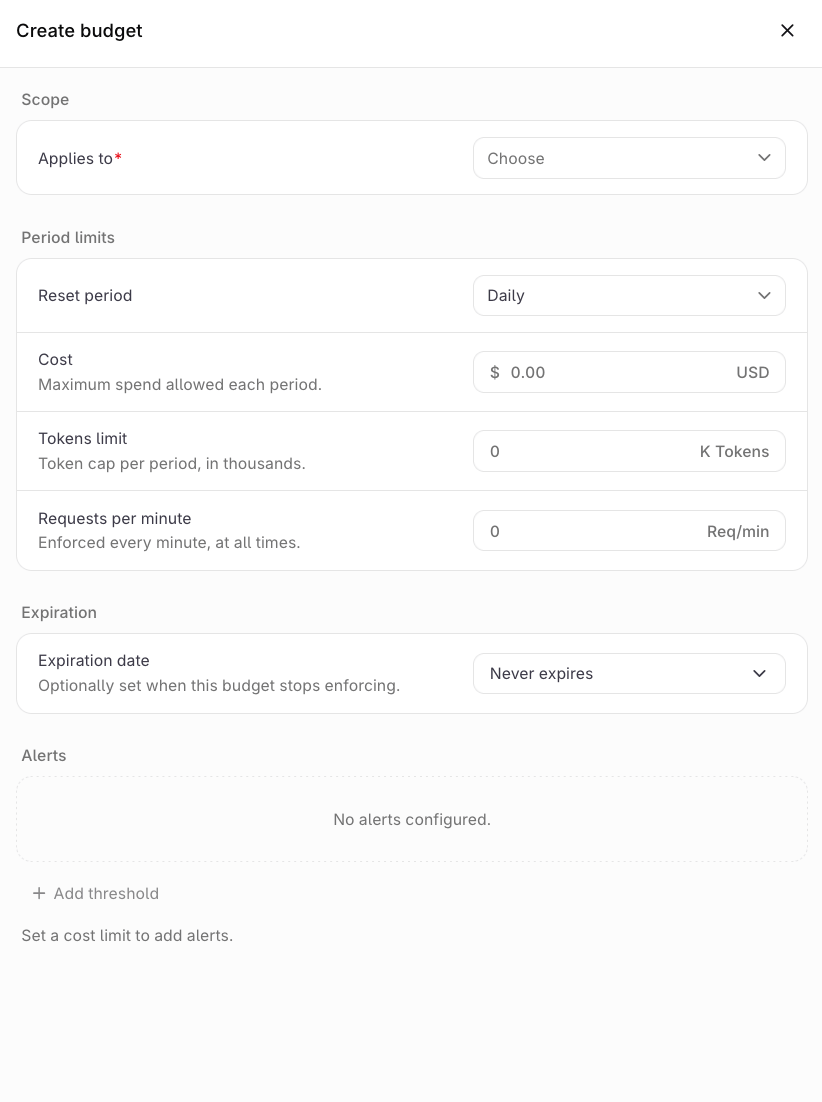
The Create budget dialog with scope, period limits, expiration date, and Alerts fields.
Set the scope
Configure period limits
0 to leave it unconfigured. At least one limit must be set to a non-zero value to create the budget.Reset periods follow a fixed schedule:Set an expiration date (optional)
Create the budget
Edit or delete a budget
Select the menu on any budget row to:- Edit: update the period limits or expiration date. The scope and target cannot be changed after creation.
- Delete: permanently removes the budget. Enforcement stops immediately.
Configure alerts
Alerts notify configured notifiers when a budget’s cost usage crosses a percentage threshold. The gateway performs two separate checks. Before a request starts, it verifies the budget hasn’t been fully consumed. Requests are blocked once usage reaches 100%. Alert thresholds are evaluated after each request completes, which means a notification can lag slightly behind the moment the threshold was crossed. Example: An 80% cost threshold on a project’s budget, notifying the project administrator by email, gives time to react before the budget blocks traffic at 100%.Create a notifier
Notifiers must exist before they can be configured in an alert. Create one under Settings > Organization > Notifiers, or with the Notifiers API.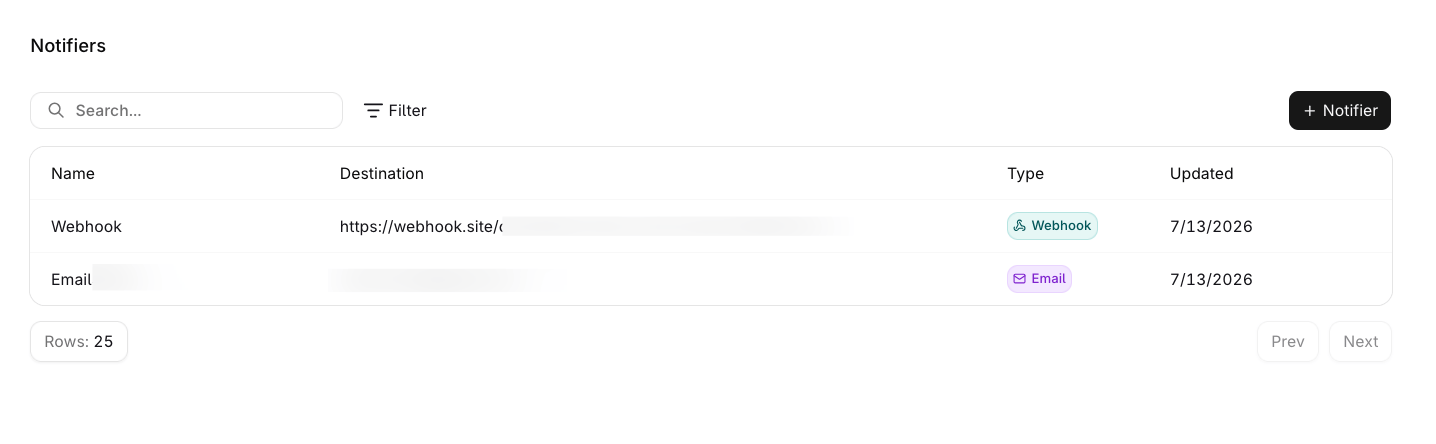
Notifiers configured in the organization, available for selection in a budget alert.
Open the notifier form
Name the notifier
Choose a channel
Save the notifier
Create an alert
The Alerts section is on the budget’s create/edit panel, and on its detail page (open a budget by clicking its row in the Budgets list).Add a threshold
Set the threshold percentage
Add notifiers
Save the alert
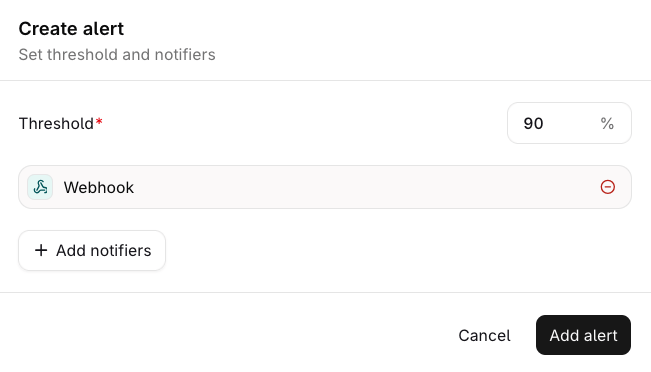
A configured alert with a 90% threshold and a Webhook notifier.
Examples
Send notifications to a Microsoft Teams channel
Route alert notifications to a Microsoft Teams channel with a generic webhook notifier. Teams renders messages in its own card format, so the webhook points at a small relay that converts Orq.ai’s notification payload before forwarding it to the channel.Create the Teams incoming webhook
Deploy a payload relay
Relay code
Relay code
TEAMS_WEBHOOK_URL to the webhook URL from the previous step. The example deploys as a Cloudflare Worker; any HTTP endpoint that accepts JSON works.Create the webhook notifier
Attach the notifier to an alert
Test delivery
application/json with X-Orq-Hook-ID, X-Orq-Event, and Idempotency-Key headers, plus any headers configured on the notifier:
400 because it expects a message card with @type and @context. The relay converts the envelope into that format before forwarding.
Troubleshooting:
Budget levels and interaction
Budgets can be set at six levels: Workspace, Project, Identity, API Key, Provider, and Model. When several budgets apply to the same request, every one of them is enforced independently and cumulatively. There is no precedence: a budget at one level never overrides a budget at another level, and a request must satisfy every budget that matches it. Because only one budget is allowed per target (see Create a budget), a request can match at most one scoped budget per level, up to six in total. When a budget is exhausted, only requests that match it are rejected.How multiple budgets interact
- Every applicable budget is enforced. A request must pass every budget that matches it. No budget overrides another.
- Each budget tracks its own usage. A request counts toward every budget that applies to it, at the same time.
- The most restrictive budget binds. The effective cap for a dimension is the most restrictive applicable budget. Limits on different dimensions (cost, tokens, requests per minute) all apply simultaneously.
- Requests per minute are enforced per budget, each with its own rolling 60-second window.
- Expired budgets stop enforcing. After the expiration date a budget no longer blocks requests, even though it stays in the list.
Worked examples
Workspace budget plus a per-project budget
Workspace budget plus a per-project budget
- Requests to Production count toward both budgets; requests to other projects count only toward the workspace budget.
- When Production reaches $300, requests to Production are rejected until the monthly reset. Other projects keep working until the workspace budget is exhausted at $1,000.
Per-identity budget inside a project with its own budget
Per-identity budget inside a project with its own budget
customer-acme has a $50/month budget.- The identity budget applies across all projects: the $50/month cap is enforced whenever
customer-acmemakes a request, regardless of project. - Requests from
customer-acmecount toward both budgets. When the identity budget is exhausted, those requests are rejected even though the project budget has room; other identities keep working.
Per-model budget alongside a workspace-wide cap
Per-model budget alongside a workspace-wide cap
anthropic/claude-sonnet-5 has an $800/month budget.- When the model budget is exhausted, requests to that model are rejected; other models keep working.
- When total workspace spend reaches $2,000, all requests are rejected until the monthly reset, regardless of model.
When a limit is exceeded
A request that matches an exhausted budget is rejected with429 Too Many Requests. The response identifies the budget and the exceeded dimension (cost, tokens, or requests); the response headers report the limit, remaining usage, and seconds until reset. Only requests that match the exhausted budget are blocked.