Orq MCP is live: Use natural language to interrogate traces, spot regressions, and experiment your way to optimal AI configurations. Available in Claude Desktop, Claude Code, Cursor, and more. Start now →
Open WebUI is an open-source, self-hosted chat interface. It supports OpenAI-compatible endpoints directly in the UI, so adding the AI Gateway as a connection routes every chat through Orq.ai with the full model catalog, unified tracing, and cost tracking. This page covers model routing and tracing only.
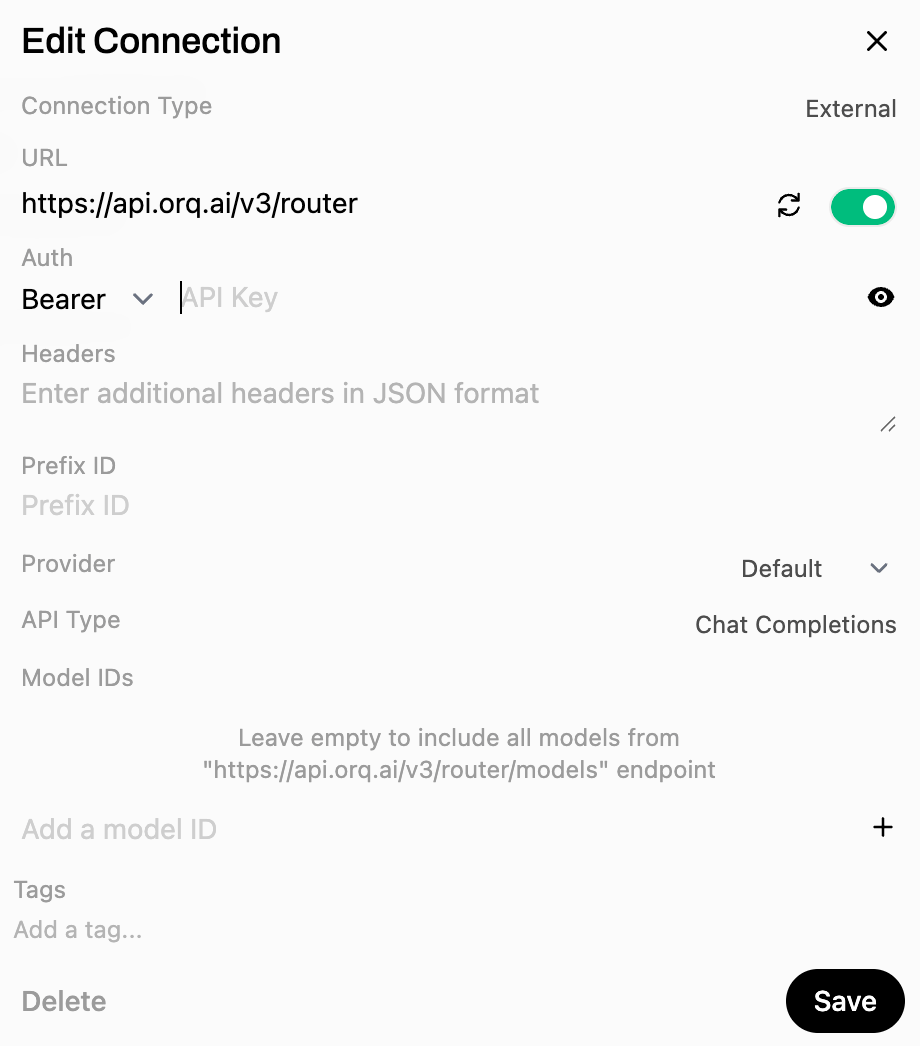
Leave Model IDs empty to include every enabled model from the AI Gateway, then Save.
Adding the AI Gateway as an OpenAI connection in Open WebUI
3
Select a model
Enabled Orq.ai models appear in the selector at the top of a new chat. To curate the list, go to Admin Settings → Models and add provider-prefixed IDs (for example openai/gpt-4o, anthropic/claude-sonnet-4-6) from Workspace Settings → Models.
The connection URL has an extra or trailing path, or the model fetch did not run. Confirm the URL is exactly https://api.orq.ai/v3/router, or add models manually under Admin Settings → Models.
Requests do not appear in Orq.ai Traces
A different connection is handling the request. Make sure the AI Gateway connection is selected, and disable any direct OpenAI connection to route exclusively through Orq.ai.
Authentication errors
Confirm the API Key is a valid Orq.aiAPI key, not an OpenAI key.
Start a new chat, choose an Orq.ai model, and send a message. The response appears in the chat, and the request appears in Orq.ai Traces with the selected model identifier.