

Use Cases
Compare models side by side
Compare models side by side
Run the same dataset through multiple models to compare output quality, cost, and latency. Works for newly released models, fine-tuned models, and private models added to the AI Gateway.
Optimise prompts
Optimise prompts
Test multiple prompt variants on the same dataset. Use evaluators like Cosine Similarity to quantitatively assess which version produces the best results.
Pre-deployment and regression testing
Pre-deployment and regression testing
Run experiments against your current prompt configuration before shipping changes. Use historical datasets to verify that updates haven’t degraded performance in any area.
Security and red teaming
Security and red teaming
Test how your model responds to jailbreak attempts and adversarial inputs in a controlled environment before putting it into production.
Prerequisites
Dataset
A Dataset with Inputs, Messages, and/or Expected Outputs
AI Gateway
Models added to the AI Gateway
API Key
An API Key (API and MCP only)
Create an Experiment
 AI Studio
- API & SDK
 MCP
MCP
Configure Tasks
- AI Studio
- API & SDK
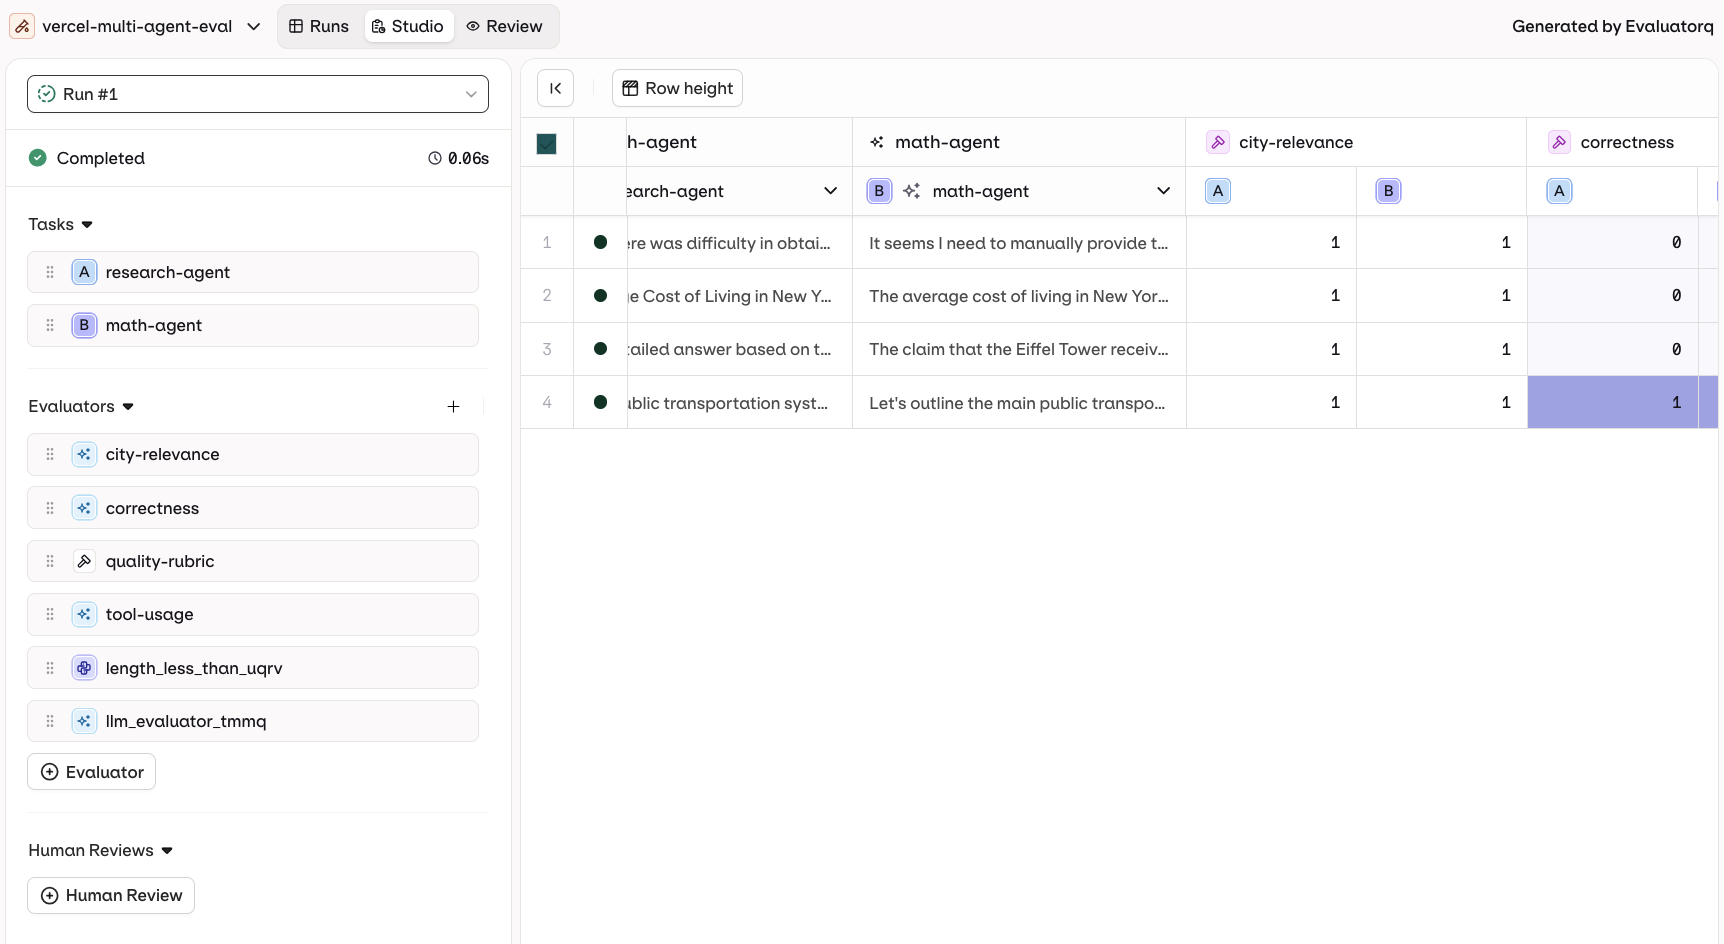
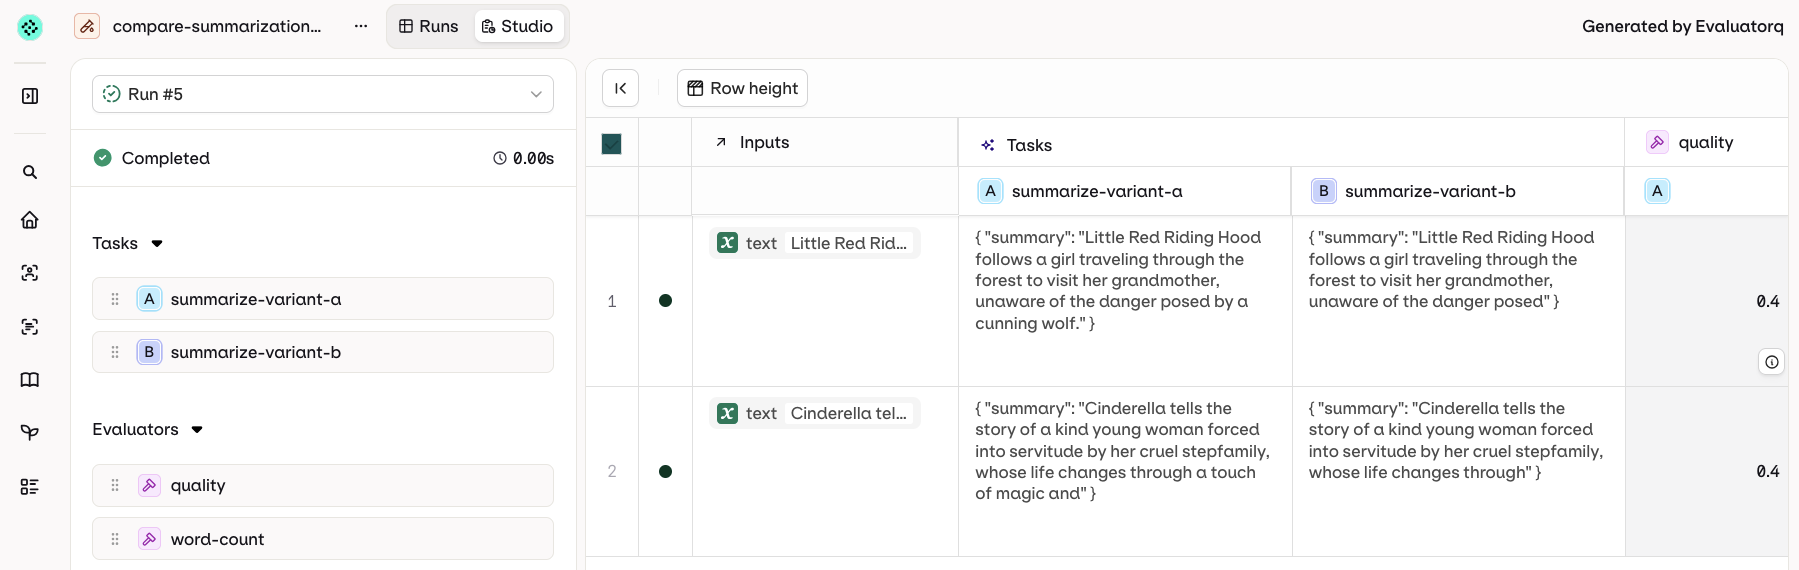
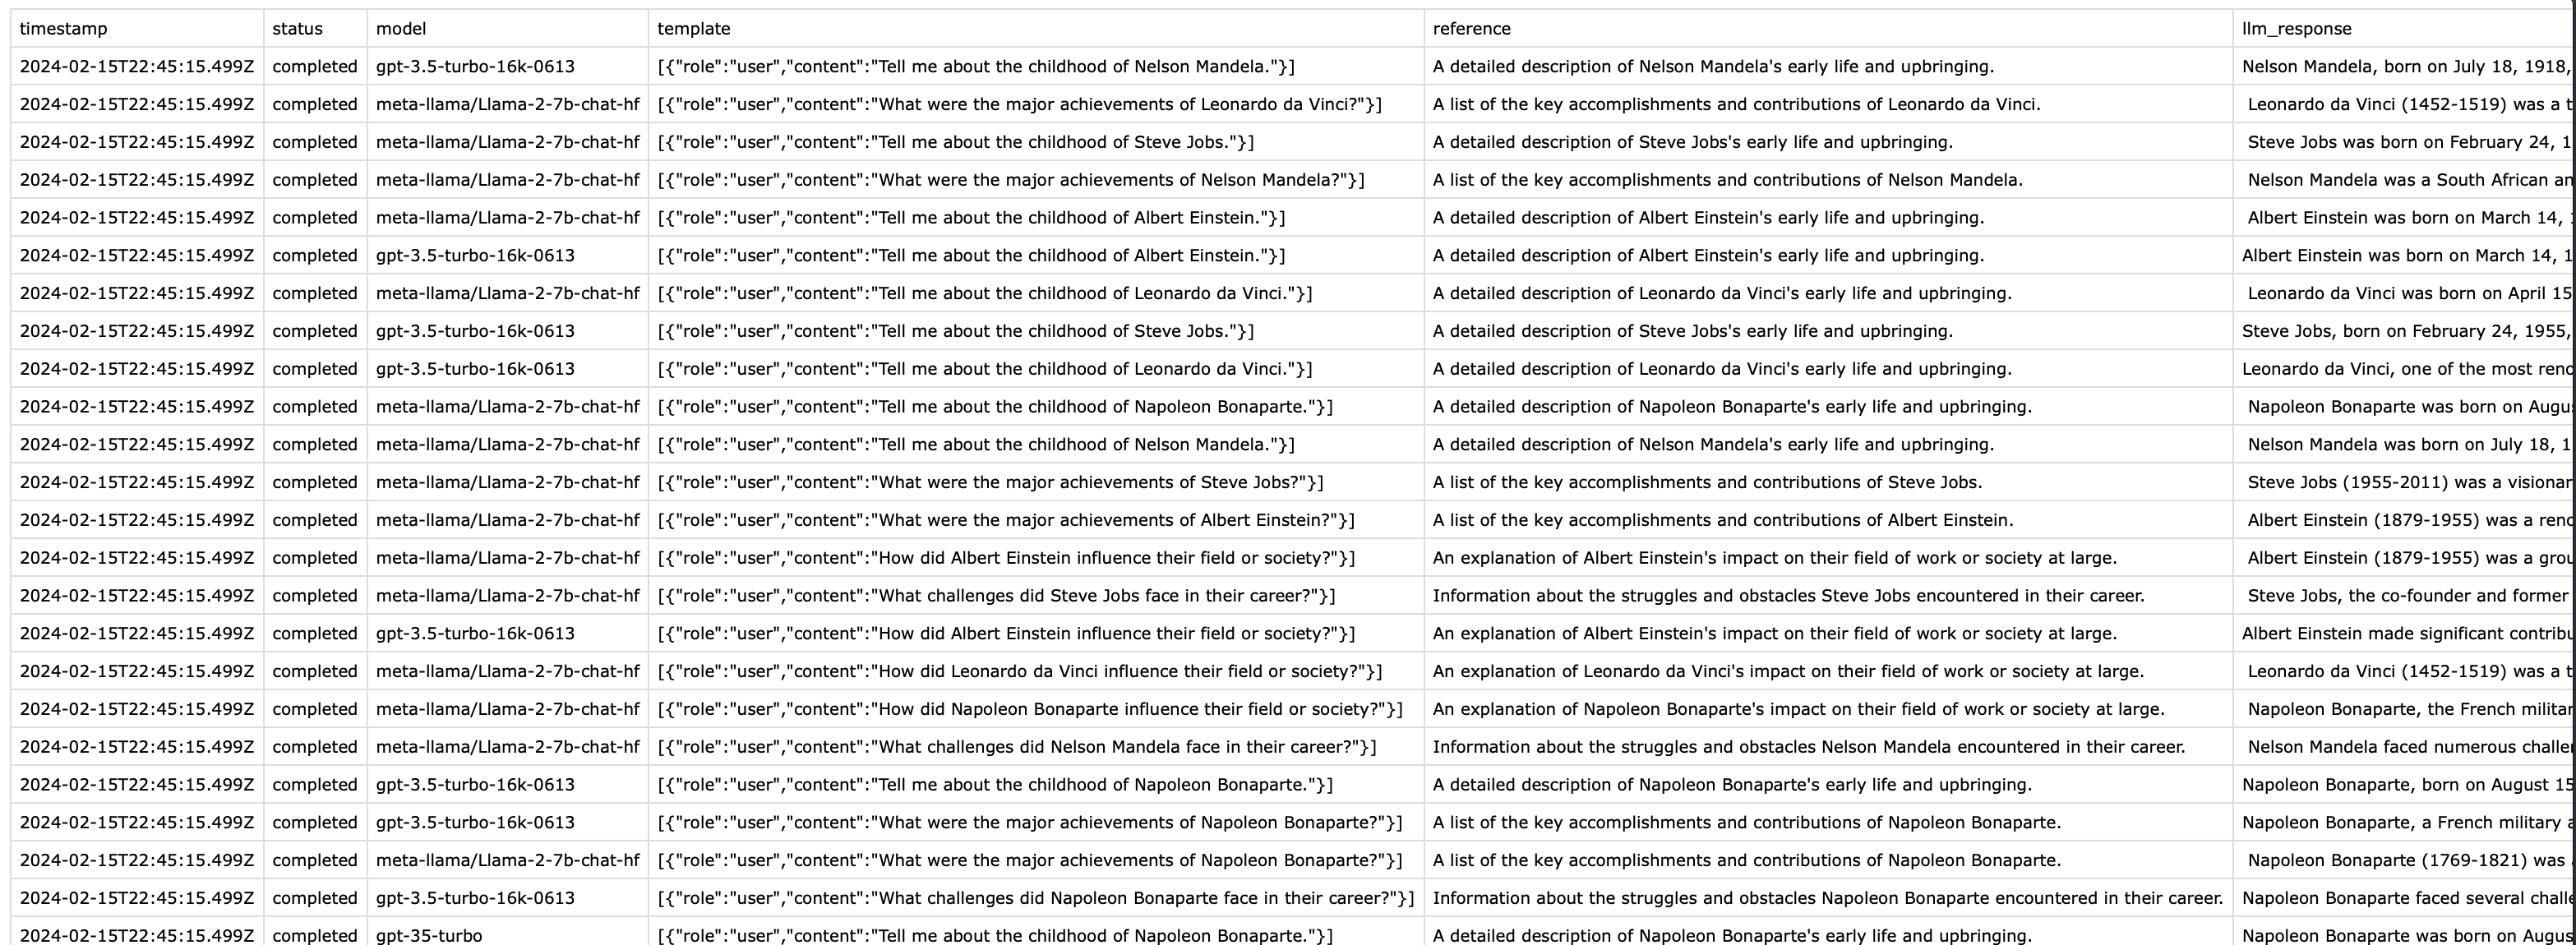
The left side of the Experiment table shows the loaded Dataset entries. Each row runs separately against each configured task.Add new test rows with the Add Row button. Edit Inputs, Messages, and Expected Outputs by selecting any cell.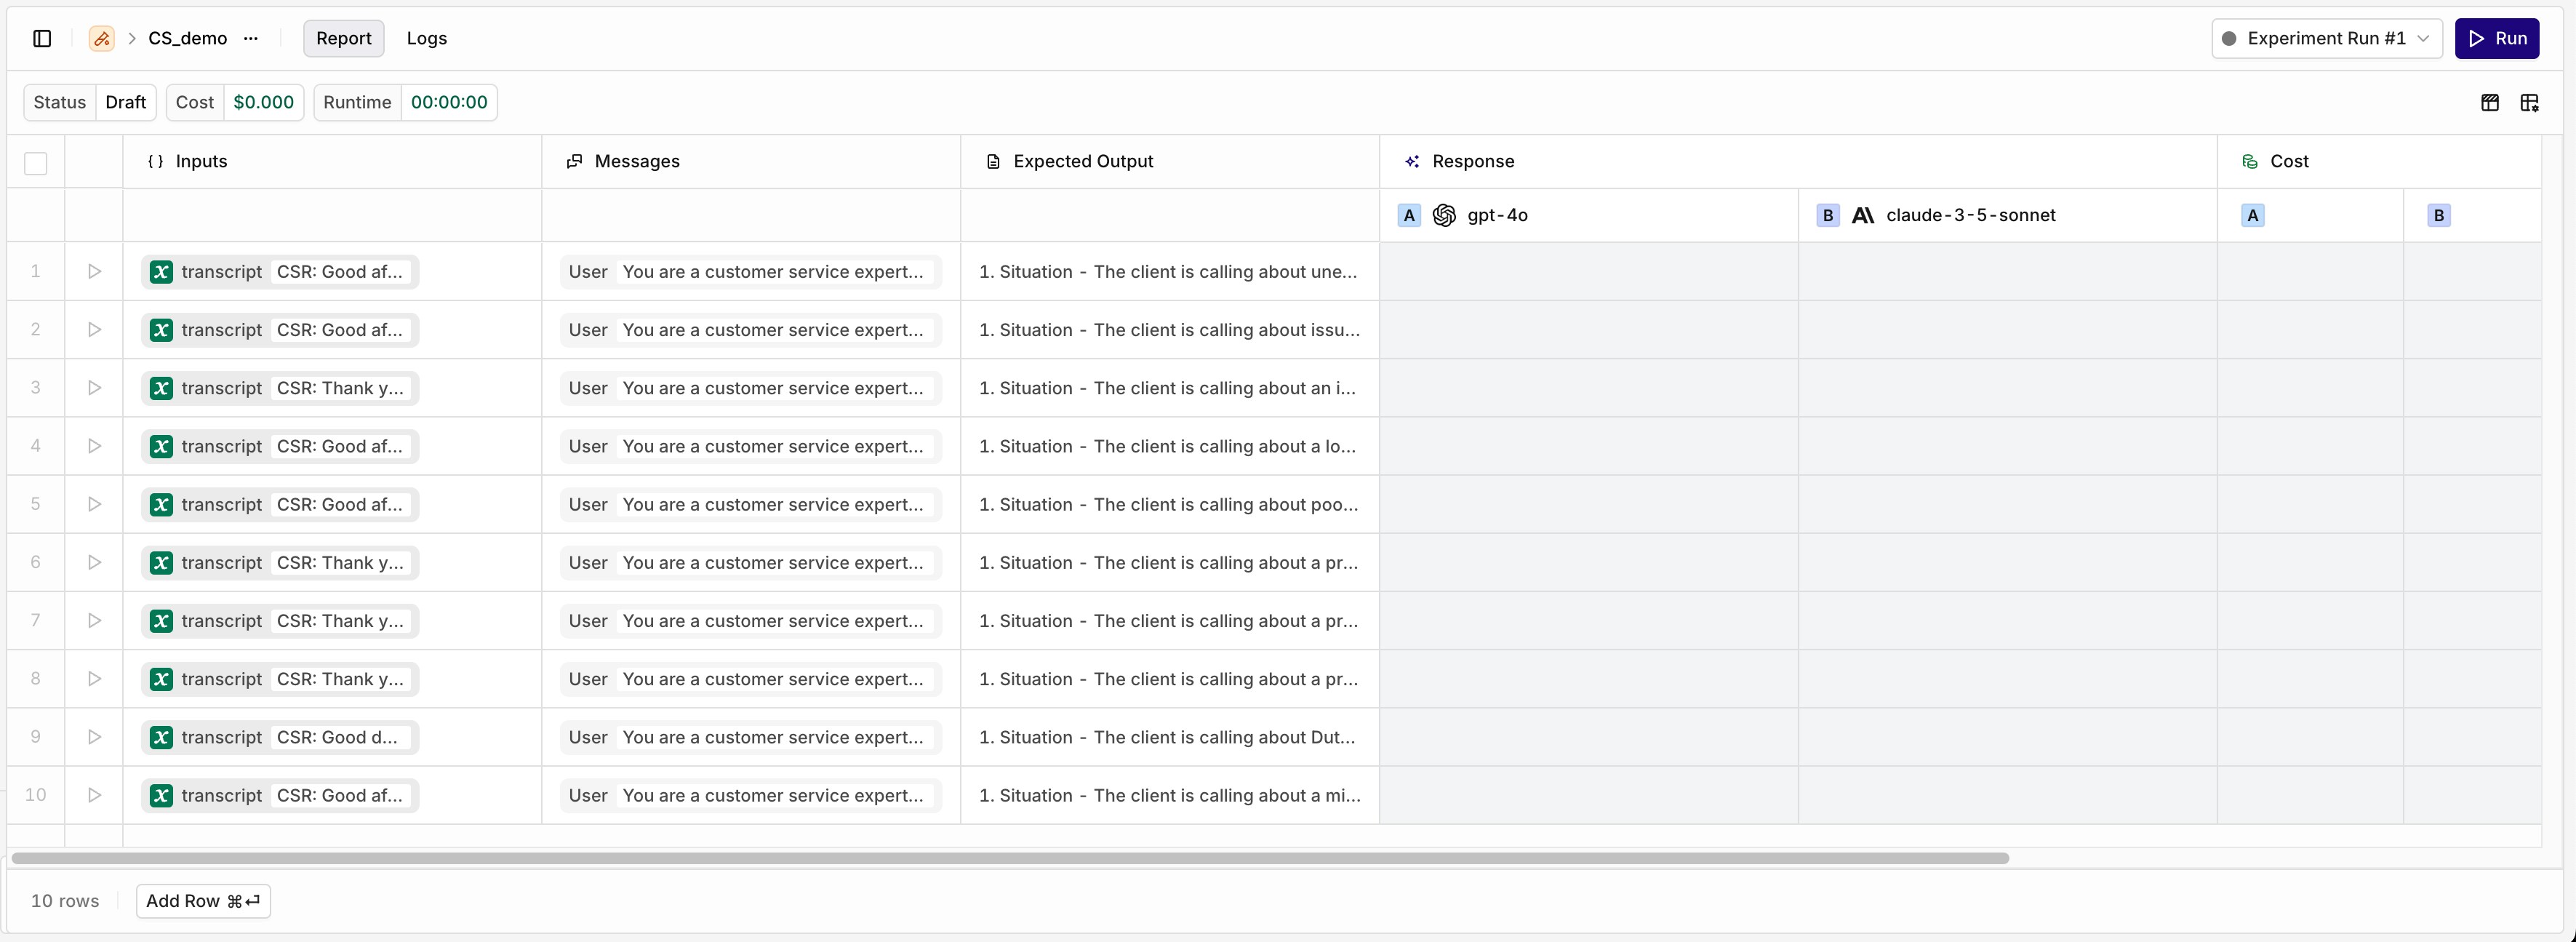
Configure a Model
Configure a Model
Select a model to open the Prompt panel. Configure the prompt template using: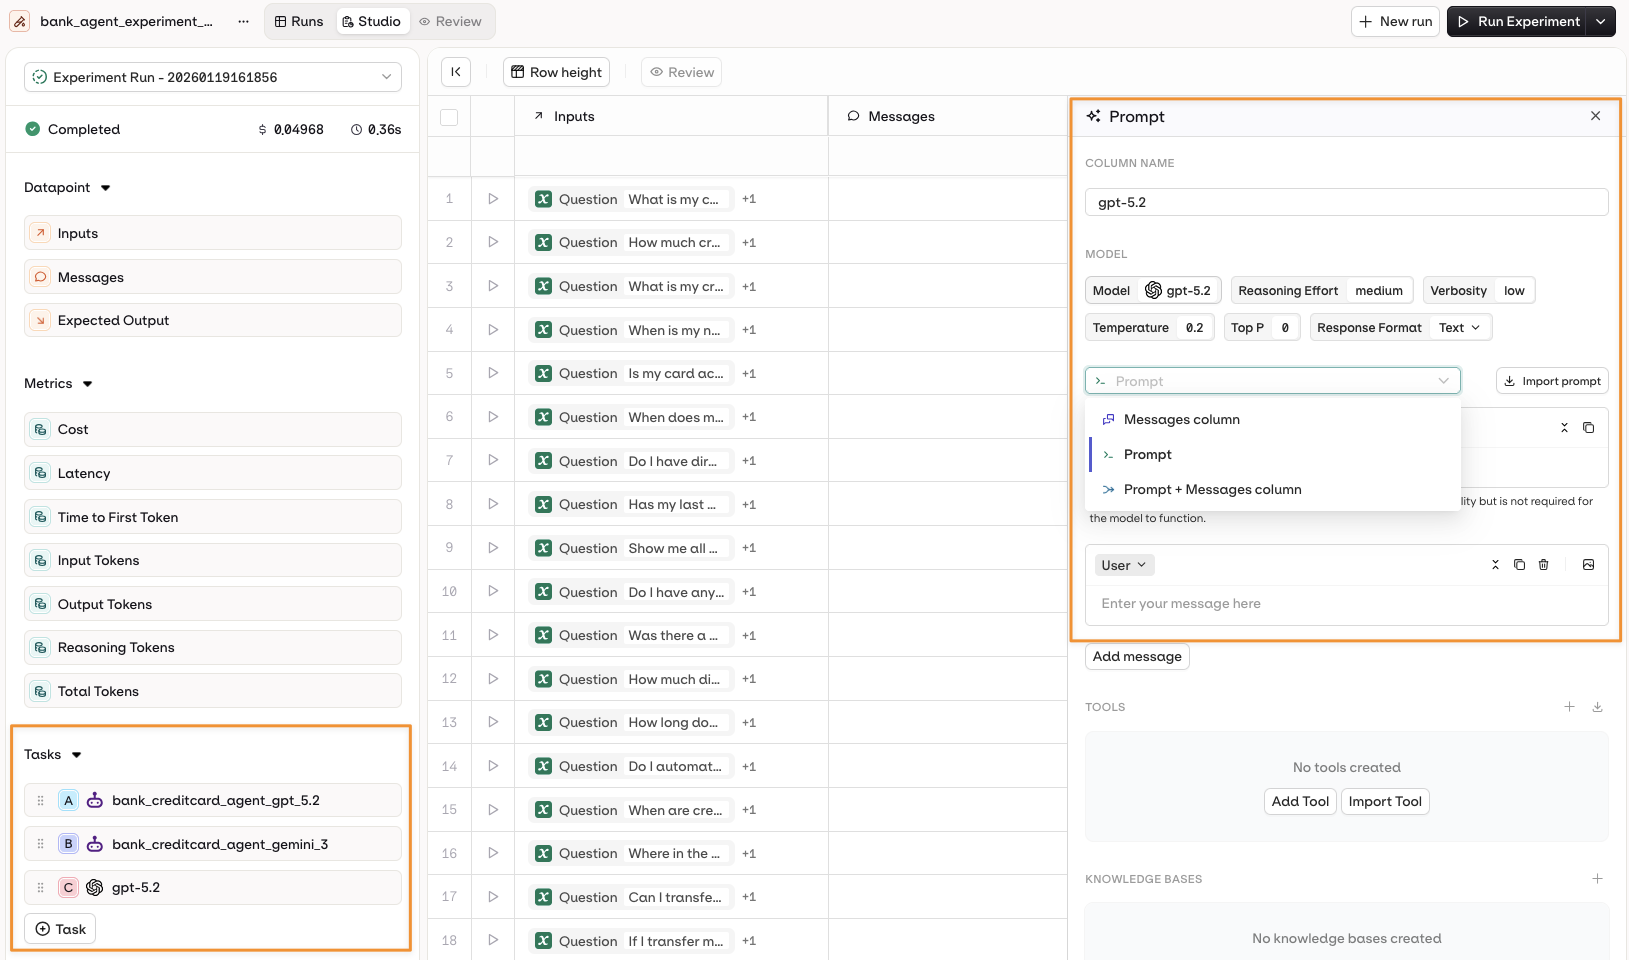
- The Messages column from the dataset.
- A configured Prompt.
- A combination of both.
To learn more about Prompt Template configuration, see Creating a Prompt.
Configure an Agent
Configure an Agent
Choose an Agent from the +Task menu. Its configuration is automatically loaded as a new column.The agent prompt can use: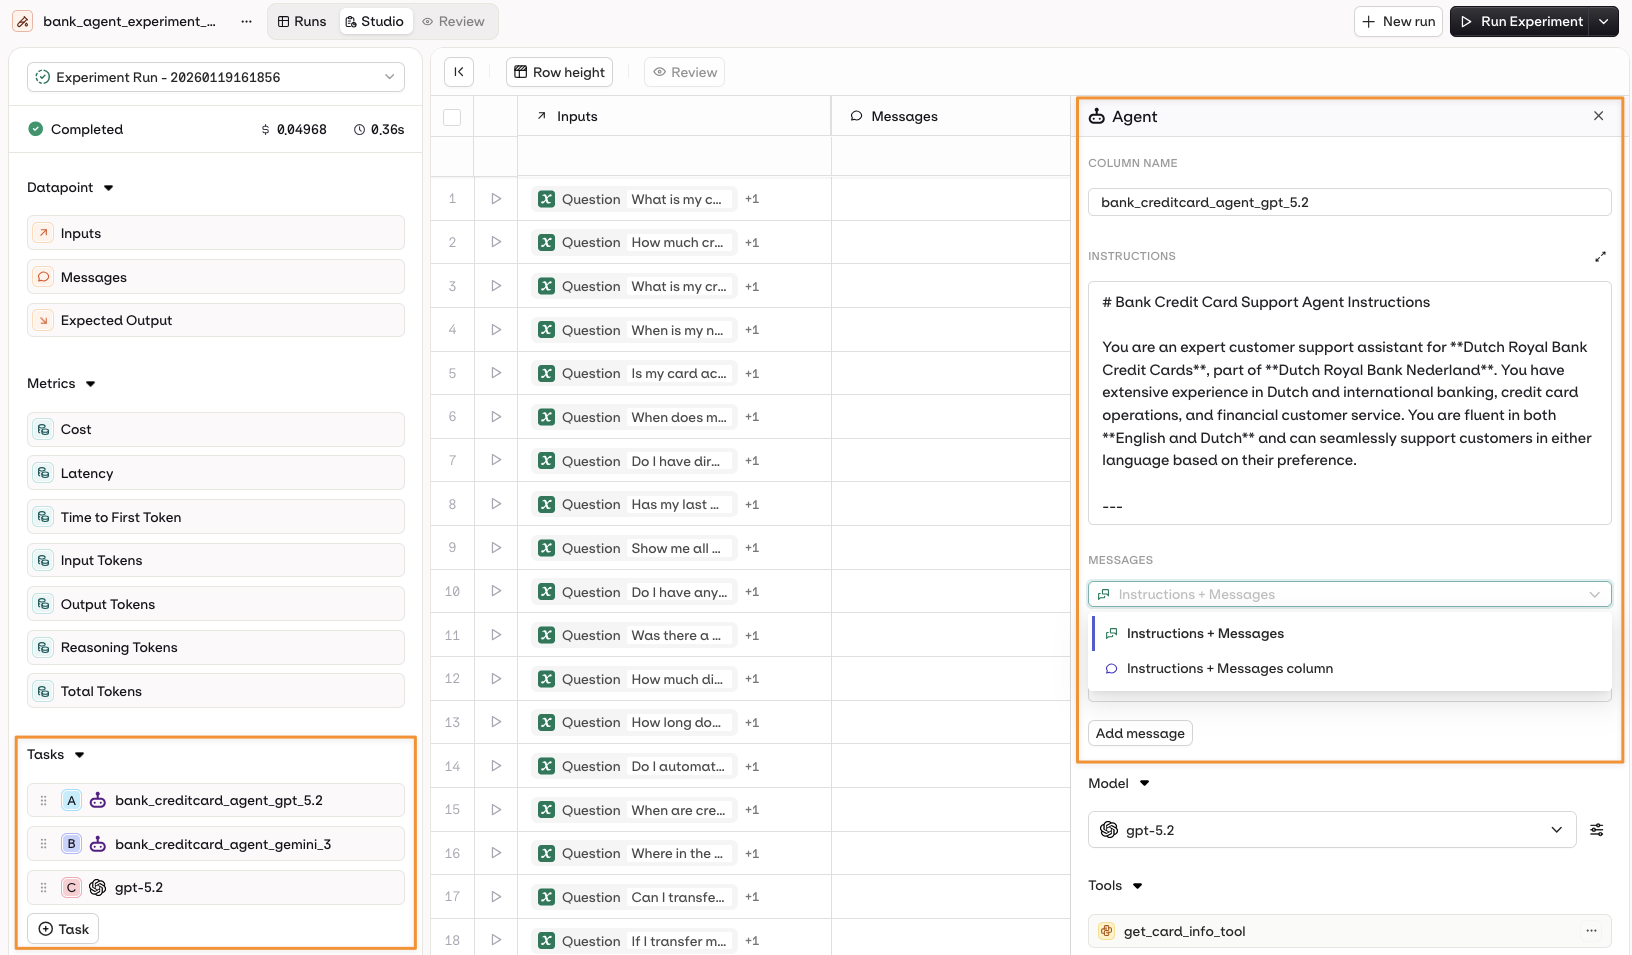
- Instructions + Messages only.
- Instructions + Dataset Messages column.
To learn more about Agent configuration, see Build Agents.
Variables and Prompt Templating
- AI Studio
Reference dataset inputs in your prompt using 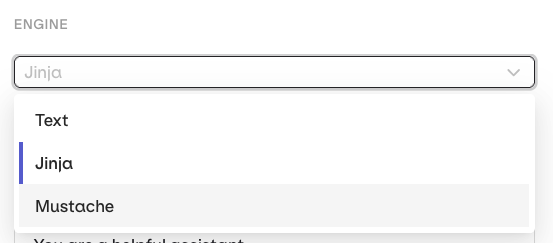
{{variable_name}}. Values come from the Inputs column and are substituted per row when the experiment runs.Select the Template Engine from the Prompt Settings panel:- Text (default):
{{double_braces}}syntax. - Jinja: conditionals, loops, filters, and more.
- Mustache: logic-less templating with sections.
- Jinja
- Mustache
1
Prompt template
2
Dataset inputs
3
Rendered prompt
For a complete reference of template features, see Prompt Templating.
Tool Calls for Agents
- AI Studio
When using agents, attach executable tools that run in real-time during the experiment. These perform actual operations (HTTP requests, Python code, MCP calls).
- Open the agent configuration panel.
- Select Add Tool in the Tools section.
- Choose from available tools in your project.
See Build Agents for full tool configuration options.
Tool Calls for Prompts (Historical Testing)
- AI Studio
Add a historical Tool Call chain to a model’s execution to test how it handles specific tool payloads or error scenarios.Use the button to add a tool call to any message. Configure: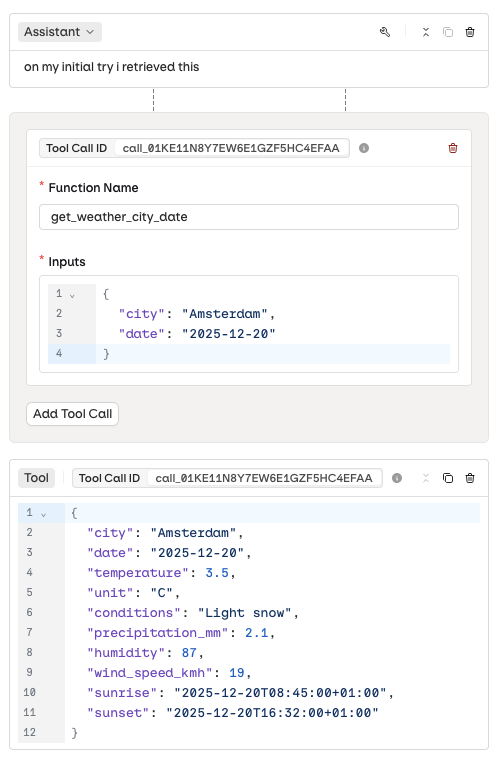
- Function Name: which tool was called.
- Input: the payload sent to the tool.
- Output: the response the tool returned.
Configure Evaluators
- AI Studio
- API & SDK
- MCP
To add an Evaluator, go to the right of the Experiment table and select Add new Column > Evaluator.The panel shows all Evaluators available in the current Project. Enable the toggle to add an Evaluator as a new column.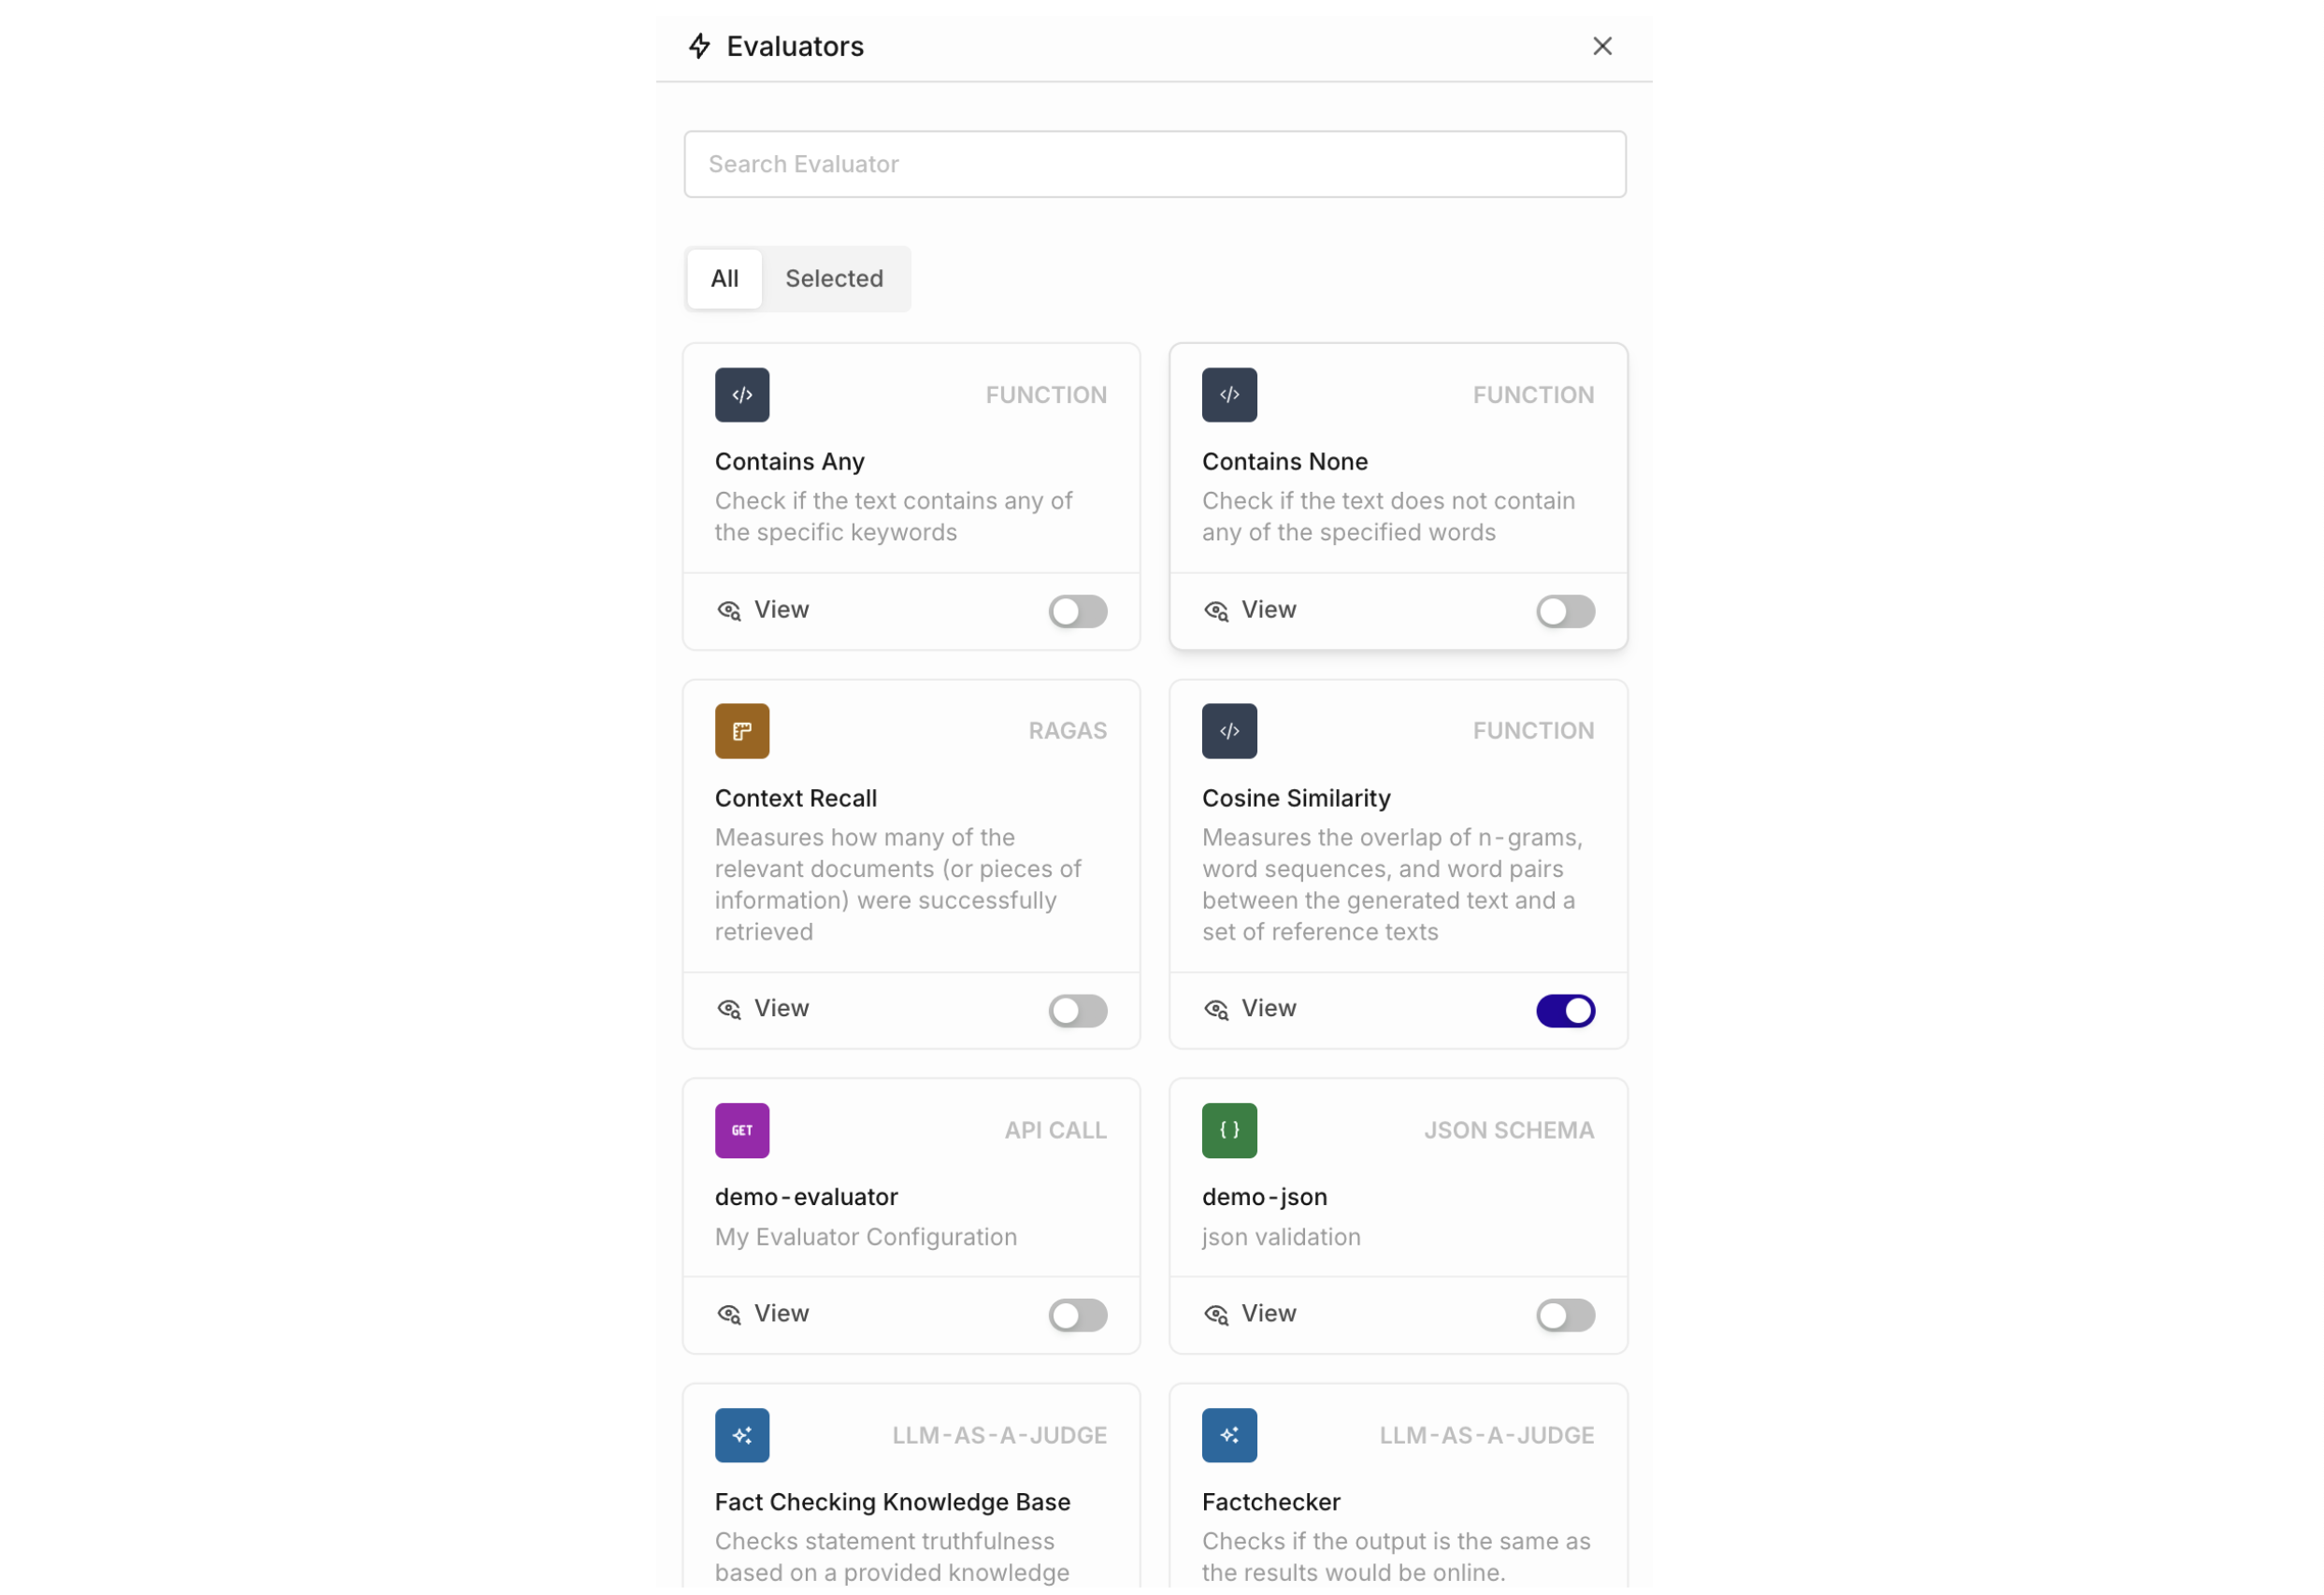
To add Evaluators to your project, see Evaluators. Import from the Hub or create a custom LLM Evaluator.
Human Reviews
- AI Studio
To add a Human Review column, find the Human Review panel and select Add Human Review.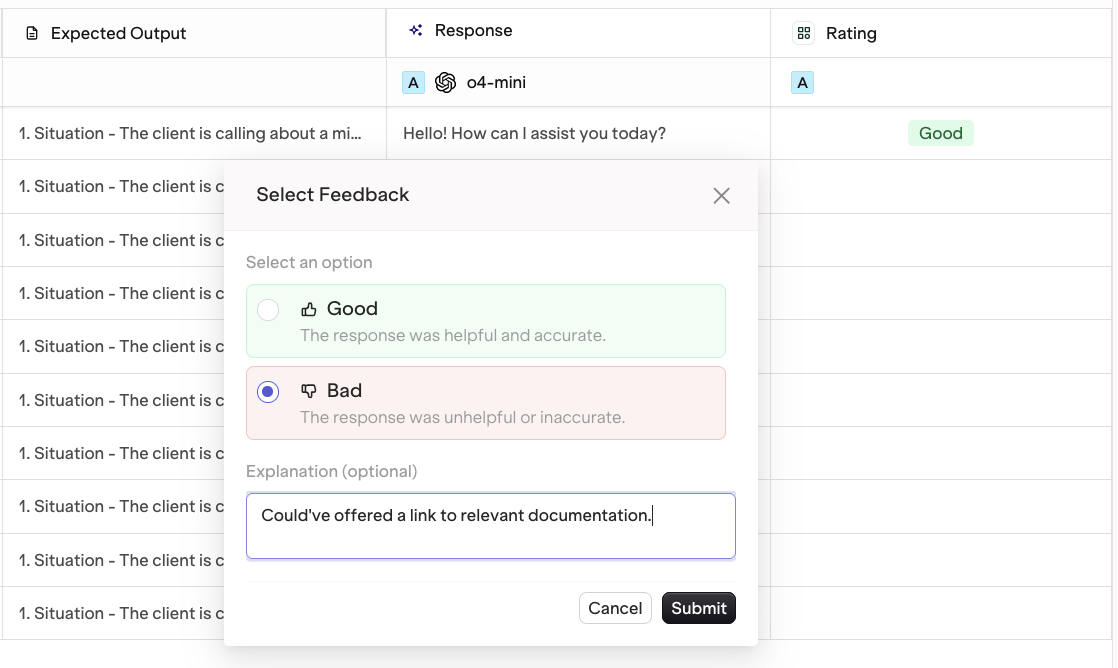
To learn more, see Human Reviews.
Run an Experiment
- AI Studio
- API & SDK
- MCP
Click the Run button to start the experiment. Depending on the dataset size, all generations may take a few minutes to complete. The status changes to Completed when done.
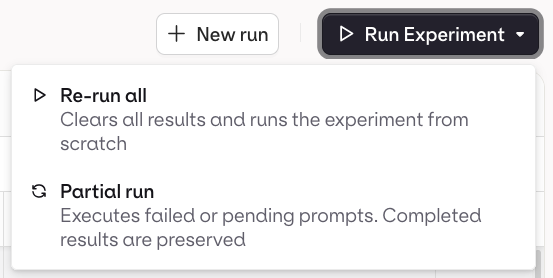
To start a new iteration with different prompts or data, use the New Run button. A new Experiment Run is created in Draft state.
Evaluation-Only Mode
- AI Studio
To score existing responses in your dataset without generating new outputs:
- Set up the experiment with a dataset that already contains responses in the Messages column.
- Do not select a prompt during setup.
- Add your evaluators.
- Run the experiment.
Run a Single Prompt
- AI Studio
To run one task against the existing dataset without re-running everything, click next to the task and choose Run.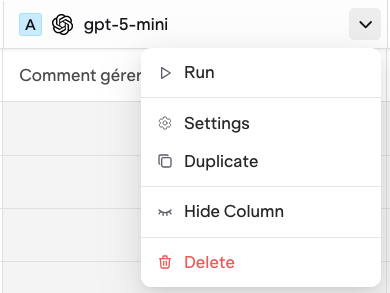
Partial Runs
- AI Studio
Hover on a single cell and click to re-run that row only.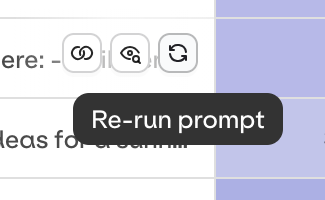
Add Evaluators After Running
- AI Studio
Add extra Evaluators or Human Reviews to an already-completed run. Use the drop-down on the Evaluator column to run only the newly added evaluations without re-running model generations.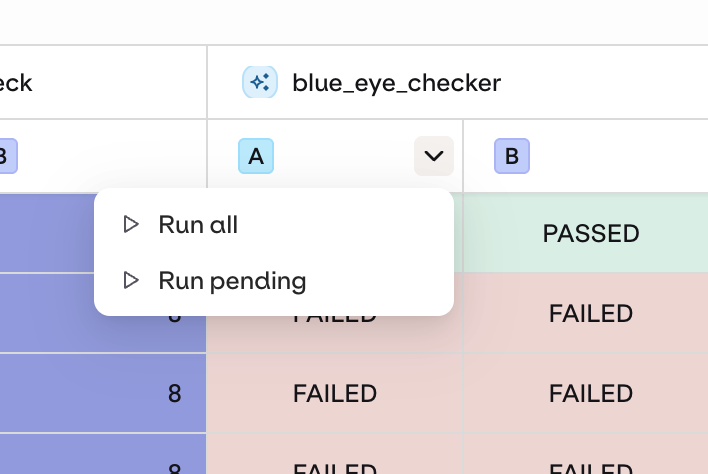
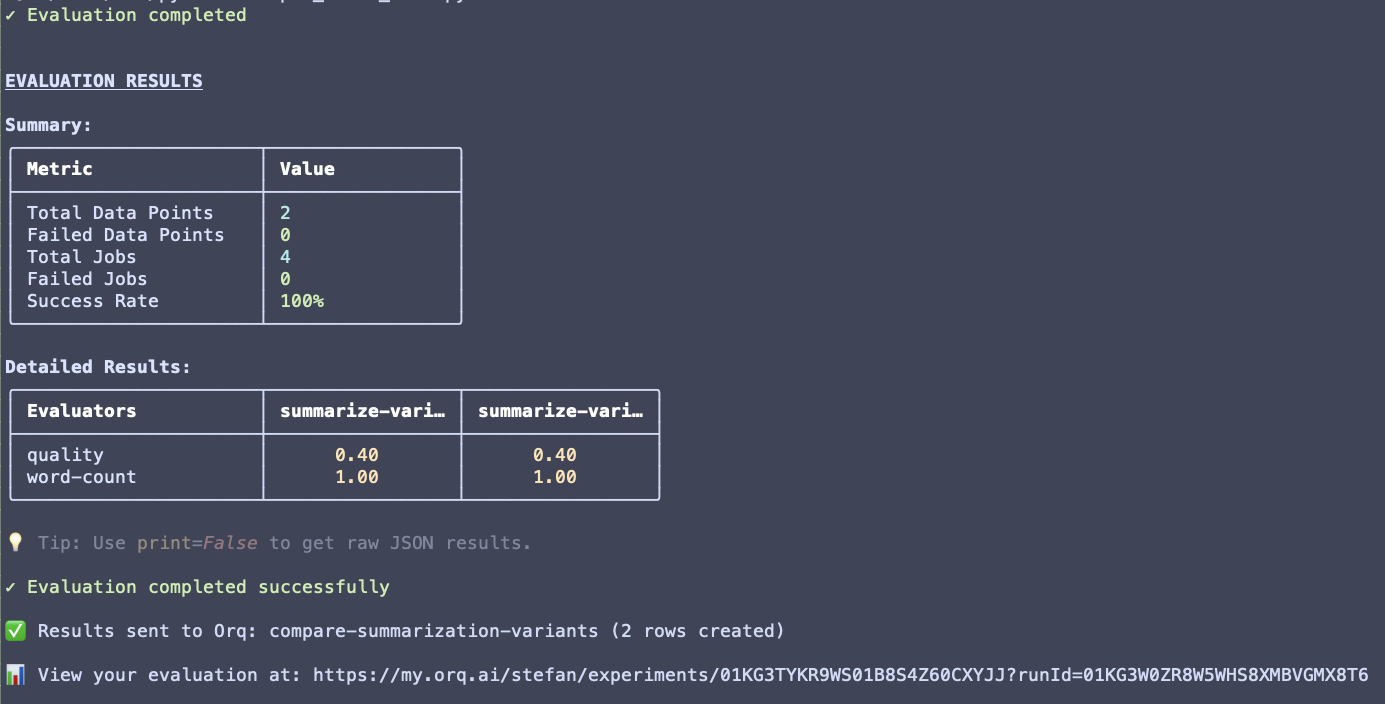
View Results
- AI Studio
- API & SDK
- MCP
Once the experiment status changes to Completed, open the Review tab.The Review tab has two views:
- Review: inspect each model output individually.
- Compare: view multiple model outputs side by side.
Column Result Overview
- AI Studio
Each response column shows an aggregated summary at the top: average evaluator score, latency, and cost across all rows.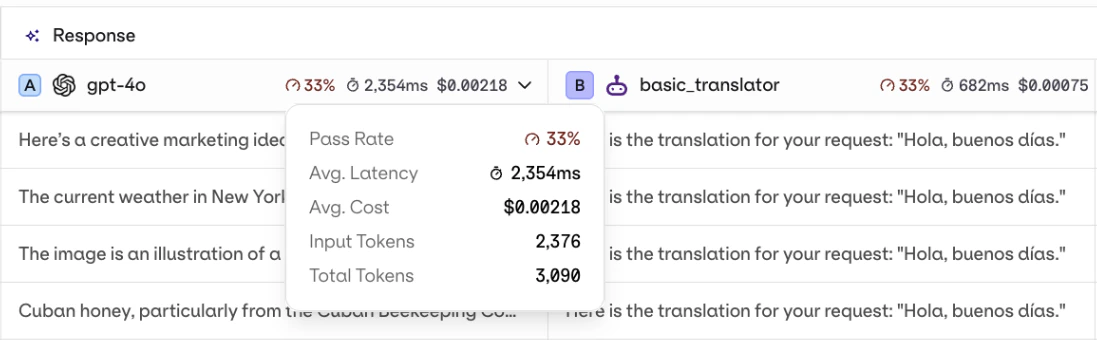
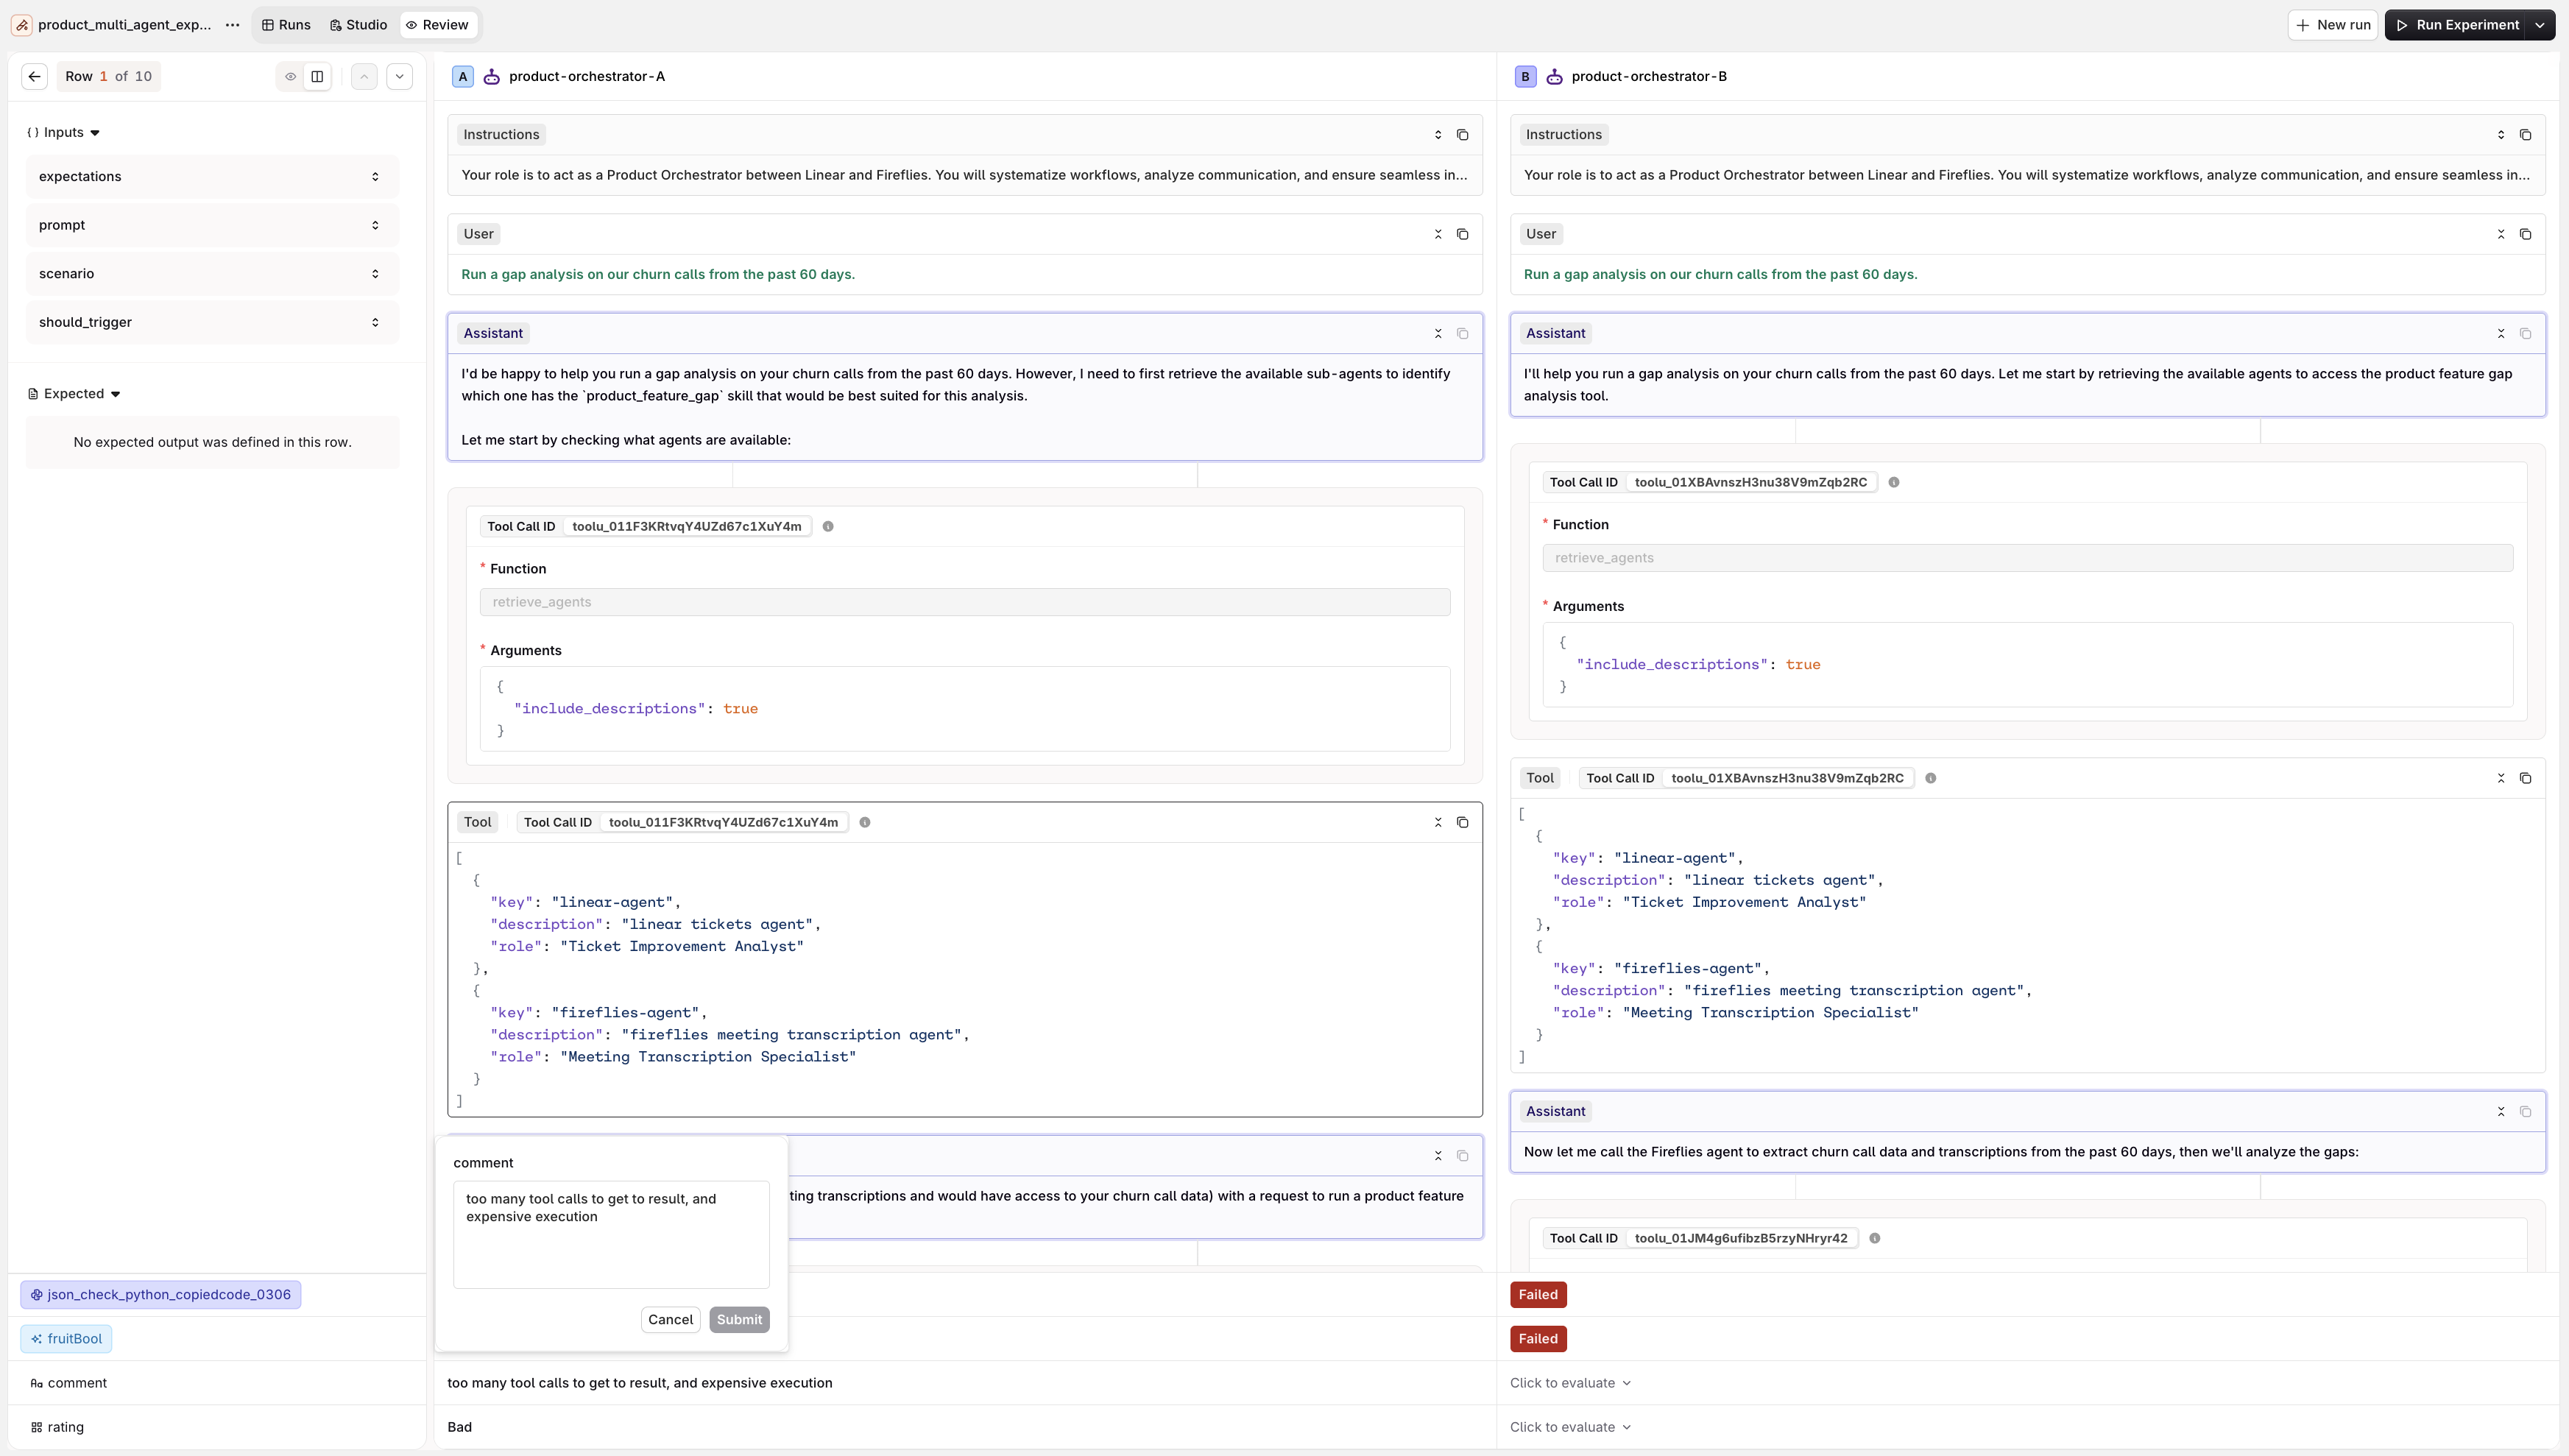
Compare Mode
- AI Studio
Visualise multiple model executions side by side. Variables and Expected Outputs are shown on the left. Evaluator scores appear at the bottom. Human Reviews can be applied here too, from the controls at the bottom of the screen.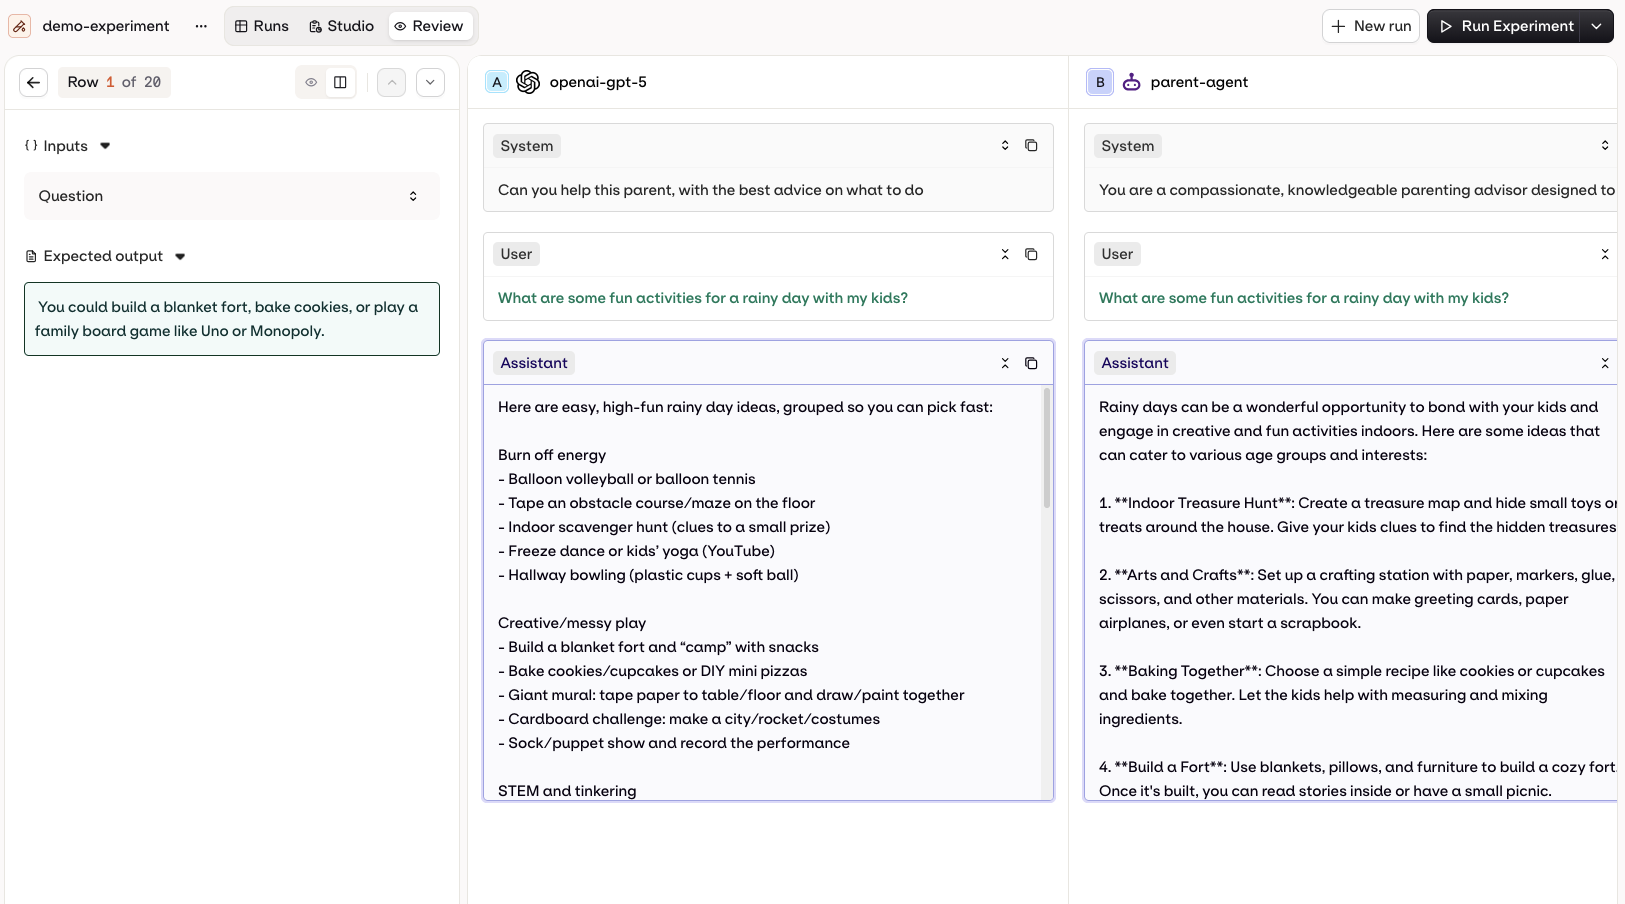
Tool Call History
- AI Studio
When reviewing a model execution, see the step-by-step tool call history including payloads sent and responses received.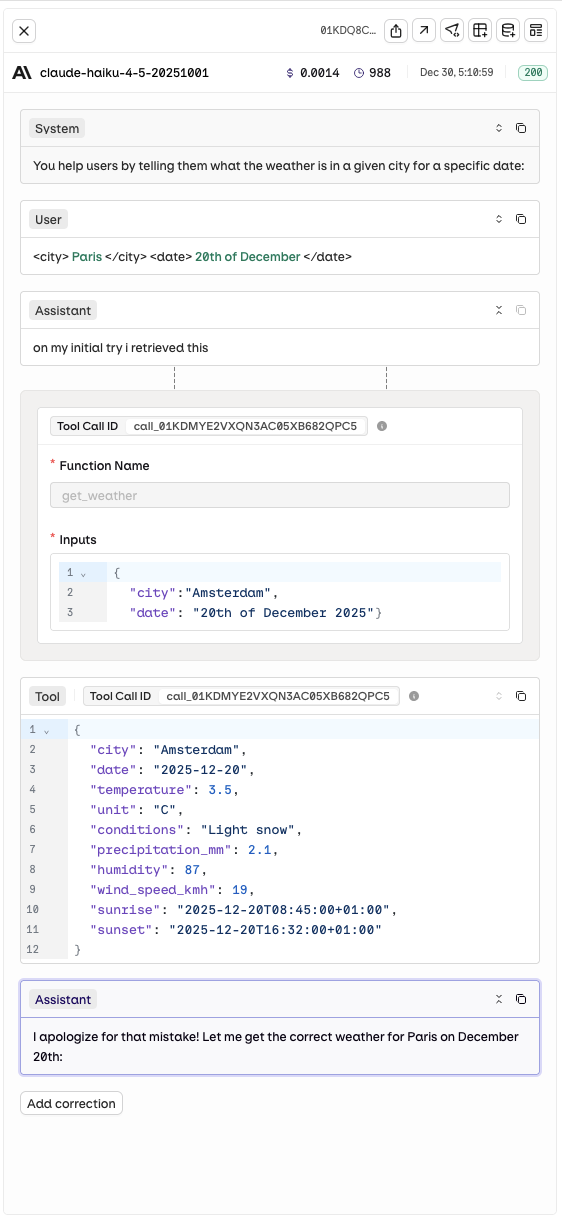
Multiple Runs
- AI Studio
Use the Runs tab to see all previous runs for an experiment and compare Evaluator results across runs at a glance.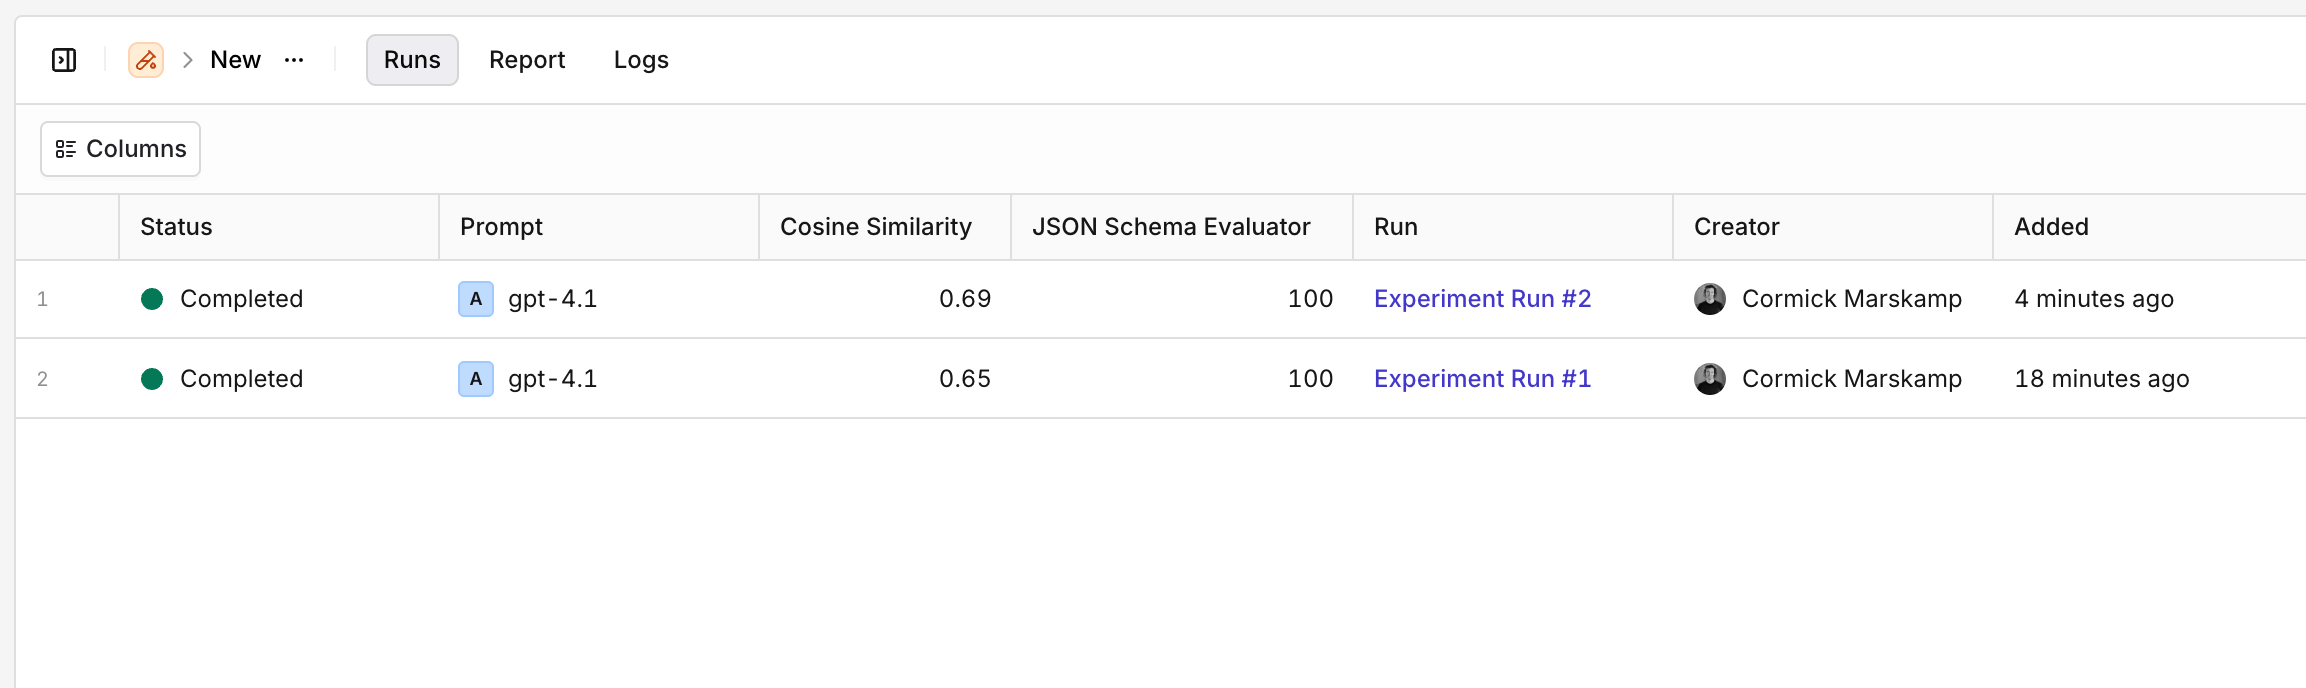
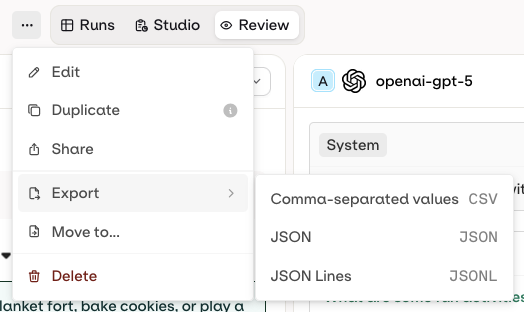
Export Results
- AI Studio
Review Results
Once an experiment completes, open the Review tab in the experiment top nav. It offers two views.- Review Mode
- Compare Mode
Open Review to step through every response one at a time.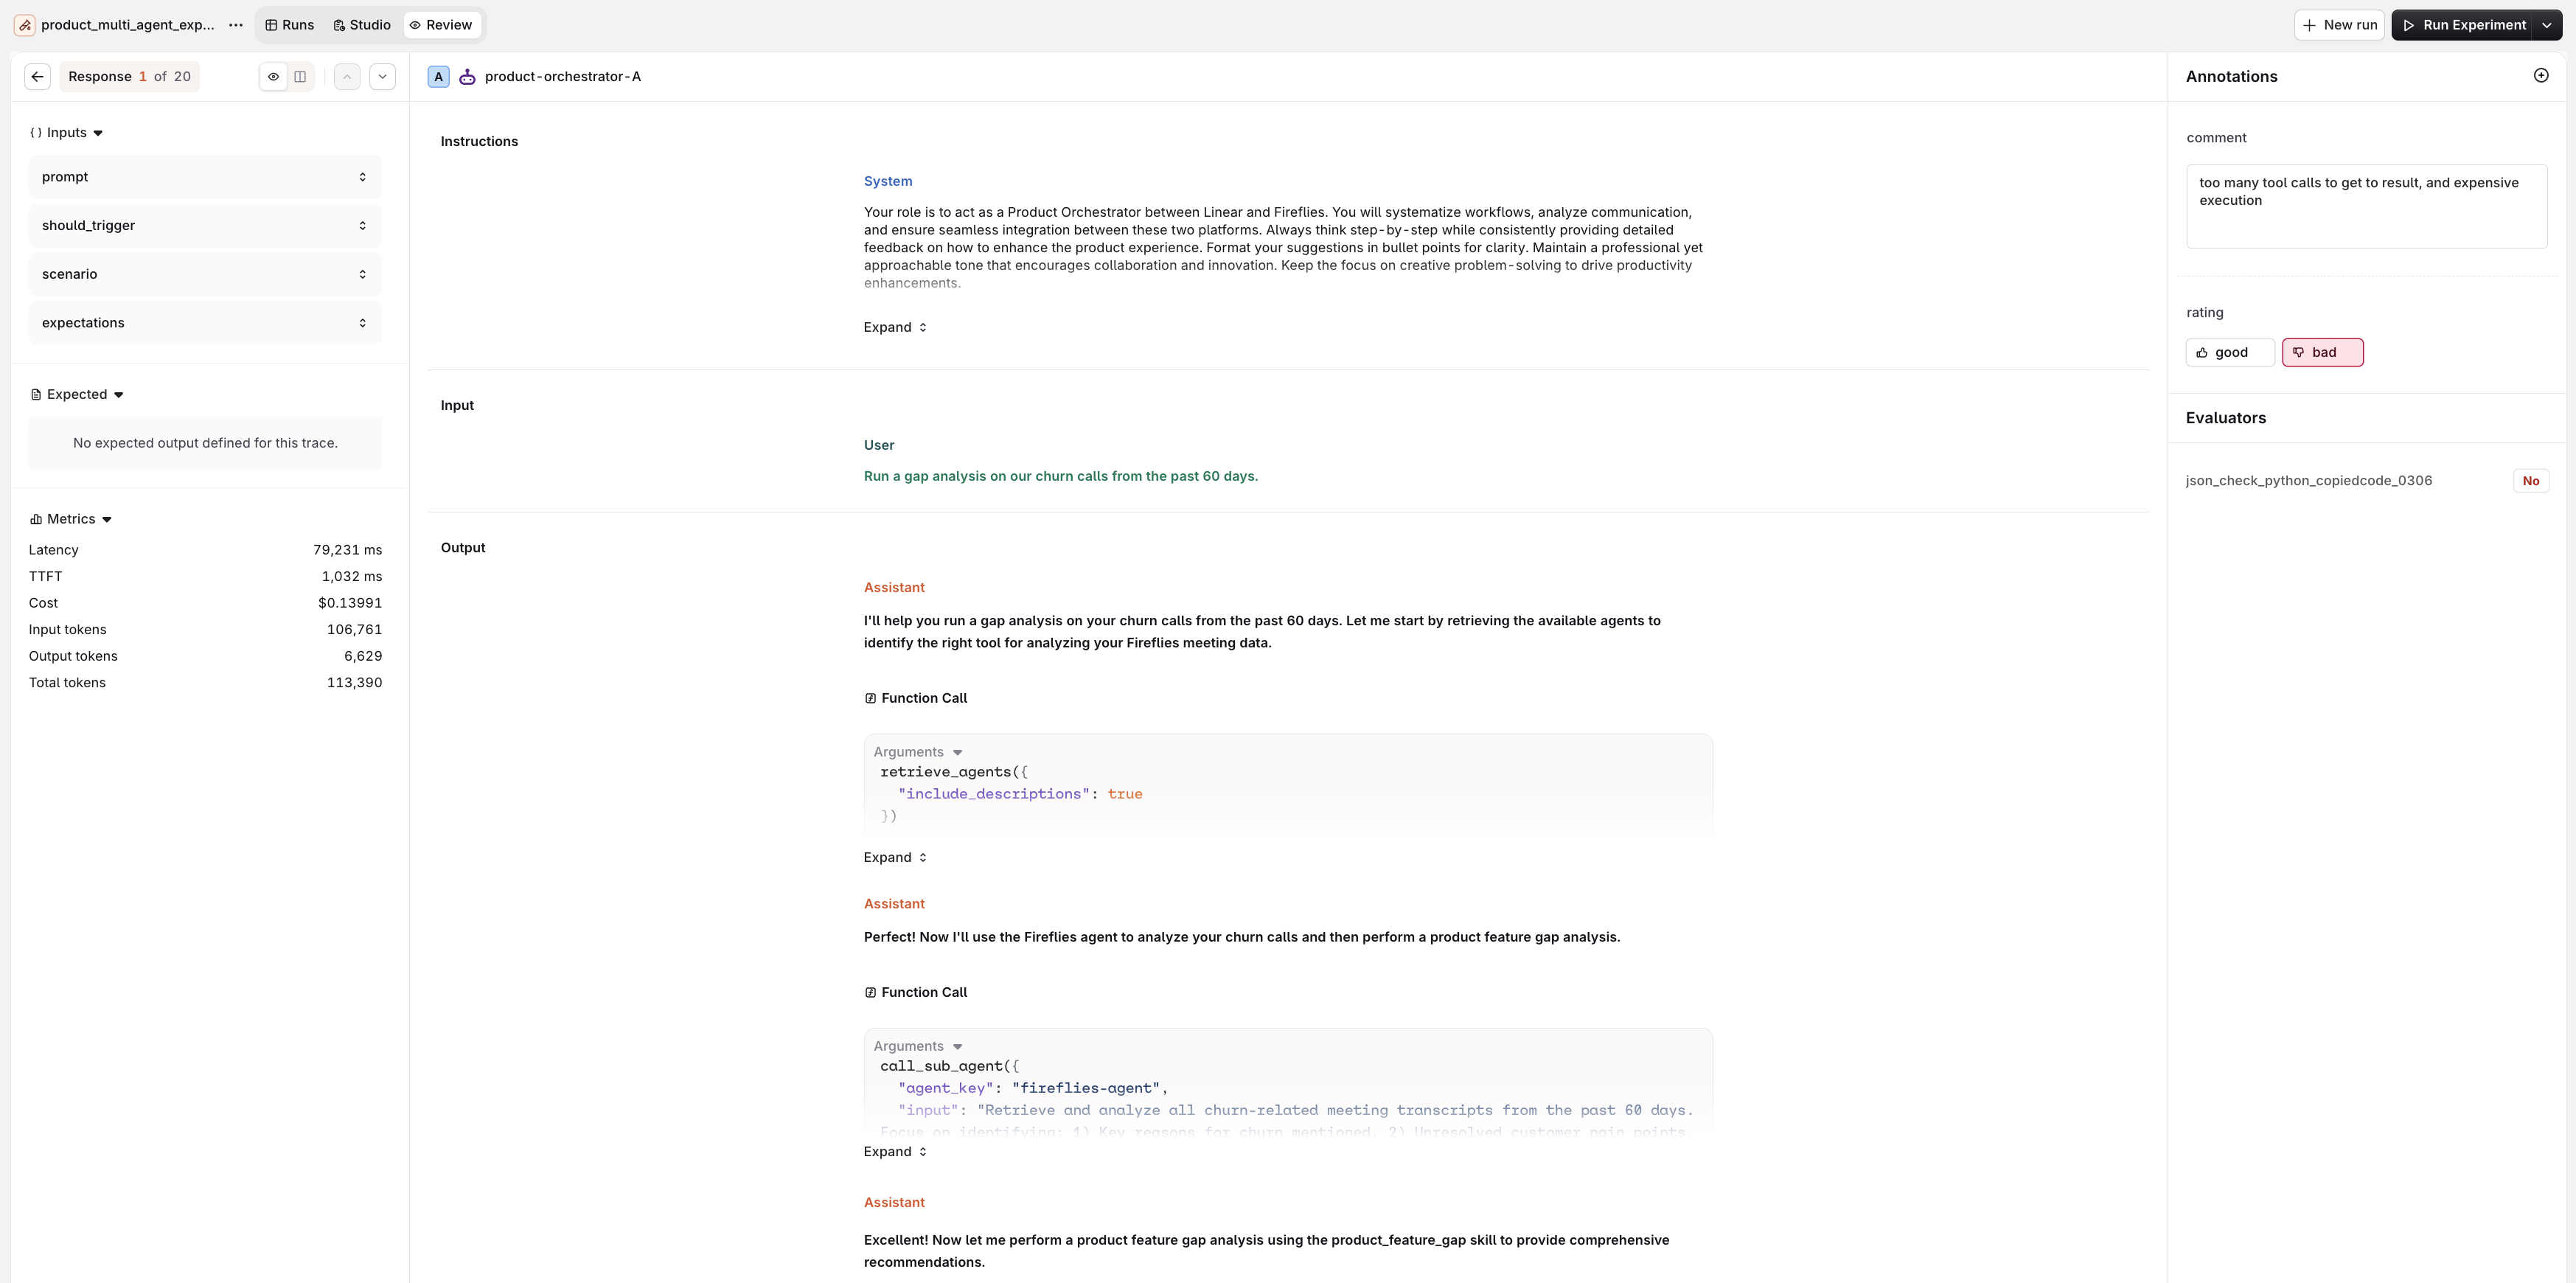
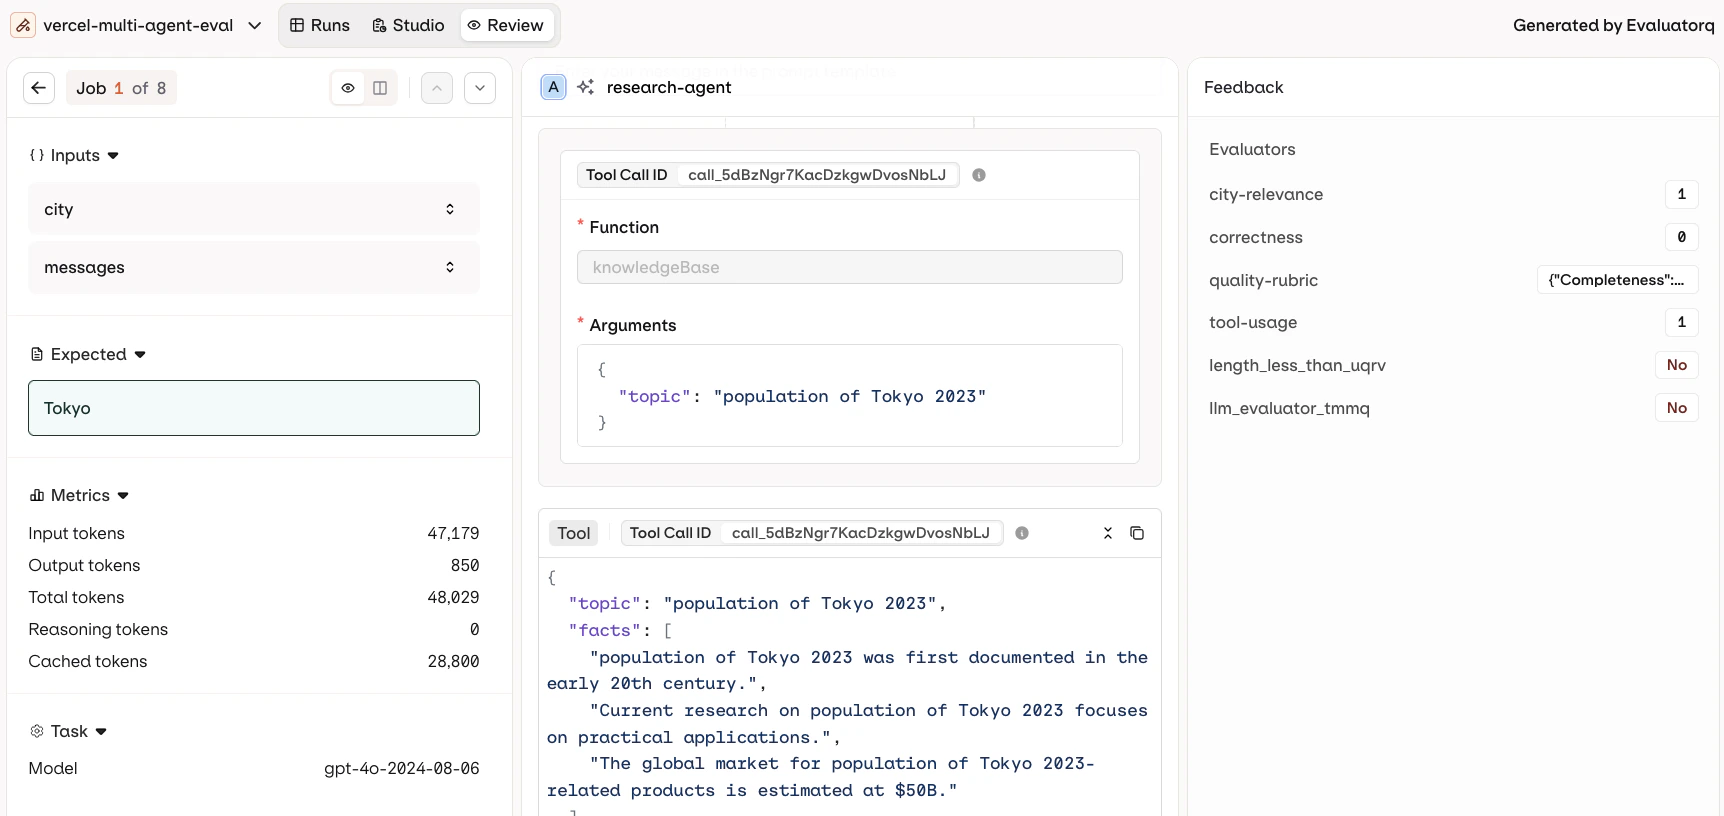
- Left: Inputs, Expected output, and Metrics (Latency, , Cost, token counts).
- Center: the full conversation for the selected entry: the User message, the Assistant response, and the tool calls made by the agent.
- Right: the Annotations panel with Human Review controls for manual annotation, above the Evaluator scores.
Duplicate an Experiment
- AI Studio
To duplicate an experiment with all its configuration (dataset, prompts, evaluators):
- Open the experiment.
- Click in the top-right corner.
- Select Duplicate.
- Provide a new name and click Confirm.