

Use Cases
Compare models side by side
Compare models side by side
Optimise prompts
Optimise prompts
Pre-deployment and regression testing
Pre-deployment and regression testing
Security and red teaming
Security and red teaming
Prerequisites
Dataset
AI Gateway
API Key
Create an Experiment
- AI Studio
- API & SDK
- MCP
 AI Studio
 MCP
MCPConfigure Tasks
- AI Studio
- API & SDK
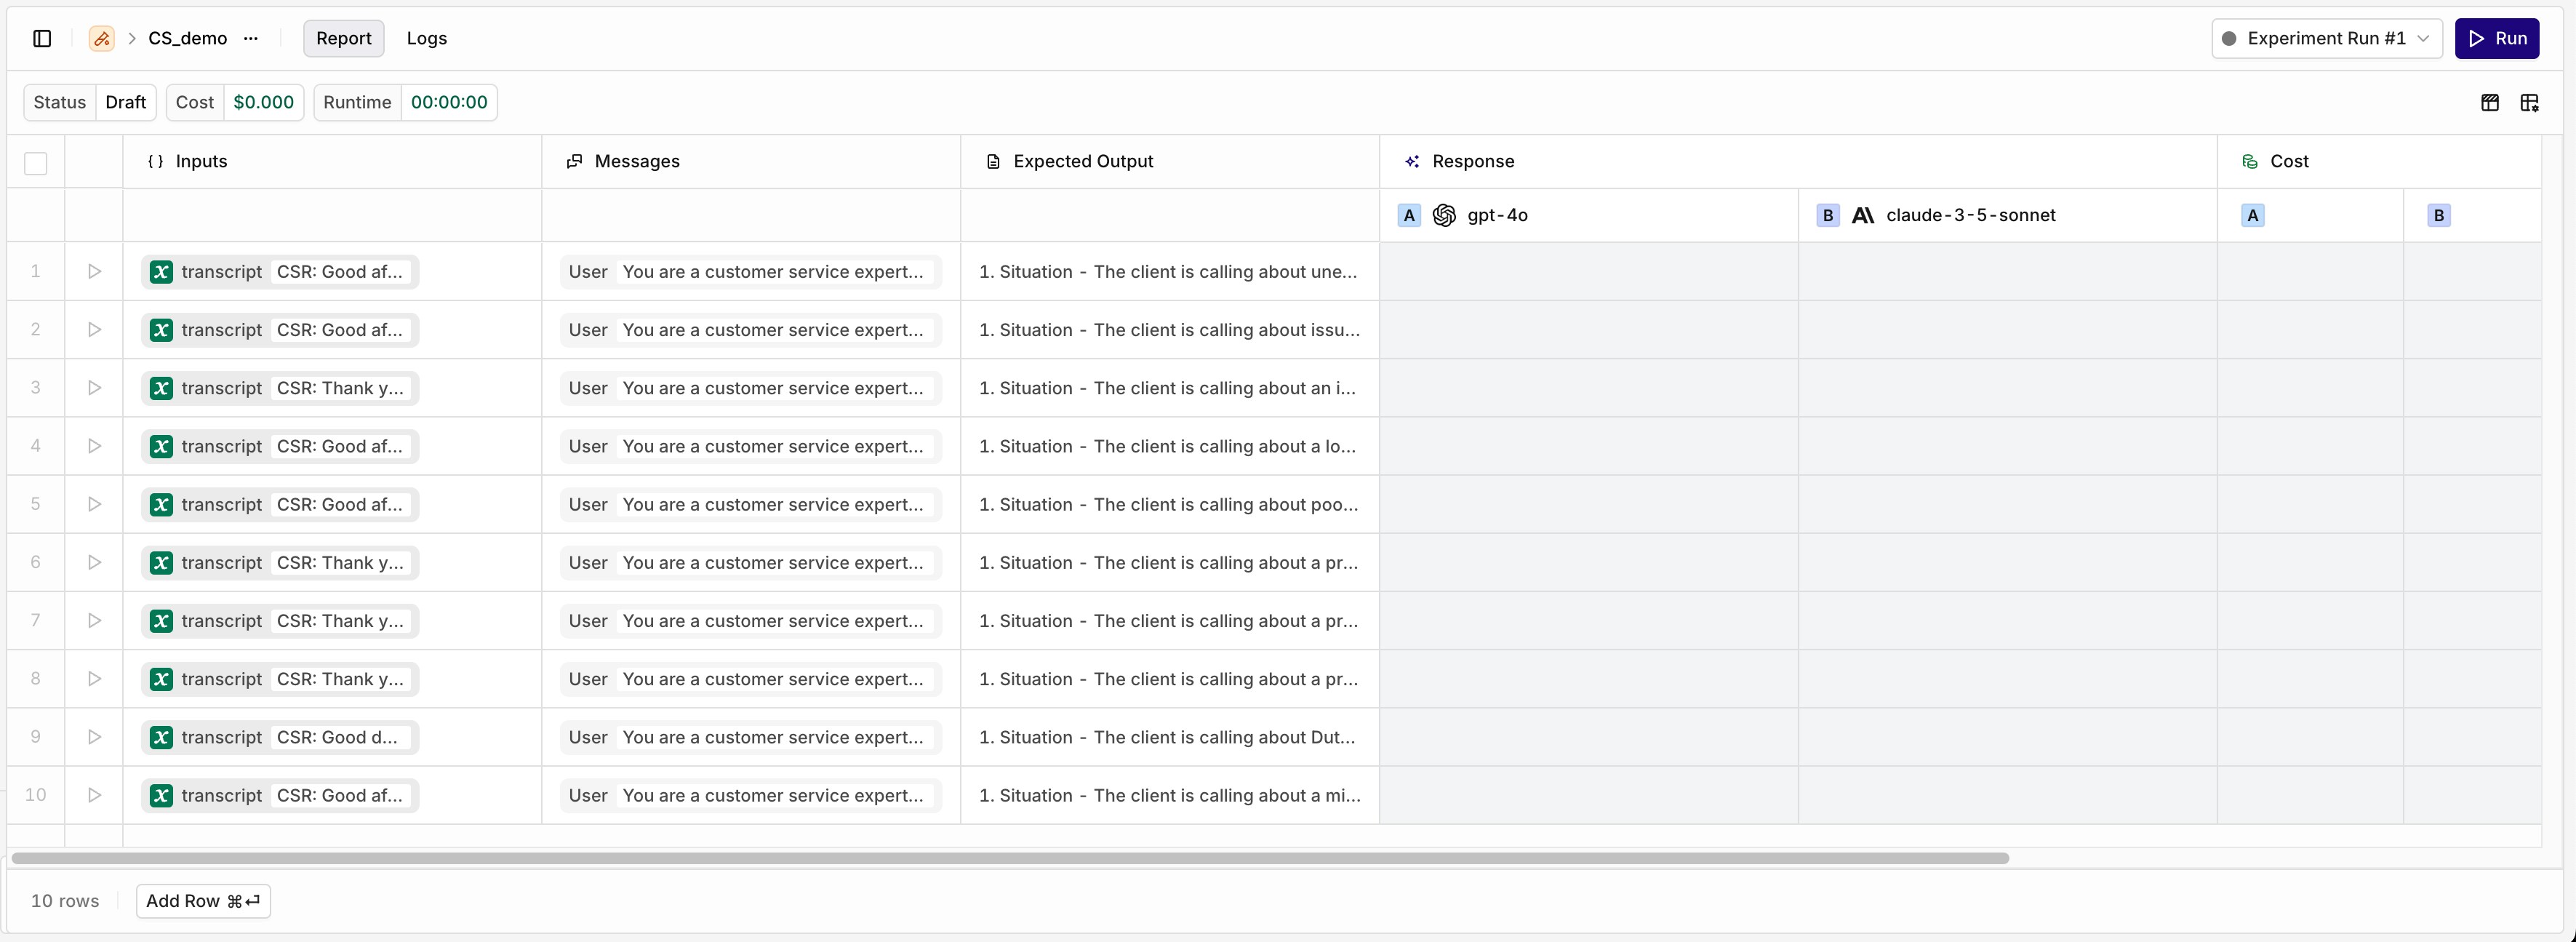
Configure a Model
Configure a Model
- The Messages column from the dataset.
- A configured Prompt.
- A combination of both.
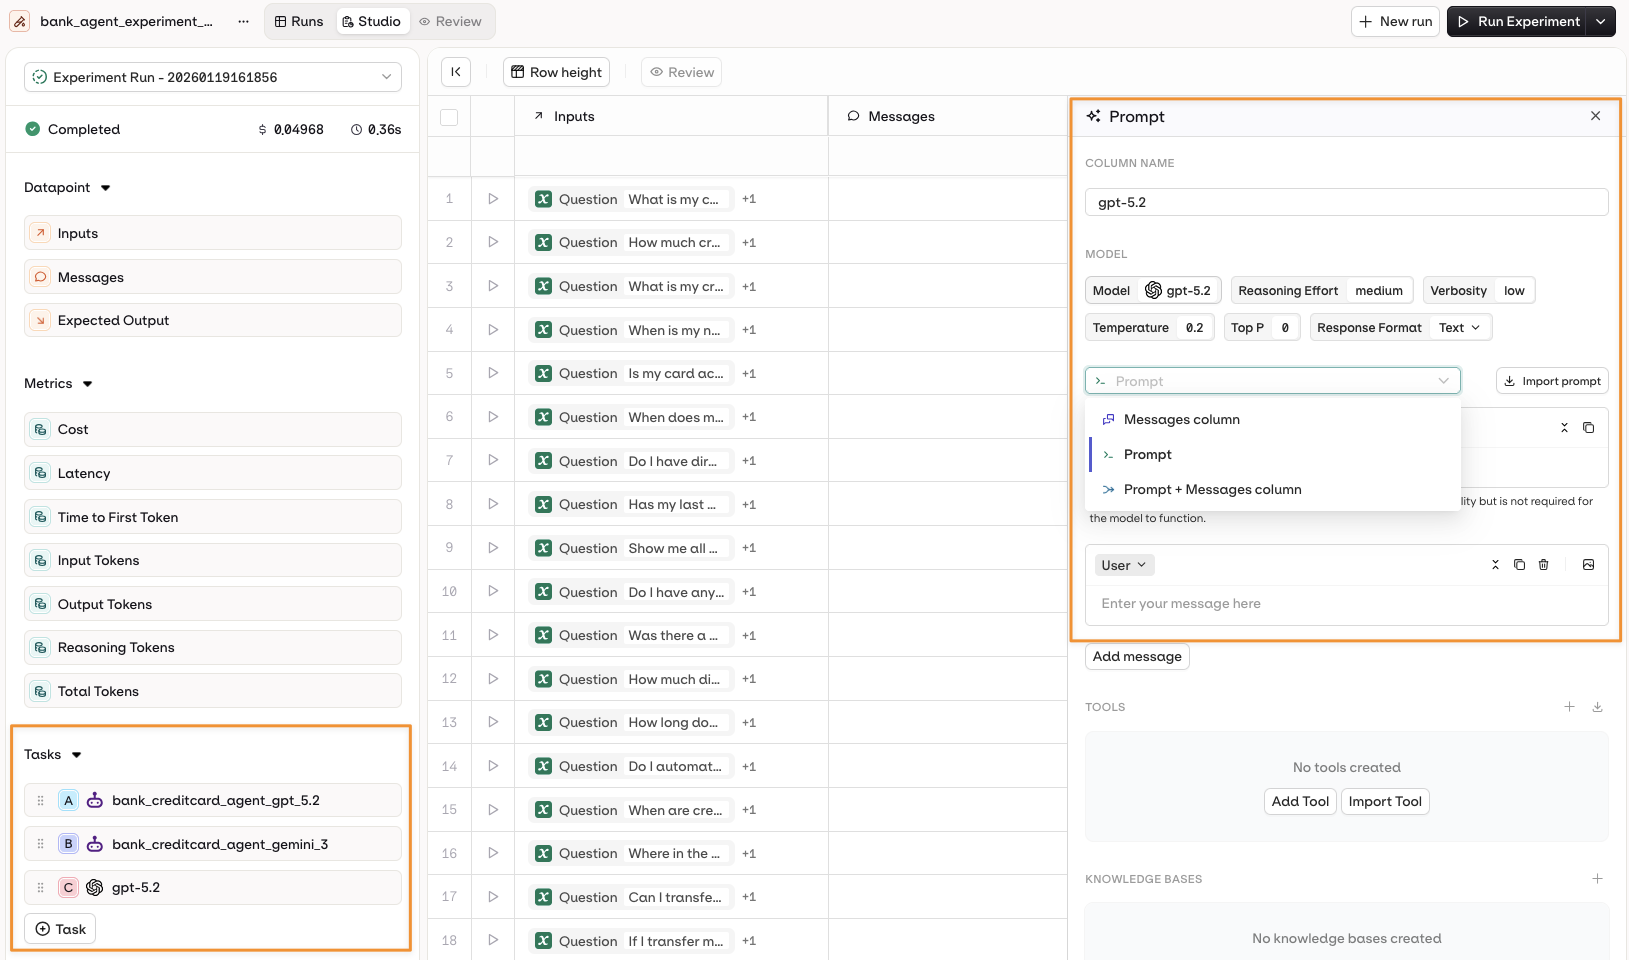
Open the Prompt panel by selecting the model name on the left panel.
Configure an Agent
Configure an Agent
- Instructions + Messages only.
- Instructions + Dataset Messages column.
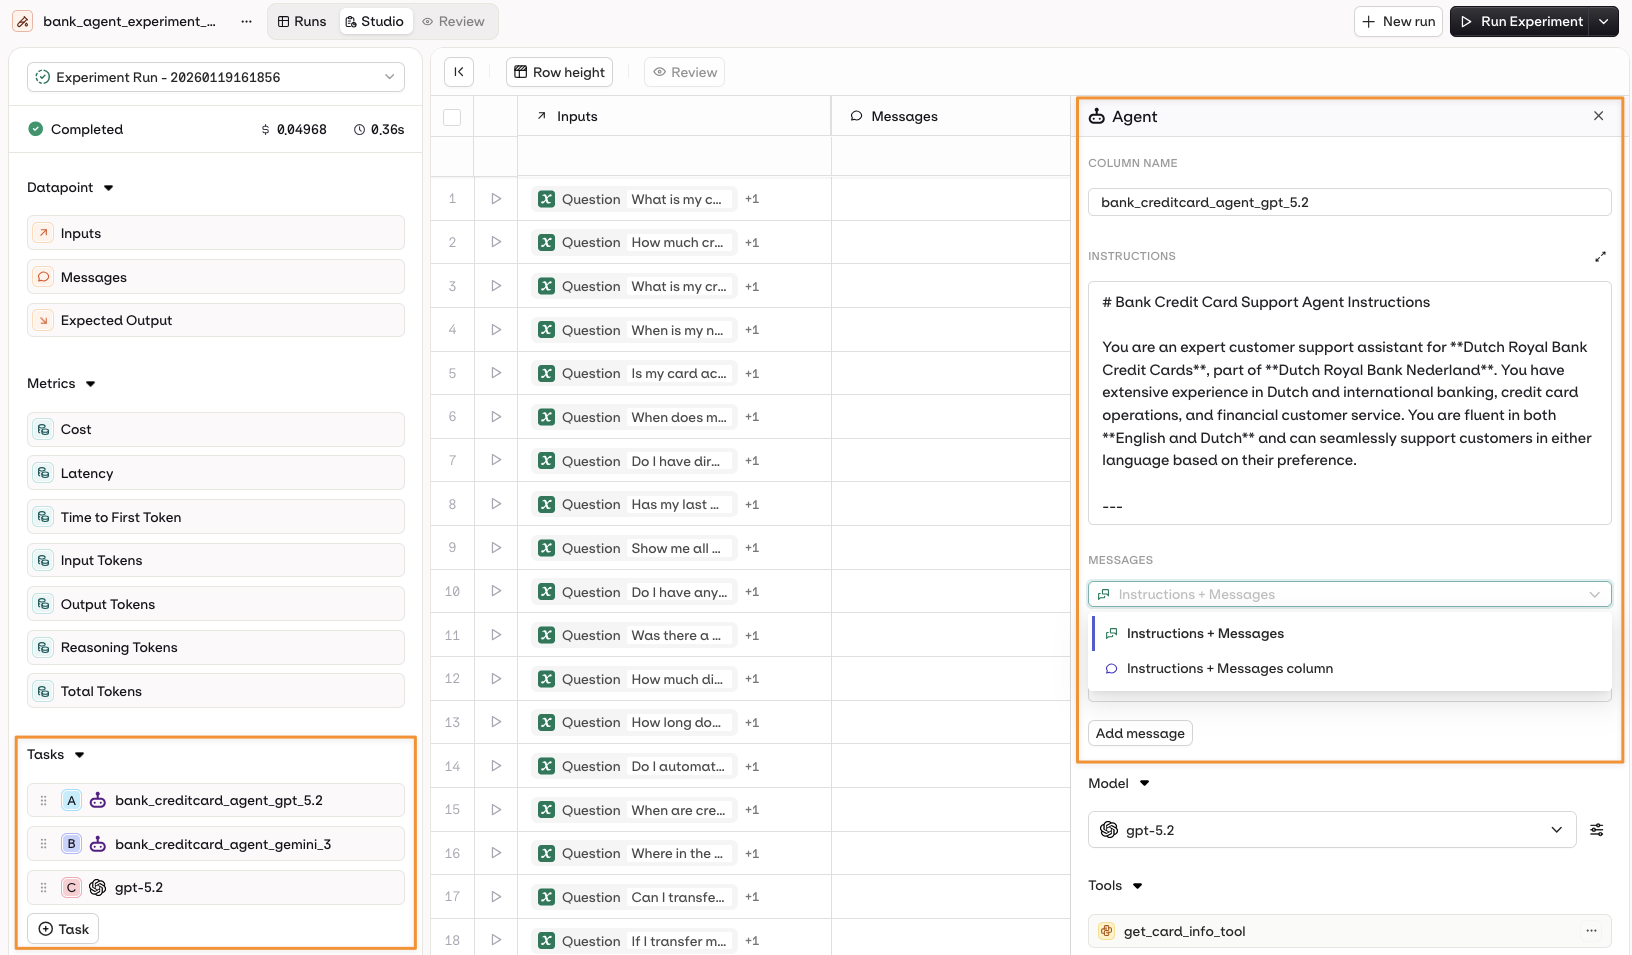
Open the Prompt panel by selecting the Agent name on the left panel.
Variables and Prompt Templating
- AI Studio
{{variable_name}}. Values come from the Inputs column and are substituted per row when the experiment runs.Select the Template Engine from the Prompt Settings panel:- Text (default):
{{double_braces}}syntax. - Jinja: conditionals, loops, filters, and more.
- Mustache: logic-less templating with sections.
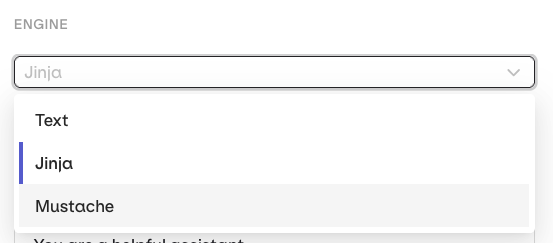
Select a Template Engine in the Prompt Settings panel.
- Jinja
- Mustache
Prompt template
Dataset inputs
Rendered prompt
Tool Calls for Agents
- AI Studio
- Open the agent configuration panel.
- Select Add Tool in the Tools section.
- Choose from available tools in your project.
Tool Calls for Prompts (Historical Testing)
- AI Studio
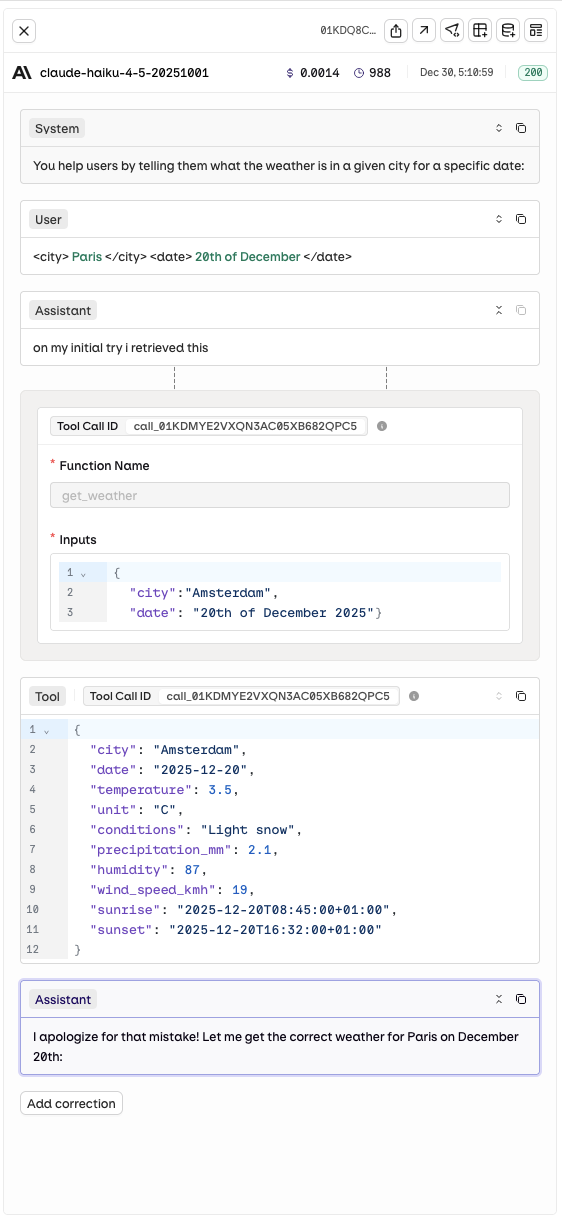
- Function Name: which tool was called.
- Input: the payload sent to the tool.
- Output: the response the tool returned.
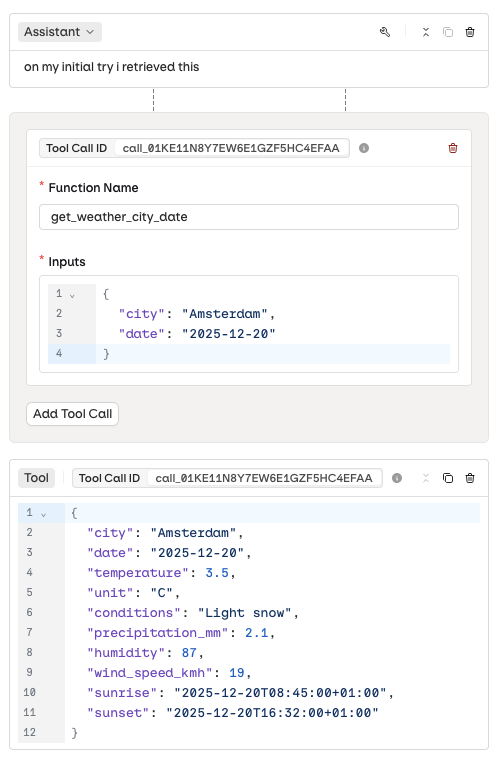
Configuring a tool call input and output.
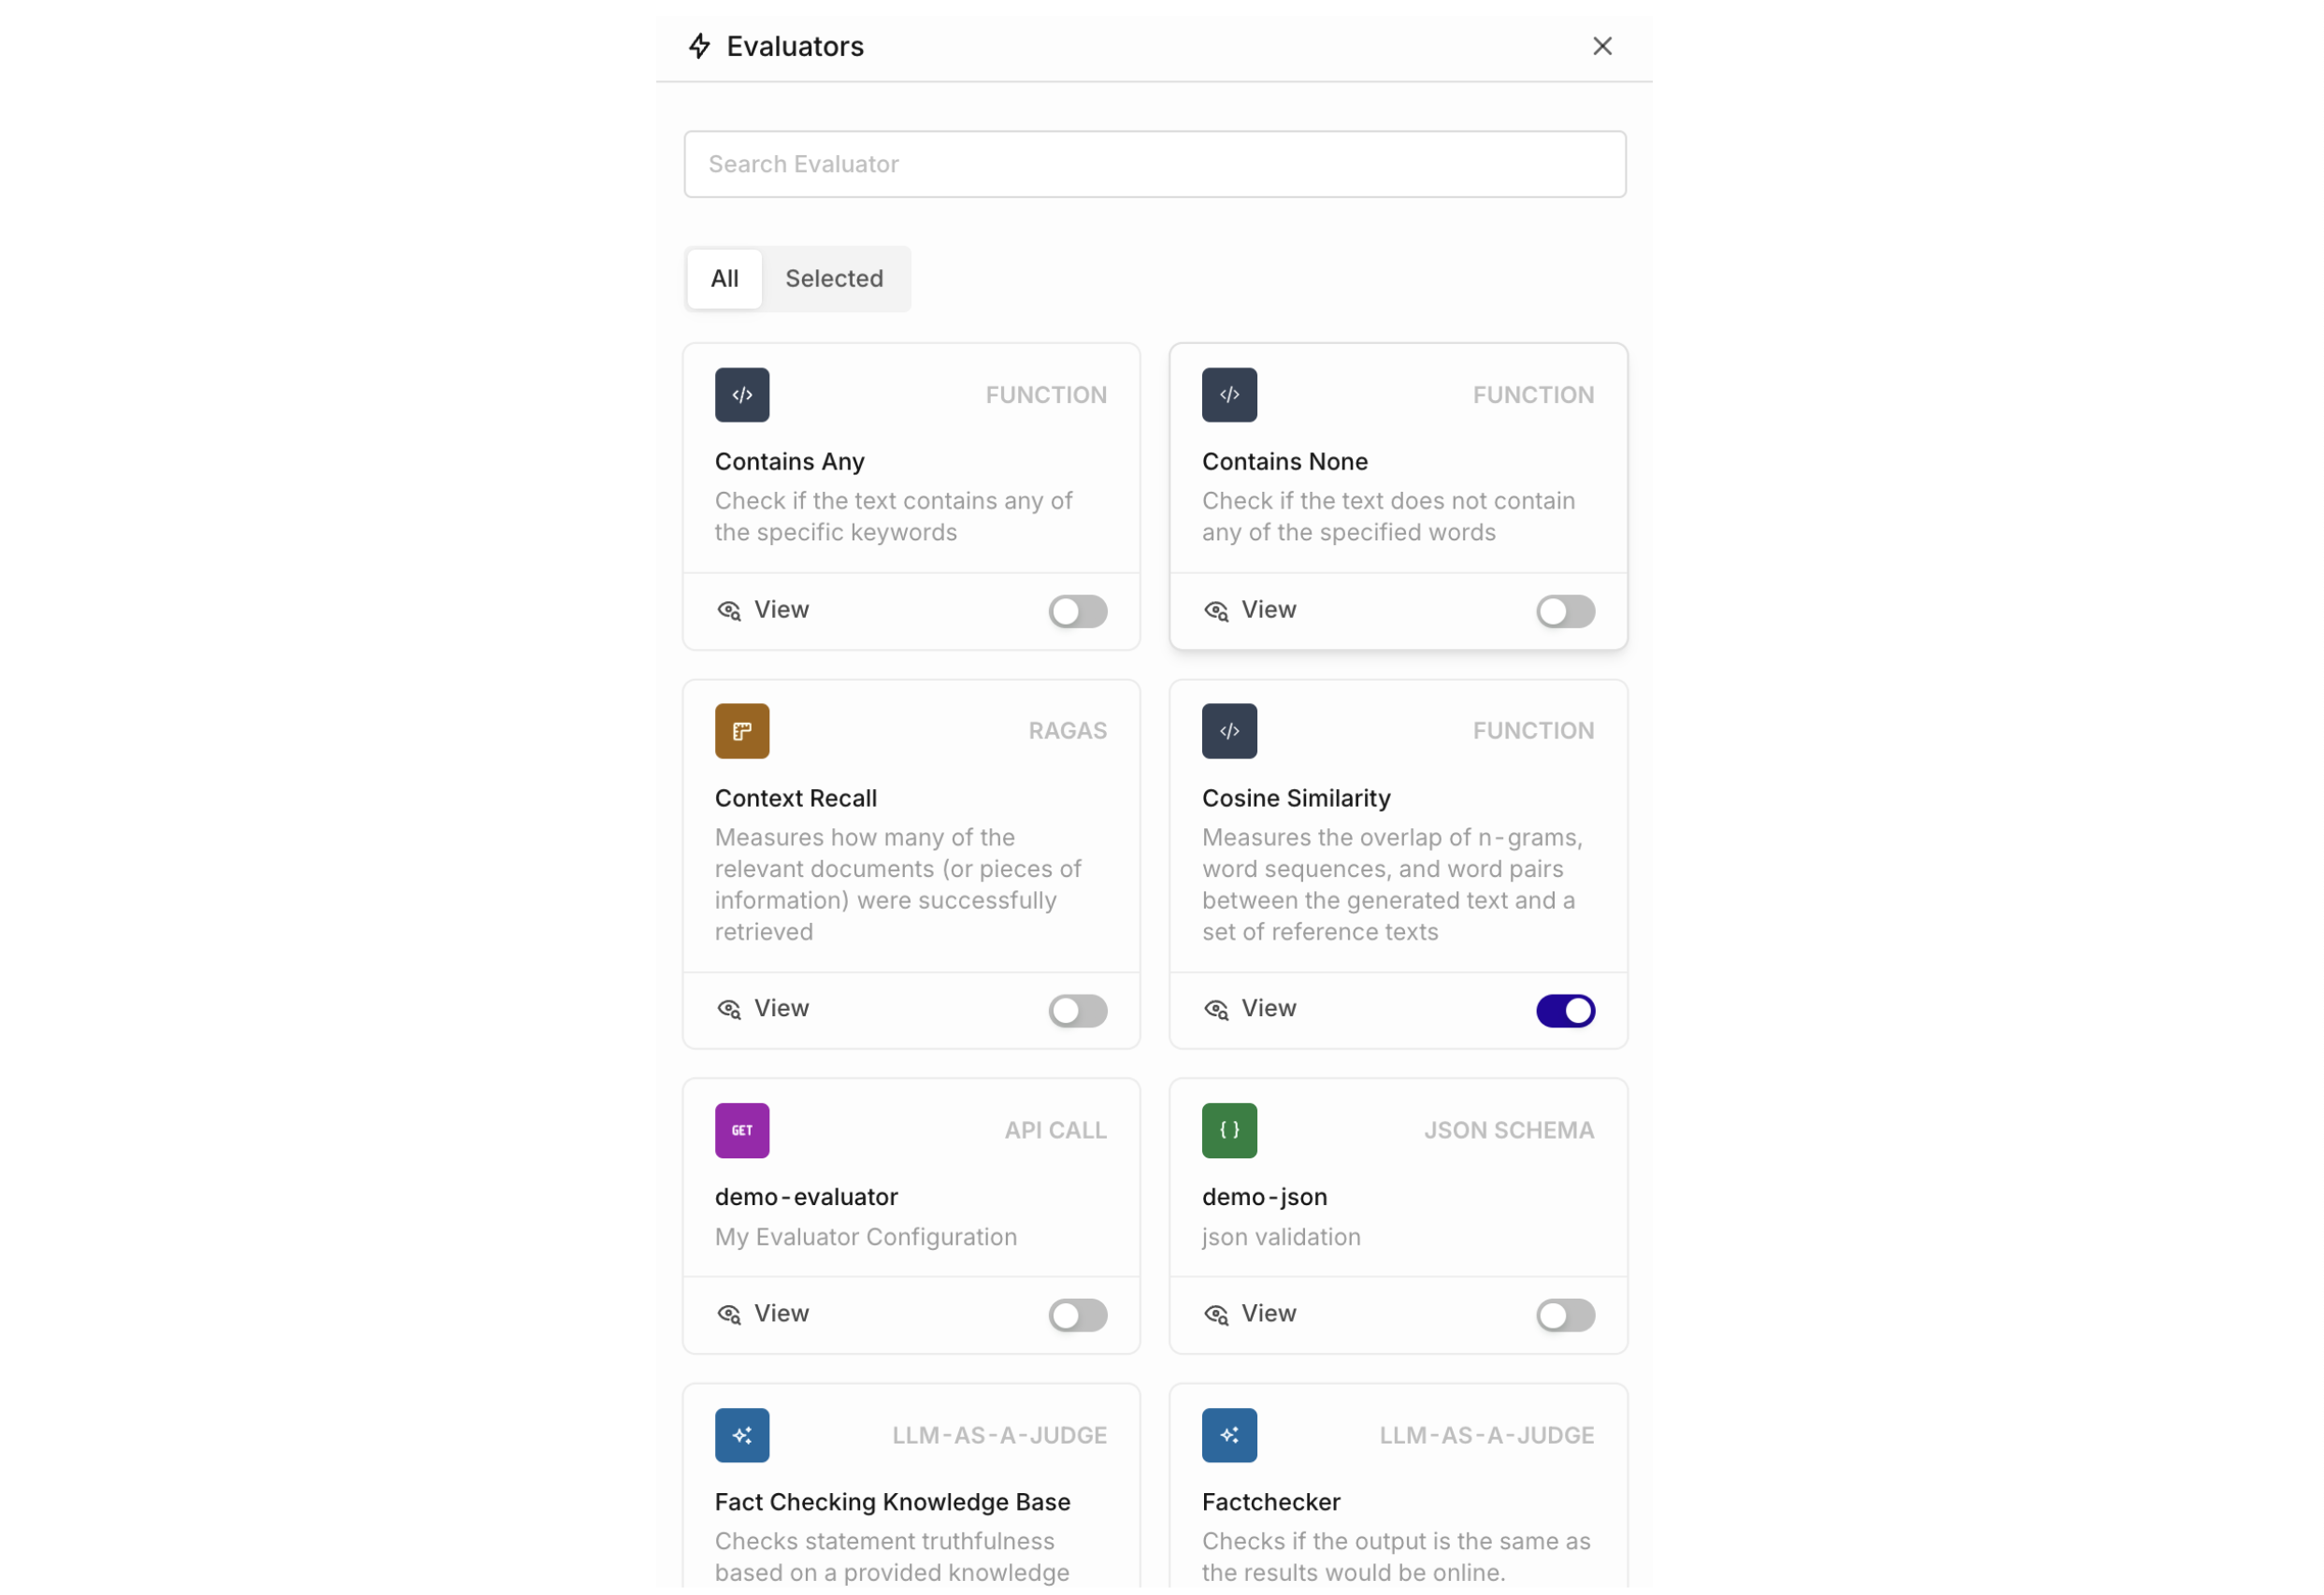
Configure Evaluators
- AI Studio
- API & SDK
- MCP
Human Reviews
- AI Studio
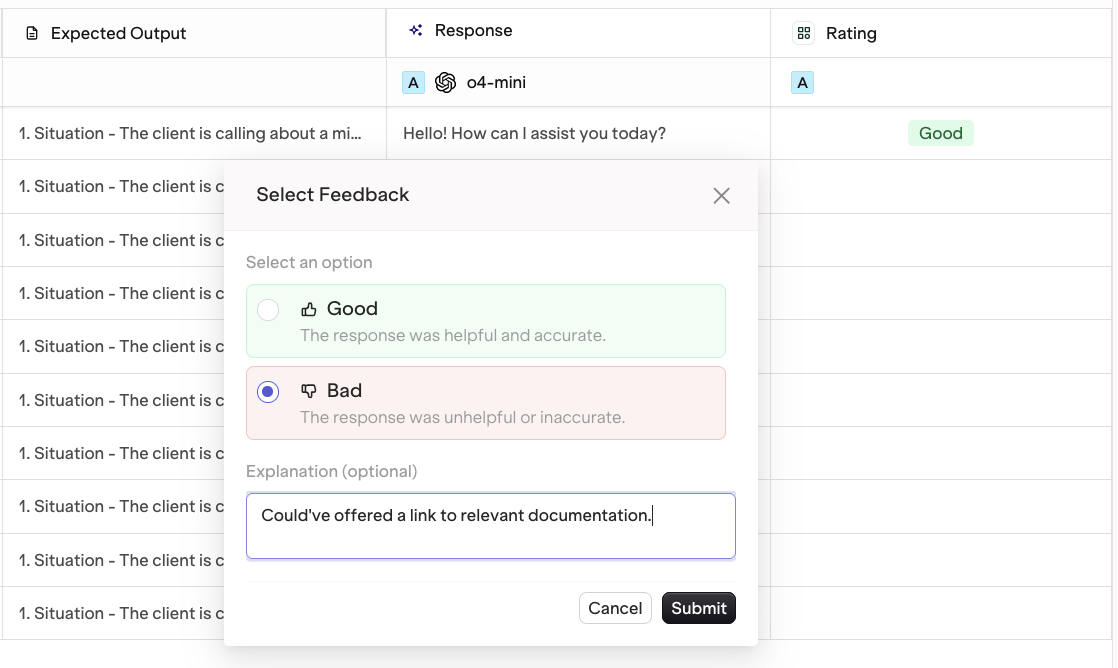
Human Reviews appear as a new column. Each output can be reviewed individually.
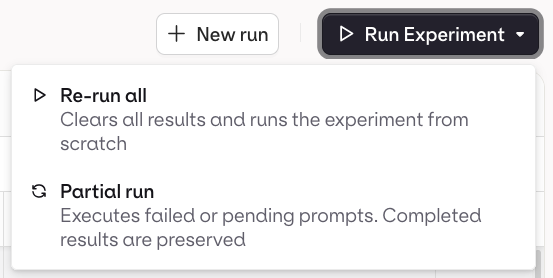
Run an Experiment
- AI Studio
- API & SDK
- MCP
Evaluation-Only Mode
- AI Studio
- Set up the experiment with a dataset that already contains responses in the Messages column.
- Do not select a prompt during setup.
- Add your evaluators.
- Run the experiment.
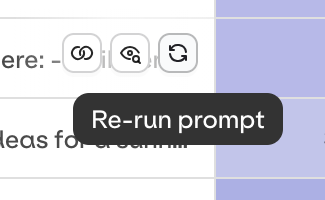
Run a Single Prompt
- AI Studio
Partial Runs
- AI Studio
Add Evaluators After Running
- AI Studio
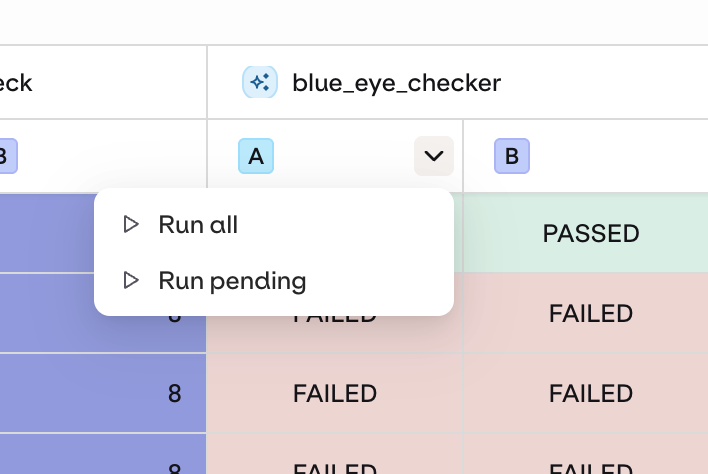
Use the drop-down on your Evaluator column to run newly added Evaluations.
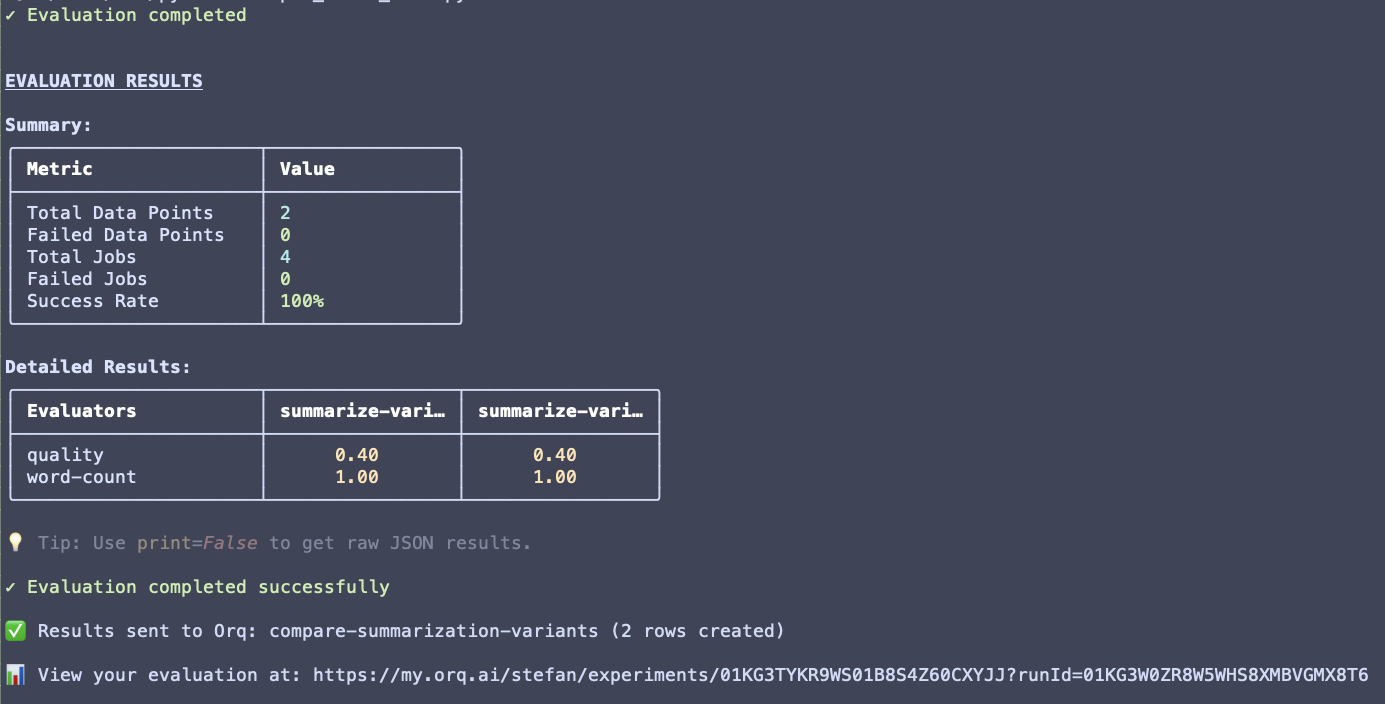
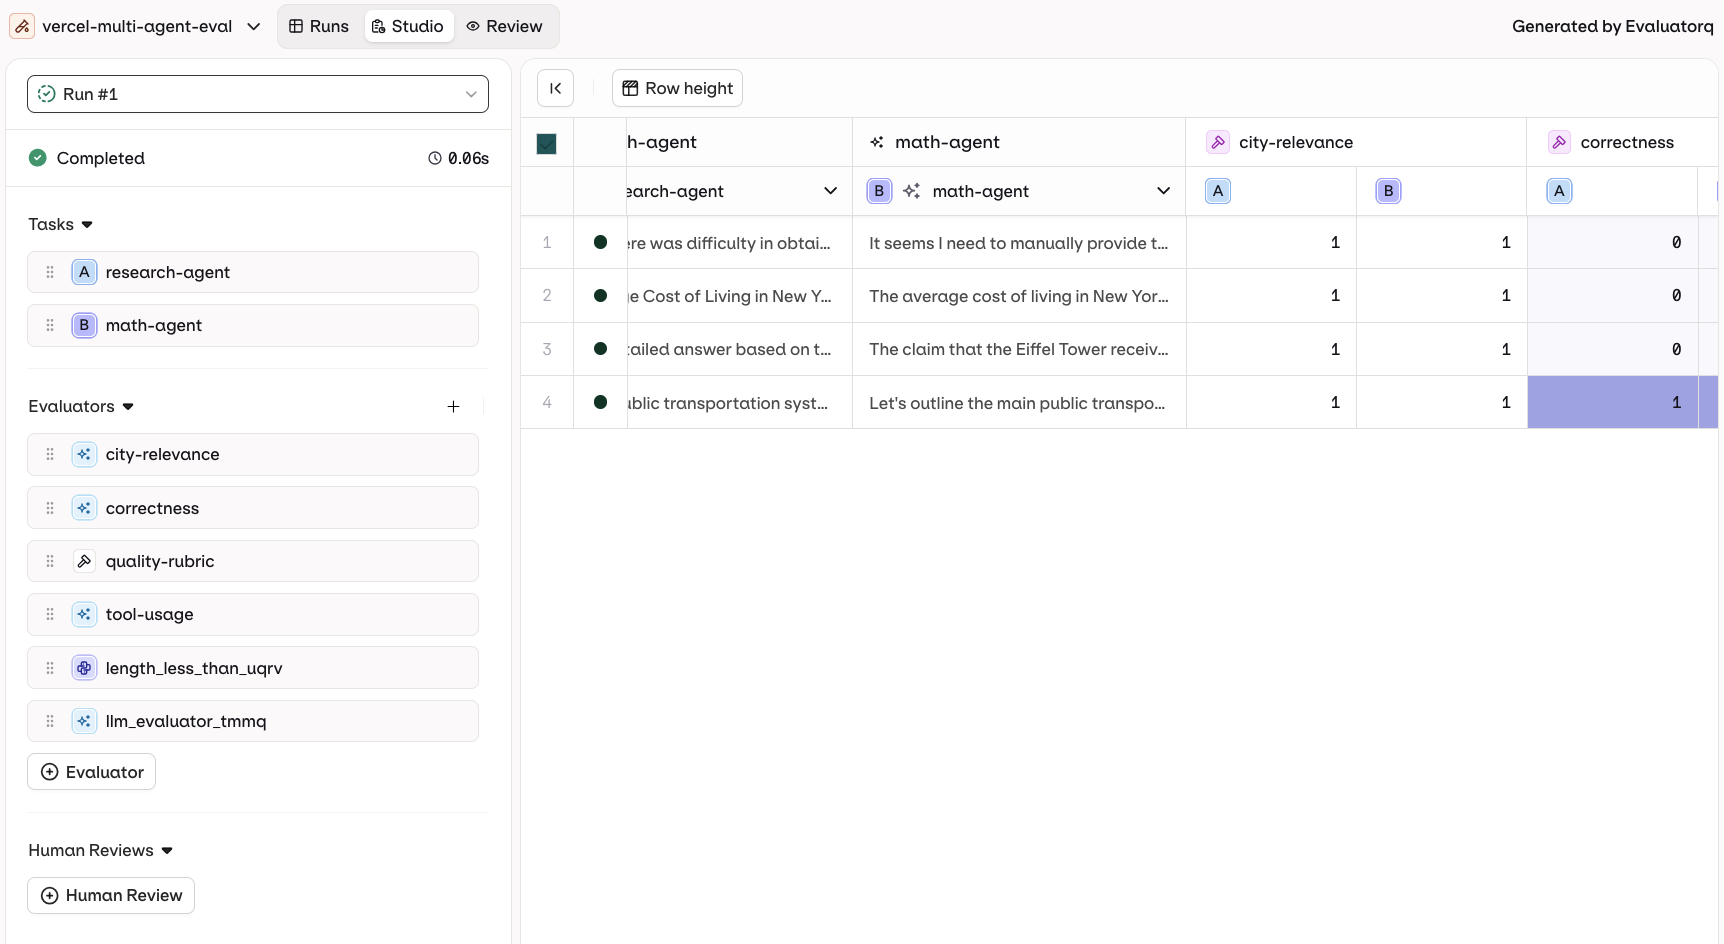
View Results
- AI Studio
- API & SDK
- MCP
- Review: inspect each model output individually.
- Compare: view multiple model outputs side by side.
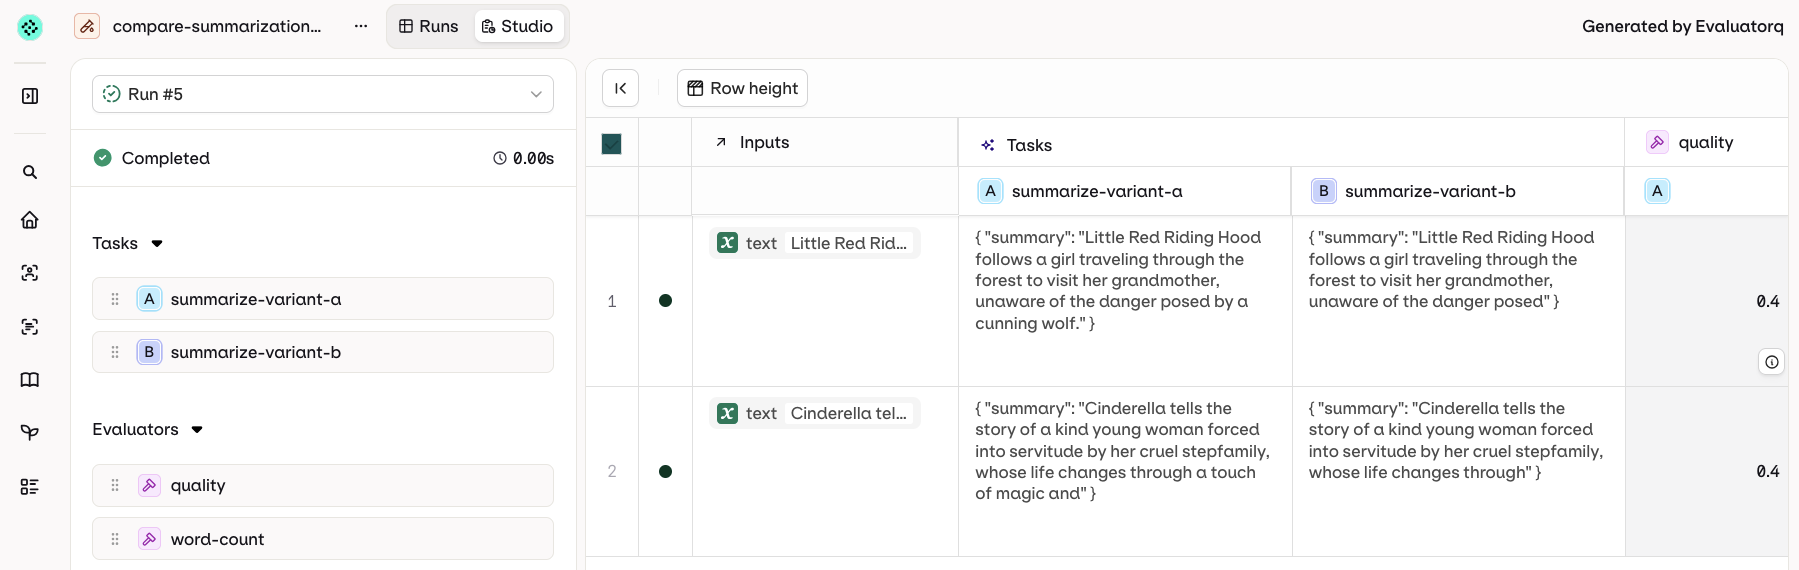
Column Result Overview
- AI Studio
Each response column shows an aggregated result overview: evaluator score, latency, and cost.
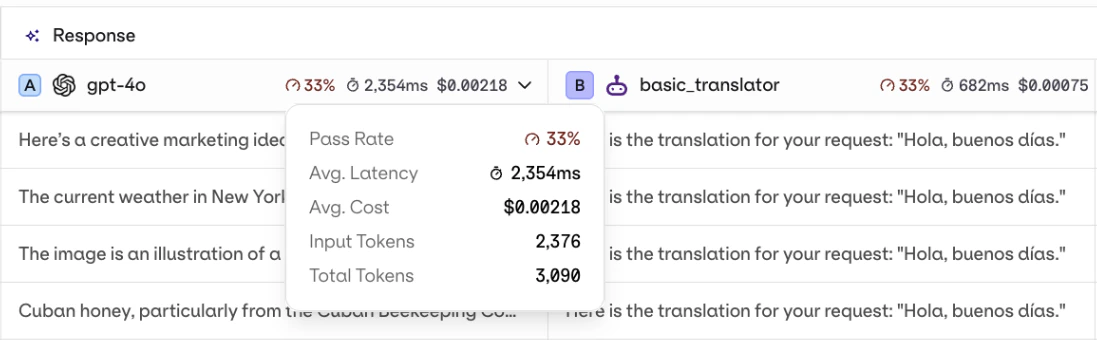
Compare Mode
- AI Studio
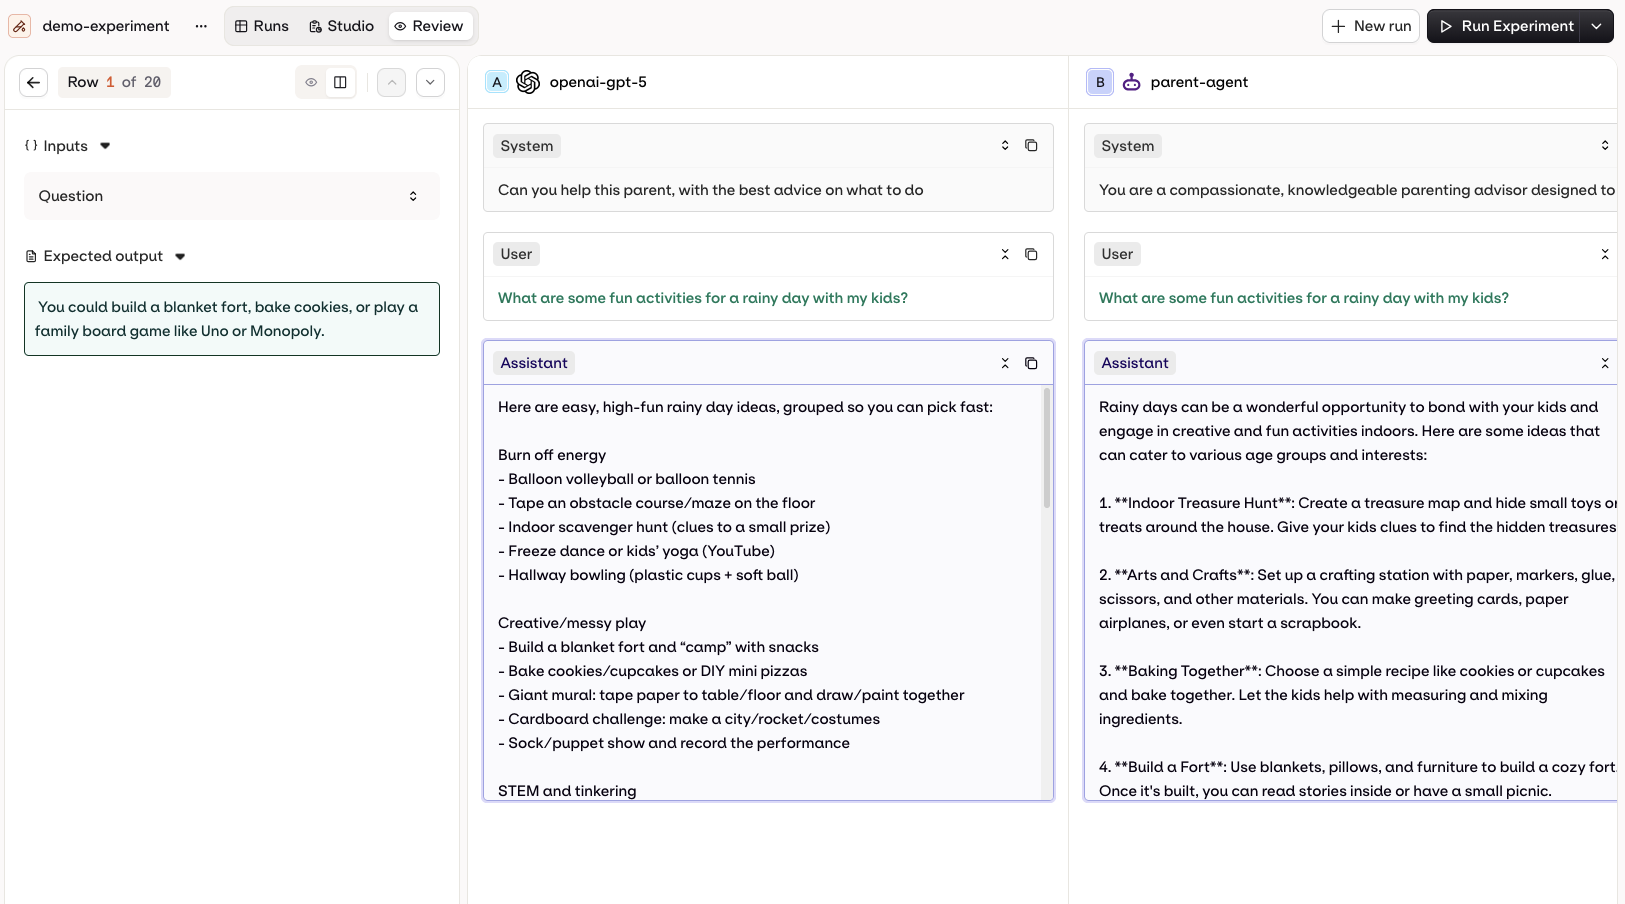
View multiple model generations side by side.
Tool Call History
- AI Studio
See the model interpretation and reasoning around each tool call.
Multiple Runs
- AI Studio
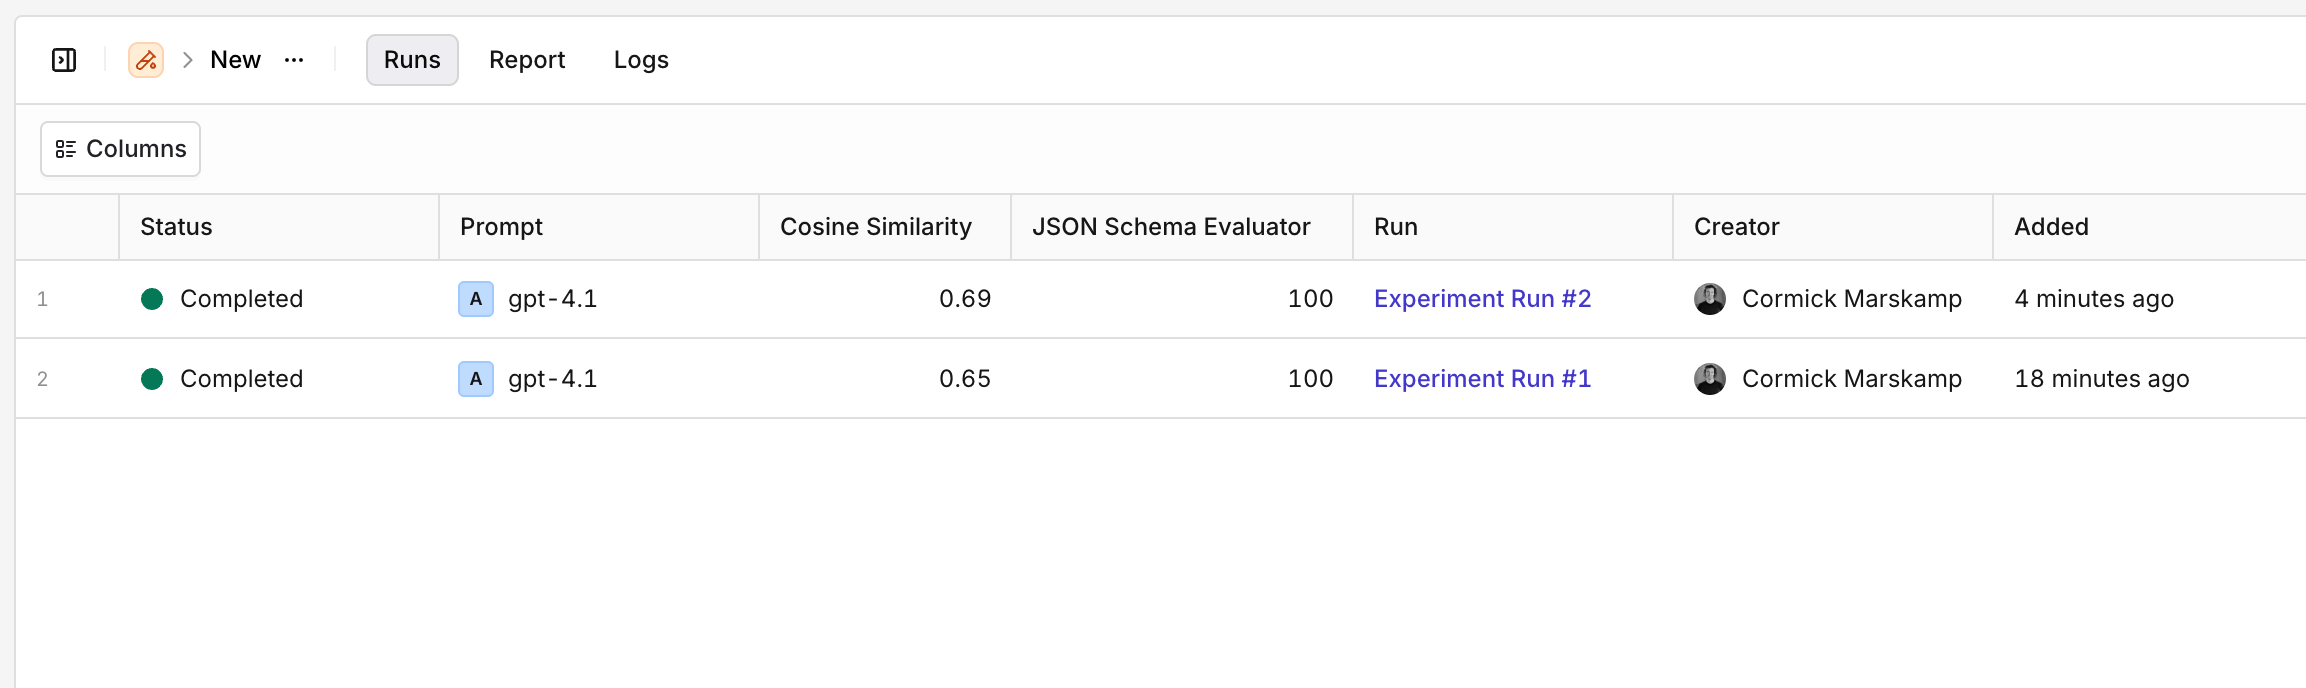
See at a glance how results evolved between two experiment runs.
Export Results
- AI Studio
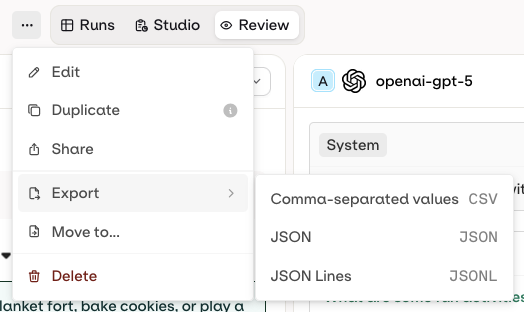
Exports are available after an experiment runs successfully.
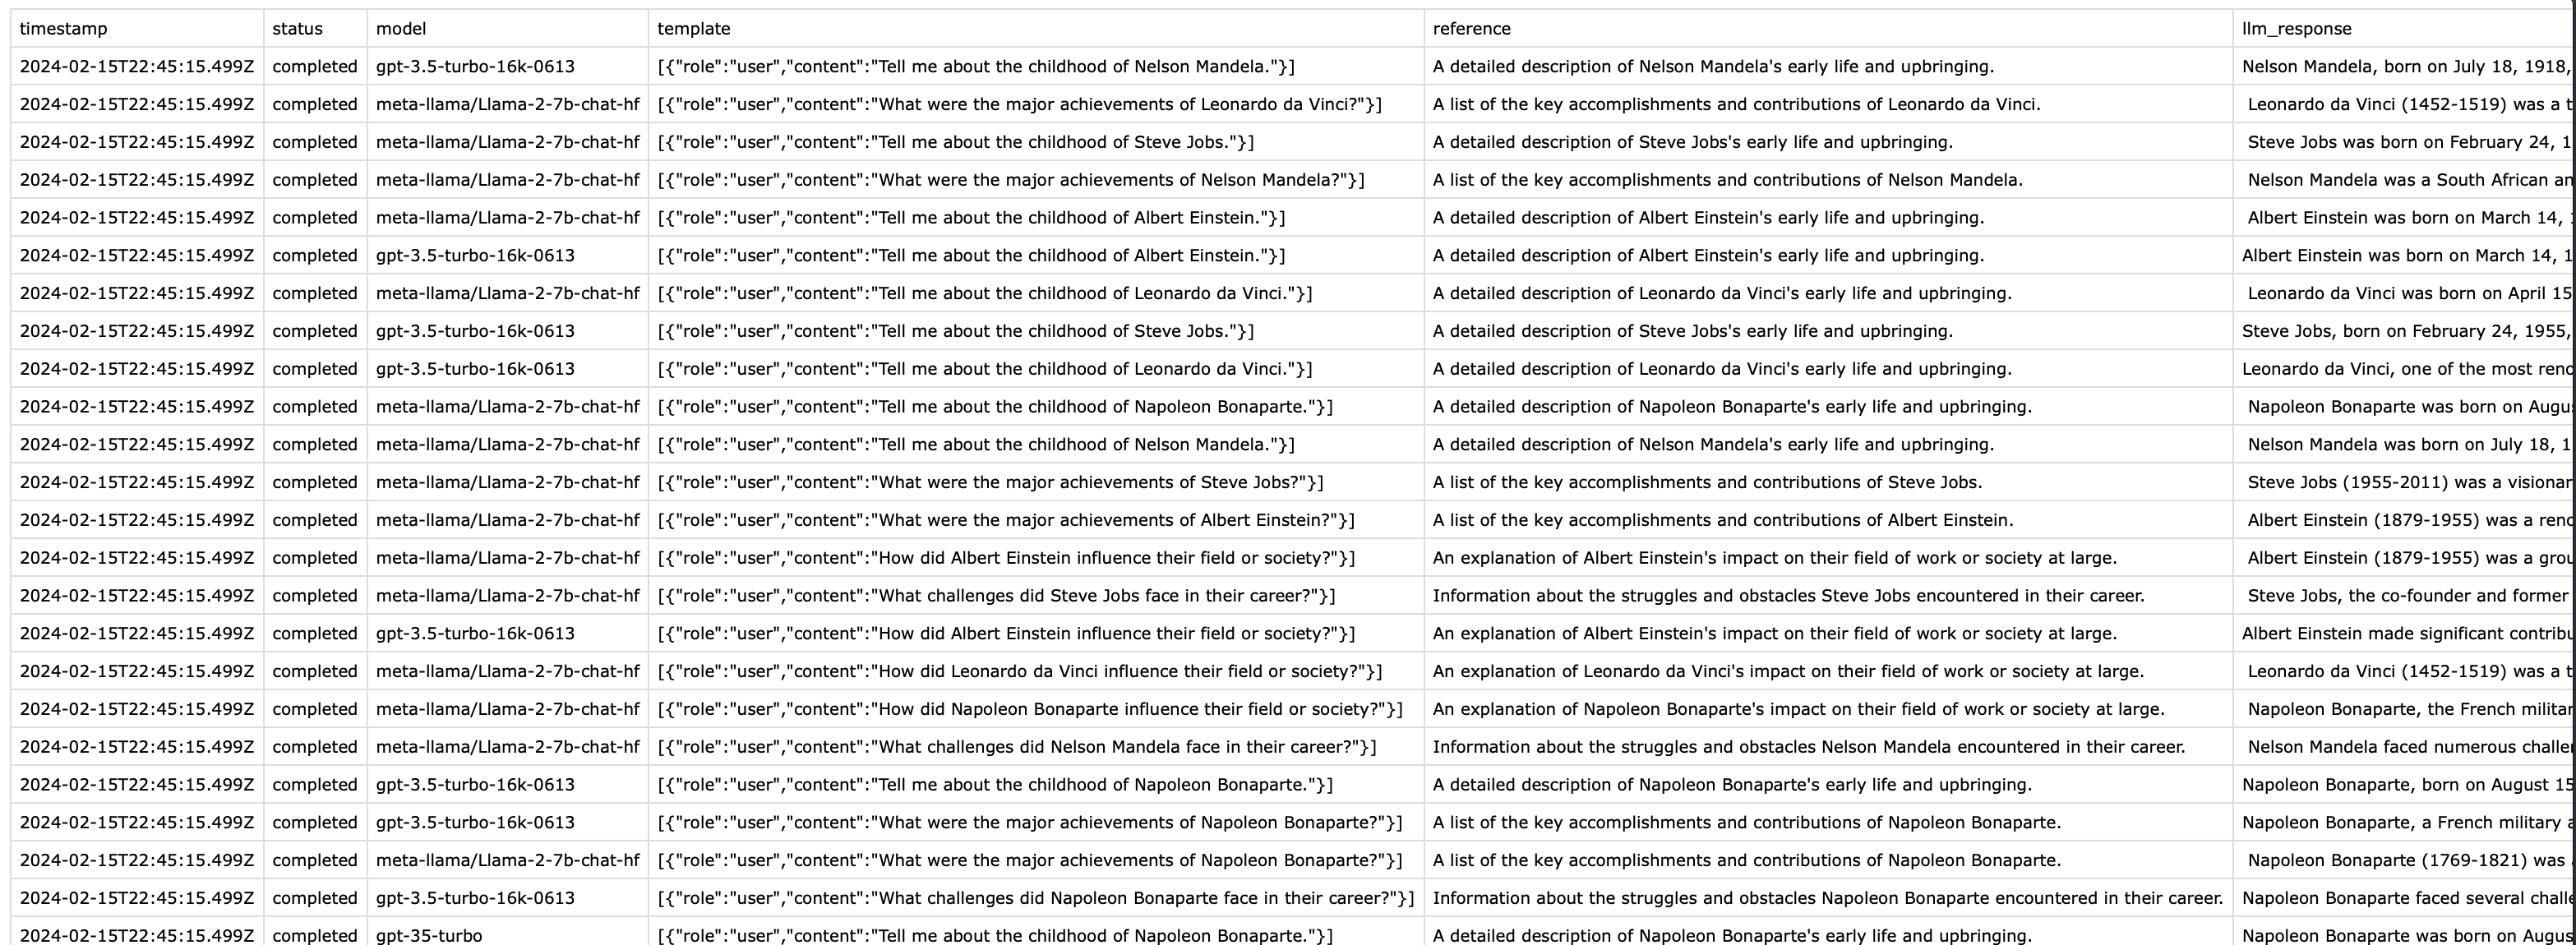
Example CSV export: each column holds data entries and generated responses.
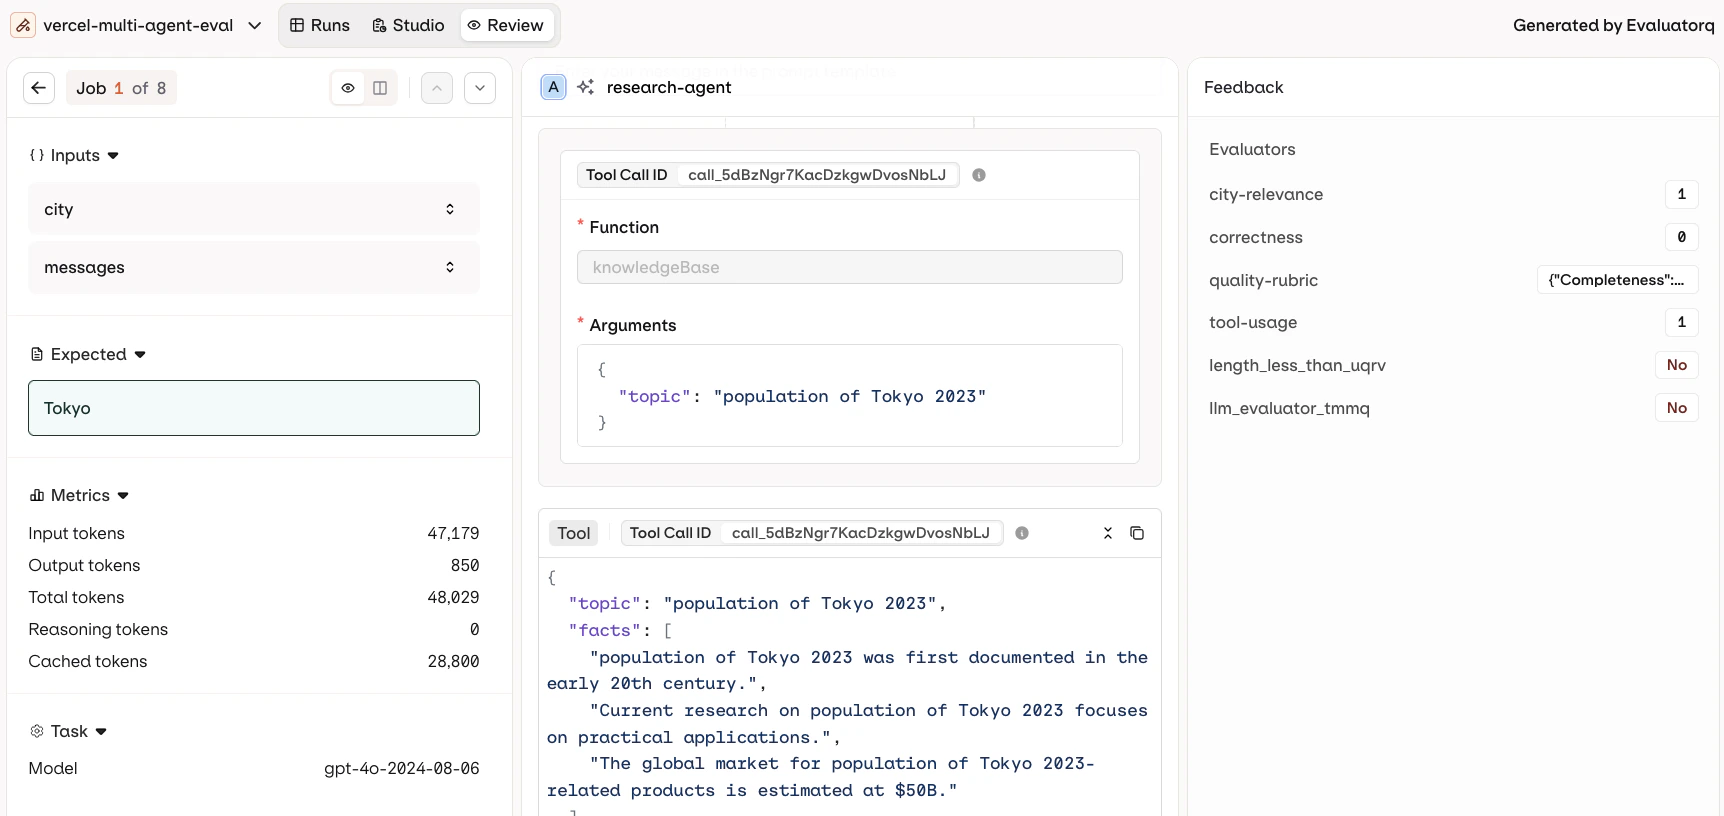
Review Results
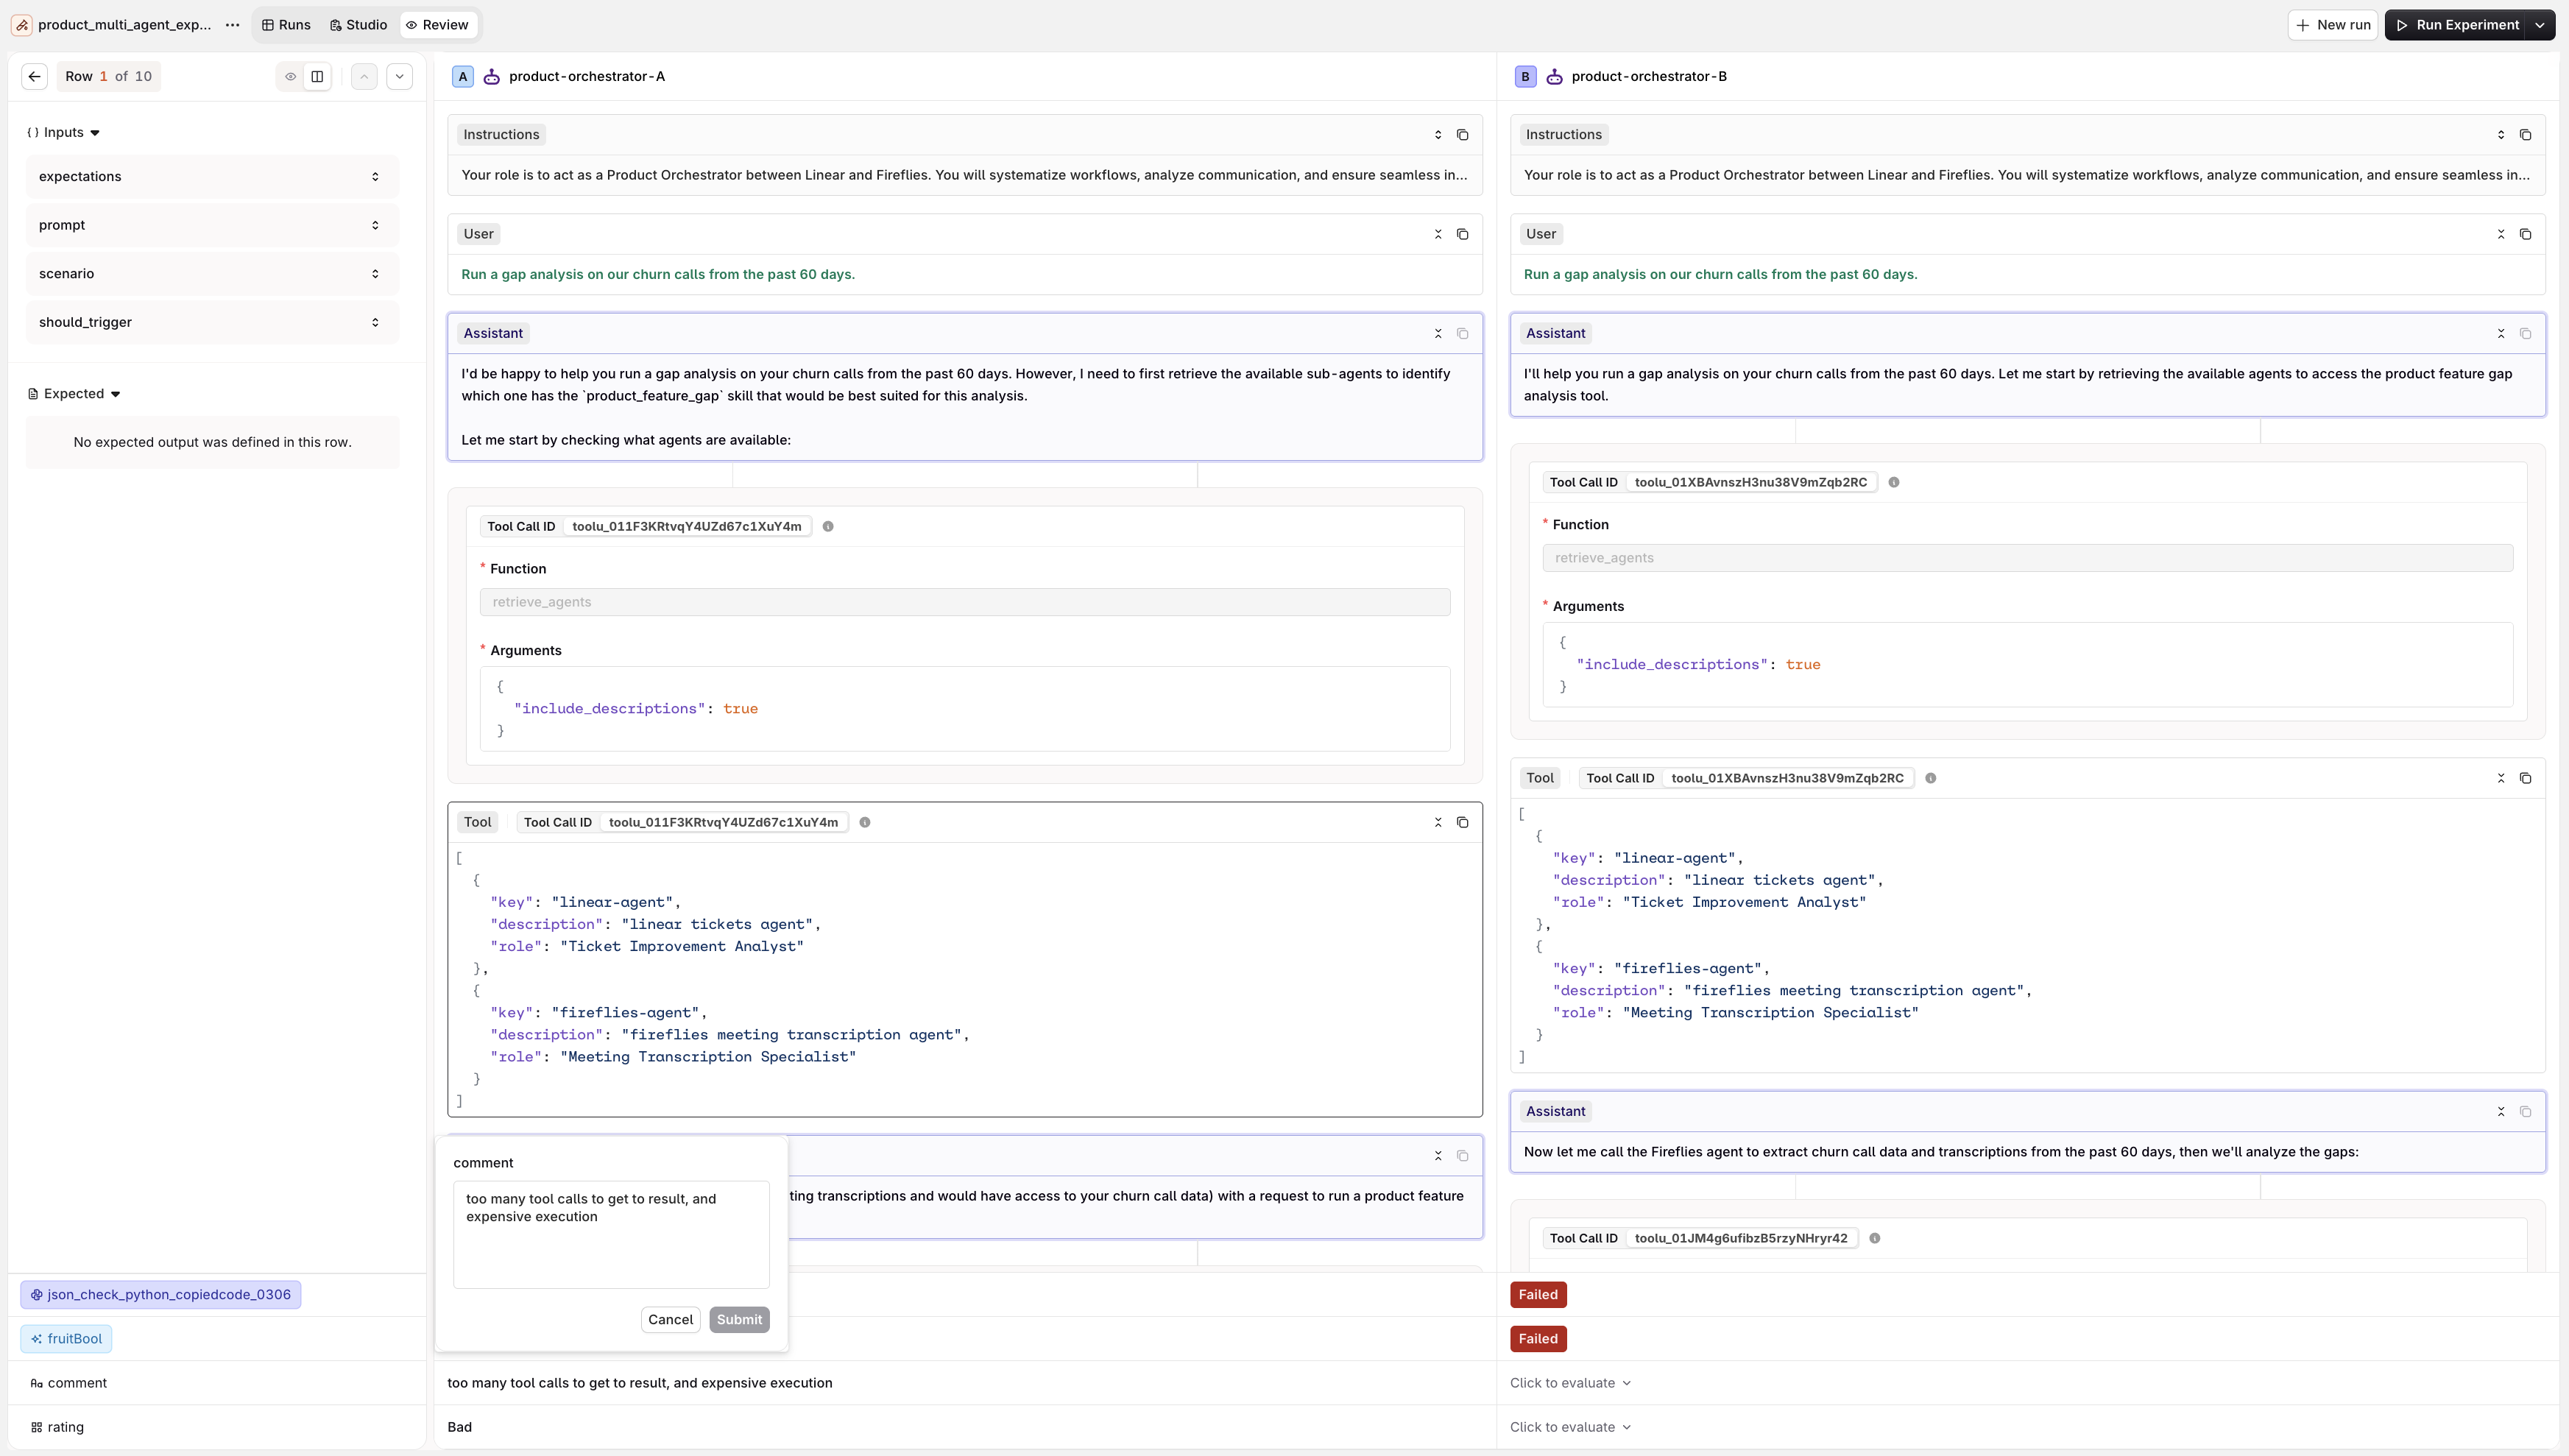
Once an experiment completes, open the Review tab in the experiment top nav. It offers two views.- Review Mode
- Compare Mode
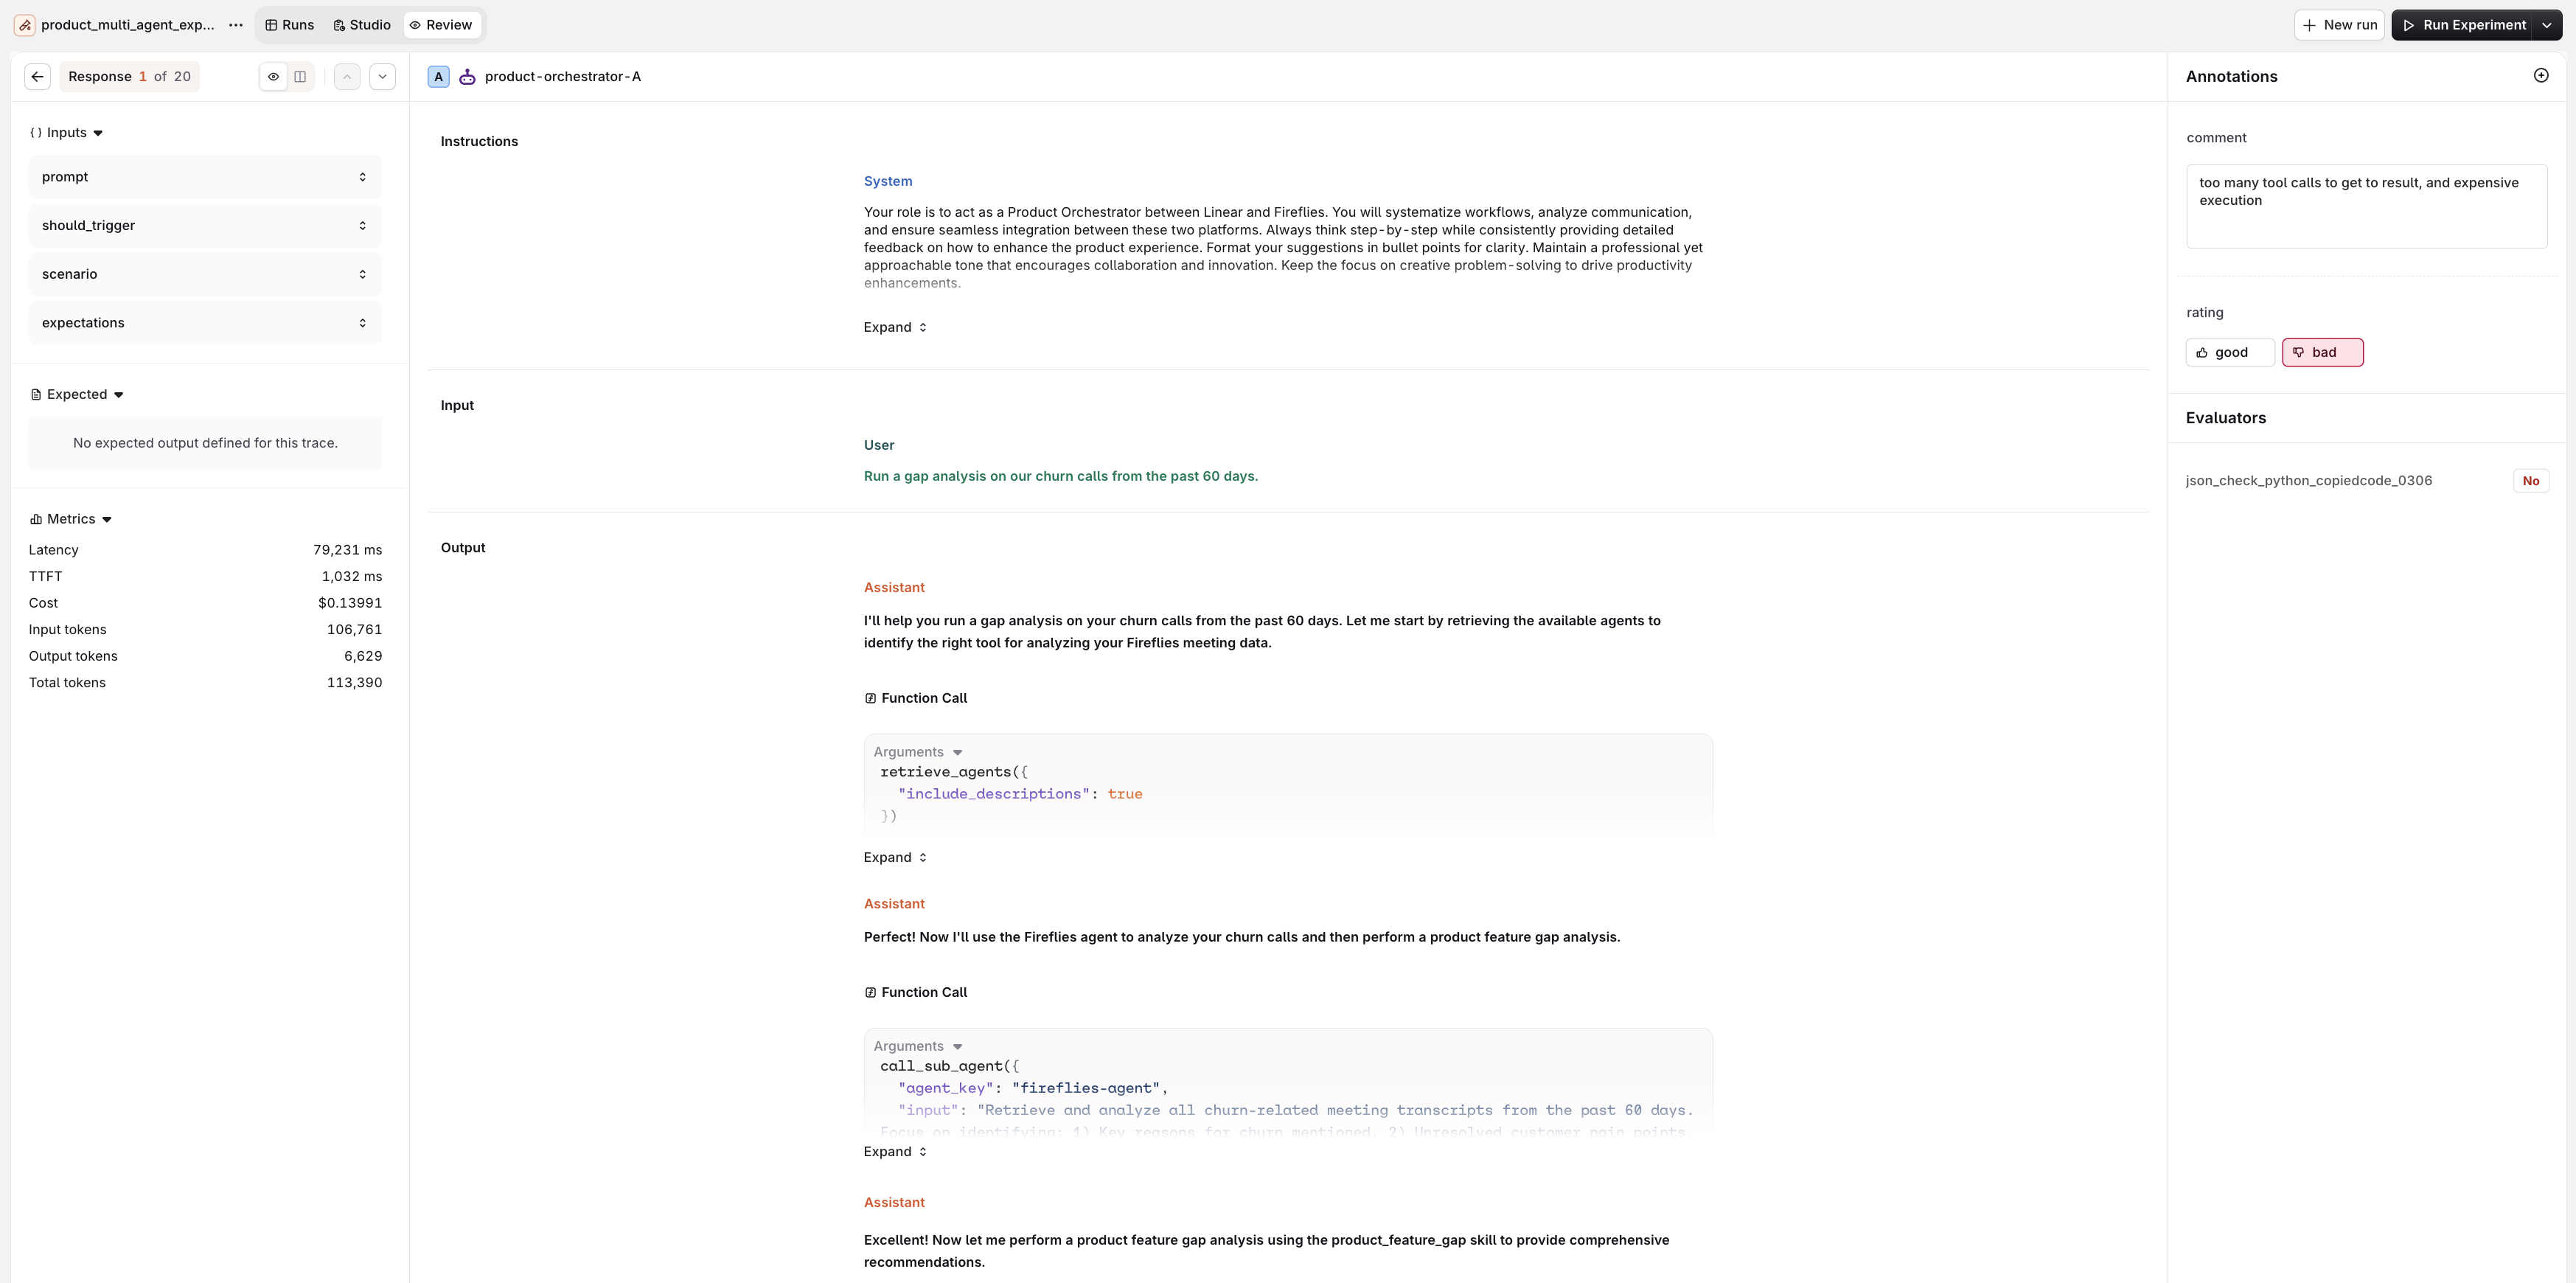
The Review tab shows inputs, metrics, the full conversation, and the Annotations panel with Human Reviews and Evaluator results for each response.
- Left: Inputs, Expected output, and Metrics (Latency, , Cost, token counts).
- Center: the full conversation for the selected entry: the User message, the Assistant response, and the tool calls made by the agent.
- Right: the Annotations panel with Human Review controls for manual annotation, above the Evaluator scores.
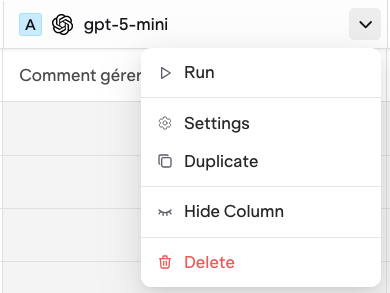
Duplicate an Experiment
- AI Studio
- Open the experiment.
- Click in the top-right corner.
- Select Duplicate.
- Provide a new name and click Confirm.