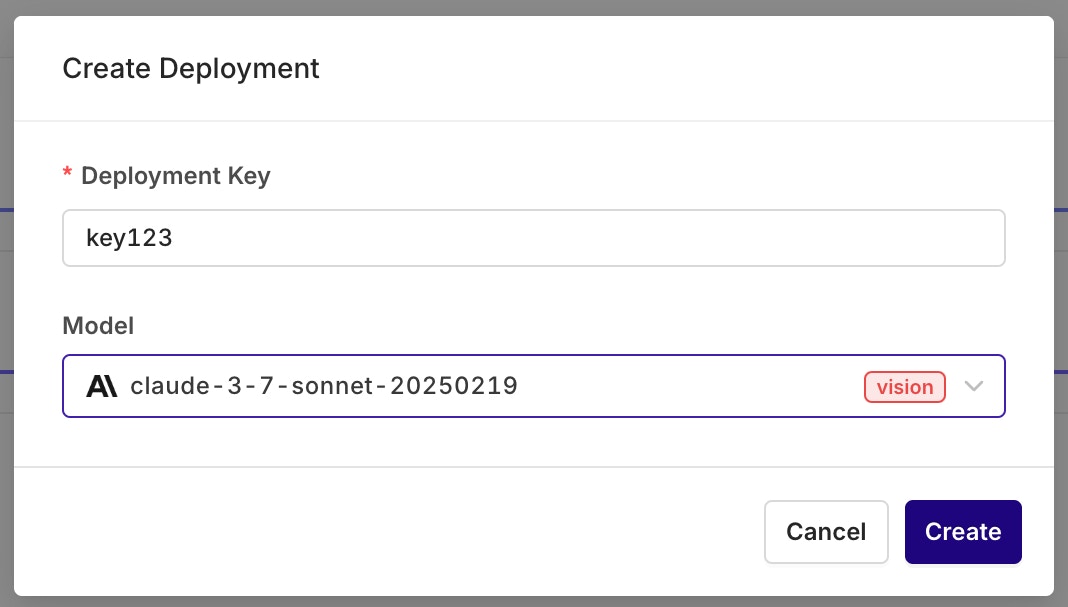
- Choose a Project and Folder and select the
+button. - Choose Deployment
Configuring a Variant
Variants are different prompt / model configurations available behind one deployment. A Deployment can hold any number of Variants. For example, you can have different variants dedicated to answering in different languages, routing your Spanish users to Spanish variants and English users to an English one. When you first create a Deployment you will be redirected to the Variant screen, where you can setup and configure your model and prompt.A Variant Prompt is similar to any other prompt, to learn how to configure a Prompt, see Creating a Prompt.
Primary Model, Retries and Fallback
The main model configuration appears in the Primary Model panel. The Primary Model defines the first model that will be queried through this Variant.Retries
A unique configuration is available for a Primary Model: Retries. In case of failure, configure here how many times a query is going to be retried with this model.Retries are only triggered if you configure a retry count greater than 0 in the Deployment’s Variant settings.When retries are enabled, Orq will automatically retry the model provider API call if it returns one of the following HTTP Status Codes:
- 429 Rate Limit Exceeded
- 500 Internal Server Error
- 501 Not Implemented
- 502 Bad Gateway
- 503 Service Unavailable
- If an error code above is returned and retries are configured (retry count > 0), Orq retries the Primary Model
- If all retry attempts fail (or no retries are configured) AND a Fallback Model is configured, Orq routes to the Fallback Model
- If the Fallback Model also fails, the error is returned to your application
Fallback Model
The fallback model will be triggered only if the Primary Model fails (after all configured retries are exhausted) and when configured. Fallback Models can have a different configuration from the Primary Model.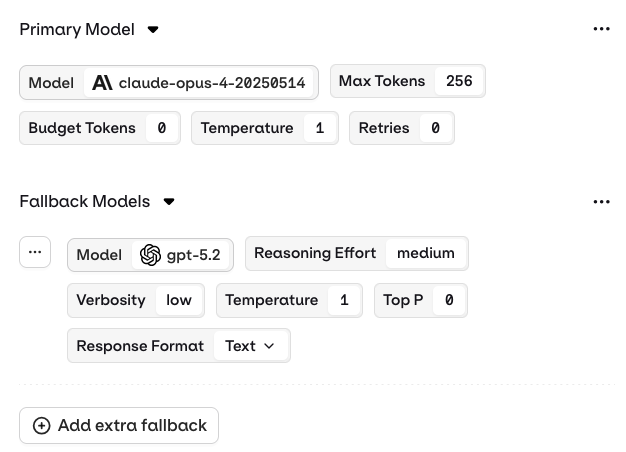
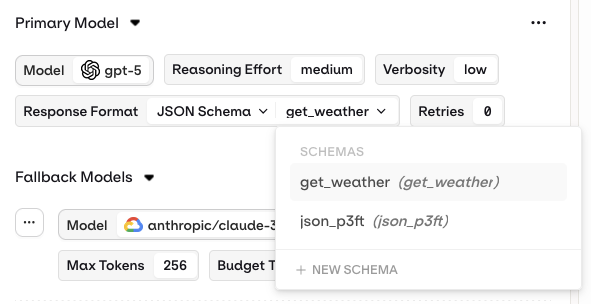
Structured Outputs
When configuring your model, you can now define structured outputs to ensure consistent and reliable responses from your Deployment.Structured outputs let you specify the exact format the model should follow when generating its response, helping you enforce predictable data structures and simplifying integration with downstream systems. You can choose between two structured output modes:
- JSON Mode – the model automatically returns a valid JSON object for every generation.
- JSON Schema – define a schema that explicitly describes the fields, types, and structure of the model output. This provides full control over how responses are formatted.
This makes it easy to maintain consistent response formats across projects and ensures that all variants referencing the schema stay aligned when it’s updated.
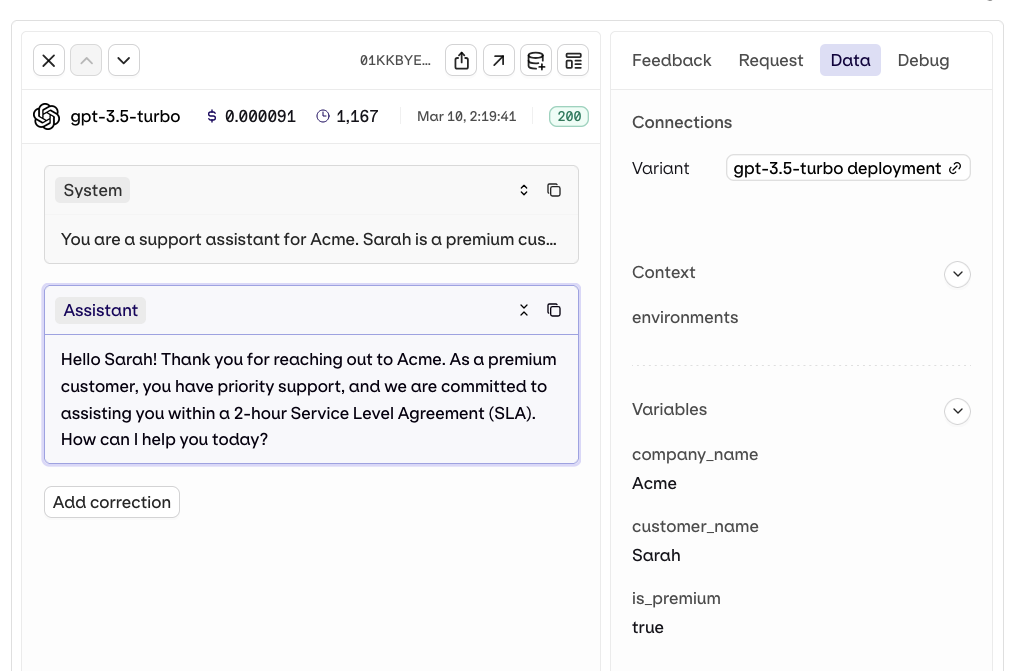
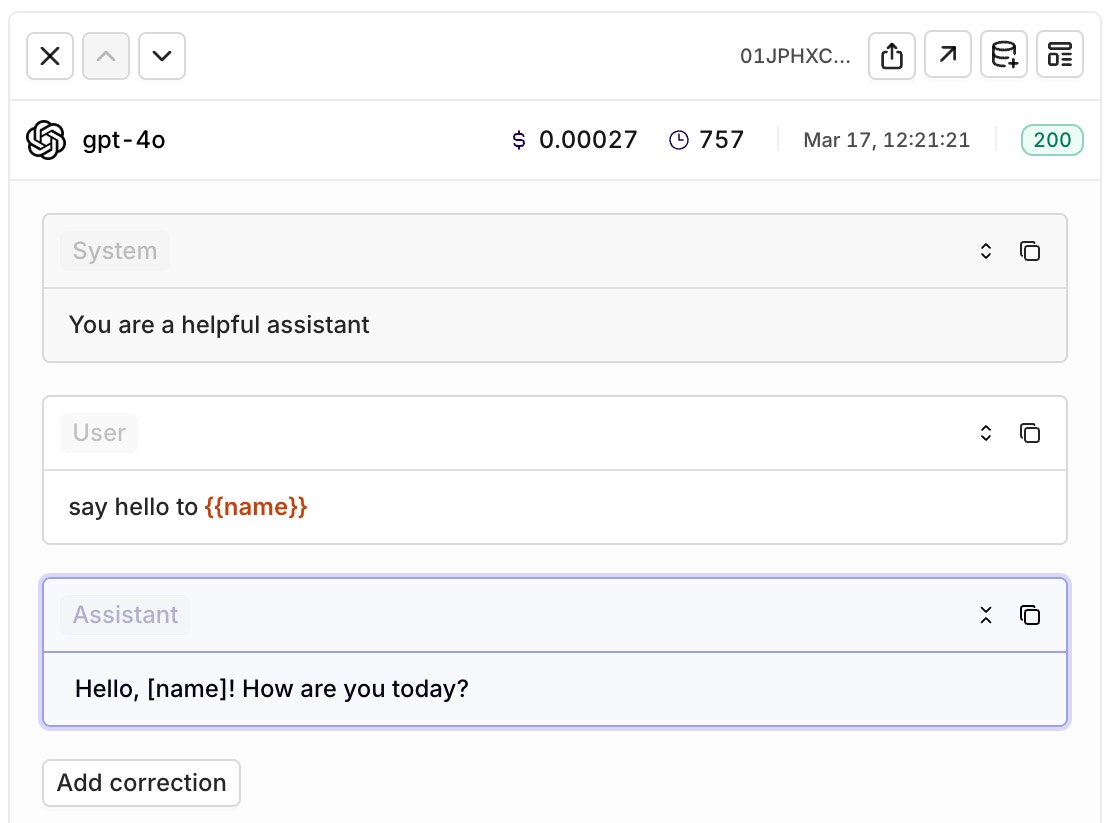
Variables and Prompt Templating
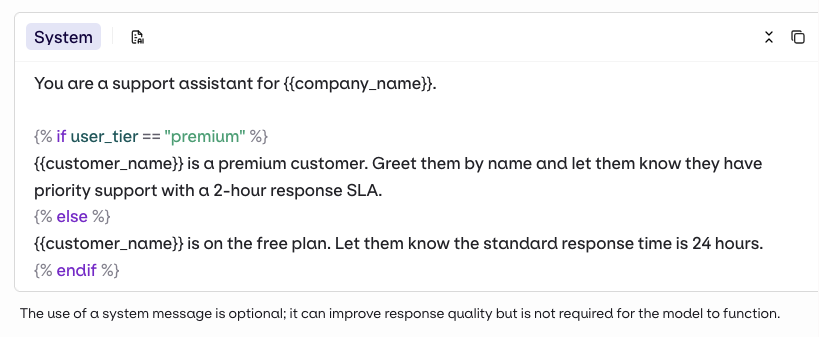
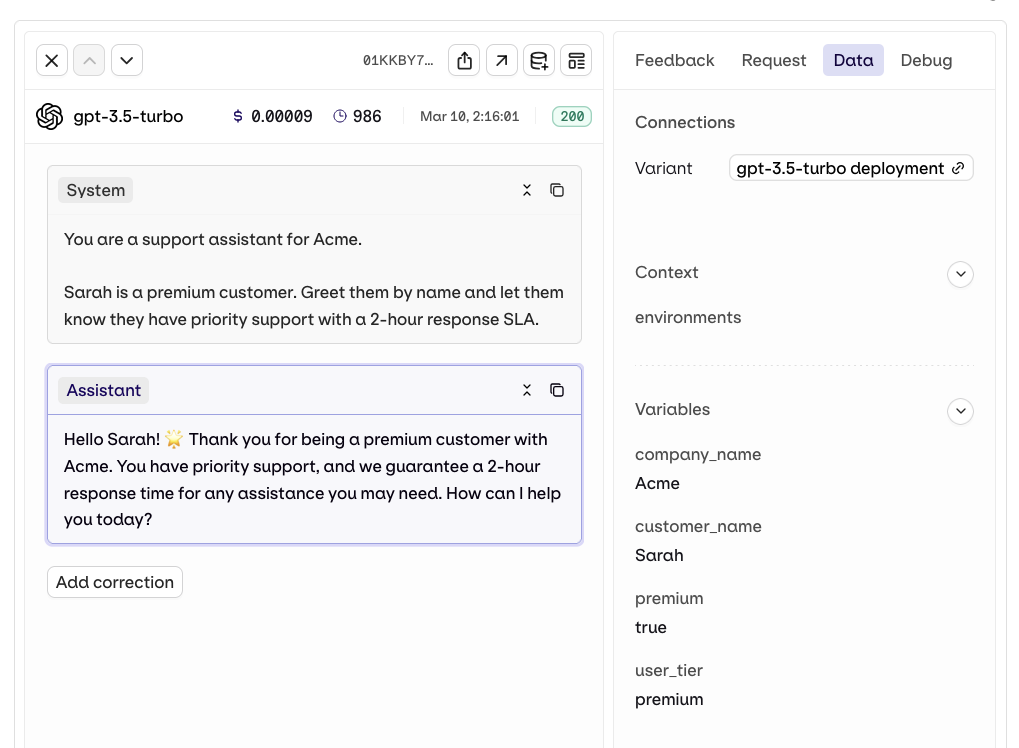
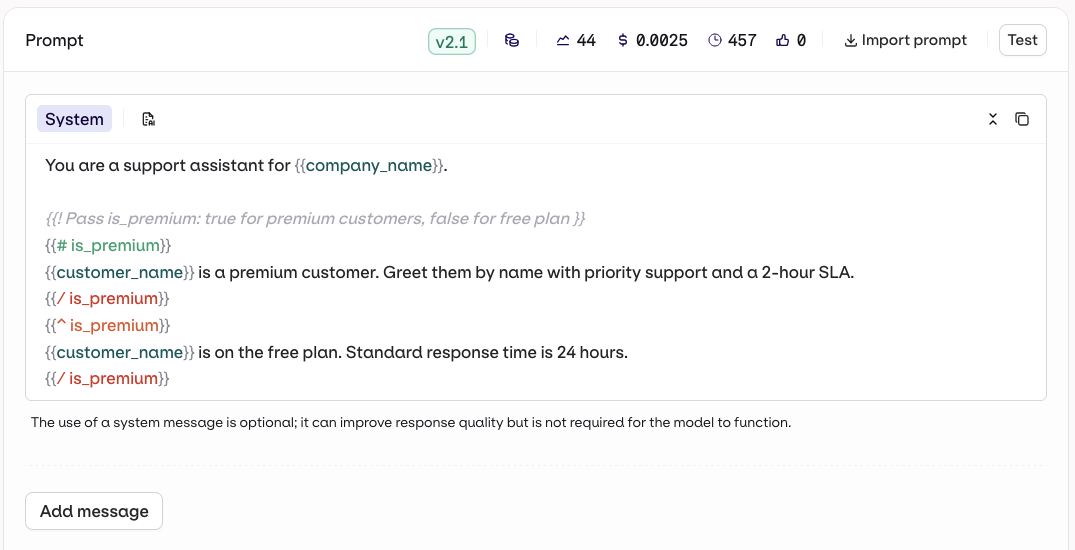
Reference dynamic values in your prompt using double braces:{{variable_name}}. Pass a key-value map to the inputs field when invoking and orq.ai substitutes each variable before sending the prompt to the model.
For code examples and the full parameter reference, see Passing Input Variables.
To prevent sensitive input values from appearing in traces and logs, see Input Masking.
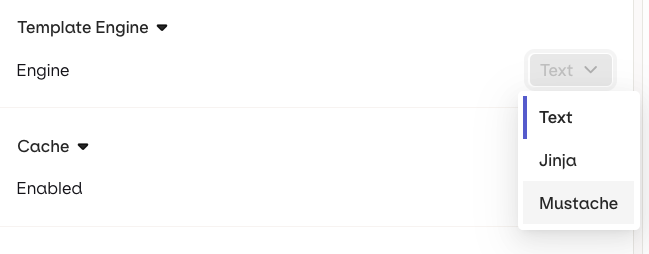
- Text (default) — variables use
{{double_braces}}syntax. - Jinja — full templating with conditionals, loops, filters, and more.
- Mustache — logic-less templating with sections.
For a complete reference of all template features including filters, macros, nested objects, and more, see Prompt Templating.
Using Knowledge Base in Deployment
You can ground your deployment’s responses in domain-specific knowledge by adding a Knowledge Base. To add a Knowledge Base to your deployment, open the deployment configuration and go to Knowledge Bases, then select Knowledge Base.Knowledge Bases enable RAG (Retrieval-Augmented Generation), allowing your model to retrieve and use relevant information from your documentation or data sources to provide more accurate and contextual responses.
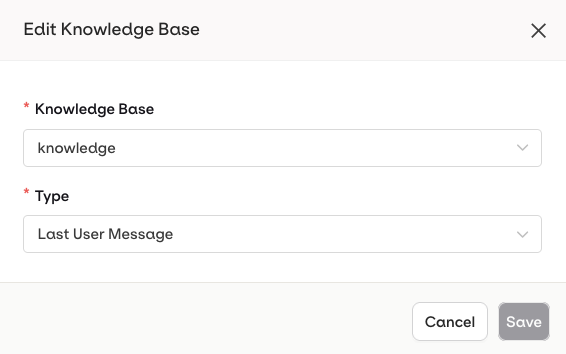
Configuration Options
When editing a Knowledge Base using the... menu, you can choose between two query types:
- Last User Message – The user’s latest message is automatically used as a query to retrieve relevant chunks from the Knowledge Base
- Query – A predefined query is used to retrieve chunks. You can also use Input Variables like
{{query}}to make it dynamic at runtime
{{knowledge_base_key}} syntax where knowledge_base_key is the identifier of your Knowledge Base. If the Knowledge Base is not explicitly referenced in the prompt, the retrieved chunks are automatically appended to the end of the system message.

To learn more about creating and configuring Knowledge Bases, see Creating a Knowledge Base.
Using Tools in Deployments
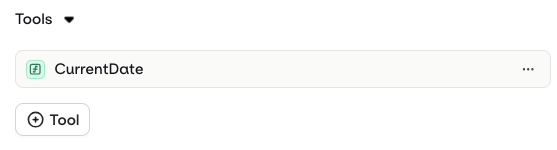
Tools can only be added and configured at the deployment level. In Orq, only Function tools are supported in deployments, enabling your model to call external functions during execution. To add a Function tool to a deployment, open the Tools tab in the deployment configuration and click Tool. You can then choose to:- Create a new Tool – Define a custom function directly within the deployment
- Import an existing Tool – Select a previously created Function tool from your Resource library
Function tools enable structured function calling, allowing the model to invoke predefined business logic based on its responses.
To learn more about creating Function tools, see Creating Tools.
Enabling Cache
Variant generation can be cached to reduce processing time and cost. When an input is received and cached already within the Variant, the stored response will be sent back directly without triggering a new generation. To enable caching, open the Variant Settings tab and select Enabled in the Caching section. You can manually invalidate the cache at any time by clicking the configuration icon.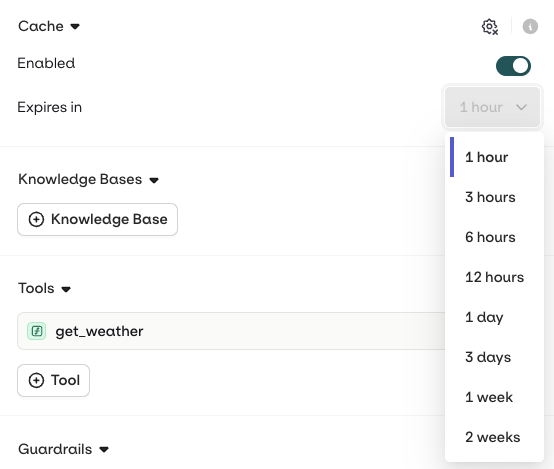
The cache only works when there is an exact match. Image models are not supported.
Configuring TTL
TTL (time to live) corresponds to the amount of time a cached response will be stored and used before being invalidated. Once invalidated, a new LLM generation will be triggered. You can configure the time-to-live once Caching is enabled by choosing from the drop-down.Evaluators and Guardrails
Evaluators and Guardrails are configured as separate sections in the variant settings. Both operate on the generation pipeline but with different behaviours.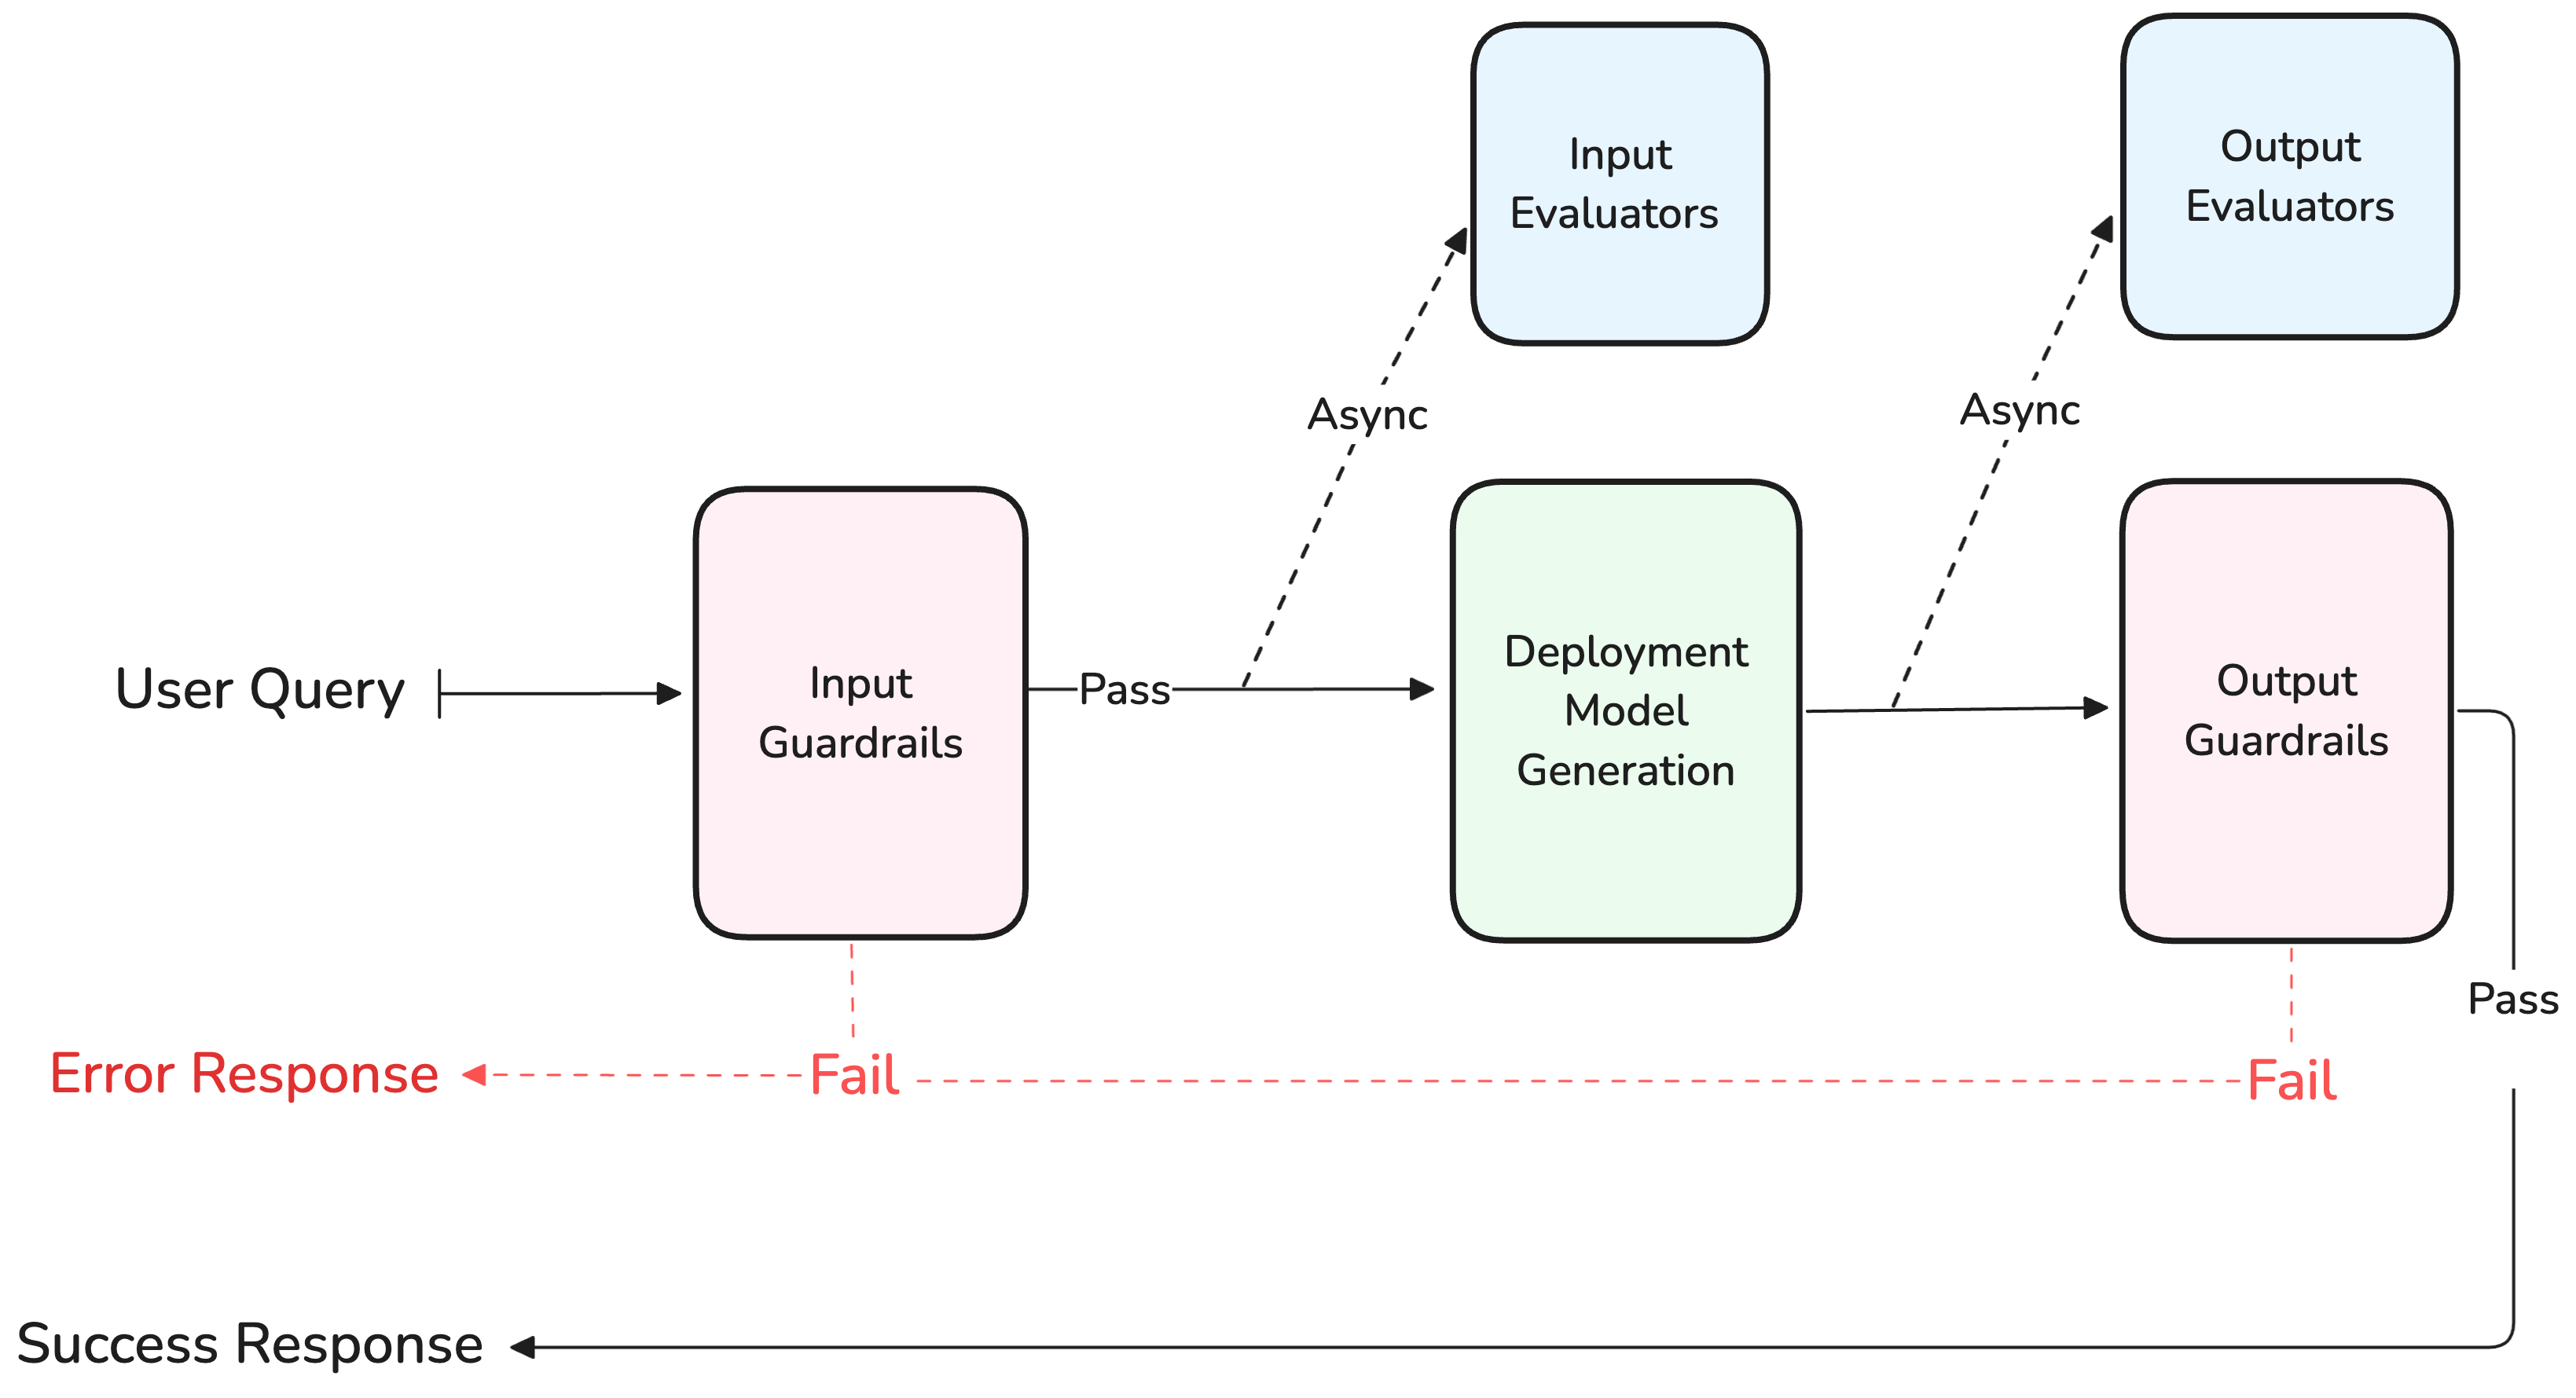
Evaluators
Click Evaluator to add an evaluator from your Library. A dropdown lets you configure:- Input evaluator: runs evaluation on the input sent to the model.
- Output evaluator: runs evaluation on the output generated by the model.
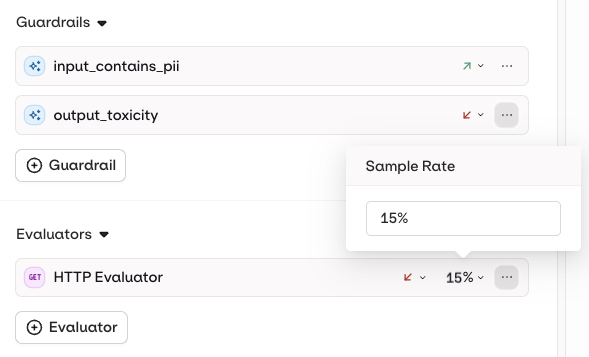
Guardrails
Click Guardrail to add a guardrail-capable evaluator from your Library. A Guardrail runs synchronously and will deny the generation if its evaluation fails, returning an error to the user. Guardrails can also be configured:- Input Guardrail: runs before the input is sent to the model.
- Output Guardrail: runs after generation, before client response.
| Behavior | Description |
|---|---|
| Retry | Triggers a new generation attempt. Use this when a transient or non-deterministic failure may resolve on retry. |
| Fallback | Executes the fallback model configured on the Deployment. Use this when you want a safe default response instead of retrying. |
Security and Privacy
Input Masking
In your variant, when using input, you can decide to flag the created input as a PII (Personally Identifiable Information). This is recommended when processing sensitive data from your users (e.g. name, email, phone number). To do so, when configuring your input, choose the Personally Identifiable Information (PII) from the Privacy drop-down, in the Security tab.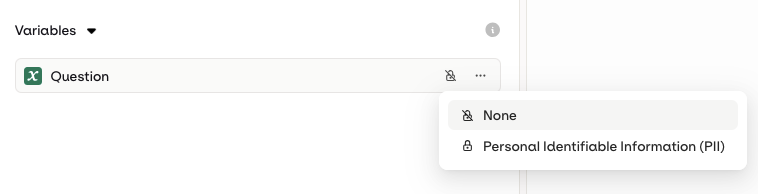
The API response will include the PII, but the input and output logs and traces won’t be logged in Orq.
Output Masking
In a Variant you can add configuration to make generated outputs hidden from logs and traces. Head to the Security tab and enable the Output masking toggle: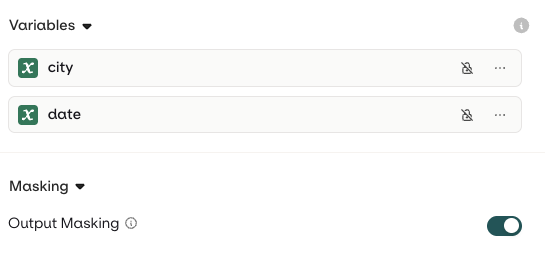

Integrating a Deployment
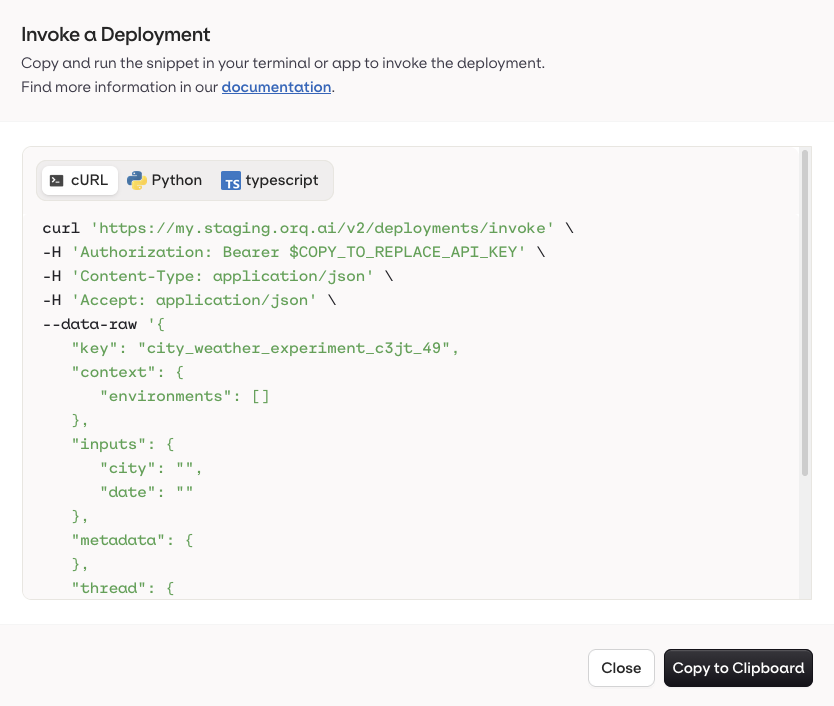
Code Snippet
By selecting the Code Snippet button at the top-right of the Variant page, you will see all code snippets to integrate the current variant within your application. You can also generate the code snippet by right-clicking on a variant in the routing tab.
Adding a new Variant to a Deployment
A single Deployment can hold multiple Variants. Multiple Variants can help you handle different use cases and scenarios within one Deployment. Multiple Variants can be used at the same time through Routing, which we will see in the next chapter. At any time you can choose to add a new Variant to your Deployment by selecting the Variant name at the top-left of your screen and choosing Add variant.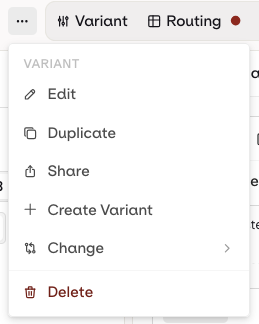
Routing
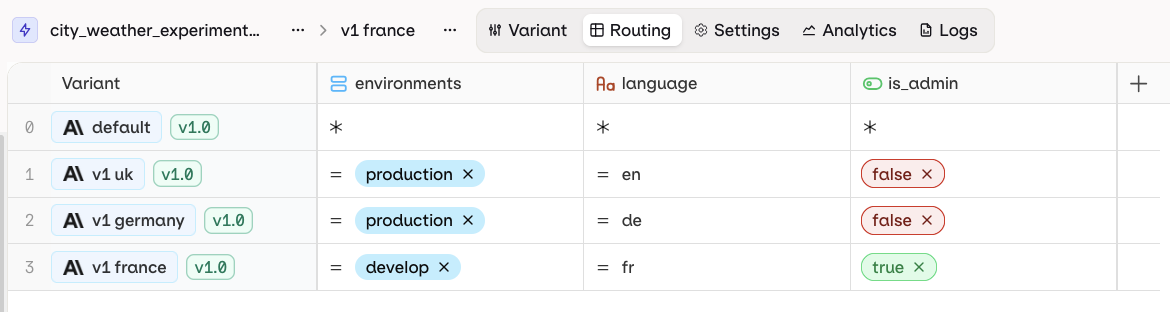
Once a variant is ready to be deployed, you need to configure the routing variables to reach the variant. To open the Routing page, select the Routing title at the top-left of the panel. Within the Routing panel, you can configure the contexts and conditions for which a Variant will be reached by your users.Viewing Routing Configuration
Within the Routing panel, you can configure the contexts and conditions for which a variant will be reached by your users. A Variant represents a version of a language model configured for your deployment, it can have its unique model configuration, prompt or parameters. The following is the visualization of the Routing configuration:The table creates correspondence between Variants and Contexts. Each row represents a single Variant. Each column represents a single Context field. Each cell represents a Value for a Context field to be matched with a Variant.
Default variant
The first row (0) of your Routing is the default variant for your deployment. If all other rules cannot be matched, or if no context values are provided, the user will be routed to the Variant 0.Code Snippets
You can quickly access code snippets for each of the variants in your routing table. These snippets will contain the correct context environment to reach your Variant. To do so, simply Right-Click on the Variant you want to see code snippets for and select Generate Code Snippets, A pop-up will open containing all necessary Code Snippets for integration within your systems.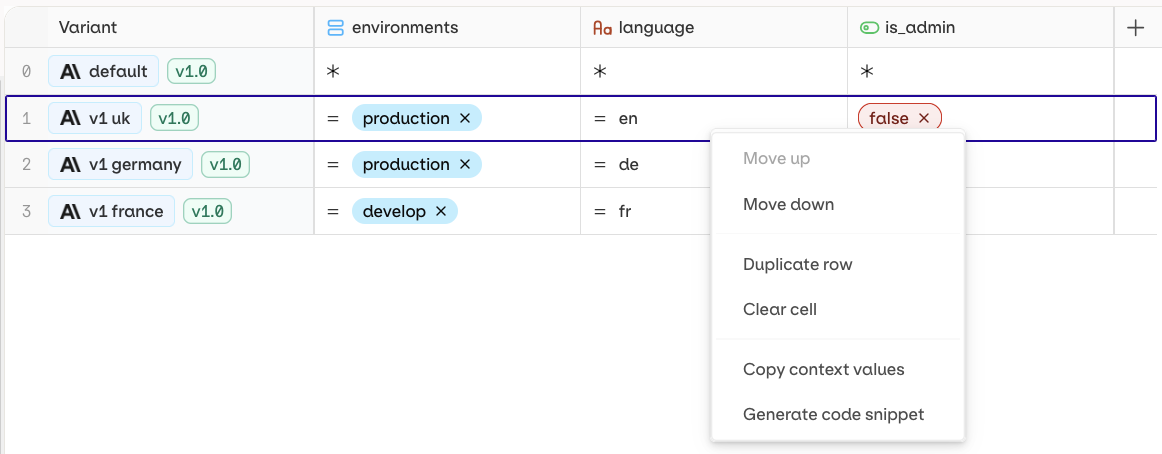
Adding a new context field
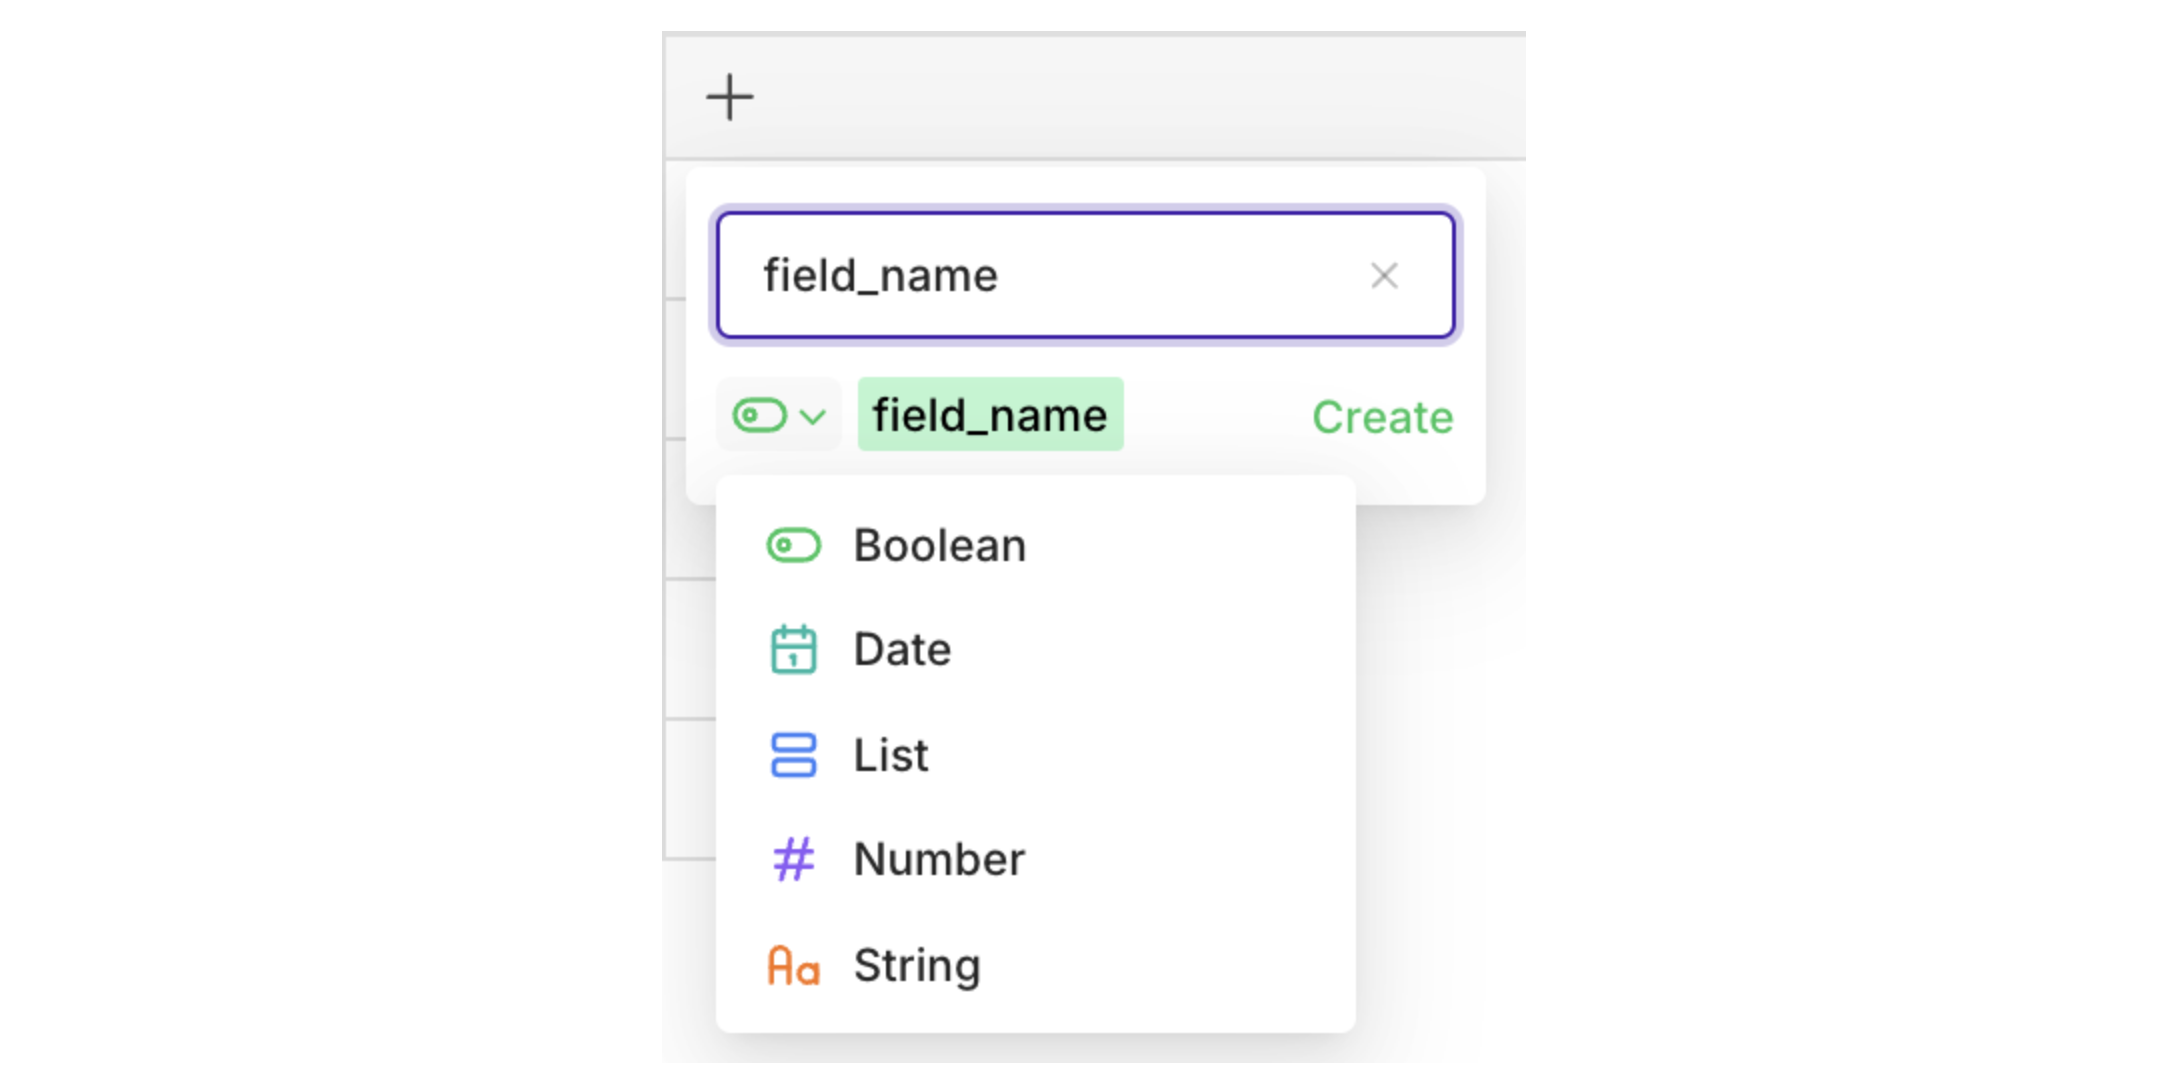
To add a new context field, press the+ button a the top right of the Routing table.
You can set a name for your field as well as type, chosen betweenboolean,date,list,number, andstring
Routing Conditions
You can create a custom routing condition for each field, with any Variant. To create a condition, simply enter a value in the corresponding cell.Condition Operators
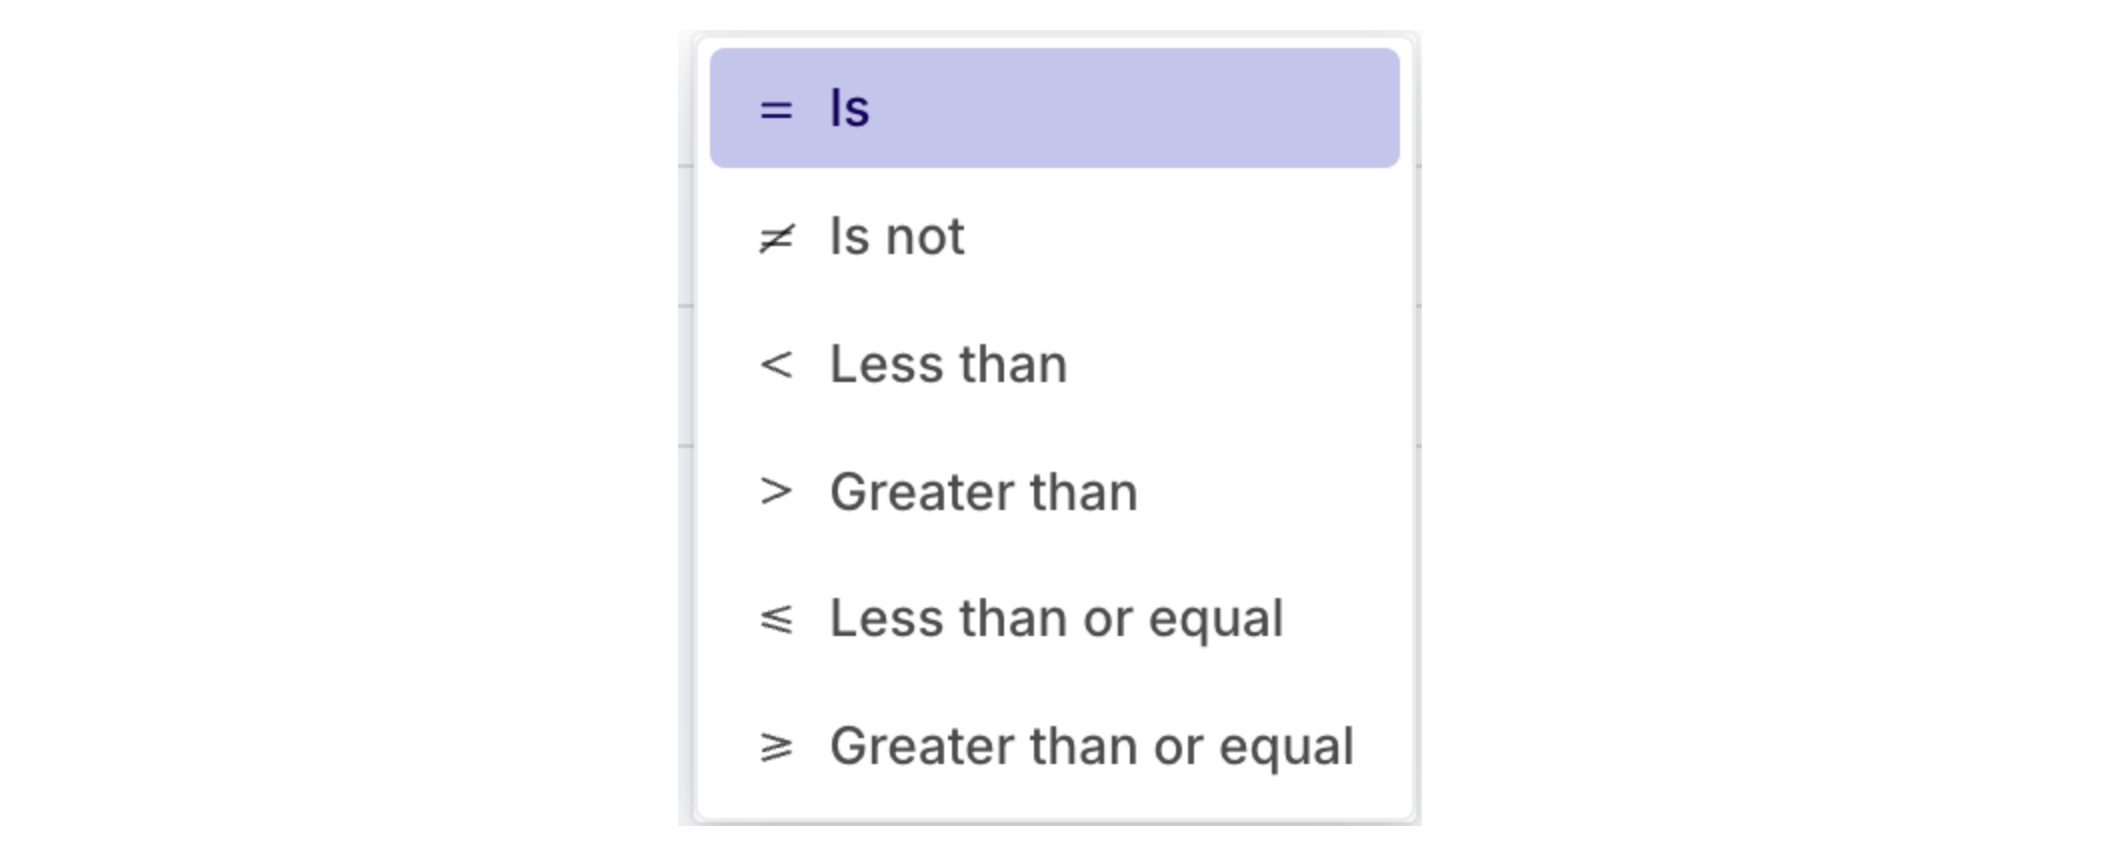
By default the= operator will be chosen to test your condition (context value must be equal to the routing condition value).
You can change the operator by clicking on the = symbol, then select the desired operator for your condition.
Using the Simulator to test Routing
At any time you can test your routing by opening the Simulator by selecting the Simulator Icon at the top-right of the panel. The following modal will open:Here you can enter values for all of the field configuration and select Simulate to see which model the query will be routed to
Versioning
Version Control lets you track all changes made to your model prompt configuration. At each deployment a new commit is made and history is kept throughout. You are able to look back at all changes and revert to any version you desire.Deploying a new version
When you configuration is complete and ready to be integrated in your systems, you can press the Deploy button on the Deployment’s Variant screen.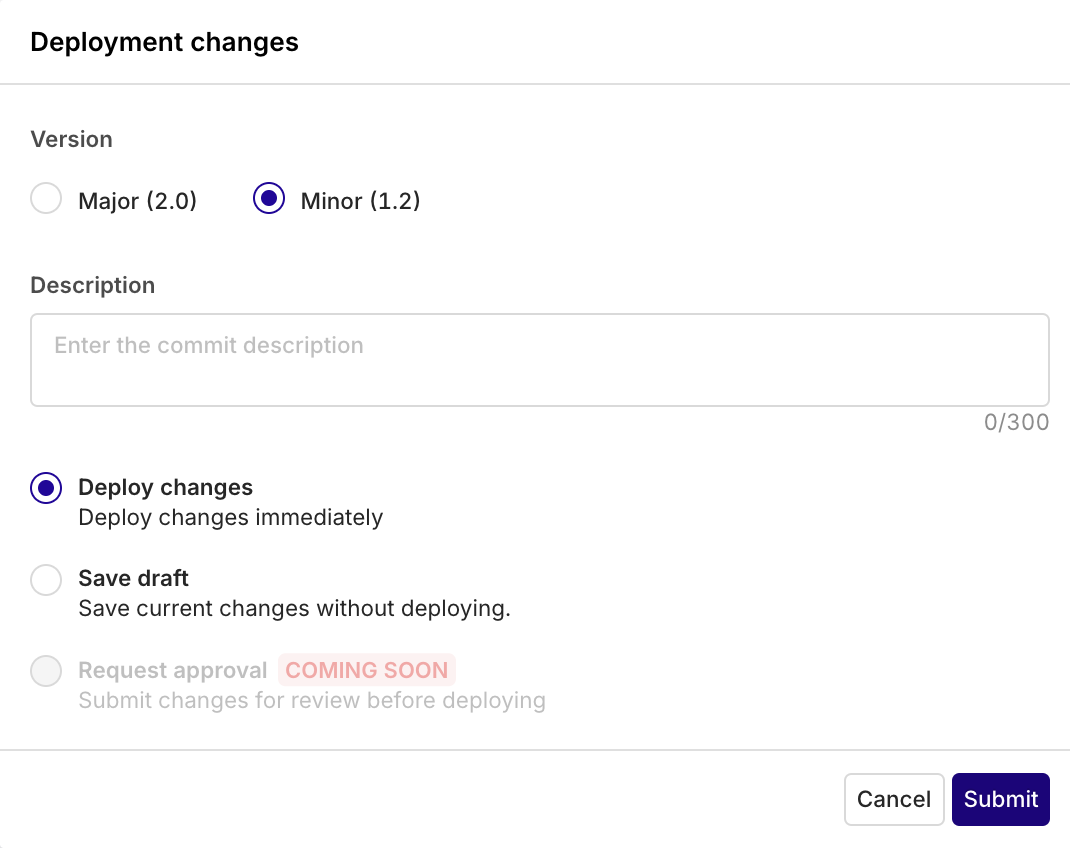
Comparing Changes
To compare changes between your configuration and the previous one, select the Compare Changes button at the top-right of the screen. Visualize changes to a configuration in a side-by-side JSON view.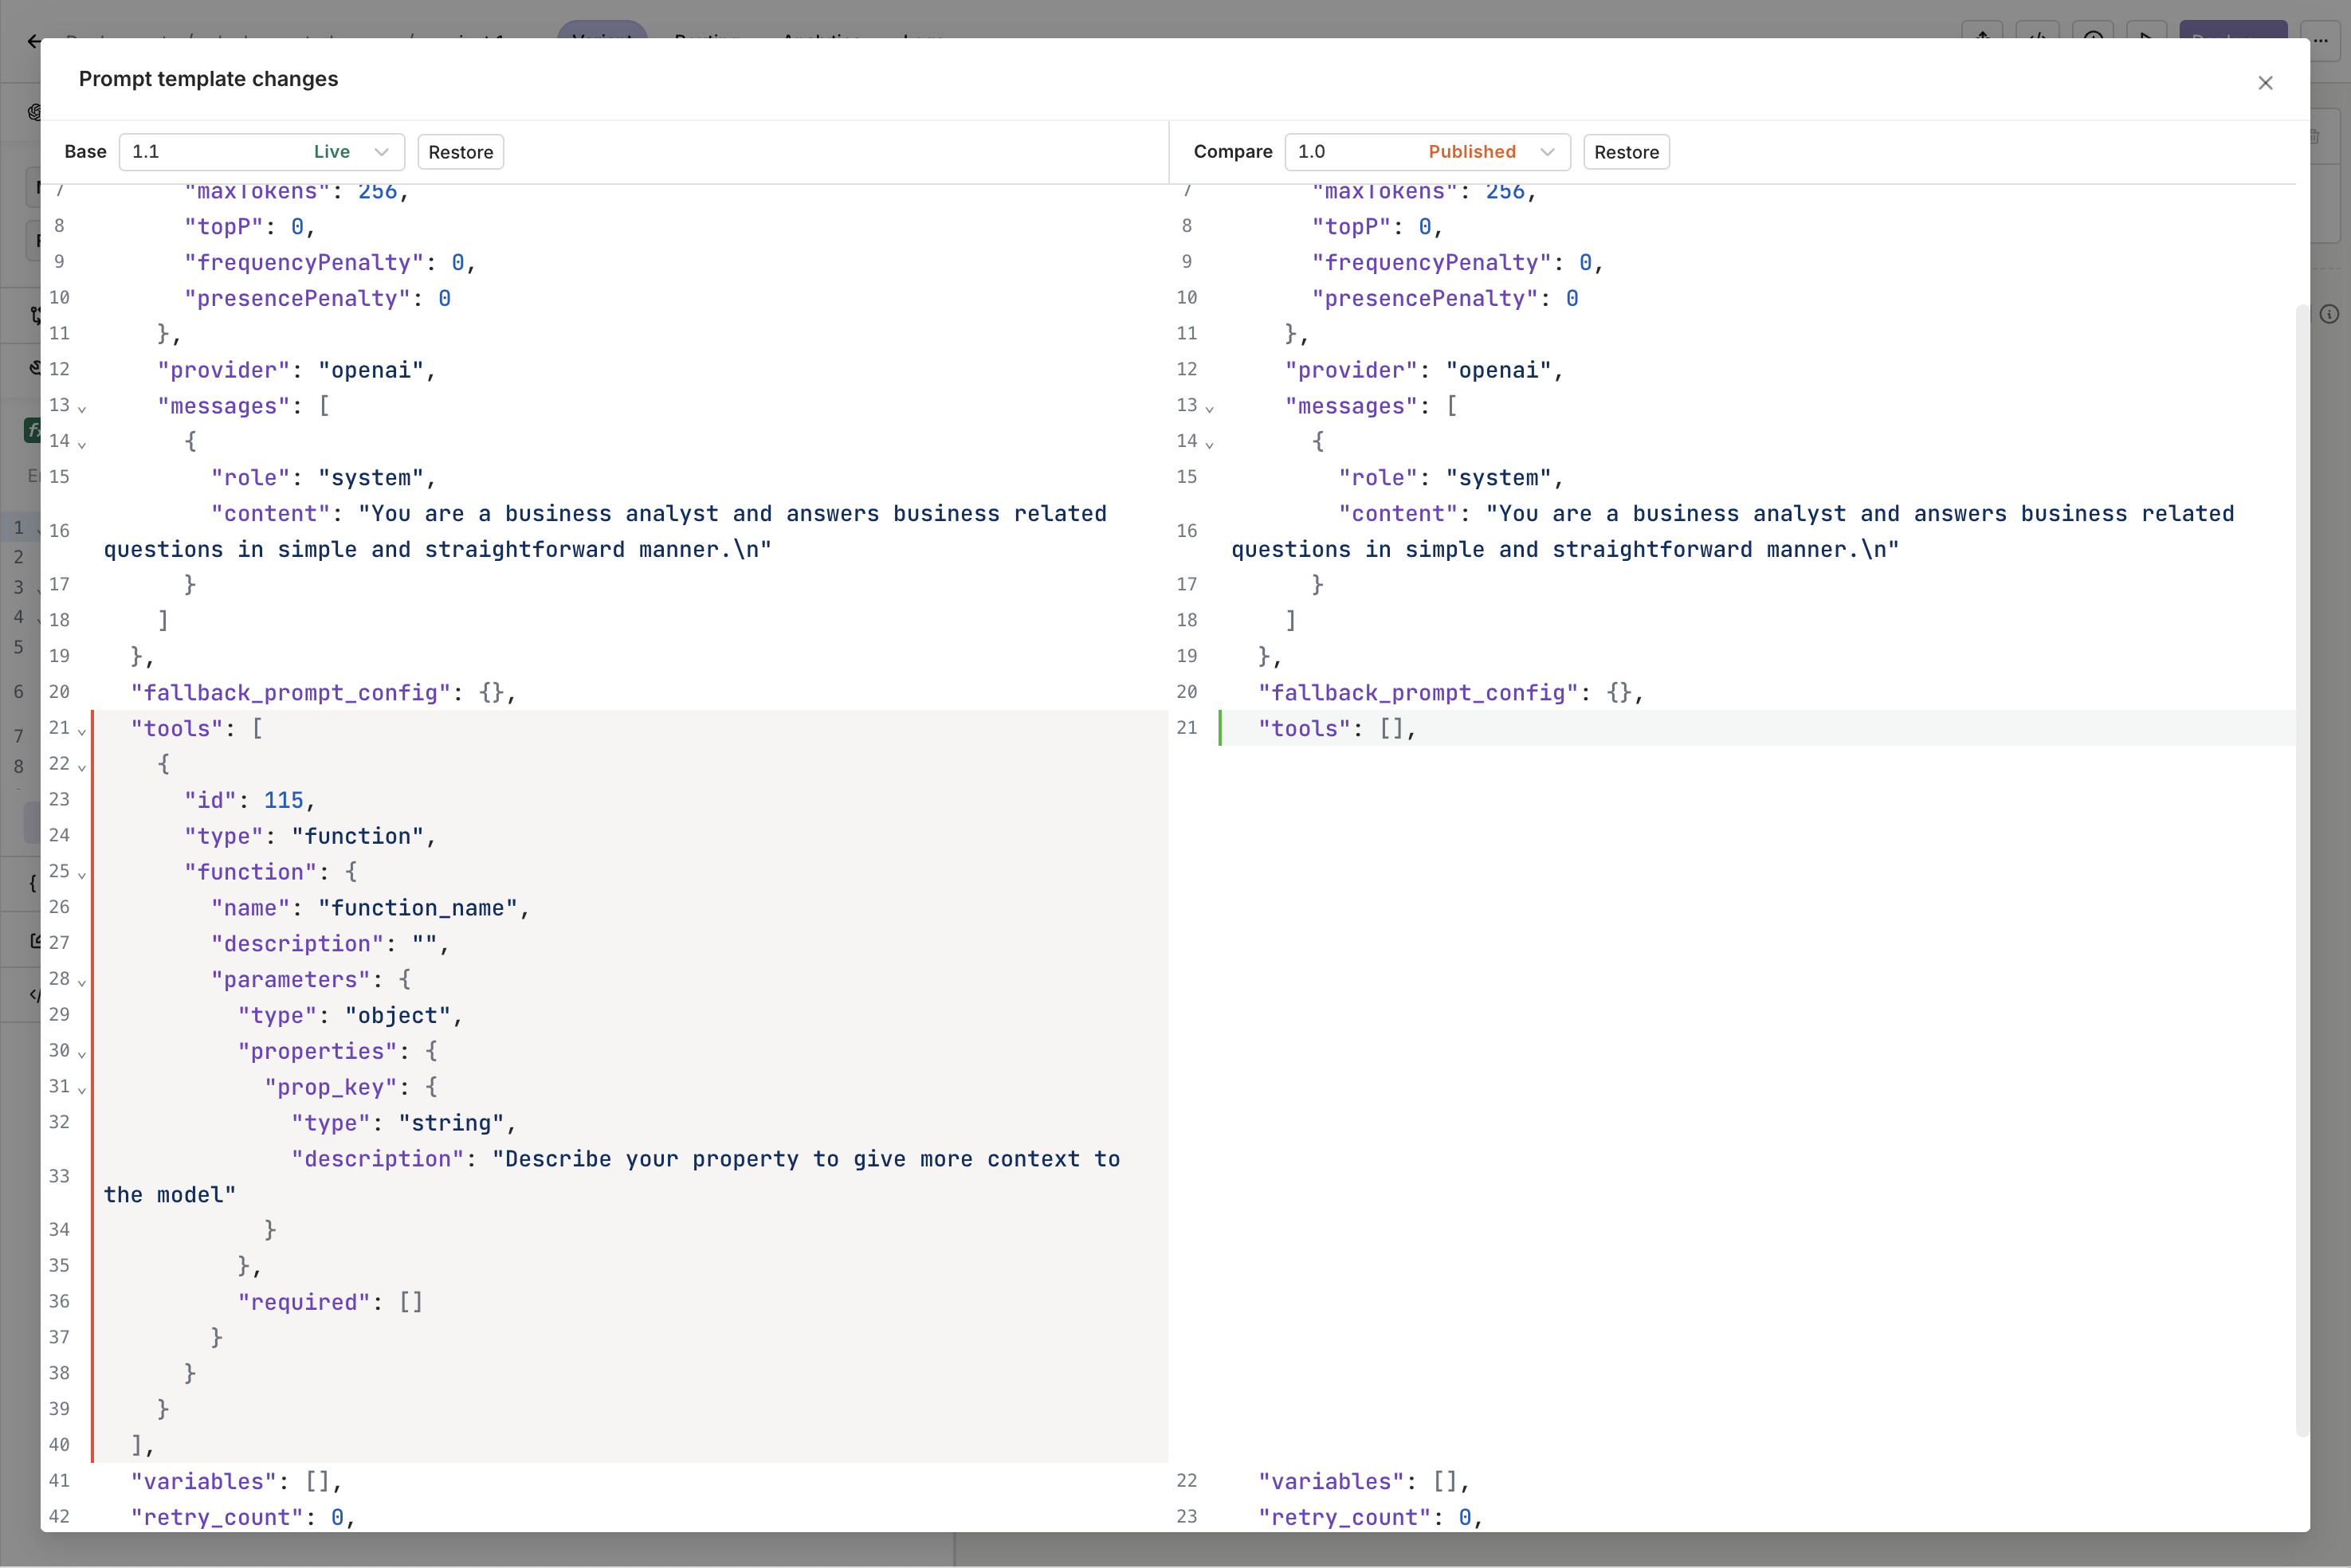
Analytics
Once a Deployment is running and called from within your systems, you’ll be able to see detailed analytics of all requests made.To learn more about Analytics, see Deployment Analytics.
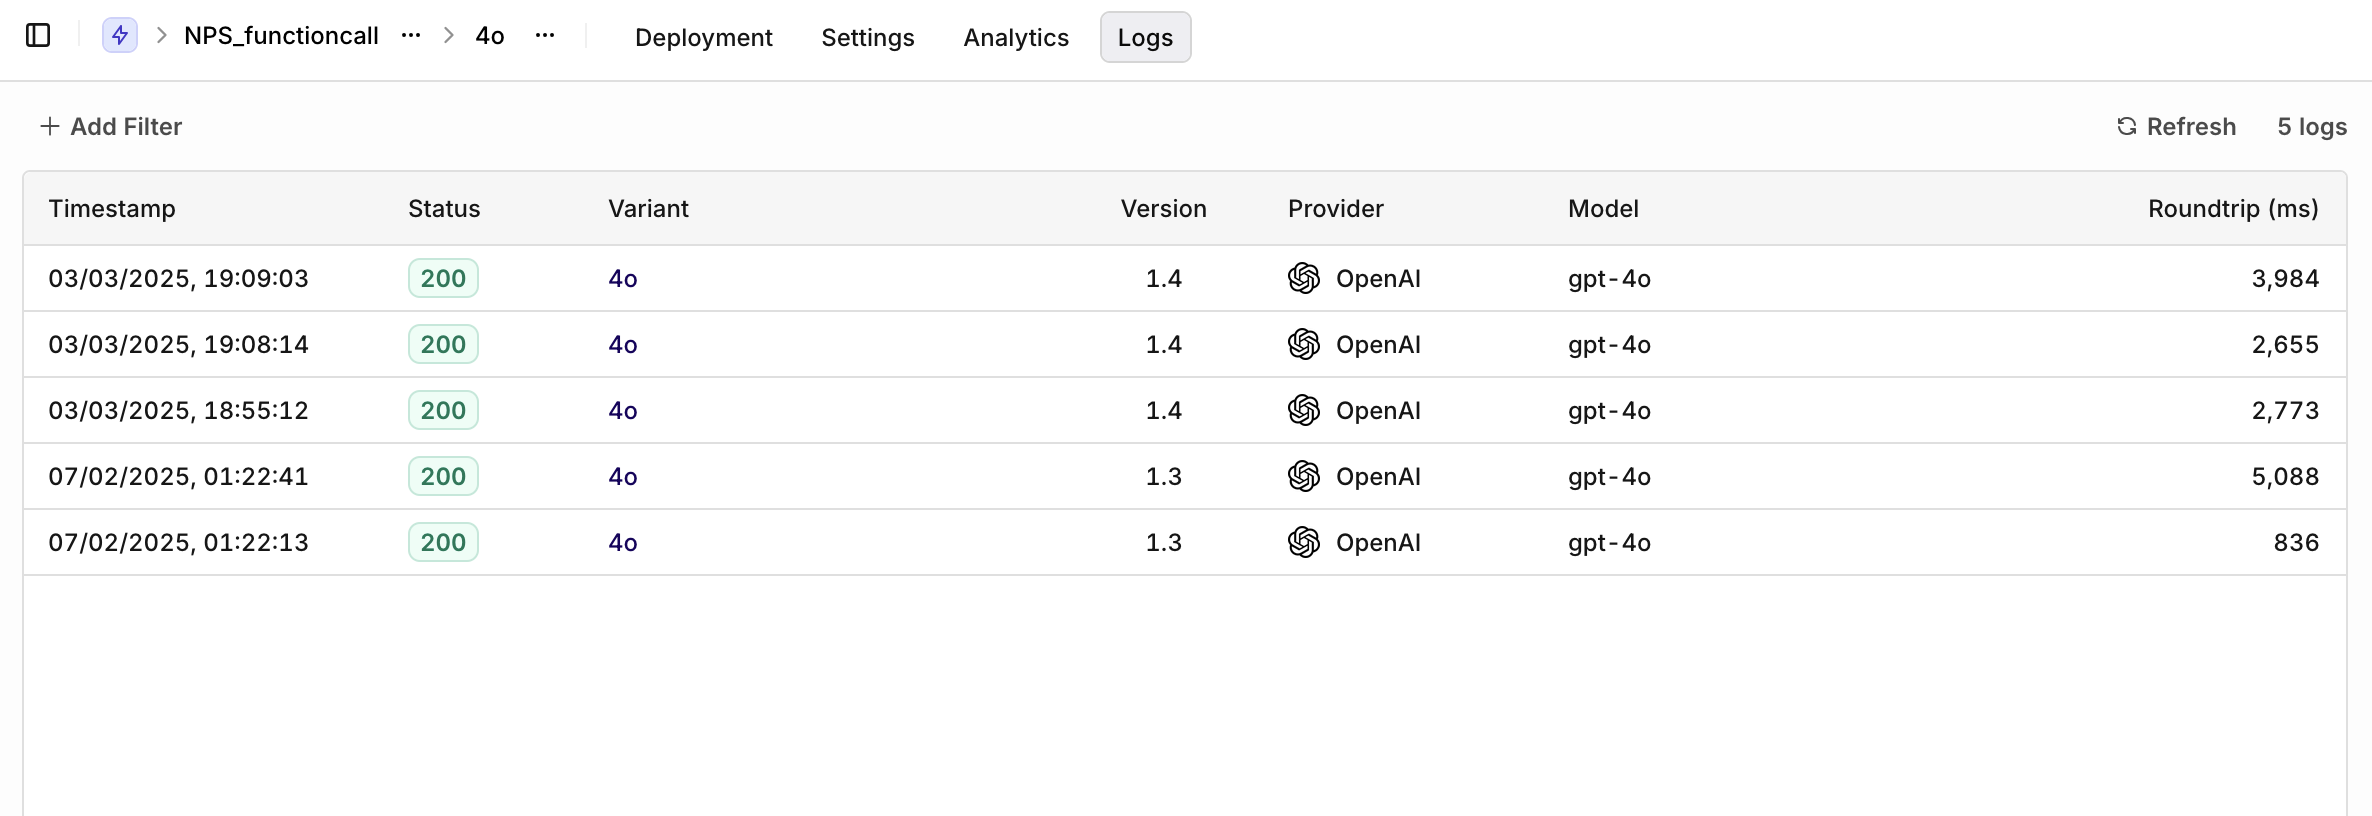
Logs
On top of analytics, you are able to visualize logs for all Variants. You have the following filters available:- Variant to select a single variant to see logs for.
- Evaluation: Matched (Routing rule was matched to a variant) or Default Matched (No routing rule was matched, default variant was chosen).
- Source: API, SDK, or Simulator to identify logs coming from different systems.