

Create
Configure
Routing
Versioning
Invoke
Analytics
Create a Deployment
- AI Studio
- MCP
 AI Studio
 MCP
MCPOpen the AI Studio
Choose Deployment
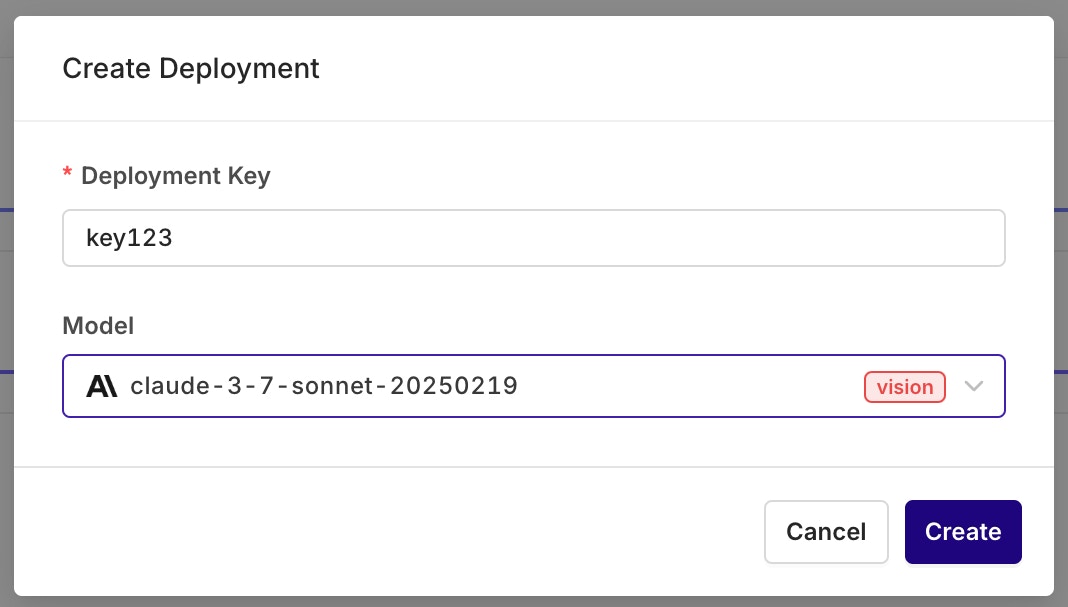
Configure the deployment key and primary model. All settings can be changed later.
Configure the initial Variant
Configure a Variant
Variants are different prompt and model configurations available behind one Deployment. A Deployment can hold any number of Variants. On creation, the Variant screen opens for model and prompt setup.Primary Model, Retries, and Fallback
- AI Studio
- 429 Rate Limit Exceeded
- 500 Internal Server Error
- 501 Not Implemented
- 502 Bad Gateway
- 503 Service Unavailable
- If an error code above is returned and retries are configured (retry count > 0), Orq.ai retries the Primary Model.
- If all retry attempts fail (or no retries are configured) AND a Fallback Model is configured, Orq.ai routes to the Fallback Model.
- If the Fallback Model also fails, the error is returned to the calling application.
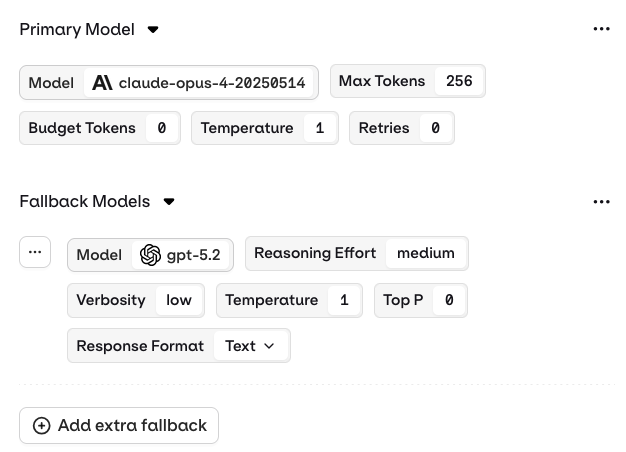
The Fallback Model configuration is right below the main model configuration. Configure them independently.
- Success on first try: Response returned immediately.
- Retry scenario: Response may be delayed by up to
base_latency × (retry_count + 1)to account for the initial attempt plus all configured retries. - Fallback invoked: Additional latency as the Fallback Model processes the request.
- All retries and fallback failed: Error returned to the calling application.
Structured Outputs
- AI Studio
- JSON Mode: the model automatically returns a valid JSON object for every generation.
- JSON Schema: define a schema that explicitly describes the fields, types, and structure of the model output.
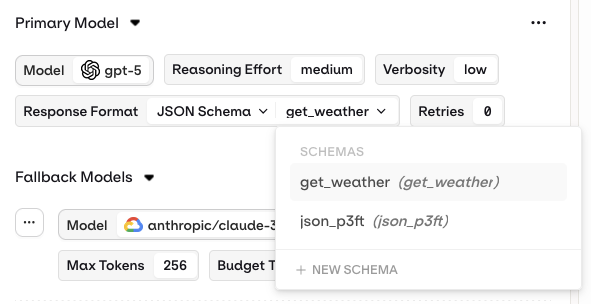
Set the Response Format to JSON Schema to configure structured output.
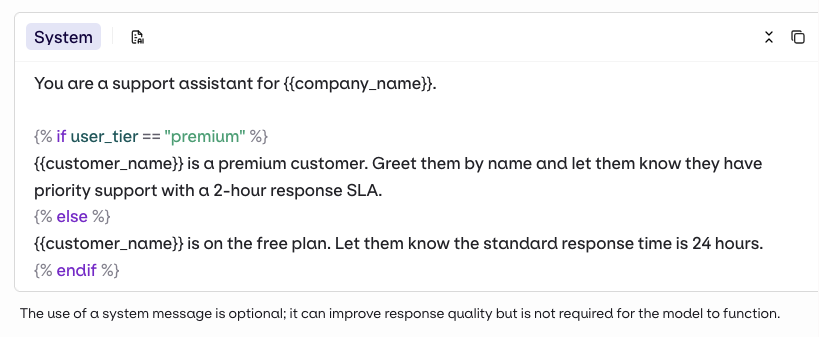
Variables and Prompt Templating
- AI Studio
- API & SDK
{{variable_name}}. Pass a key-value map to the inputs field when invoking and Orq.ai substitutes each variable before sending the prompt to the model.- Text (default): variables use
{{double_braces}}syntax. - Jinja: full templating with conditionals, loops, filters, and more.
- Mustache: logic-less templating with sections.
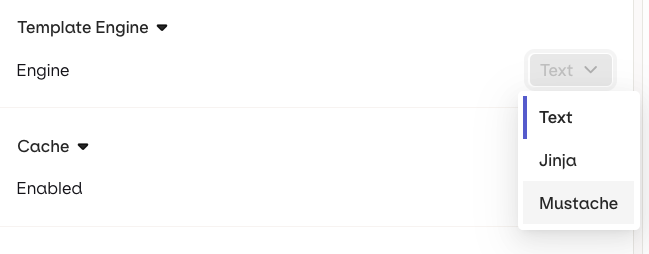
Select a Template Engine in the Variant Settings panel.
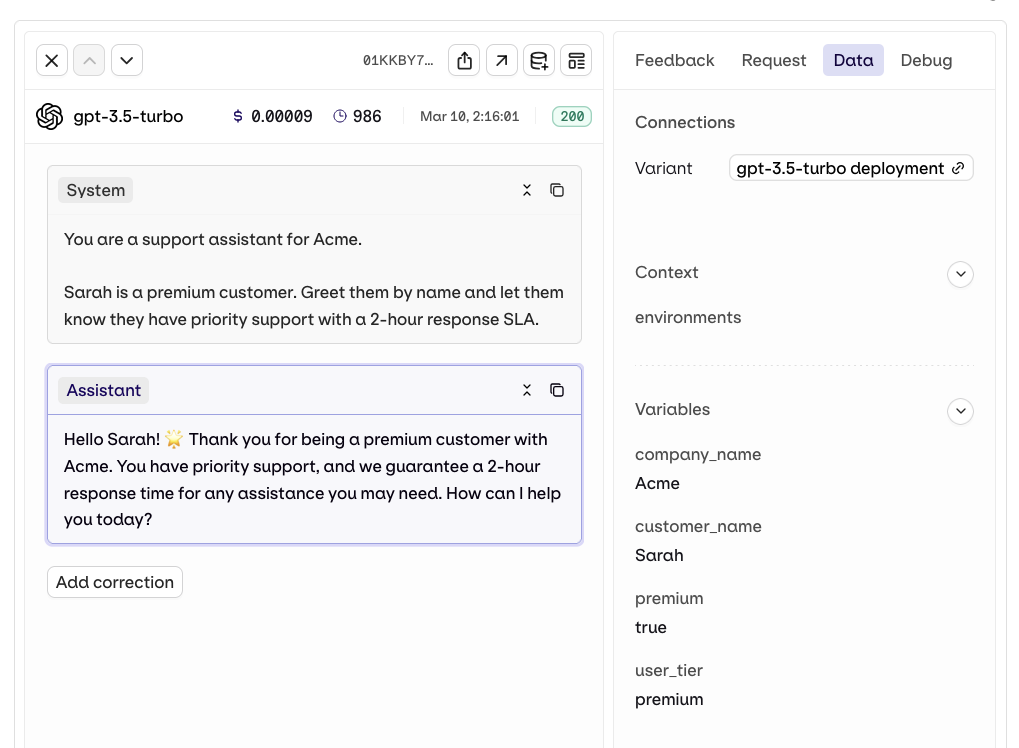
Jinja example
Jinja example
Prompt template
Template in the Studio
Call the deployment
Trace
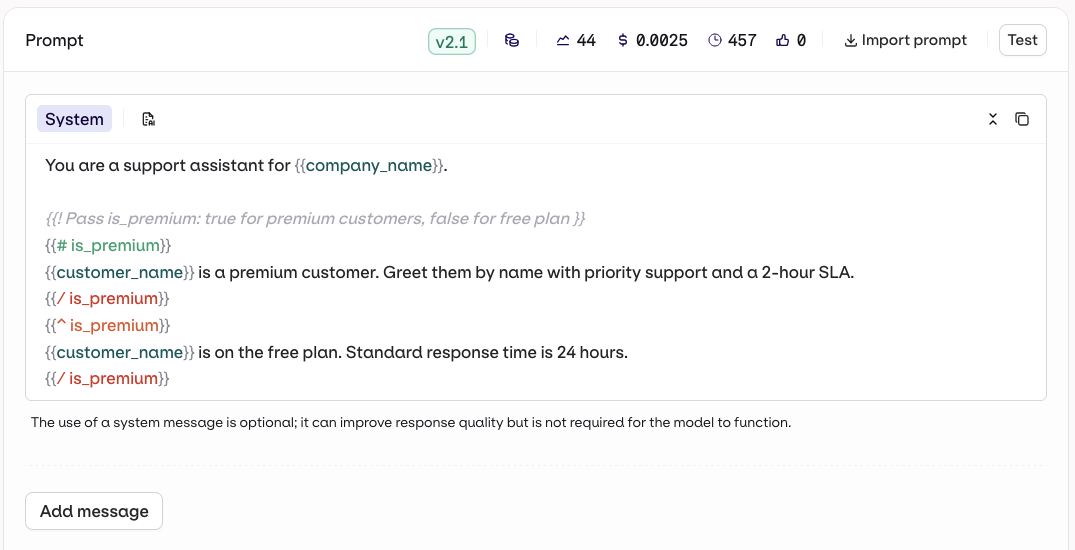
Mustache example
Mustache example
Prompt template
Template in the Studio
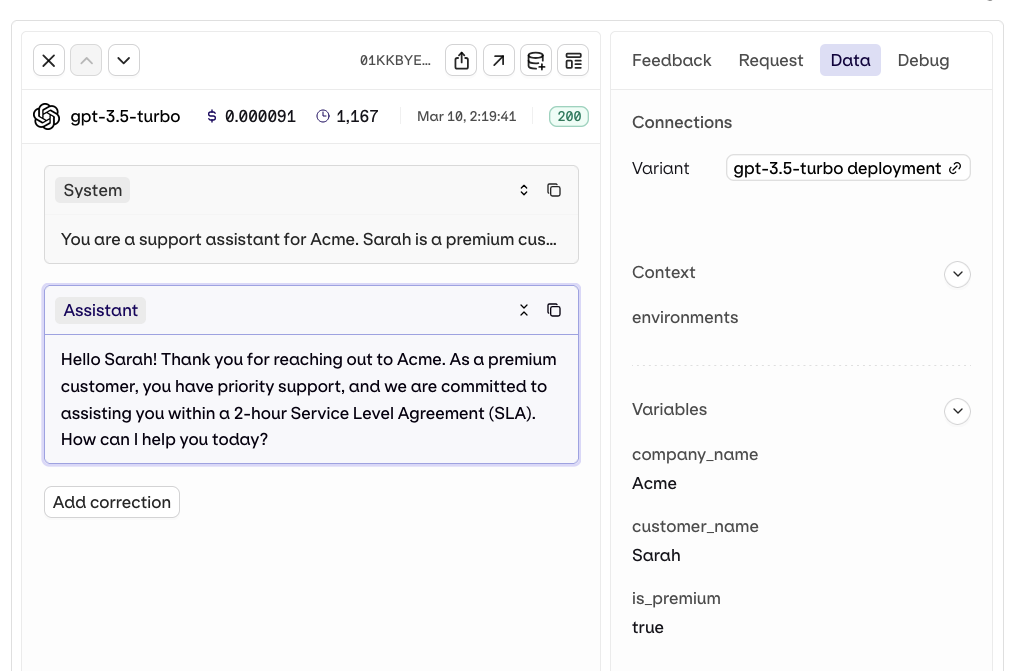
Call the deployment
Trace
Knowledge Base
- AI Studio
- API & SDK
... menu on an attached Knowledge Base):- Last User Message: the user’s latest message is automatically used as a query to retrieve relevant chunks.
- Query: a predefined query is used to retrieve chunks. Use Input Variables like
{{query}}to make it dynamic at runtime.
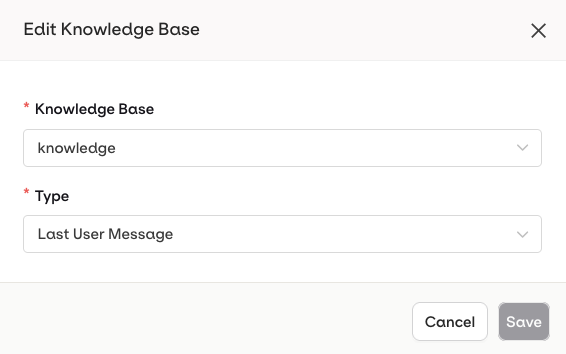
Configure which Knowledge Base to use and how it should be queried in the deployment.
{{knowledge_base_key}} syntax, where knowledge_base_key is the identifier of the Knowledge Base. If the Knowledge Base is not explicitly referenced in the prompt, retrieved chunks are automatically appended to the end of the system message.
Using a Knowledge Base in a prompt.

Tools
- AI Studio
- Create a new Tool: define a custom function directly within the deployment.
- Import an existing Tool: select a previously created Function tool from the resource library.
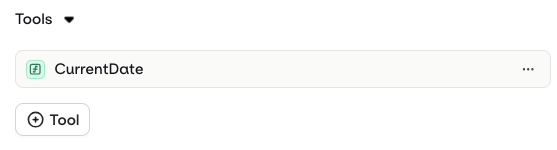
Configure function tools the model can call during deployment execution.
Cache
- AI Studio
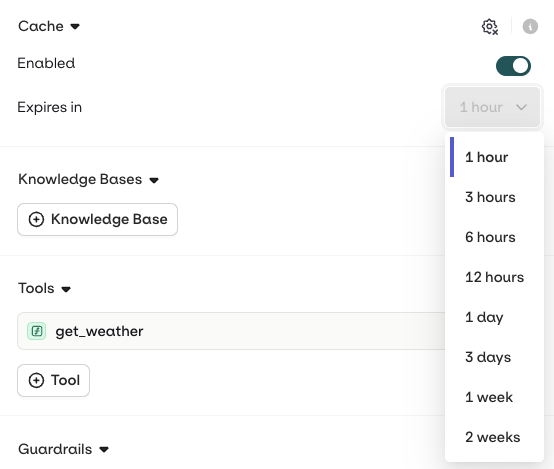
Configure the cache expiration time.
Evaluators and Guardrails
- AI Studio
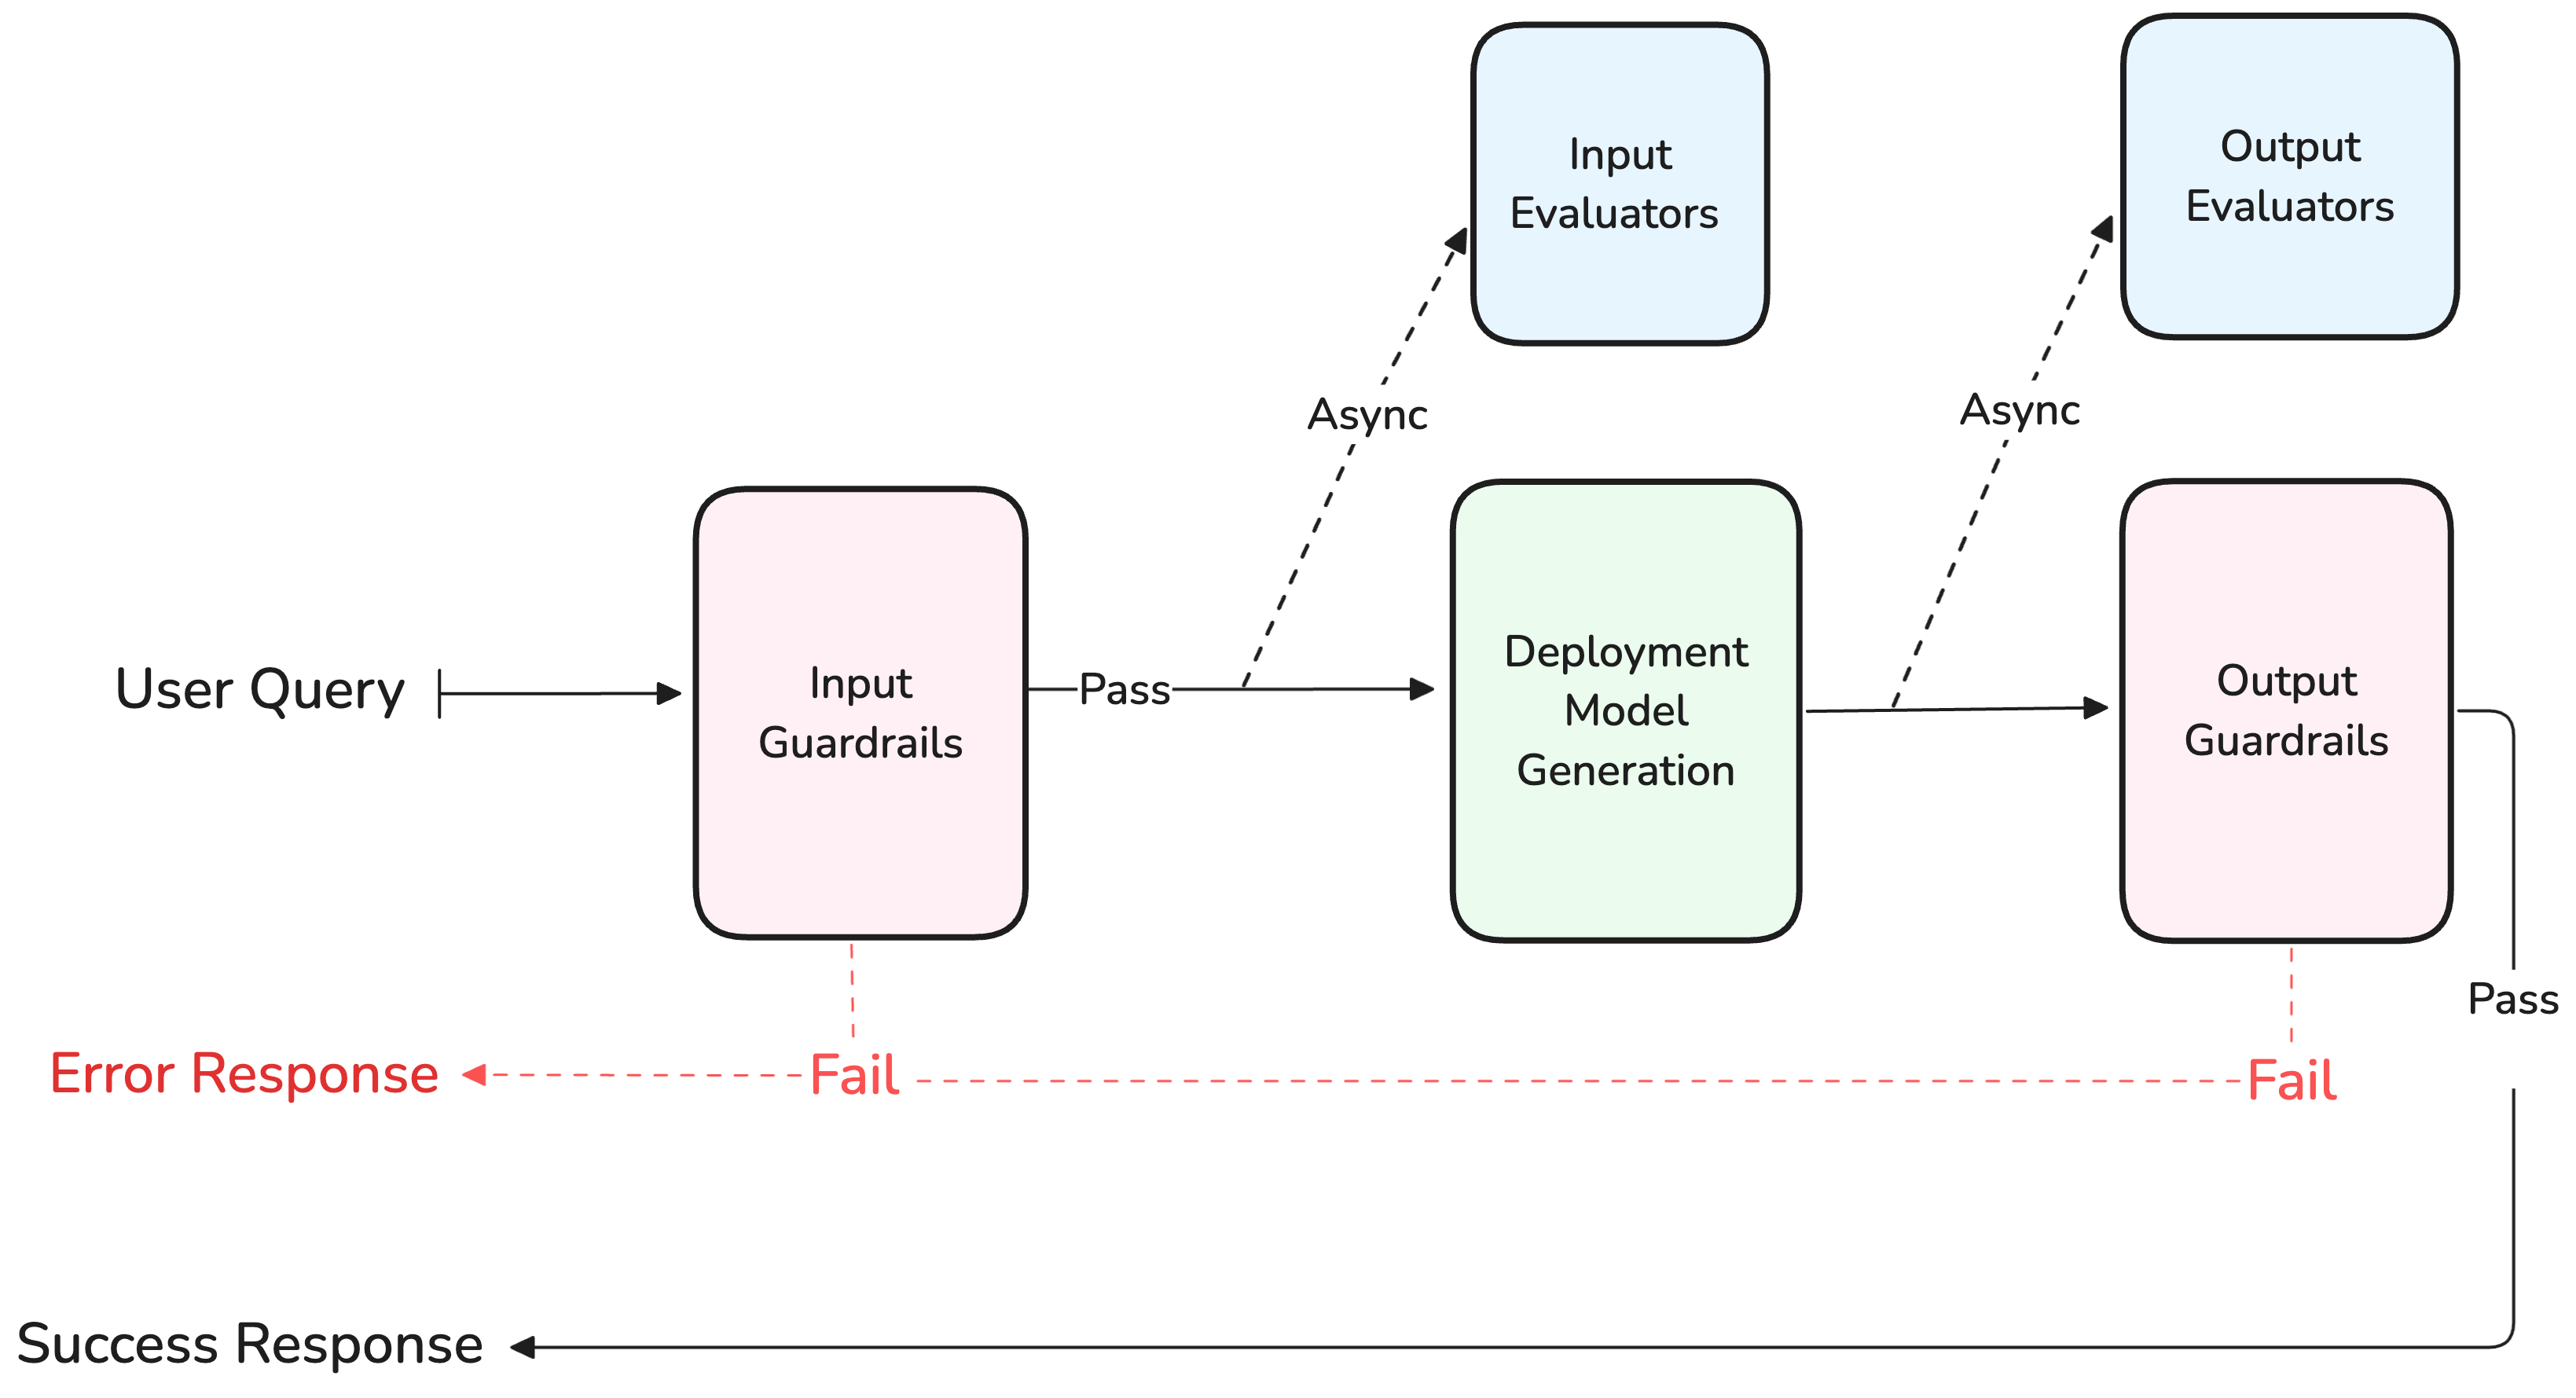
Guardrails execute synchronously and can block a generation, while Evaluators run asynchronously and never block the response.
- Input evaluator: runs evaluation on the input sent to the model.
- Output evaluator: runs evaluation on the output generated by the model.
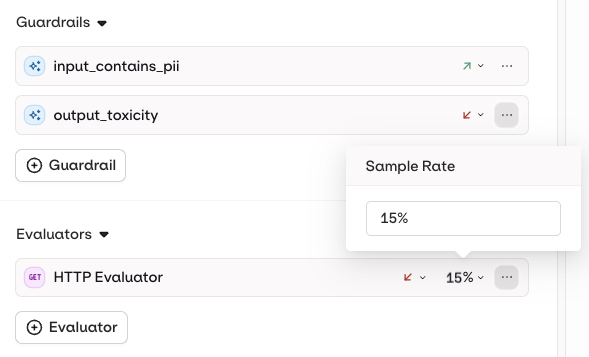
Configure a Sample Rate (0–100%) on each evaluator to control how frequently it runs.
- Input Guardrail: runs before the input is sent to the model.
- Output Guardrail: runs after generation, before client response.
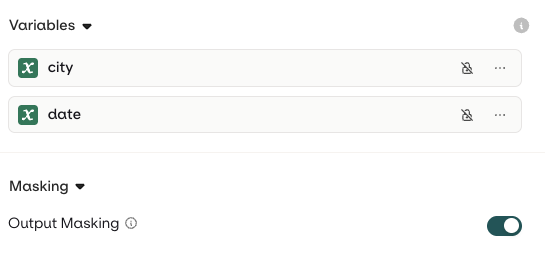
Security and Privacy
- AI Studio
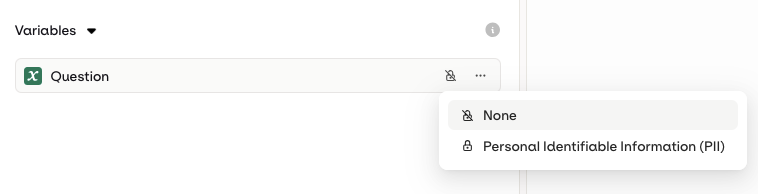
Once deployed, the input value will not be logged within Orq systems.
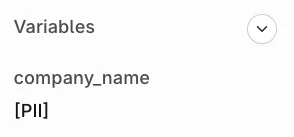
![Trace detail for gpt-4o showing a user message say hello to {name} and the assistant reply Hello, [name]! How are you today?](https://mintcdn.com/orqai/E8L3R46ivX7g9-QI/images/docs/955b175e6f005d7f112a98e54d3468acb0b72f001a150ced0ac4262128321179-iScreen_Shoter_-_Google_Chrome_-_250317122231.jpg?fit=max&auto=format&n=E8L3R46ivX7g9-QI&q=85&s=700d1089a333f51107572e98bb4a0a05)
Add a Variant
- AI Studio
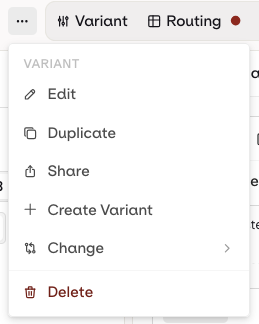
Switch between Variants and add a new Variant to a Deployment at any time.
Routing
- AI Studio
Each row represents a single Variant. Each column represents a single Context field. Each cell represents a Value for a Context field to be matched with a Variant.
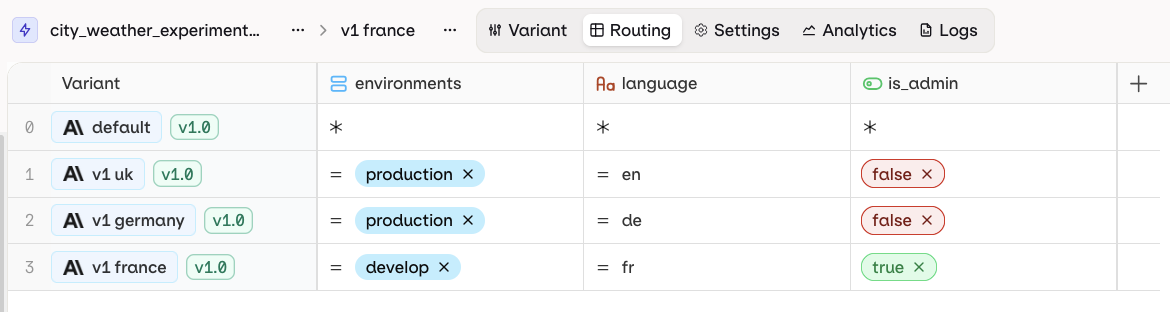
An example routing table.
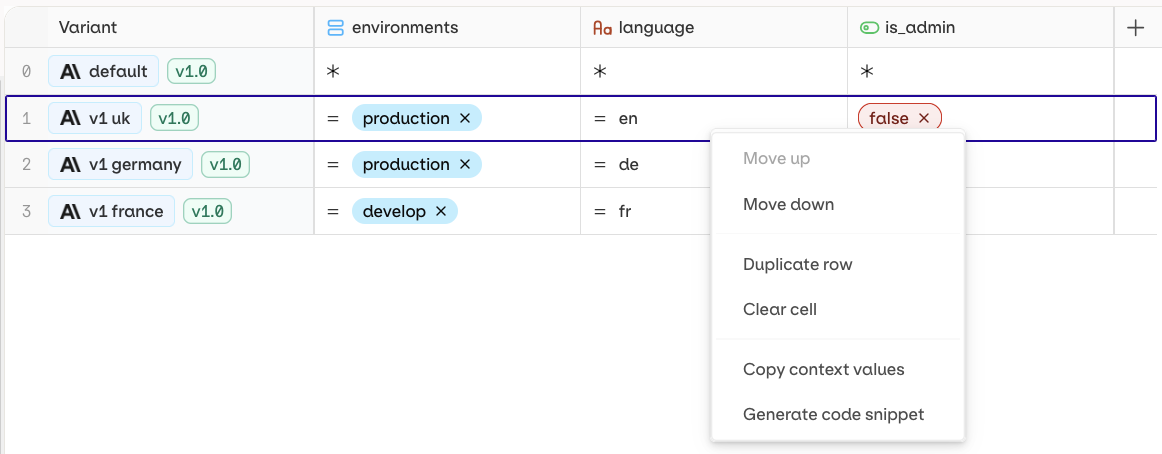
Right-click on the variant path to generate code snippets.
boolean, date, list, number, or string.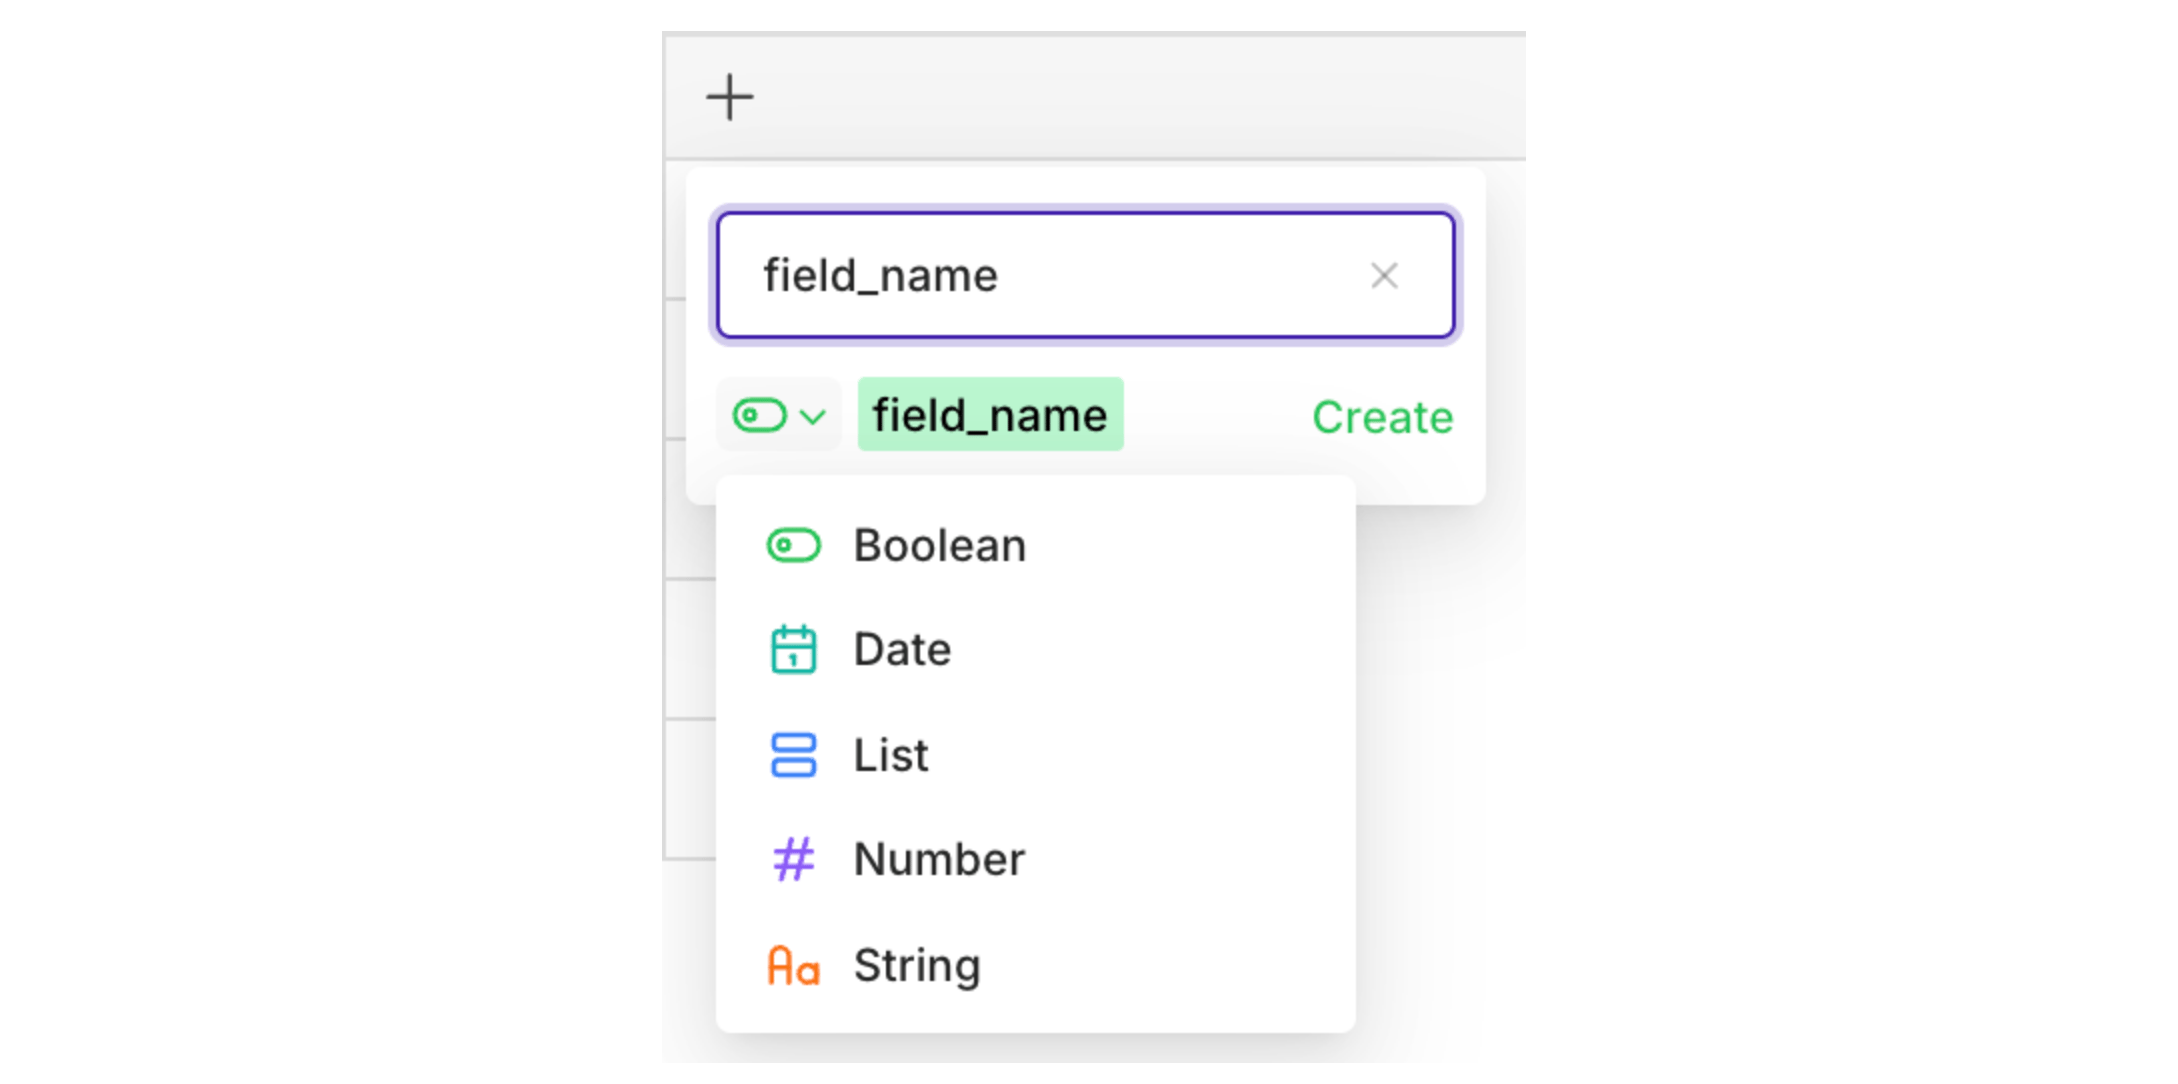
= operator is used. Click = to change the operator.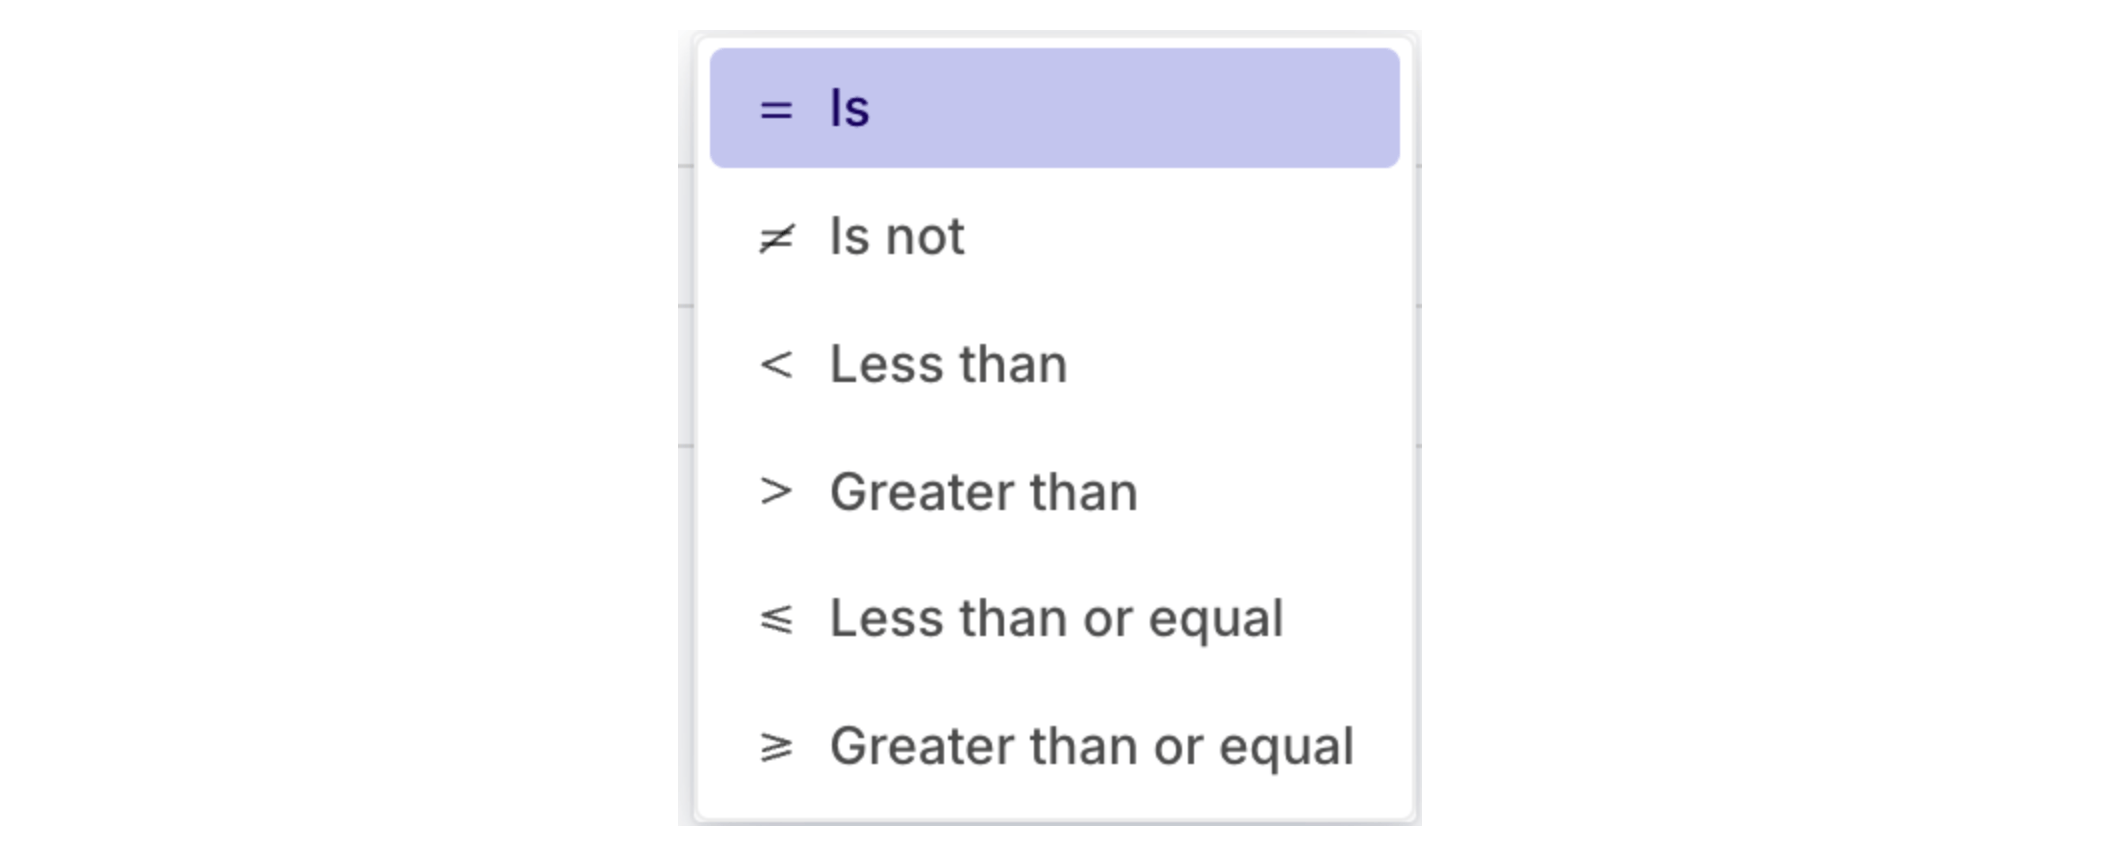
Different operators are available depending on the field type.
Versioning
- AI Studio

The Deploy button is enabled once there are changes to commit.
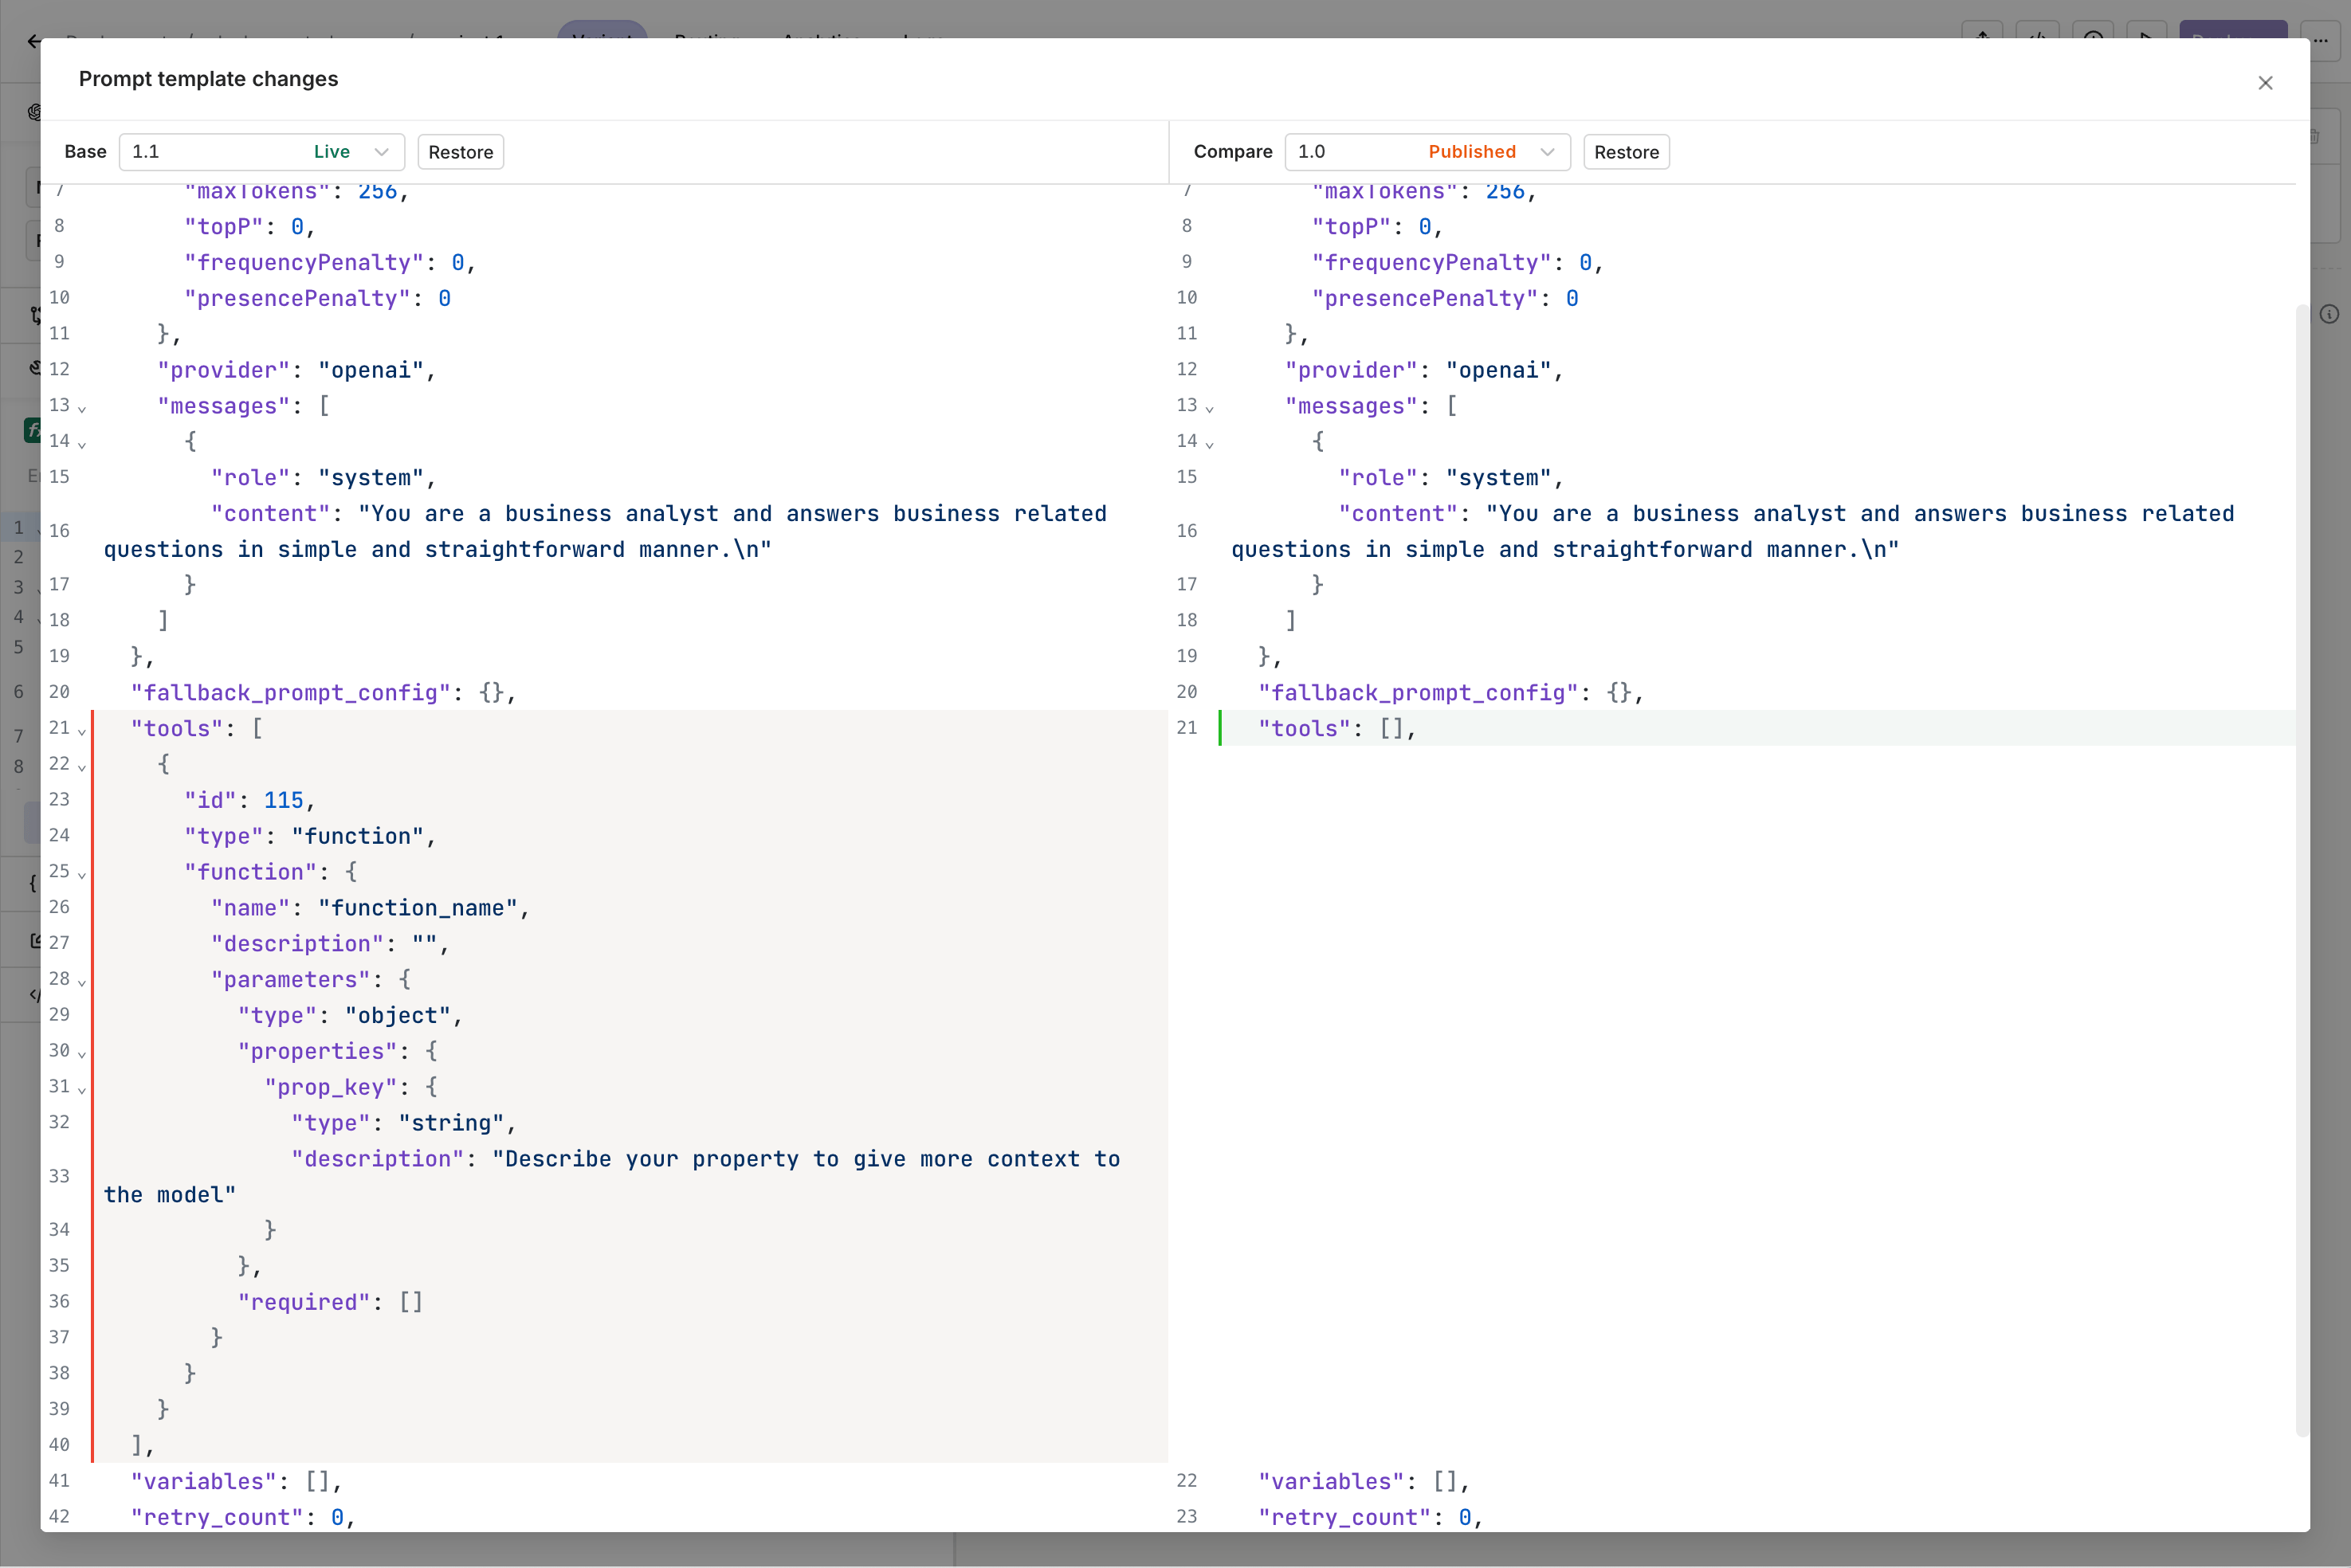
Side-by-side visualization of two versions of the same Variant.
Test a Deployment
- AI Studio
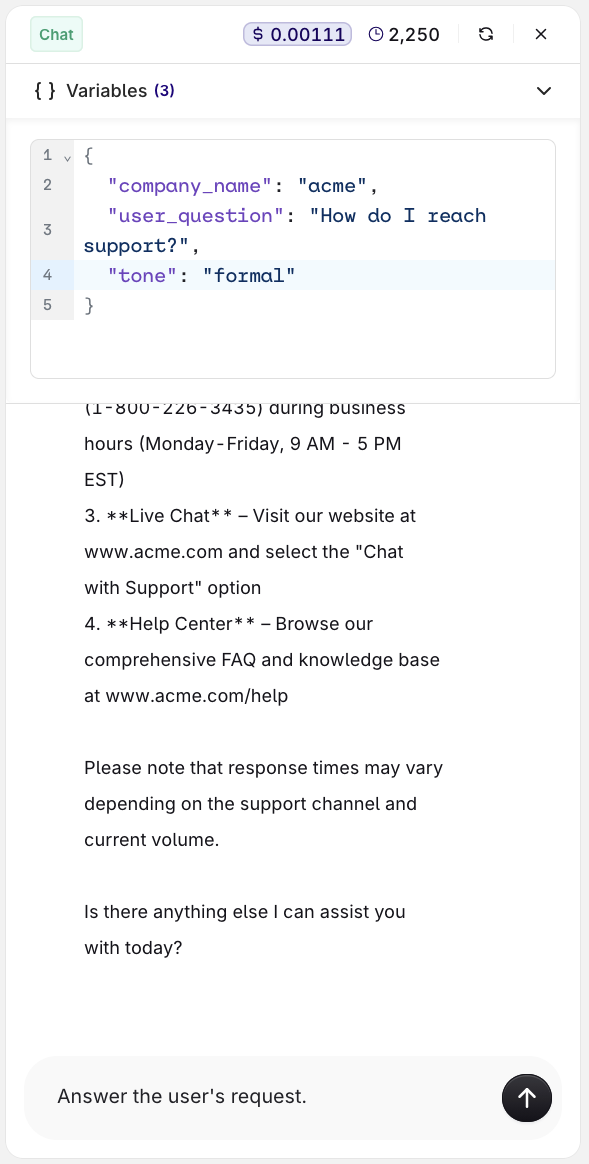
The Test panel with variable inputs and the model response.
Invoke a Deployment
- AI Studio
- API & SDK
The Code Snippet button at the top-right of the Variant page.
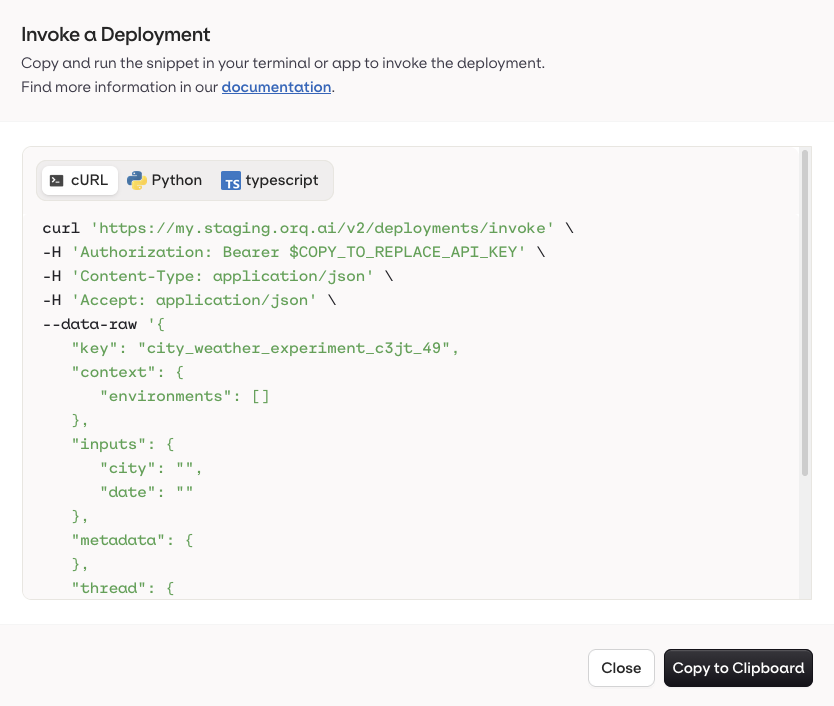
The Code Snippet panel with all integration languages.
-
Open a Deployment and go to the Routing page.

- Right-click the target Variant and select Generate Code Snippet.
Extra Parameters
- API & SDK
extra_params to pass parameters not directly exposed by the Orq.ai panel, or to override existing model configuration at runtime.Passing an unsupported parameter:Attach Files
- API & SDK
file_ids / fileIds parameter on deployment invocations is deprecated and will be removed in a future release. Use native file attachment instead.- Send PDFs directly to the model in the invocation payload.
- Attach a Knowledge Base to the Deployment.
file type message with a standard data URI scheme: data:content/type;base64 followed by the base64-encoded file data.Analytics and Logs
- AI Studio
- Variant: select a single Variant to filter logs.
- Evaluation: Matched (a routing rule was matched) or Default Matched (no routing rule matched, default Variant was used).
- Source: API, SDK, or Simulator.
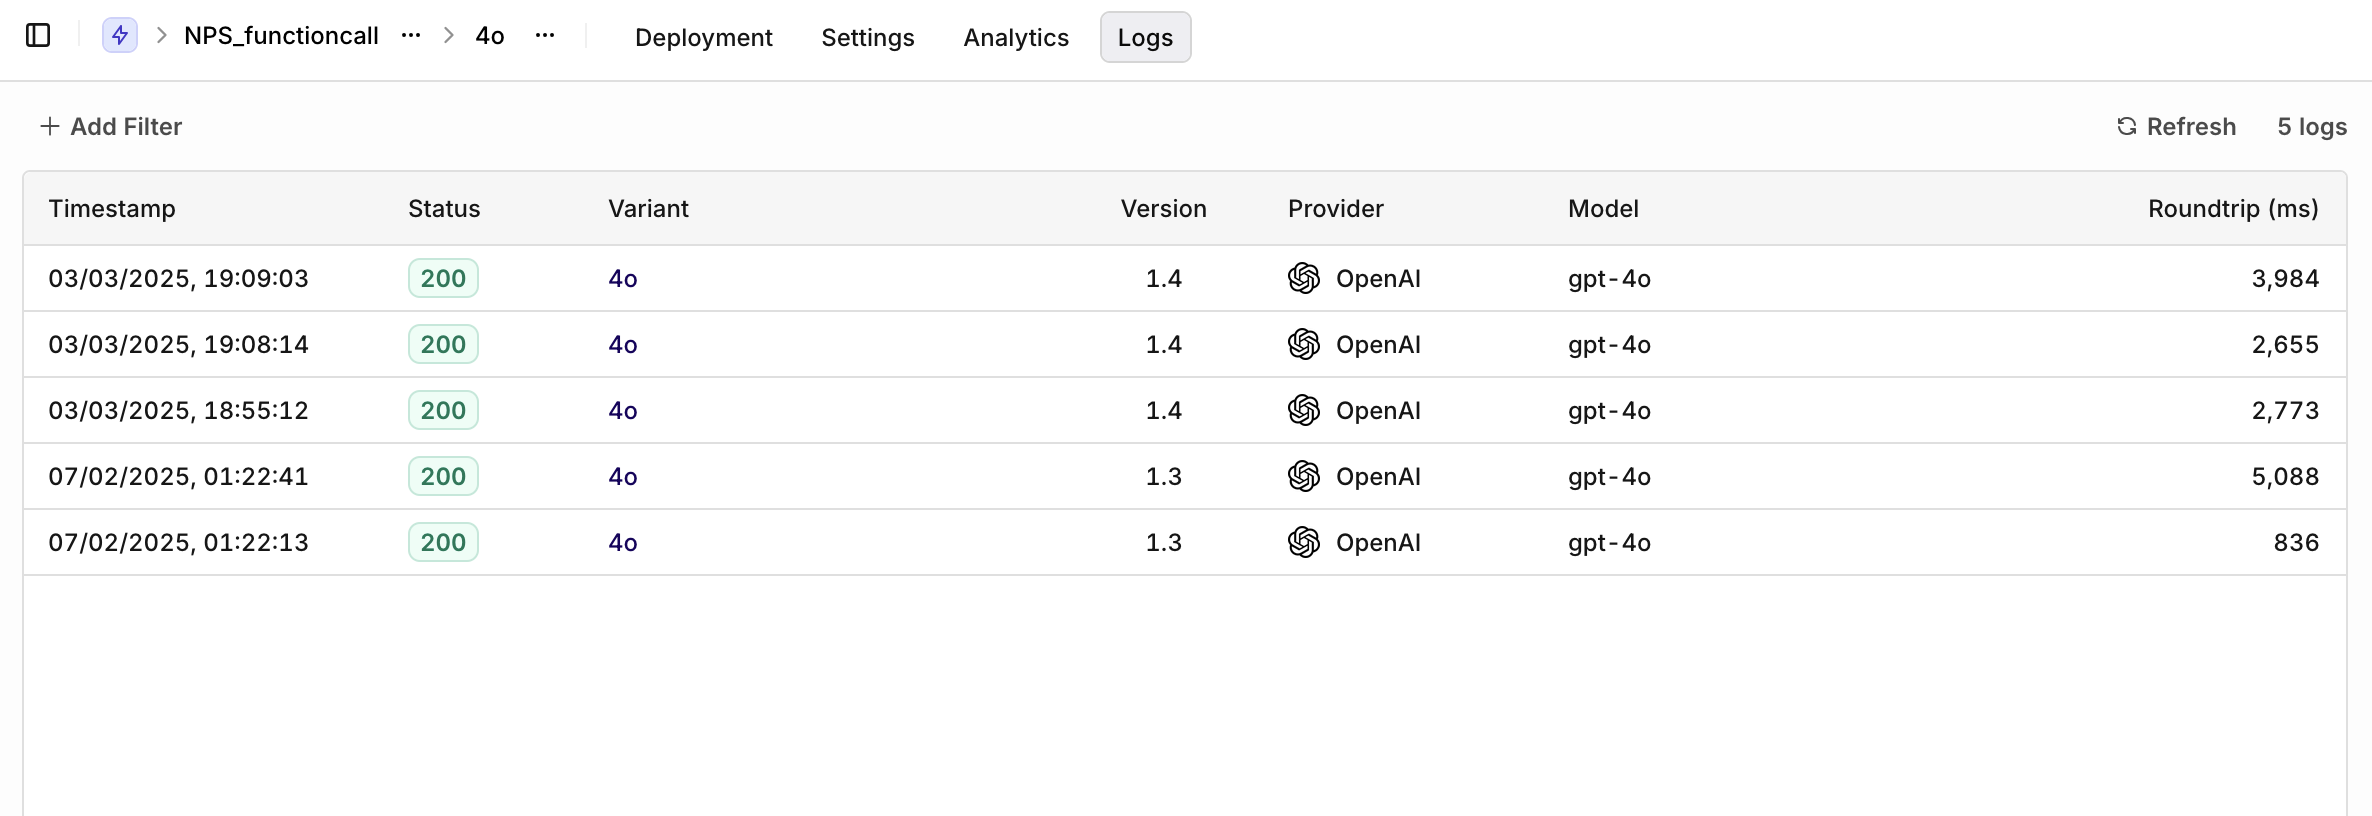
Logs overview.