Currently available only on n8n Desktop and self-hosted. Not yet supported on n8n Cloud.
1. Installation
- Open n8n
- Go to Settings (click on your profile icon in the bottom left)
- Select “Community Nodes”
- Click “Install a community node”
- Enter:
@orq-ai/n8n-nodes-orq
- Click “Install”
The node will be downloaded from npm and installed automatically. You may need to refresh your browser or restart n8n Desktop for the node to appear.
2. Get Your API Key
- Sign up at orq.ai
- Go to Workspace settings → API Keys
- Copy the key
3. Add Credentials in n8n
- Go to Credentials → New
- Search for “Orq API”
- Paste your API key
- Name it and save
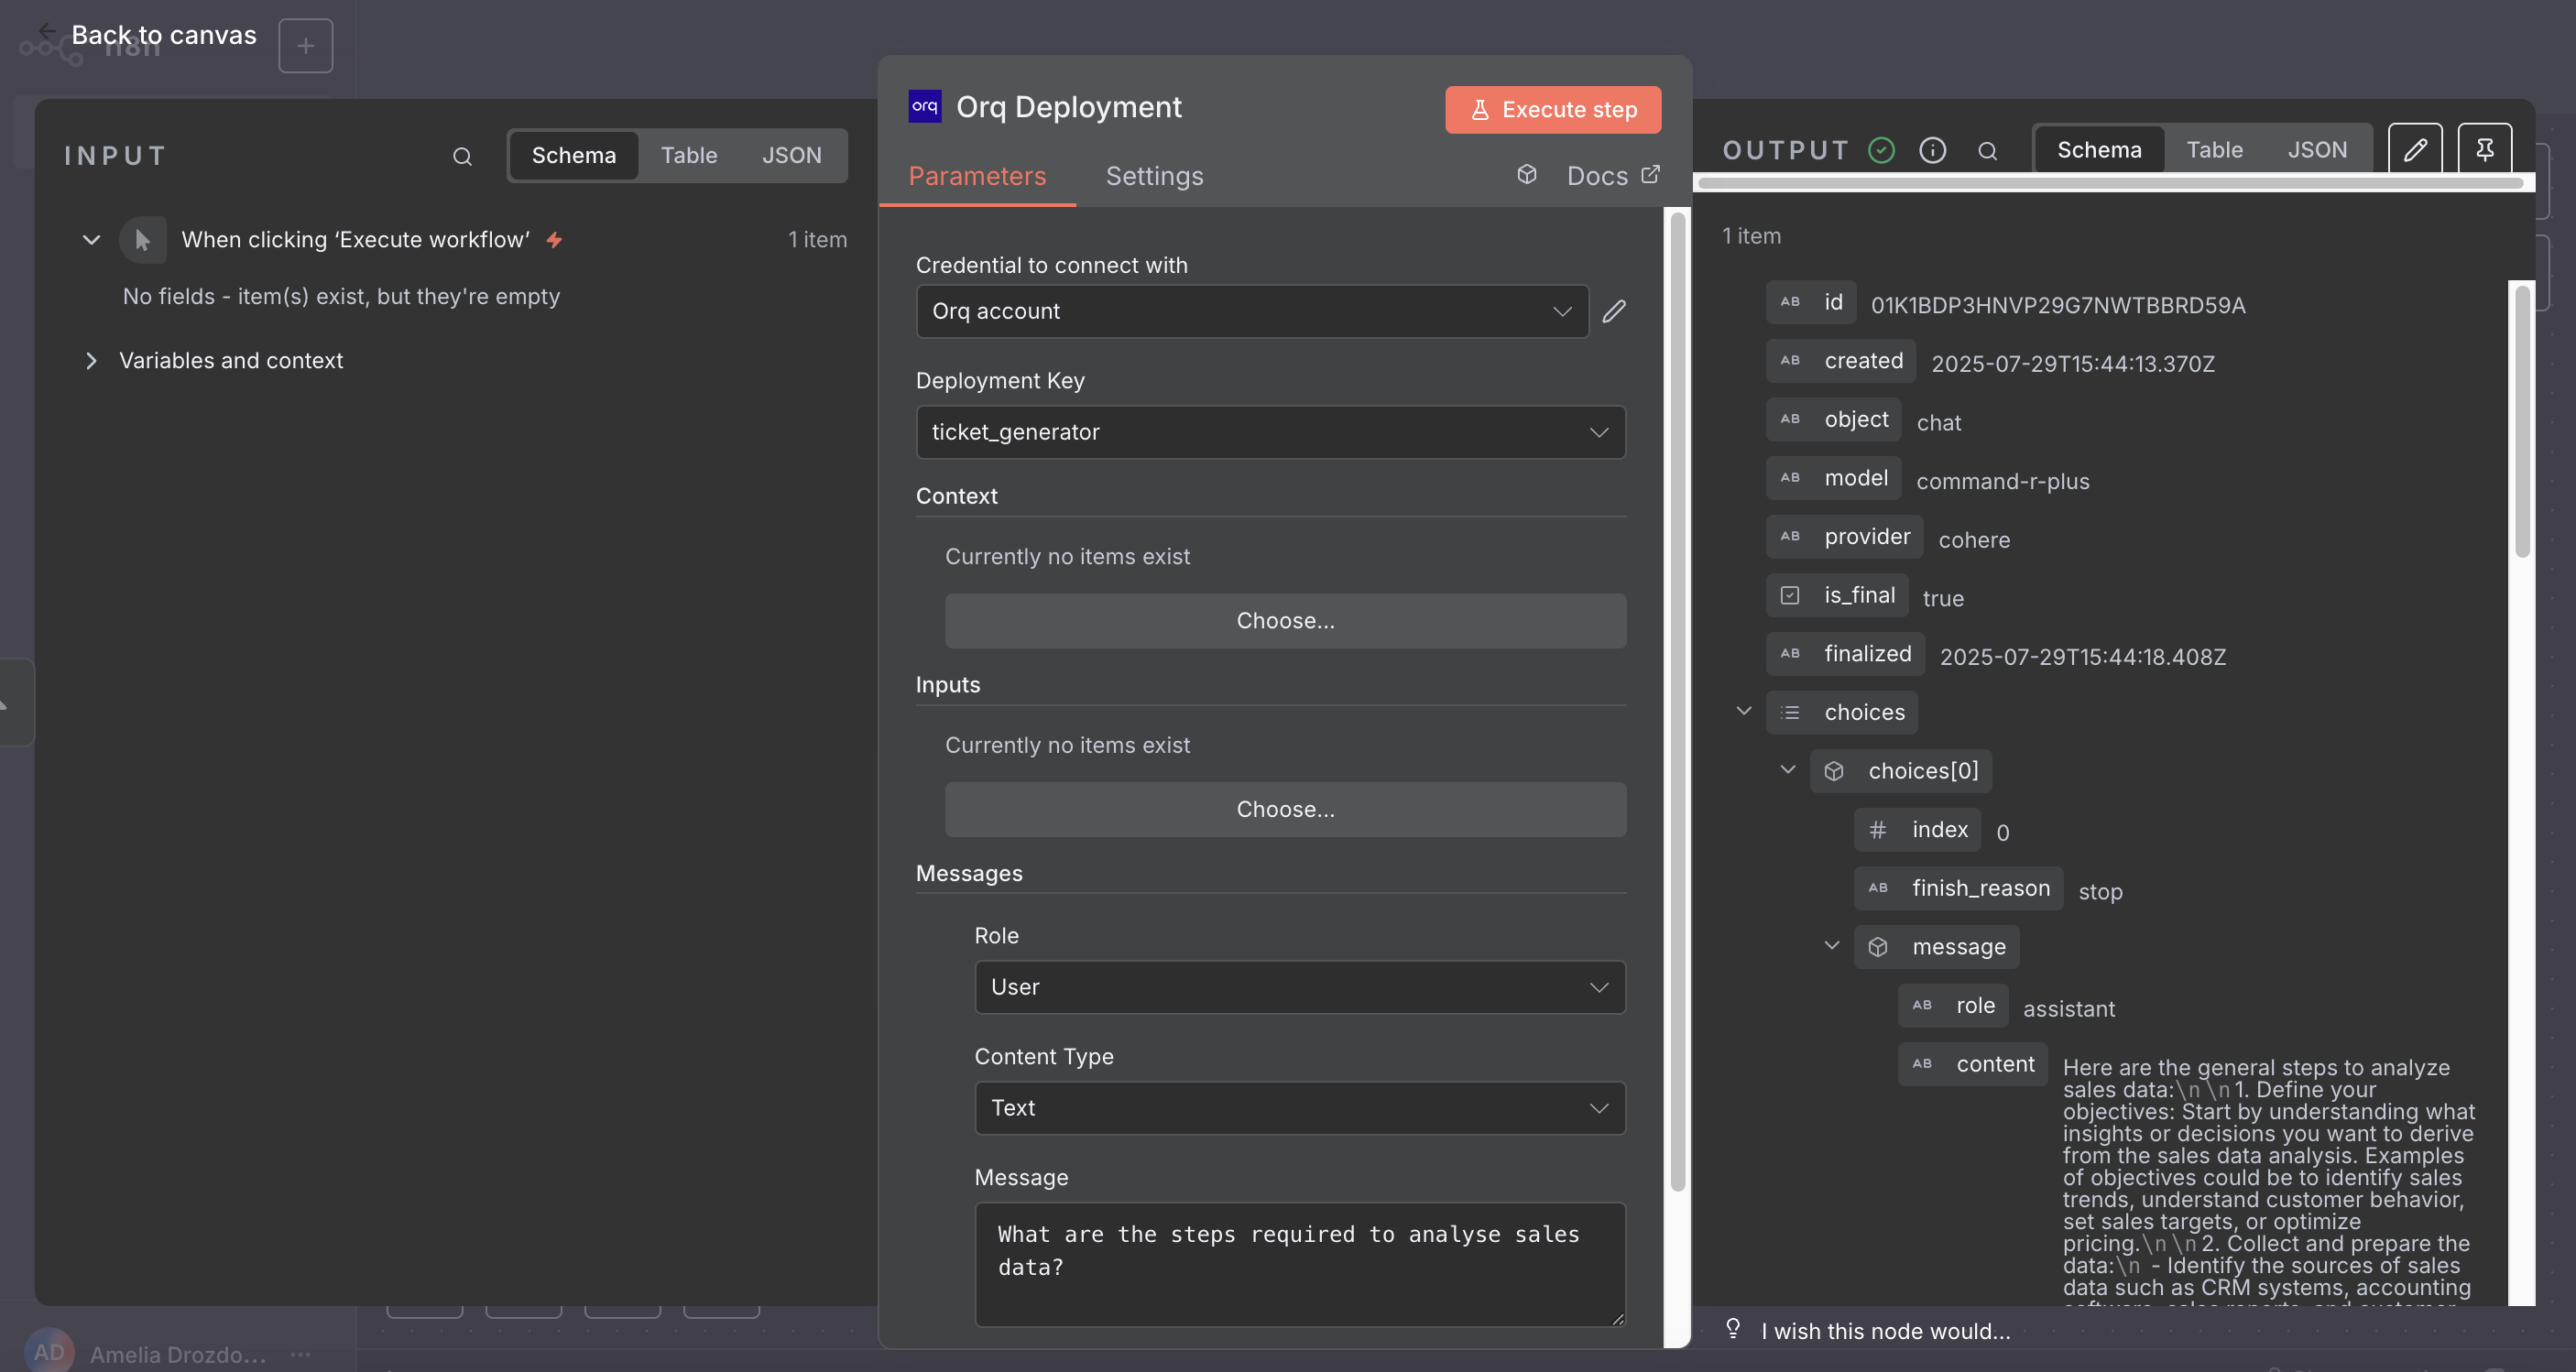
4. Create Your First Workflow
Simple Text Generation
-
Add a Manual Trigger node
-
Add an Orq Deployment node
-
Connect them
-
Configure the Orq node:
-
Select a deployment
-
Add a message:
- Role:
user
- Content:
your prompt
-
Click Execute Workflow

Deployment Node
Invoke an Orq deployment with messages, context, and inputs.
Parameters:
-
Deployment Key: Select from your available deployments
-
Context: Set key-value pairs for deployment routing
-
Inputs: Provide values for prompt variables
- Add key-value pairs for each
{{variable}} in your deployment
-
Messages: Add conversation messages with support for:
-
Roles: User, System, or Assistant
-
Content Types (User role only):
- Text: Plain text messages
- Image: URLs or Base64-encoded images
-
Optional text: Add descriptions with images for models that support it


