Handling unstructured data at scale is a common challenge, particularly when dealing with formats like .jpg and .png. Orq provides a robust solution for transforming these images into actionable data. This guide walks through the process of encoding images, sending them to Orq for processing, and extracting structured outputs efficiently. Whether it’s a handful of receipts or a large batch, this workflow ensures accuracy and scalability. To make things even easier, we’ve created a Google Colab file that you can copy and run straight away after replacing the API key—the deployment is already live and ready in the deployment section. Below, we’ll run through the code step by step for further explanation. Ready to unlock Orq’s magic? Sign up to get started and keep the process rolling! Step 1: Preparing the Environment Before diving into image processing, the necessary tools must be in place. Installing the Orq SDK is quick and straightforward, setting the stage for seamless integration.Documentation Index
Fetch the complete documentation index at: https://docs.orq.ai/llms.txt
Use this file to discover all available pages before exploring further.
- Go to Identity Analytics in your workspace
- Click Create an Identity
- Add the user details (name, email, external ID)
- Set optional metadata and budget limits


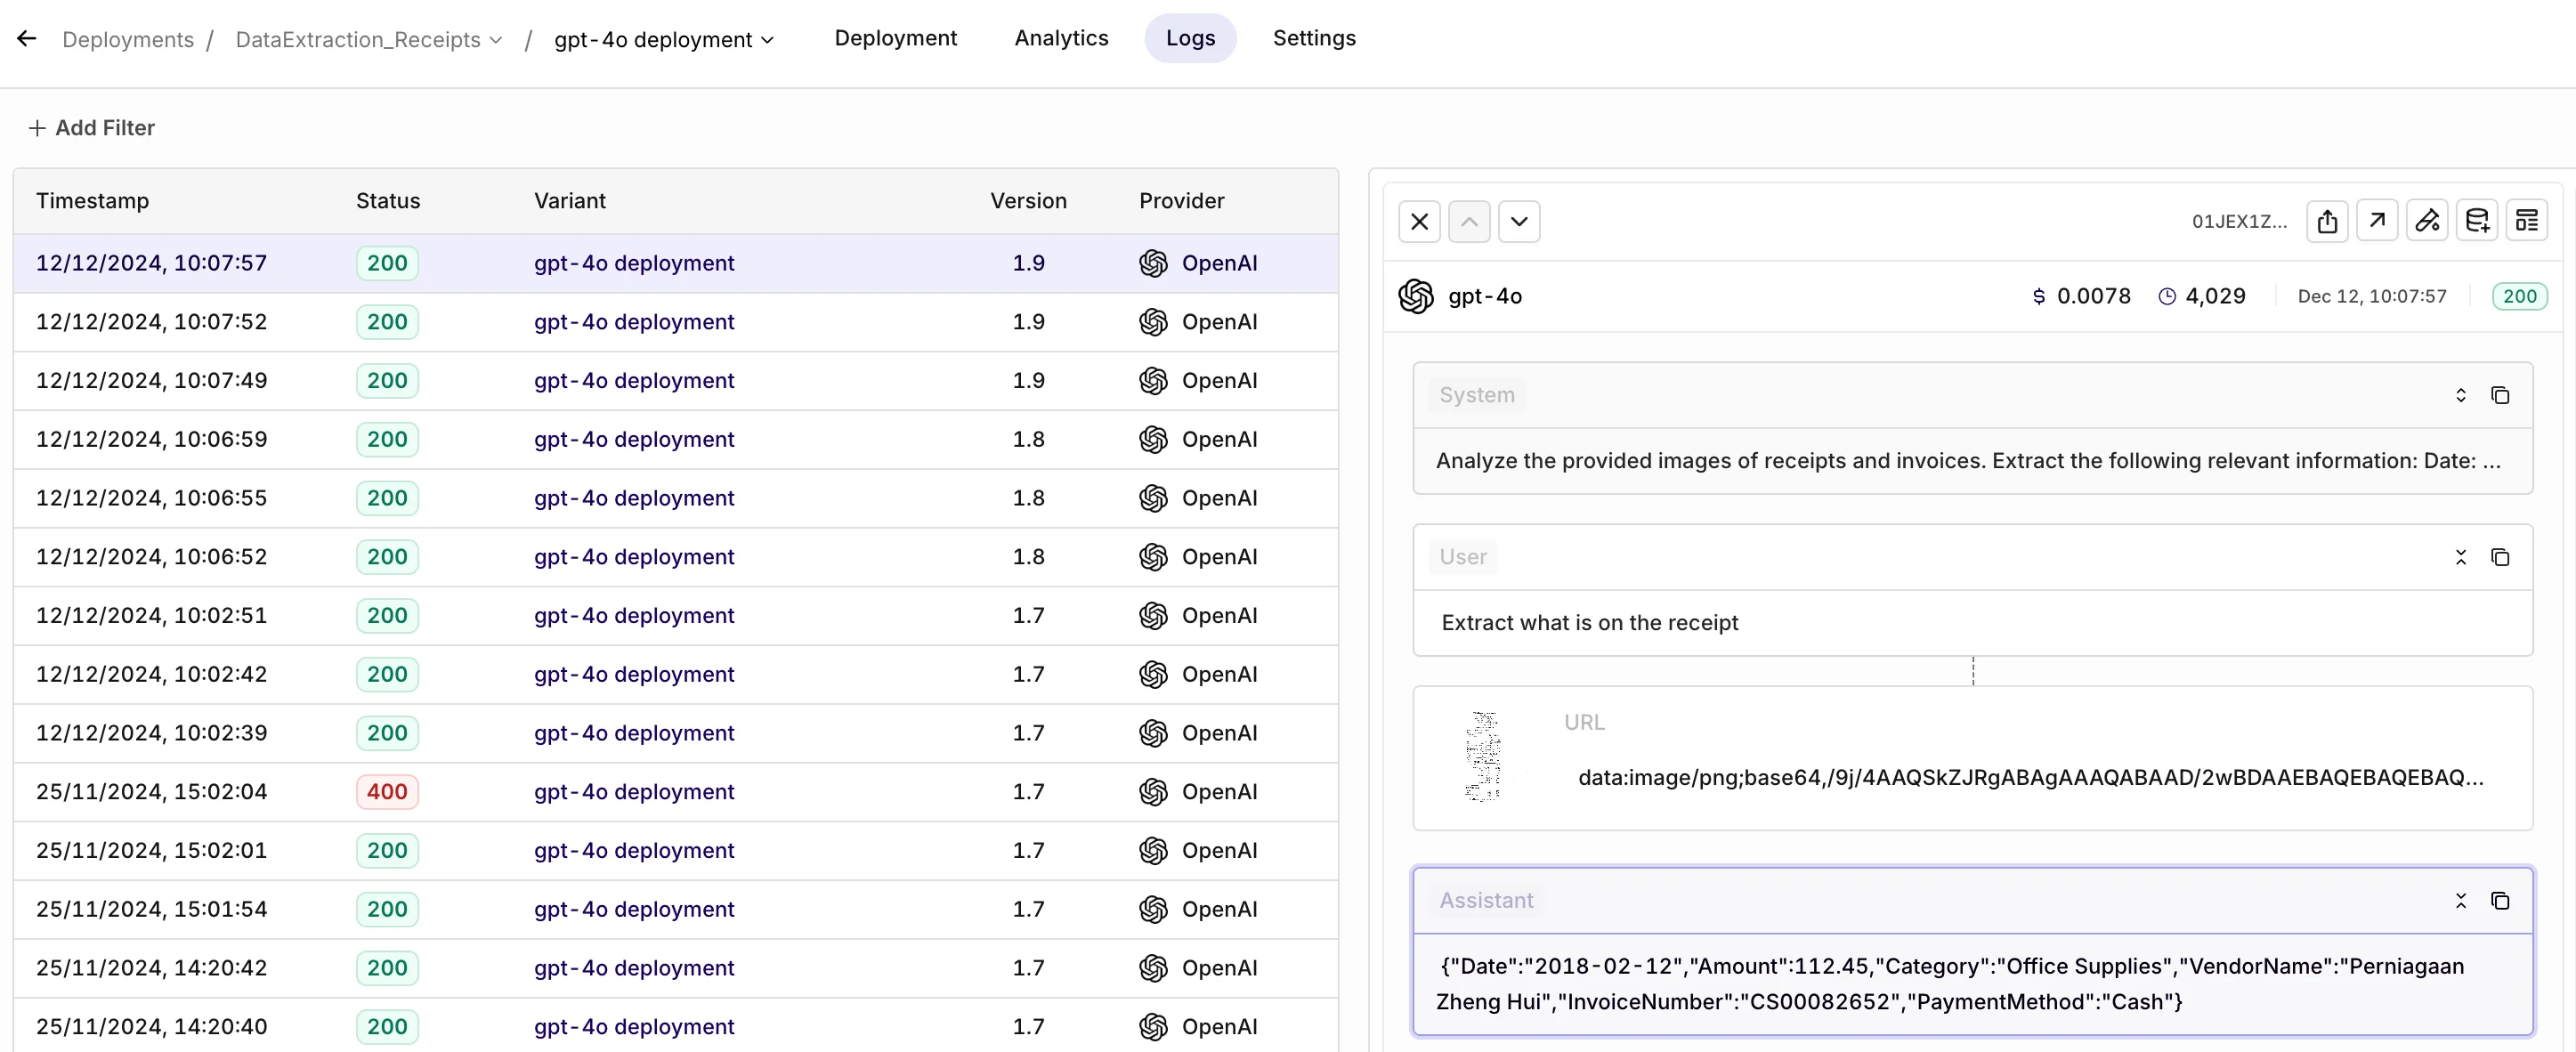
- Go to Logs in your workspace
- Find the specific deployment invocation
- Use the feedback interface to rate responses
- Add defect classifications or corrections as needed
You can also collect feedback programmatically via the API if needed.
- Scale Data Processing: Extend the workflow to process larger datasets or integrate it into existing systems.
- Refine Model Outputs: Explore Orq’s deployment configurations to optimize the data extraction process for specific image types or fields.
- Automate Further: Combine this workflow with automated pipelines to streamline tasks like financial reporting or expense management.