Handling unstructured data at scale is a common challenge, particularly when dealing with formats like .jpg and .png. Orq provides a robust solution for transforming these images into actionable data. This guide walks through the process of encoding images, sending them to Orq for processing, and extracting structured outputs efficiently. Whether it’s a handful of receipts or a large batch, this workflow ensures accuracy and scalability. To make things even easier, we’ve created a Google Colab file that you can copy and run straight away after replacing the API key—the deployment is already live and ready in the deployment section. Below, we’ll run through the code step by step for further explanation. Ready to unlock Orq’s magic? Sign up to get started and keep the process rolling! Step 1: Preparing the Environment Before diving into image processing, the necessary tools must be in place. Installing the Orq SDK is quick and straightforward, setting the stage for seamless integration.
With the SDK installed, the focus shifts to setting up the client and preparing the workflow. Step 2: Setting Up the Orq Client The Orq client bridges your environment with Orq’s powerful APIs. By authenticating with an API key, it provides access to deployments that simplify data extraction from images. After you are logged into the platform, you can find your API key here.
Identity Tracking (Optional) Identities in Orq.ai help track user interactions and API usage across your application. They can represent users, teams, or projects and enable better analytics and budget management. Create an Identity through the AI Studio:
  1. Go to Identity Analytics in your workspace
  2. Click Create an Identity
  3. Add the user details (name, email, external ID)
  4. Set optional metadata and budget limits
Learn more about creating identities, see Creating an Identity. Once connected, the client is ready to process image files for extraction. Step 3: Converting Images to Base64 To process images with Orq’s deployments, they must first be encoded into Base64 format. This section outlines how to process a folder of .jpg and .png files, preparing them for data extraction. To get you started, we’ve provided a Google Drive folder filled with .jpg files of receipts that you can copy and use to test and explore the workflow.
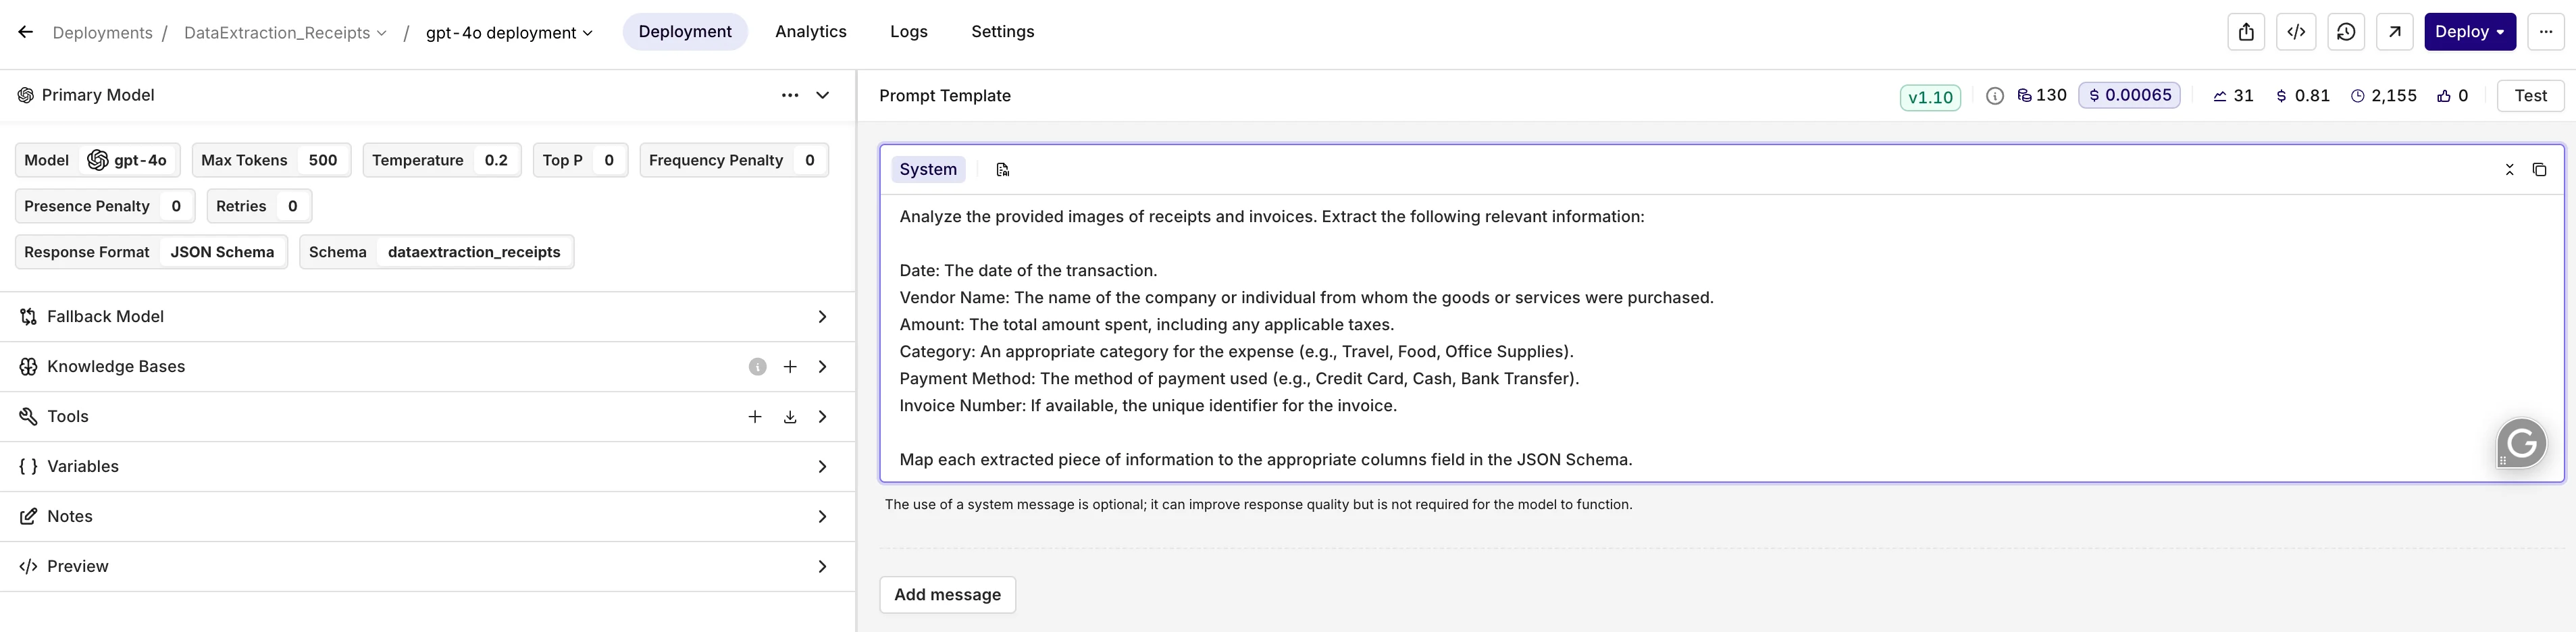
The transformation to Base64 ensures that all images are uniformly encoded, enabling them to be seamlessly sent to Orq’s deployment. Step 4: Prompt and Model Configuration Before we dive into how to set up the deployment, let’s first explore how the prompt is constructed and how you can customize it. Convert each image to Base64 The prompt is designed to extract key financial details from images of receipts and invoices and present them in a structured format. It specifies the data fields to be extracted—such as date, vendor name, amount, and payment method. Additionally, it uses a strict JSON schema to ensure the extracted data adheres to consistent formatting and data types, which is essential for downstream processing. To tailor the prompt you can tweak it to suit various industries, applications, or workflows.
The prompt not only defines the instructions for extracting data but also utilizes the option to output a structured JSON file, ensuring the data is ready for integration into automated workflows or databases.
Step 5: Data Extraction Deployment With images in Base64 format, the final step is to send each encoded image to Orq’s DataExtraction_Receipts deployment. This process extracts meaningful data fields, such as dates, vendor names, and amounts, from each image. The ‘text’ field within the ‘content’ section represents the user-message.
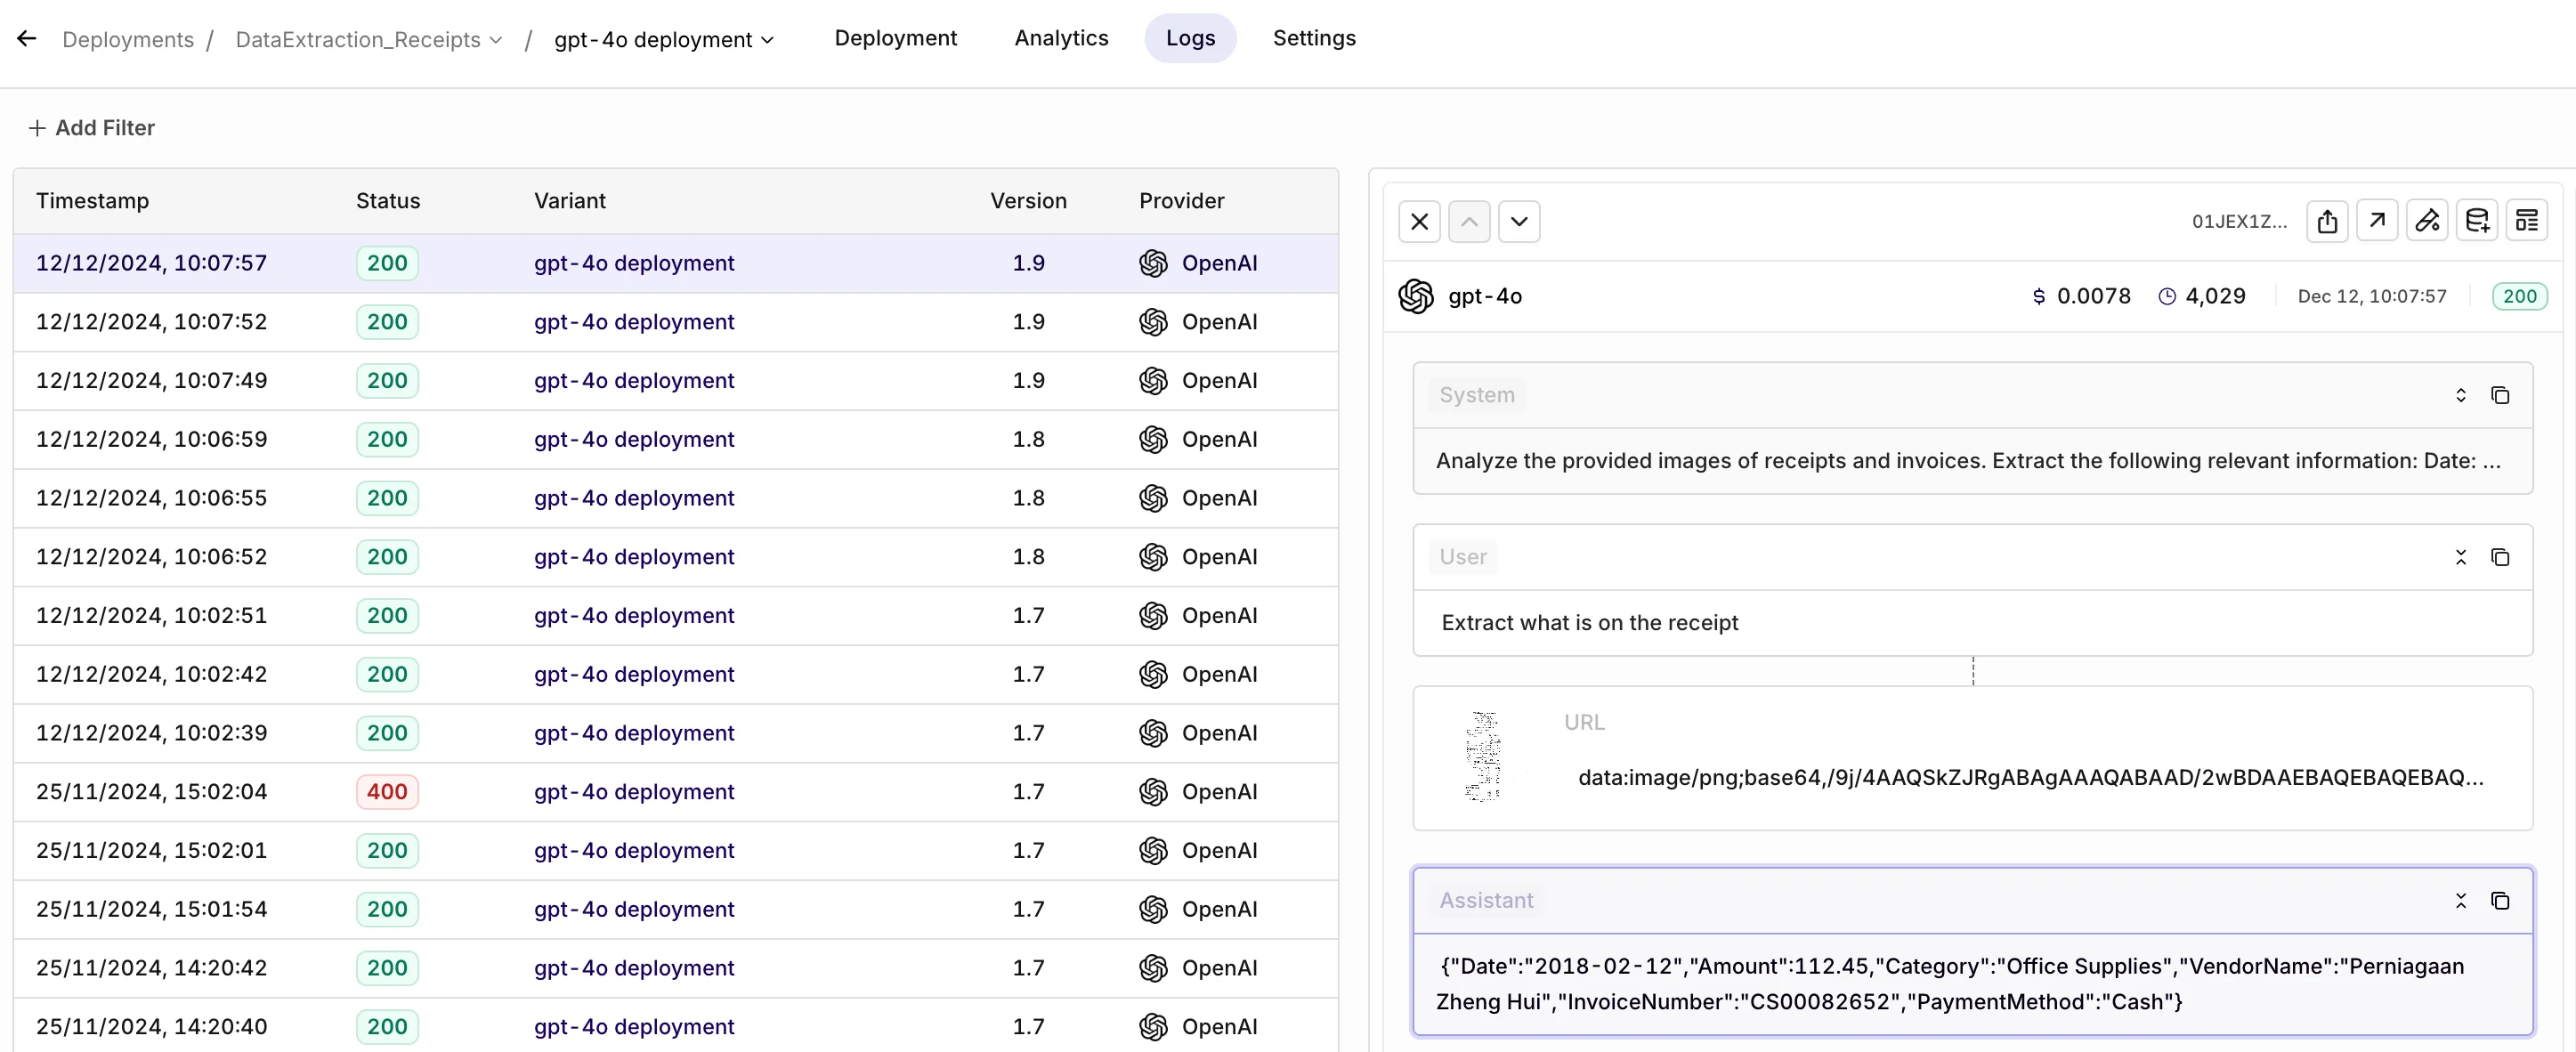
Logs Below you find an example of what the logs should look like when processing a receipt image. The logs detail the interaction, including timestamps, status codes, and system instructions. On the right, you can see the user input (image in Base64 format), system instructions for extracting receipt data, and the AI-generated structured output. This format ensures clarity and traceability in deployment performance. Iterate through each Base64-encoded image and invoke the deployment Feedback Collection (Optional) Feedback in Orq.ai helps track response quality and identify areas for improvement. You can collect user ratings, defect classifications, and corrections to continuously enhance your application. Provide feedback through the AI Studio:
  1. Go to Logs in your workspace
  2. Find the specific deployment invocation
  3. Use the feedback interface to rate responses
  4. Add defect classifications or corrections as needed
Feedback can also be collected programmatically via the Annotations API.
What’s Next? Orq’s tools unlock powerful capabilities for handling unstructured image data. With this workflow, you can:
  • Scale Data Processing: Extend the workflow to process larger datasets or integrate it into existing systems.
  • Refine Model Outputs: Explore Orq’s deployment configurations to optimize the data extraction process for specific image types or fields.
  • Automate Further: Combine this workflow with automated pipelines to streamline tasks like financial reporting or expense management.
By bridging unstructured image data with structured outputs, Orq ensures that businesses can transform their operations and uncover new efficiencies with minimal effort.