

Objective
An AI Agent system provides intelligent prospect qualification and lead generation through a multi-step, orchestrated workflow using multiple specialized agents. This architecture demonstrates how to build a comprehensive lead generation pipeline where different AI agents handle specific stages: conversation, qualification, and CRM insertion. Built on the modern Agents API framework with the A2A Protocol, each agent is independently configured with its own role, instructions, tools, and memory. Conversation context is maintained across turns usingprevious_response_id.
Use Case
AI Agent is ideal for applications that need:- Multi-Stage Lead Processing: Break down prospect qualification into specialized steps handled by different agents
- Automated Prospect Qualification: Systematically collect prospect information and score leads based on qualification criteria
- CRM Integration: Automatically insert qualified leads directly into your sales pipeline
- Intelligent Routing: Route prospects through different workflows based on their responses and qualification level
- Sales Process Automation: Reduce manual lead processing while maintaining high-quality prospect data
Prerequisites
Before configuring an AI Agent, ensure you have:- Orq.ai Account: Active workspace in the AI Studio.
- API Access: Valid API key from Workspace Settings > API Keys.
- Model Access: At least one text generation model enabled in the AI Gateway, such as
gpt-5.6-sol,claude-sonnet-5, orgpt-5.4-mini. - CRM API: Access to your CRM system API (Salesforce, HubSpot, Pipedrive, etc.) with authentication credentials for inserting new leads.
Multi-Agent Workflow Architecture
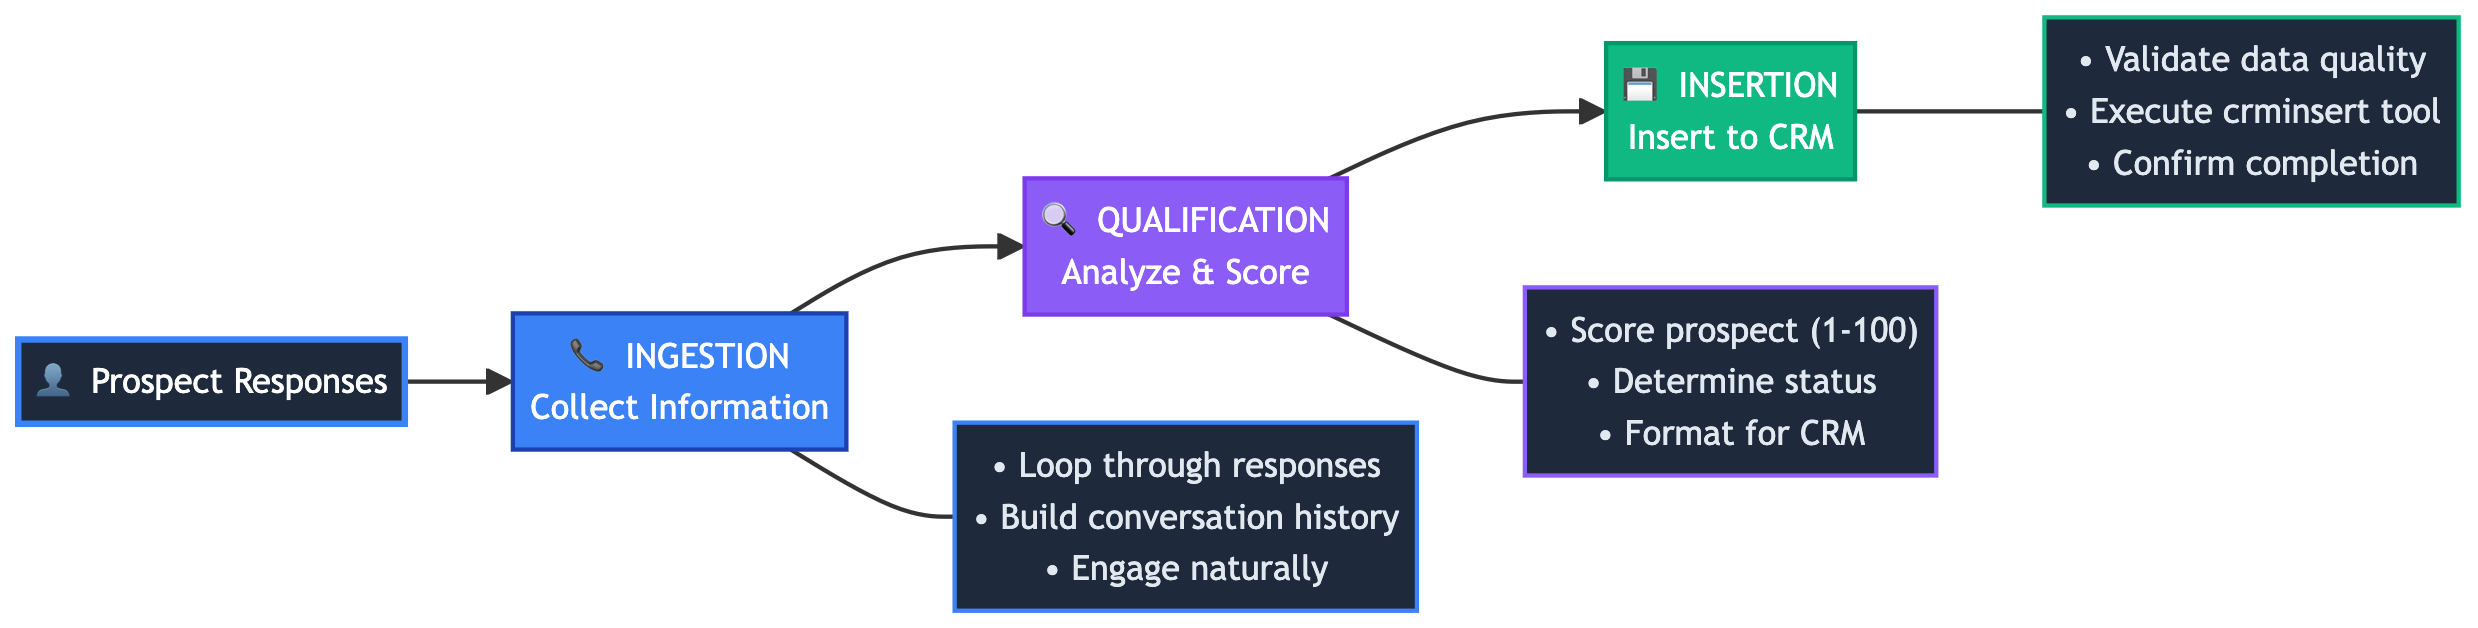
These agents are created using the modern Agents API framework with support for memory stores, knowledge bases, streaming, and the A2A Protocol for standardized communication.
Creating a CRM Insert Tool
First, create a tool for adding prospects to your CRM system. Head to the AI Studio:- Open Tools in the Managed Agents section, then click Tool.
- Create a
crminserttool for adding prospects to your CRM
CRM Insert Tool Configuration
Configure the CRM tool with JSON schema for function calling:The JSON schema above defines the function signature. Tool execution requires a two-step workflow:Step 1: Receive tool calls - Agent returns with
tool_calls array and enters “Input Required” state, pausing executionStep 2: Execute and resume - Your code executes the tool, then calls the agent again with the same previous_response_id and tool result to let the agent continueThis allows your code to integrate with external systems (CRM APIs, webhooks, databases) and feed results back to the agent for completion.Handling Tool Calls
When an agent needs to use a tool (like inserting a prospect into CRM), it pauses and returns a response withtool_calls. Your code must execute the tool and send the result back via the continuation API:
- Agent calls tool: Agent decides it needs a tool and returns with
tool_callsarray - Your code executes: Parse arguments and execute the actual business logic (CRM API call, database insert, external webhook, etc.)
- Agent resumes: Call the agent again with the same
previous_response_idand pass the result back as input - Agent completes: With the tool result, the agent continues processing and provides its final response
- Tool arguments may be a JSON string or object - handle both with
isinstance()(Python) ortypeofchecks (TypeScript) - Always use the response
idasprevious_response_idwhen continuing the conversation after tool execution - Send tool results back as a user message to resume the agent
- The agent maintains full context - it remembers the tool call and your provided result
Creating Three Specialized Agents
Create three specialized agents using the Agents API. You can create agents via the Studio UI or programmatically via API.1. Create the Ingestion Agent
You can create the ingestion agent either programmatically via the Agents API or using the Studio UI. Choose your preferred approach below:Option A: Using the Agents API
Option B: Using the Studio UI
Alternatively, create the ingestion agent directly in the AI Studio:- Navigate to Agents: Open the AI Studio and go to your project
- Create New Agent: Click the button and select Agent
- Configure Agent:
- Key:
ingestion-agent - Role:
Prospect Ingestion Specialist - Description:
Collects prospect information through natural conversation - Model: Select
gpt-5.6-sol(or your preferred model)
- Key:
- Add Instructions: Copy the system instructions from the section below into the Instructions field
- Configure Settings:
- Max Iterations: 15
- Max Execution Time: 300 seconds
- Add Tools: Include the
Current Datetool for context awareness - Save: Click Create Agent
2. Create the Qualification Agent
You can create the qualification agent either programmatically via the Agents API or using the Studio UI. Choose your preferred approach below:Option A: Using the Agents API
Option B: Using the Studio UI
Alternatively, create the qualification agent directly in the AI Studio:- Navigate to Agents: Go to your project in the AI Studio
- Create New Agent: Click the button and select Agent
- Configure Agent:
- Key:
qualification-agent - Role:
Lead Qualification Specialist - Description:
Analyzes prospect conversations and scores leads - Model: Select
gpt-5.6-sol(or your preferred model)
- Key:
- Add Instructions: Copy the system instructions from the section below into the Instructions field
- Configure Settings:
- Max Iterations: 5
- Max Execution Time: 300 seconds
- Tools: No tools needed for this agent (leave empty)
- Save: Click Create Agent
3. Create the Insertion Agent
You can create the insertion agent either programmatically via the Agents API or using the Studio UI. Choose your preferred approach below:Option A: Using the Agents API
Option B: Using the Studio UI
Alternatively, create the insertion agent directly in the AI Studio:- Navigate to Agents: Go to your project in the AI Studio
- Create New Agent: Click the button and select Agent
- Configure Agent:
- Key:
insertion-agent - Role:
CRM Insertion Specialist - Description:
Validates and inserts qualified prospects into the CRM - Model: Select
gpt-5.6-sol(or your preferred model)
- Key:
- Add Instructions: Copy the system instructions from the section below into the Instructions field
- Configure Settings:
- Max Iterations: 3
- Max Execution Time: 300 seconds
- Add the CRM Insert Tool:
- Click Add Tool and select Function
- Tool Name:
crminsert - Description:
Insert qualified prospect into CRM - Function Parameters: Add the schema fields (company_name, contact_name, contact_email, etc.)
- See the CRM Insert Tool Configuration section above for the complete JSON schema
- Save: Click Create Agent
Learn more about tool configuration in Creating a Tool, and agent setup in Creating an Agent.
Integrating with the SDK
Choose your preferred programming language and install the corresponding SDK:Output
When going through the process, you’ll see the 3 agents at work:- The ingestion agent is progressively ingesting the conversation.
- The qualifying agent transforms and validates all the conversation.
- The insertion agent generates the correct payload.
Viewing Logs
In the AI Studio, you can view the execution logs for each agent in your 3-agent prospect qualification system. Navigate to the Agents section and select each agent to view detailed logs of all runs, including:- Ingestion Agent Logs: View all multi-turn conversations with context preservation via
previous_response_id - Qualification Agent Logs: Analyze the qualification analysis and scoring results
- Insertion Agent Logs: Monitor tool execution and CRM insertion attempts
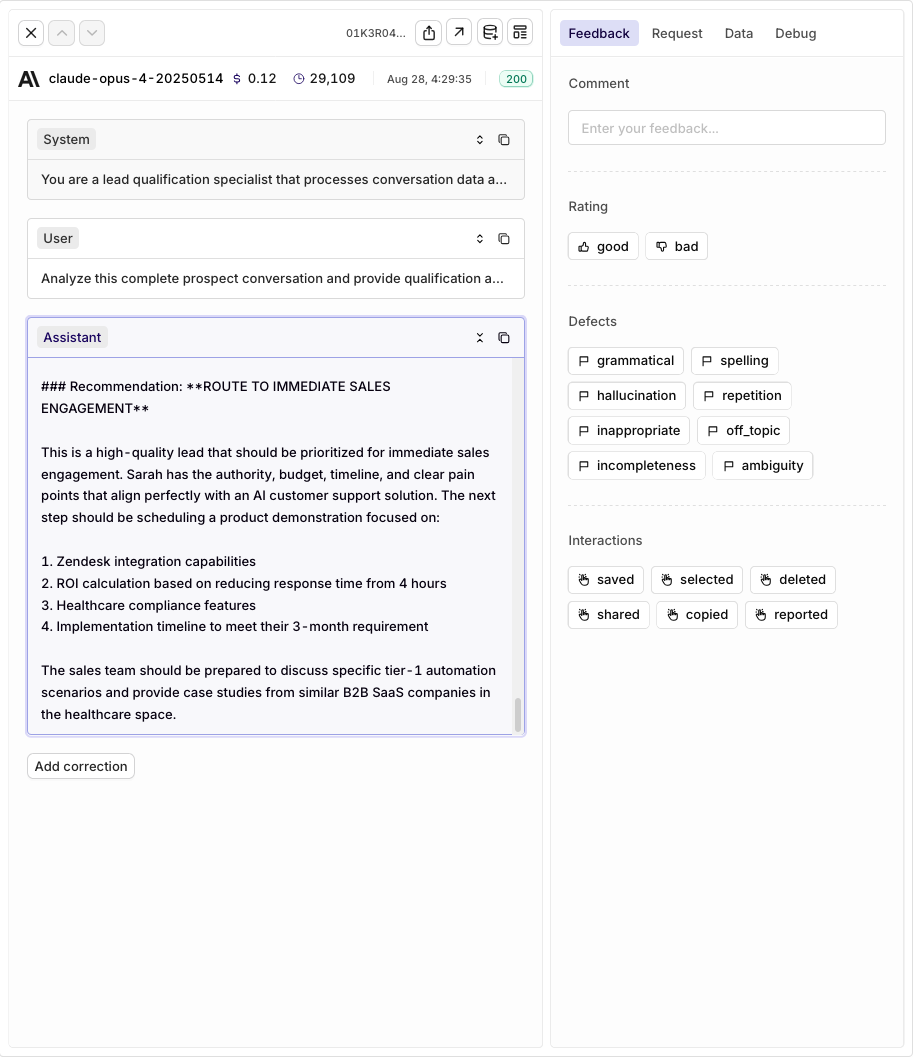
Logs for the qualifying agent
To learn more about agents and their capabilities, see Agents API Documentation.
Key Benefits
- Context Persistence:
previous_response_idmaintains conversation state across multiple turns without passing full history - Specialized Agents: Each agent optimized for its specific role (ingestion, qualification, insertion)
- Modern Framework: Built on A2A Protocol for standardized agent-to-agent communication
- Tool Integration: Seamless function tool integration for CRM and external system operations
- Scalable Architecture: Independent agents enable parallel processing and easy optimization
Next Steps: Learn about Multi-Agent Workflows and Tool Support to expand your pipeline capabilities.