

Overview
Warp is a modern terminal with AI capabilities and native MCP support. With the Orq MCP integration, access the Orq.ai workspace directly from Warp’s AI features.Prerequisites
- Warp terminal installed
- Active Orq.ai account
- Orq.ai API key
Installation
Add MCP Server
- Open Warp Settings by clicking Warp in the top-left menu, then select Settings
- Click MCP Server in the sidebar
- Click the Add button
- Paste the following configuration:
- Replace
YOUR_ORQ_API_KEYwith your actual API key from Workspace Settings → API Keys - Save the configuration
Verify Installation
In Warp’s AI features, ask: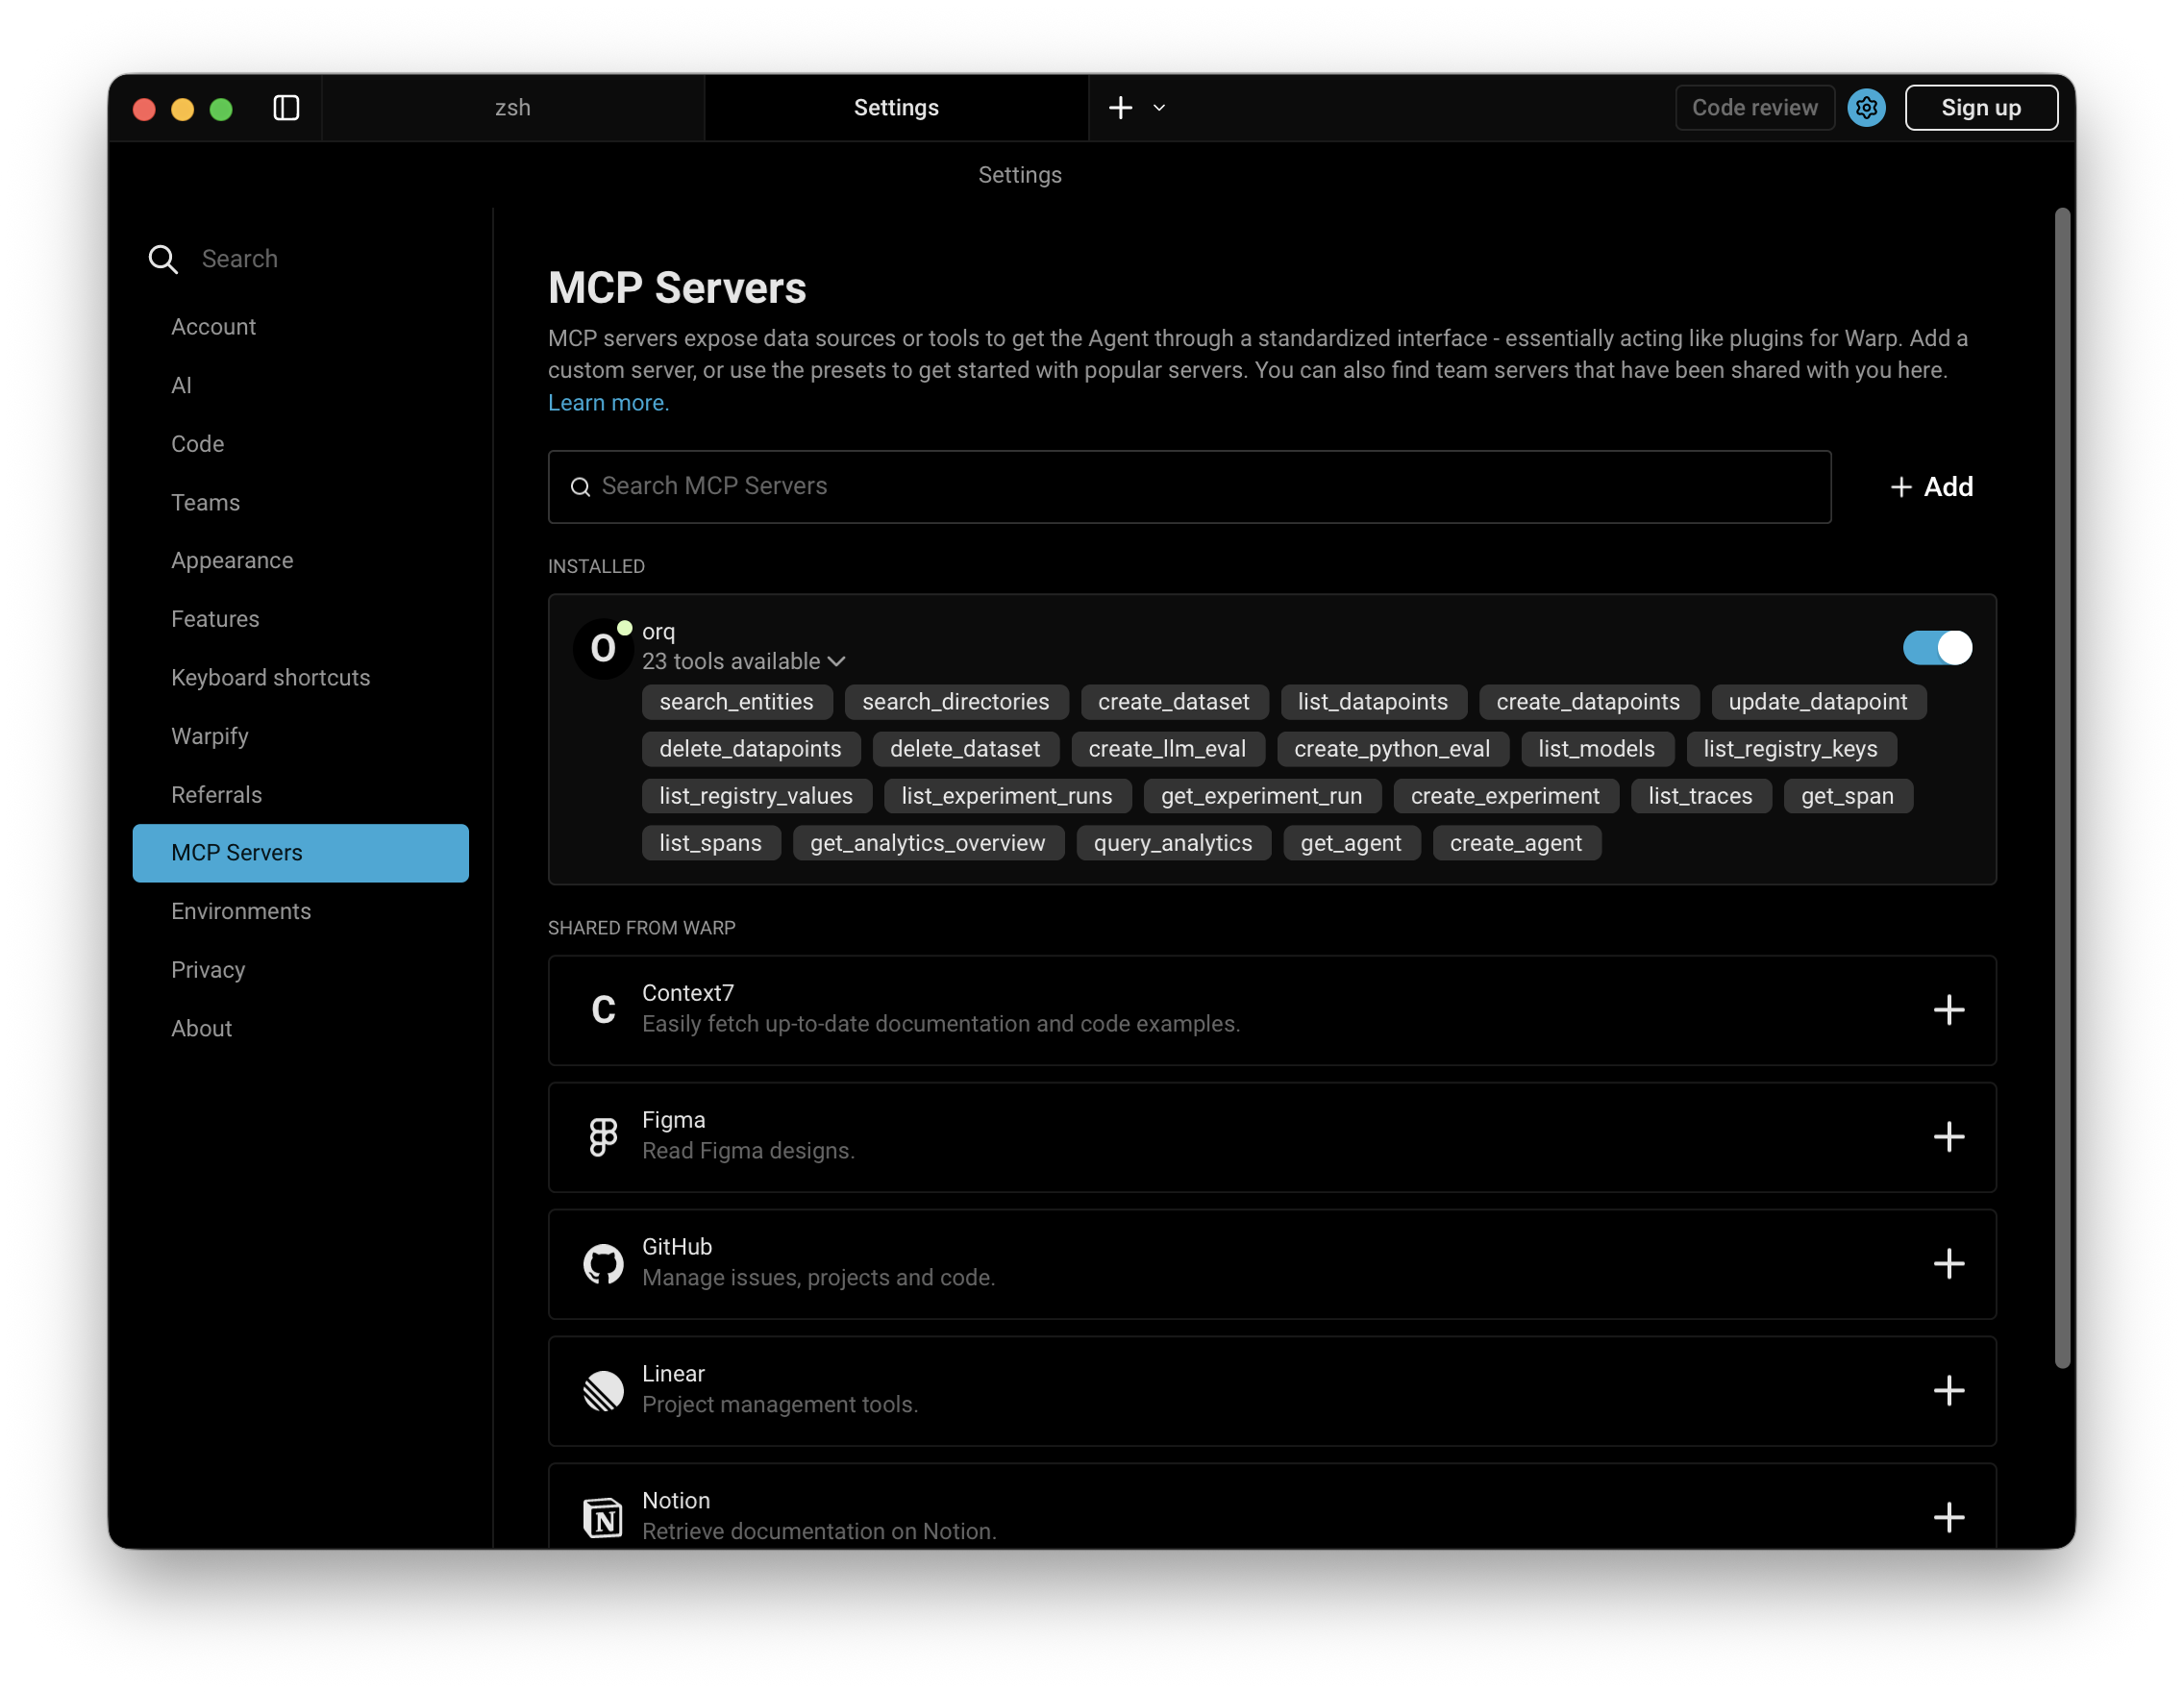
Available Commands
Use natural language in Warp to perform these operations:Agents
Agents
create an agent with custom instructions and toolsget agent configuration for [agent-key]update agent [agent-key] with new instructions or modelconfigure agent with evaluators and guardrailsinvoke agent [agent-key] with input [message]retrieve agent response [response-id]
Deployments
Deployments
create a deployment called [deployment-key]get deployment configuration for [deployment-key]
Skills
Skills
create a skill called [skill-key]list all skills in my workspaceget skill [skill-key]update skill [skill-key]delete skill [skill-key]
Analytics
Analytics
get analytics overview for my workspaceshow me workspace metrics for the last 7 daysquery analytics filtered by deployment ID
Datasets
Datasets
create a dataset called "customer-queries"list all datapoints in dataset [dataset-key]add datapoints to dataset [dataset-key]update datapoint [datapoint-id]delete specific datapoints in dataset [dataset-key]delete dataset [dataset-key]
Experiments
Experiments
create an experiment from dataset [dataset-key]list all experiment runsexport experiment run [run-id] as CSVrun experiment and auto-evaluate results
Evaluators
Evaluators
get evaluator configuration for [evaluator-key]create an LLM-as-a-Judge evaluator for tonecreate a Python evaluator to check response lengthadd evaluator to experiment [experiment-key]update evaluator [evaluator-key] with a new promptupdate Python evaluator [evaluator-key] with revised code
Traces
Traces
list traces from the last 24 hoursshow me traces with errorsget span details for trace [trace-id]find the slowest traces from todayshow all traces for thread [thread-id]
Models
Models
list all available chat modelslist all available embedding modelsinvoke model [model-id] with prompt [message]
Search
Search
search for datasets named "customer"find experiments in project [project-id]list directories in project [project-id]
Documentation
Documentation
search the Orq.ai docs for [topic]
Managing Entities
Managing Entities
delete agent [agent-key]delete experiment [experiment-key]delete evaluator [evaluator-key]delete prompt [prompt-key]delete knowledge base [knowledge-base-key]
delete_dataset to delete a dataset along with all its datapoints.Usage Examples
Chat Panel Commands
Use natural language in Warp’s chat panel:- Generate 20 synthetic API request examples
- Use
create_datasetto create a new dataset named “API Tests” - Use
create_datapointsto add all examples to the dataset - Confirm creation with the dataset ID
- Calculate the time range for the last 24 hours
- Use
list_traceswith error status filter - Display trace IDs, error messages, and timestamps
- Provide a summary of error types and frequency
- Search for the “user-queries” dataset using
search_entities - Use
create_experimentwith two configurations (one for GPT-5.2, one for Claude Sonnet 4.6) - Run the experiment against all datapoints in the dataset
- Display the experiment ID and status
Inline Code Integration
Warp can use the Orq MCP context while you’re working in the terminal:- Open Warp AI (⌘ I)
- Reference the deployment key and ask about traces or analytics
- Resolve the deployment key using
search_entities - Use
query_analyticswith the deployment filter - Set time range to the last 7 days
- Analyze performance metrics (requests, errors, latency, tokens)
- Provide insights and recommendations based on the data
Dataset Creation from Code
- Parse the JSON array from the terminal context
- Use
create_datasetto create a new dataset with an auto-generated name - Use
create_datapointsto add each entry as a datapoint - Confirm the dataset ID and number of datapoints added
Experiment Analysis
- Search for the “customer-feedback” dataset using
search_entities - Use
create_experimentwith two prompt variants (empathy-focused and brevity-focused) and auto-run enabled - Execute both variants against all datapoints automatically via the auto-run option
- Use
get_experiment_runto retrieve evaluation metrics - Compare the two variants and provide a summary of which performed better
Performance Investigation
- Use
list_traceswith today’s date filter - Sort traces by duration (descending)
- Retrieve the top 5 slowest traces
- Use
list_spansto fetch span information for each trace - Display latency breakdowns, bottlenecks, and performance insights
Synthetic Data Generation
- Generate 50 synthetic customer support questions and expected responses
- Use
create_datasetto create a dataset named “Support Training Data” - Use
create_datapointsto add all 50 examples to the dataset - Confirm creation with the dataset ID and sample of generated questions
Skills
Skills add pre-built agentic workflows to Warp for the full Build, Evaluate, Optimize lifecycle. See the Skills page for the full reference.Installation
Available Skills
Triggered by describing what you need. Warp picks the right skill automatically.| Skill | Description |
|---|---|
| build-agent | Design, create, and configure an Orq.ai agent |
| build-evaluator | Create validated LLM-as-a-Judge evaluators |
| analyze-trace-failures | Read production traces and categorize failures |
| run-experiment | Create and run experiments with evaluation |
| generate-synthetic-dataset | Generate and curate evaluation datasets |
| optimize-prompt | Analyze and optimize system prompts |
| setup-observability | Instrument LLM applications with orq.ai tracing: AI Gateway for zero-code traces, or OpenTelemetry for framework-level spans |
| compare-agents | Run cross-framework agent comparisons using evaluatorq |
Slash commands (
/orq:quickstart, /orq:traces, etc.) are only available in Claude Code. See Skills for details.Troubleshooting
Orq MCP Not Responding
Orq MCP Not Responding
- Check Warp’s Orq MCP status in Settings
- Verify the API key is correct
- Restart Warp
Authentication Errors
Authentication Errors
- Confirm the API key is valid
- Ensure the API key has the necessary permissions
- Try regenerating the API key
Tools Not Available
Tools Not Available
- Verify the Orq MCP server is running in Settings
- Check network connectivity
- Review Warp’s own diagnostic output or submit a bug report