

Enabling new Models
To see available Models and enable them for use, head to the AI Gateway section in AI Studio and open the Models page.
- Name: full model name and provider
- Input / Output pricing: per-token cost for input and output
- Features: capability badges indicating support for ZDR, BYOK, and other model-specific features
- Released: the model’s release date
- Max Output Tokens: maximum tokens the model can generate per response
- Context Length: total token window (input + output)
- Location: the region where the model is served
Use the Status Toggle to Enable a model for use with the AI Gateway.
Filters
Use the modality tabs at the top of the list to scope models by type: All Text Image Audio Speech Embedding Moderation Rerank The sidebar provides additional filters:| Filter | Description |
|---|---|
| Location | Filter by region: Europe, United States, Global, APAC, Australia, Singapore |
| Access | Toggle Zero data retention for ZDR-compliant providers, or BYOK for providers where an API key has been added |
| Providers | Filter by LLM provider. See Providers to configure API keys |
| Status | Show Enabled or Disabled models |
| Features | Filter by capability: Base64, Code Execution, Image Edit, JSON Mode, PDF, Reasoning, Streaming, Tool Calling, URL, Vision, Web Search |
| Context length | Drag the range slider to filter by context window size (512 to 2M tokens) |
| Owner | Filter between Public (Orq.ai-provided) and Private (onboarded) models |
Onboarding Private Models
You can onboard private models by choosing Model at the top-right of the screen. This can be useful when you have a model fine-tuned you want to use.Private Models Providers
Show Azure
Show Azure
Here is an example configuration for an Azure model, entering the endpoint and API Key will make your private model available on the platform.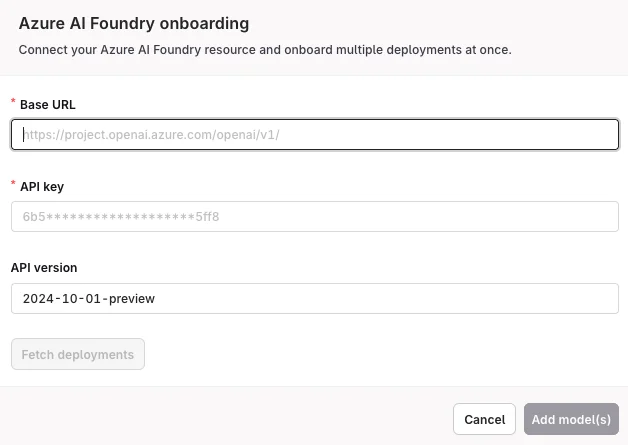
Show Vertex AI
Show Vertex AI
Here is an example configuration for a Google Vertex AI model, enter the JSON configuration to make a private model available on the platform.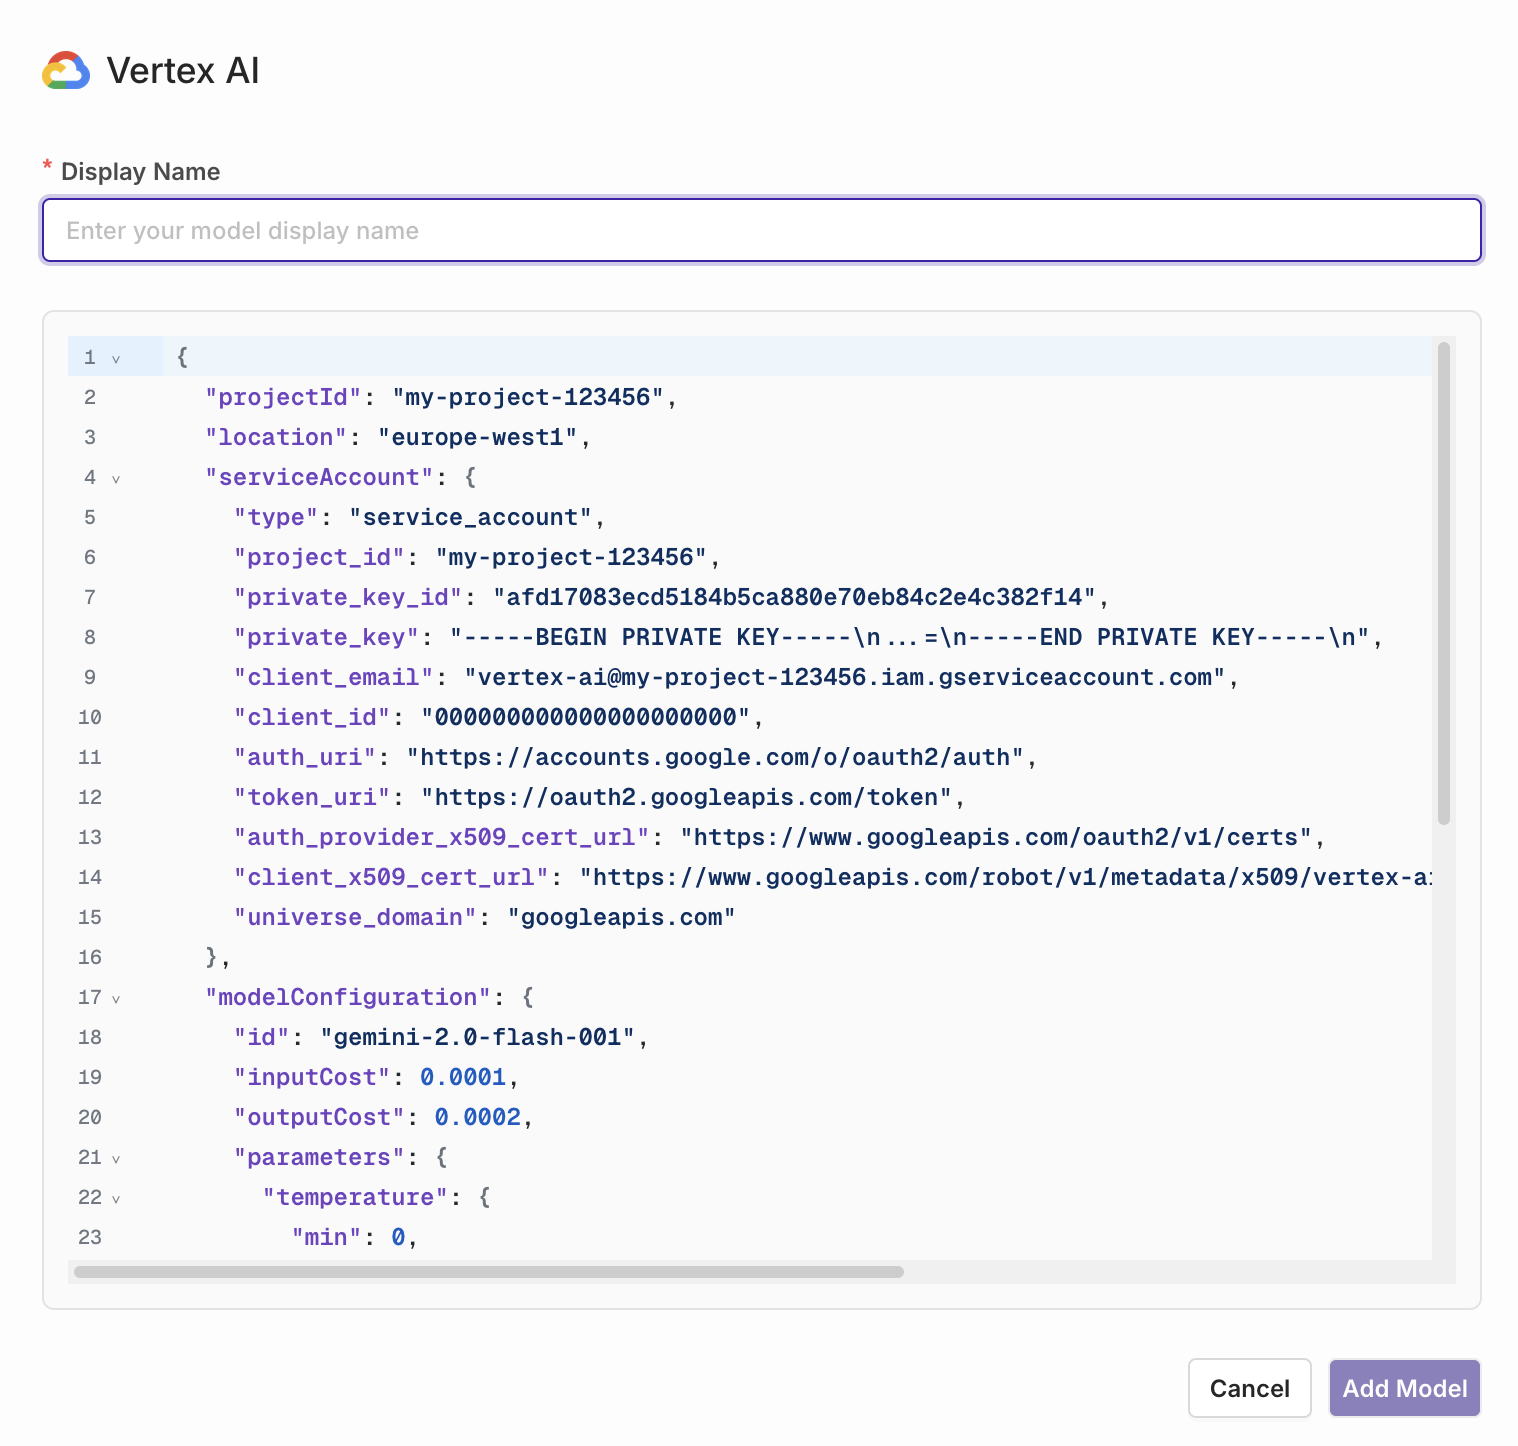
Referencing Private Models in Code
When referencing private models through the SDKs, API, or Supported Libraries, the model is referenced by the following string:<workspacename>@<provider>/<modelname>.
Example: corp@azure/gpt-4o-2024-05-13