

Add your provider API key
orq.ai routes requests through provider credentials managed in the workspace, keeping spend and data under full control. This quickstart uses OpenAI as an example, but any supported provider works the same way.- Go to AI Gateway > BYOK in the AI Studio.
- Find the OpenAI provider.
- Click Setup your own API Key and enter the OpenAI API key.
Supported providers
See the full list of supported model providers and how to connect them.
Enable models in the AI Gateway
With your provider connected:- Go to AI Gateway > Models and search for
gpt-4o. - Click on it and toggle it on.
AI Gateway
Browse and manage all available models across providers.
Get your orq.ai API key
Go to Organization > API Keys in the left sidebar. Click Create API Key, give it a name, and copy it.Then open a terminal and run the command below, replacingyour-api-key-here with the key you just copied. The code samples in the next steps read it from this environment variable.Create your agent
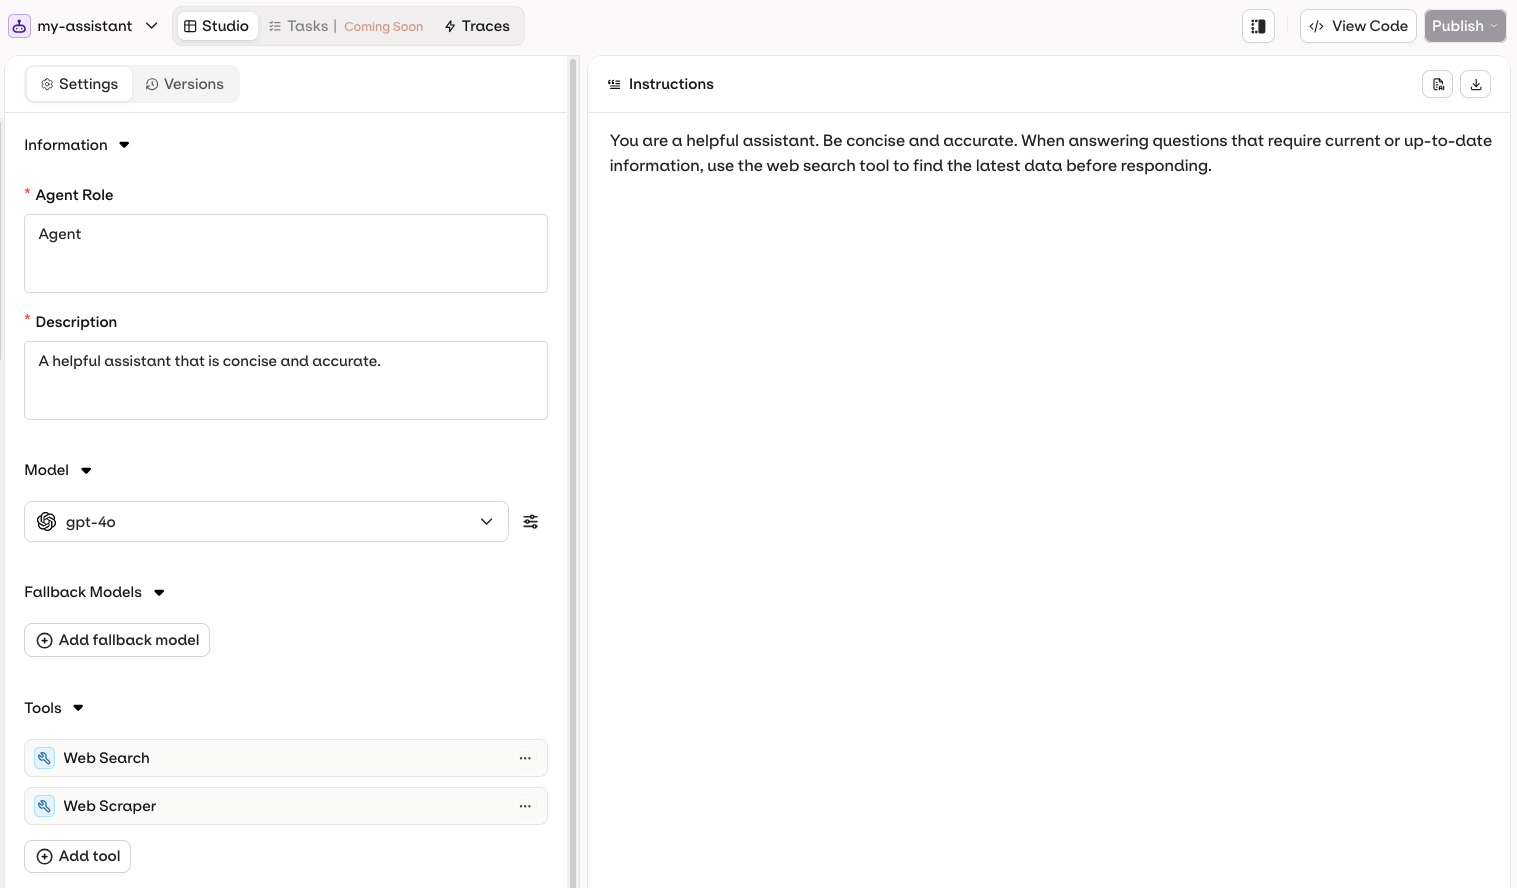
Build an Agent namedmy-assistant with OpenAI GPT-4o and the Web Search and Web Scraper tools. AI Studio
- API & SDK
 MCP
MCP
- Open the AI Studio and navigate to your project.
- Click the + button and select Agent.
- In the popup, select openai/gpt-4o as the model.
- Name the agent
my-assistant. - Add a description:
A helpful assistant with web search. - Click Create.
- Set the agent’s instructions to:
You are a helpful assistant. Be concise and accurate. When answering questions that require current or up-to-date information, use the web search tool to find the latest data before responding. - Under Tools, add Web Search and Web Scraper.
- Click Publish, choose a version bump (Major, Minor, or Patch), and click Publish to confirm.
See the Agent Studio guide for the full walkthrough.
View your traces
Every Agent call is automatically traced. Execution history, token counts, latency, and cost are visible in the AI Studio or queryable through MCP.- AI Studio
- MCP
Open 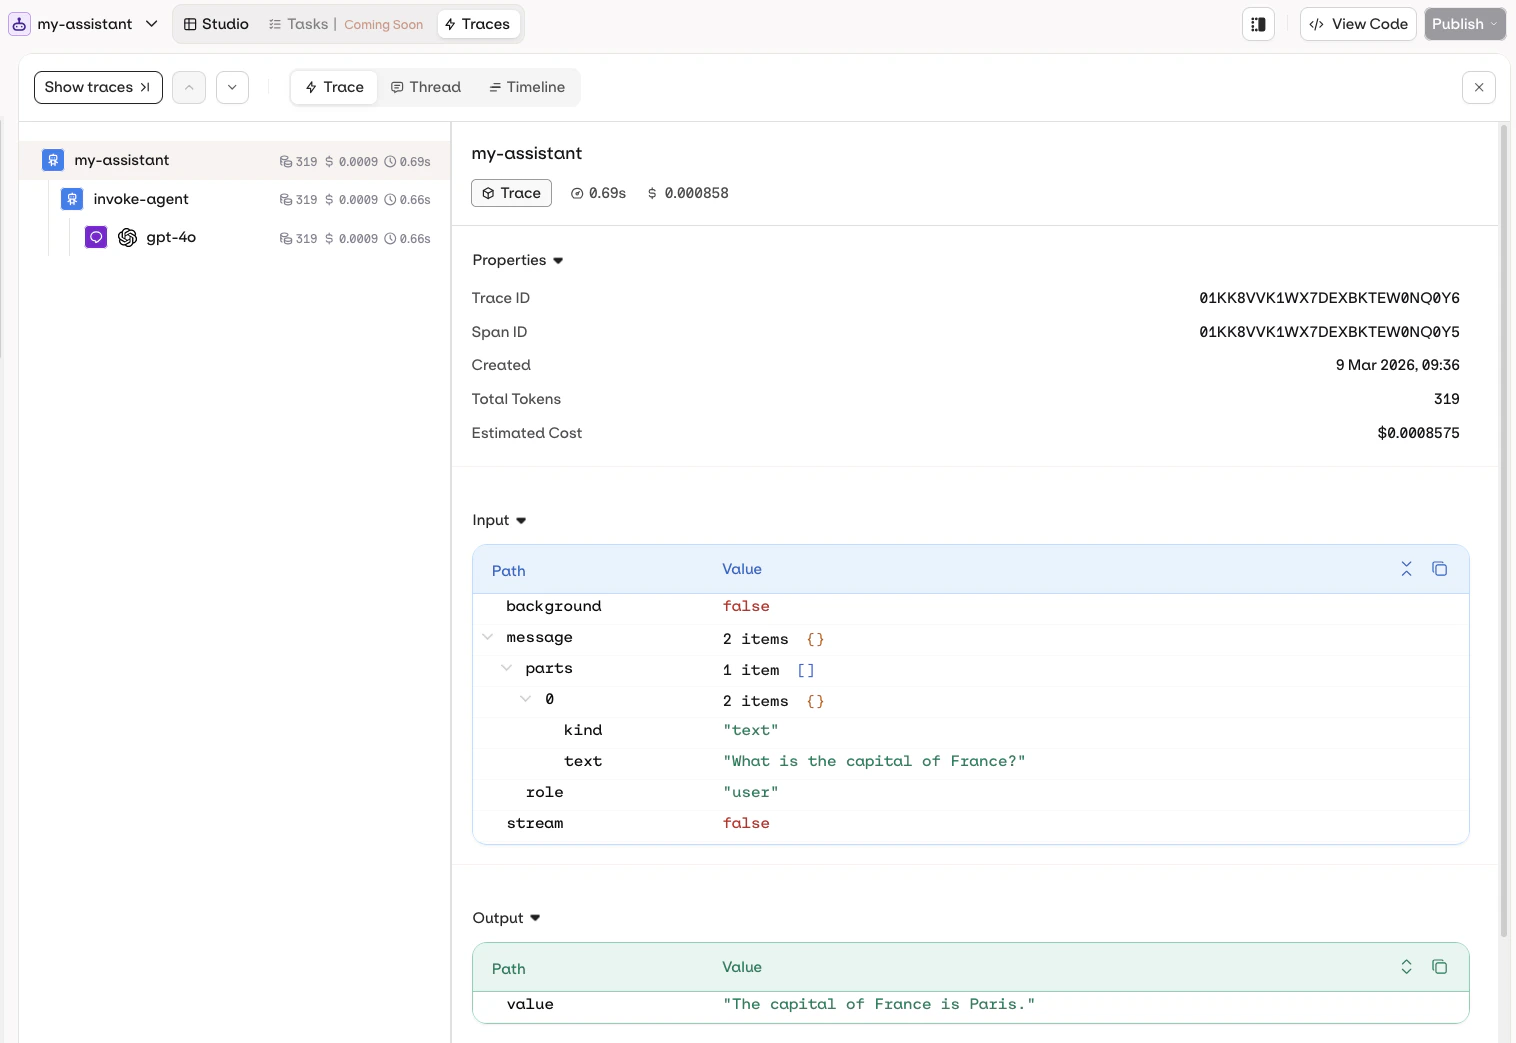
my-assistant in the AI Studio and click the Traces tab to see the full execution history, including model calls, tool use, token counts, and latency.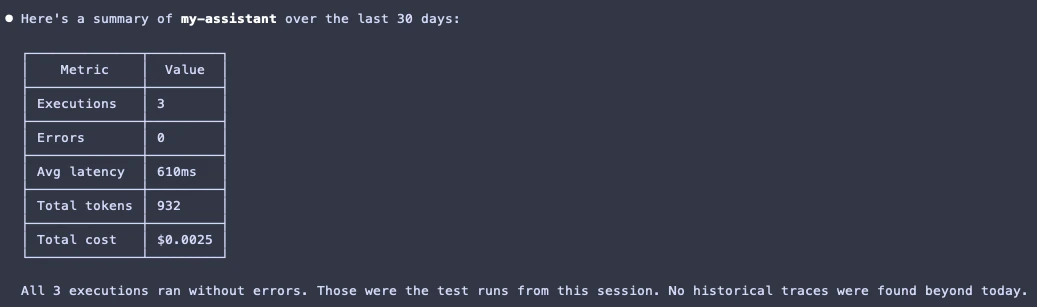
Run your first experiment
Compare prompts, models, and configurations side by side to find what performs best before shipping.
Add an evaluator
Score your Agent’s outputs automatically with LLM-based, code, or human Evaluators.
Connect a knowledge base
Give your Agent access to your own documents and data with built-in RAG.
Log your first trace
Already running agents elsewhere? Connect via OpenTelemetry to get full trace visibility and cost tracking.