Image-Based Receipt Extraction with Orq
This guide demonstrates how to process image-based receipts using Orq, transforming .jpg and .png files into structured, actionable data. By encoding images to Base64 and leveraging Orq's powerful deployments, businesses can efficiently extract key details like dates, vendor names, and amounts for streamlined operations.
Handling unstructured data at scale is a common challenge, particularly when dealing with formats like .jpg and .png. Orq provides a robust solution for transforming these images into actionable data. This guide walks through the process of encoding images, sending them to Orq for processing, and extracting structured outputs efficiently. Whether it’s a handful of receipts or a large batch, this workflow ensures accuracy and scalability.
To make things even easier, we’ve created a Google Colab file that you can copy and run straight away after replacing the API key—the deployment is already live and ready in the deployment section. Below, we’ll run through the code step by step for further explanation.
Ready to unlock Orq's magic? Sign up to get started and keep the process rolling!
Step 1: Preparing the Environment
Before diving into image processing, the necessary tools must be in place. Installing the Orq SDK is quick and straightforward, setting the stage for seamless integration.
!pip install orq-ai-sdk
With the SDK installed, the focus shifts to setting up the client and preparing the workflow.
Step 2: Setting Up the Orq Client
The Orq client bridges your environment with Orq’s powerful APIs. By authenticating with an API key, it provides access to deployments that simplify data extraction from images.
After you are logged into the platform, you can find your API key here.
import os
from orq_ai_sdk import OrqAI
# Store the API key for reuse
API_KEY = os.environ.get("ORQ_API_KEY", "your_api_key_here")
# Initialize the Orq client
client = OrqAI(
api_key=API_KEY,
environment="production"
)
# Optional: Specify user details for tracking
client.set_user(id=2024)
Once connected, the client is ready to process image files for extraction.
Step 3: Converting Images to Base64
To process images with Orq’s deployments, they must first be encoded into Base64 format. This section outlines how to process a folder of .jpg and .png files, preparing them for data extraction.
To get you started, we’ve provided a Google Drive folder filled with .jpg files of receipts that you can copy and use to test and explore the workflow.
import os
import base64
# Define the folder containing the images
folder_path = '/content/drive/MyDrive/receipts_test'
# Identify all .jpg and .png files in the folder
image_files = [file for file in os.listdir(folder_path) if file.endswith(('.jpg', '.png'))]
# List to store Base64-encoded images
base64_images = []
# Convert each image to Base64
for image_file in image_files:
file_path = os.path.join(folder_path, image_file)
try:
with open(file_path, 'rb') as img_file:
# Encode image to Base64
base64_data = base64.b64encode(img_file.read()).decode('utf-8')
base64_images.append(base64_data)
print(f"Successfully encoded {image_file}.")
except Exception as e:
print(f"Error processing {image_file}: {e}")
print("Base64-encoded images are ready.")
The transformation to Base64 ensures that all images are uniformly encoded, enabling them to be seamlessly sent to Orq’s deployment.
Step 4: Prompt and Model Configuration
Before we dive into how to set up the deployment, let’s first explore how the prompt is constructed and how you can customize it.
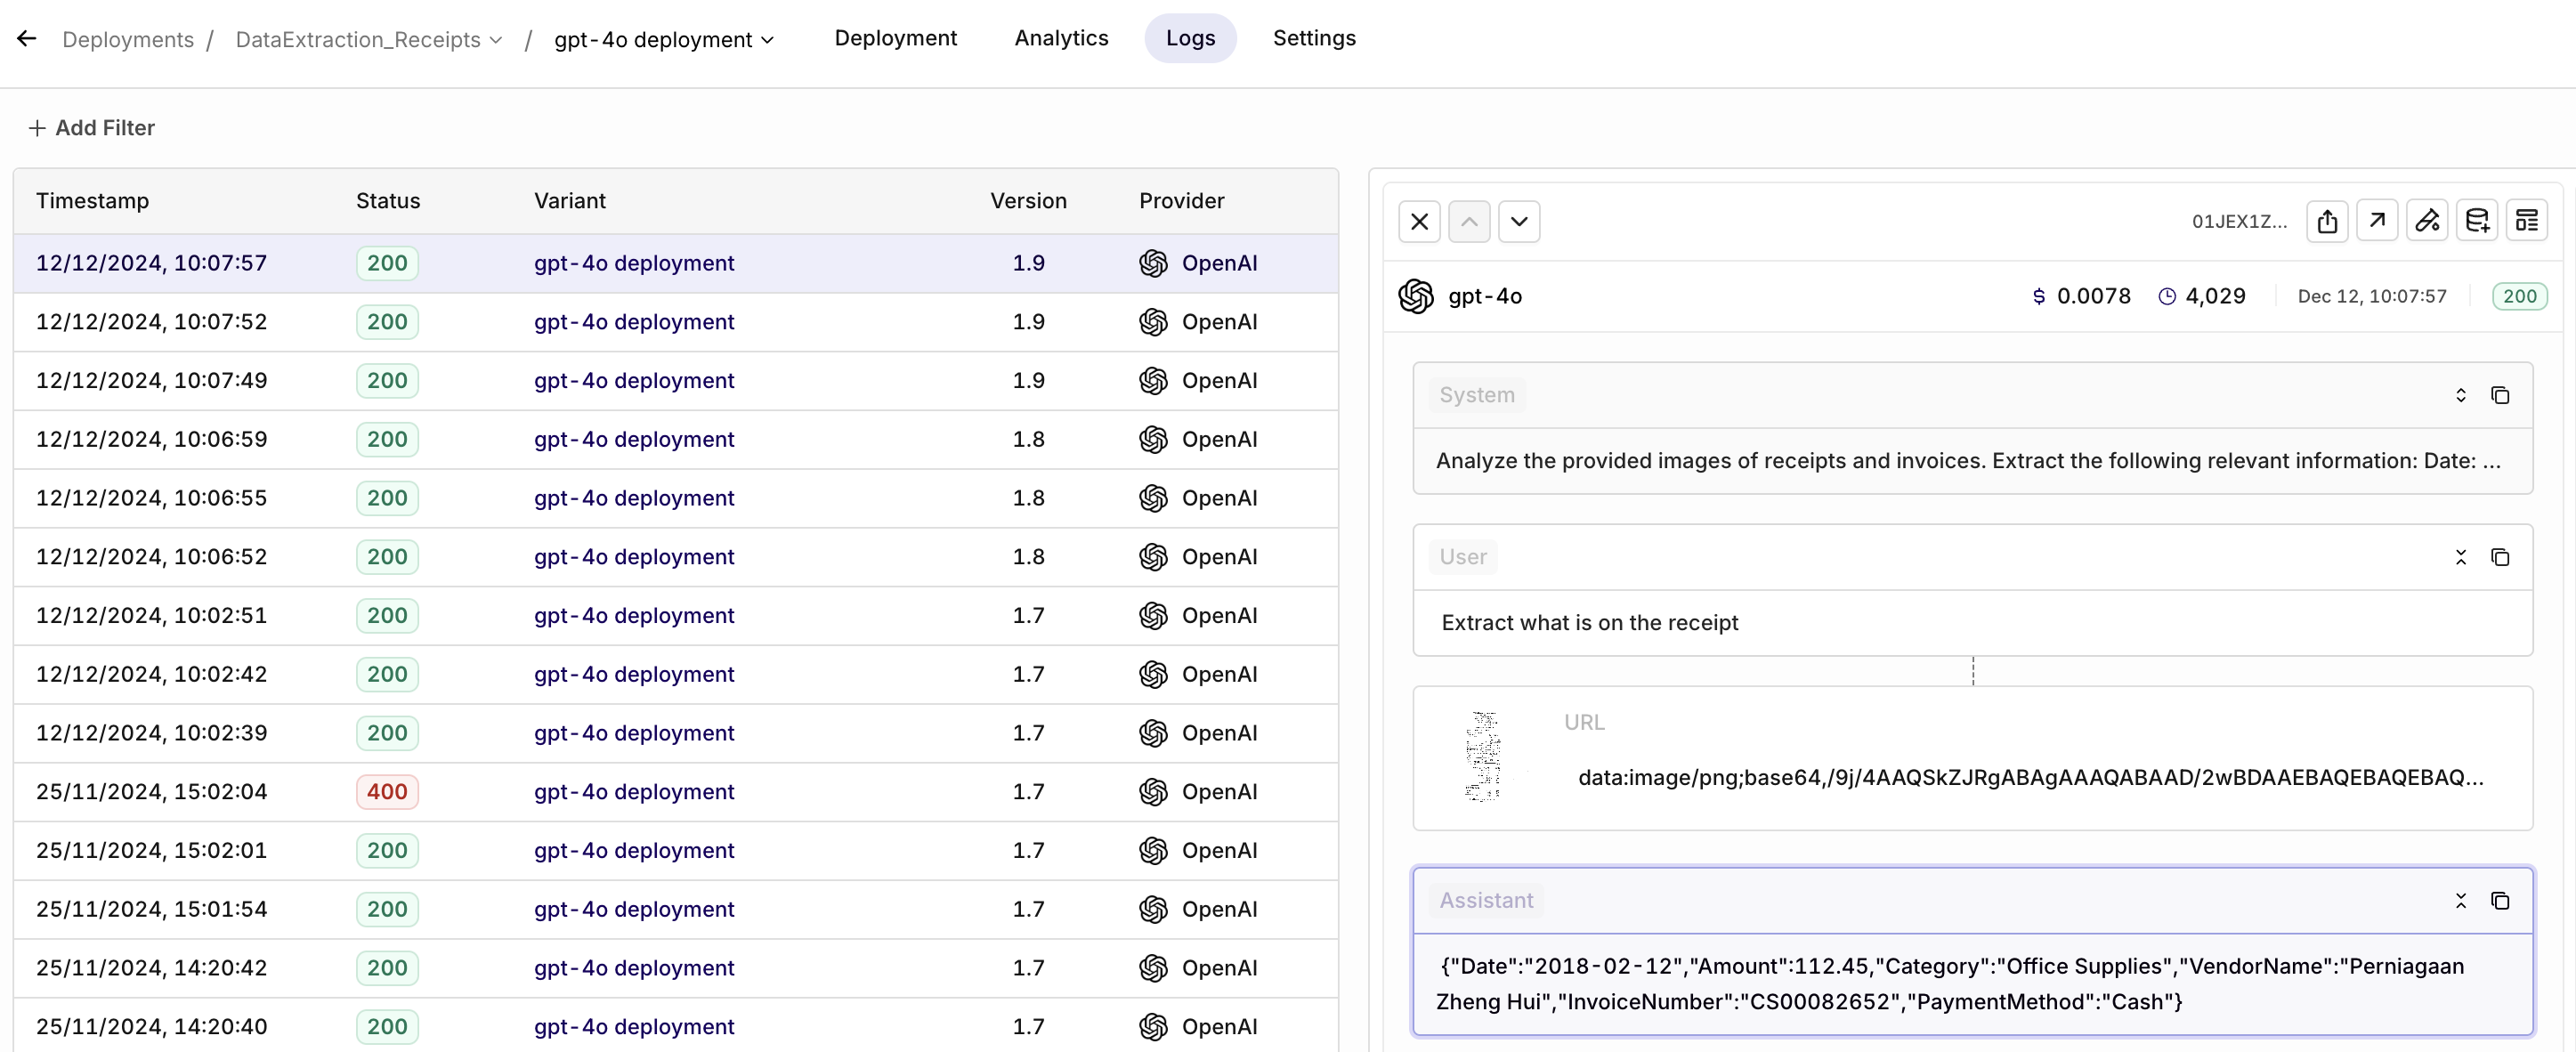
The prompt is designed to extract key financial details from images of receipts and invoices and present them in a structured format. It specifies the data fields to be extracted—such as date, vendor name, amount, and payment method. Additionally, it uses a strict JSON schema to ensure the extracted data adheres to consistent formatting and data types, which is essential for downstream processing.
To tailor the prompt you can tweak it to suit various industries, applications, or workflows.
Analyze the provided images of receipts and invoices. Extract the following relevant information:
Date: The date of the transaction.
Vendor Name: The name of the company or individual from whom the goods or services were purchased.
Amount: The total amount spent, including any applicable taxes.
Category: An appropriate category for the expense (e.g., Travel, Food, Office Supplies).
Payment Method: The method of payment used (e.g., Credit Card, Cash, Bank Transfer).
Invoice Number: If available, the unique identifier for the invoice.
Map each extracted piece of information to the appropriate columns field in the JSON Schema.
This is the receipt: {{receipt}}
The prompt not only defines the instructions for extracting data but also utilizes the option to output a structured JSON file, ensuring the data is ready for integration into automated workflows or databases.
{
"name": "dataextraction_receipts",
"strict": true,
"schema": {
"type": "object",
"properties": {
"Date": {
"type": "string",
"description": "The date of the transaction in YYYY-MM-DD format."
},
"VendorName": {
"type": "string",
"description": "The name of the company or individual from whom the goods or services were purchased."
},
"Amount": {
"type": "number",
"description": "The total amount spent, including any applicable taxes."
},
"Category": {
"type": "string",
"description": "An appropriate category for the expense (e.g., Travel, Food, Office Supplies)."
},
"PaymentMethod": {
"type": "string",
"description": "The method of payment used (e.g., Credit Card, Cash, Bank Transfer)."
},
"InvoiceNumber": {
"type": "string",
"description": "The unique identifier for the invoice, if available."
}
},
"additionalProperties": false,
"required": [
"Date",
"VendorName",
"Amount",
"Category",
"PaymentMethod",
"InvoiceNumber"
]
}
}
Step 5: Data Extraction Deployment
With images in Base64 format, the final step is to send each encoded image to Orq’s DataExtraction_Receipts deployment. This process extracts meaningful data fields, such as dates, vendor names, and amounts, from each image.
# Process each Base64-encoded image
for base64_image in base64_images:
try:
generation = client.deployments.invoke(
key="DataExtraction_Receipts",
context={
"environments": []
},
inputs={
"receipt": base64_image
},
metadata={
"custom-field-name": "custom-metadata-value"
}
)
# Output the result for each image
print(f"Extraction result: {generation.choices[0].message.content}")
except Exception as e:
print(f"Error processing an image: {e}")
What’s Next?
Orq’s tools unlock powerful capabilities for handling unstructured image data. With this workflow, you can:
- Scale Data Processing: Extend the workflow to process larger datasets or integrate it into existing systems.
- Refine Model Outputs: Explore Orq's deployment configurations to optimize the data extraction process for specific image types or fields.
- Automate Further: Combine this workflow with automated pipelines to streamline tasks like financial reporting or expense management.
By bridging unstructured image data with structured outputs, Orq ensures that businesses can transform their operations and uncover new efficiencies with minimal effort.
Updated 10 days ago