

Knowledge Bases
Upload and index documents for retrieval-augmented generation. Ground model responses in your domain data.
External Knowledge Bases
Connect your own vector database via a standard API. Keep data management on your infrastructure.
Memory Stores
Entity-scoped long-term memory that persists across sessions. Enables personalization and context continuity.
Connect Knowledge Bases to Agents
Attach a Knowledge Base so the agent queries it automatically when relevant.
Connect Memory Stores to Agents
Give the agent persistent per-entity memory across conversations.
Use-cases
All three solutions store information that an agent can retrieve, but they serve different purposes depending on where the data lives and how it changes. Knowledge Bases index documents you upload into Orq.ai. The platform handles embeddings, chunking, and retrieval. Use them when you have documents to ingest and want a fully managed RAG pipeline. External Knowledge Bases connect to a vector database you already operate. Orq.ai calls your API at query time and passes the results to the model. Use them when your data cannot leave your infrastructure, or when you already have an embedding pipeline. Memory Stores store arbitrary text per entity, such as a user or session. Documents accumulate over time and are retrieved semantically on each interaction. Use them when your agent needs to remember what a specific person said or did in a previous conversation.| Knowledge Base | External Knowledge Base | Memory Store | |
|---|---|---|---|
| Data hosted by | Orq.ai | Your infrastructure | Orq.ai |
| Document upload | Via Studio or API | Managed externally | Via API per entity |
| Embeddings | Managed by Orq.ai | Managed externally | Managed by Orq.ai |
| Search config | Full control | Delegated to your API | Automatic |
| Reranking | Supported | Post-processing | Not applicable |
| Agentic RAG | Supported | Supported | Not applicable |
| Metadata filtering | Full support | Depends on your API | Via entity metadata |
| Scoped per entity | No | No | Yes |
| Persists across sessions | Yes (static content) | Yes (static content) | Yes (accumulates over time) |
| Best for | Domain documents, FAQs, policies | Existing vector DBs | User history, preferences, session state |
Knowledge Bases
A Knowledge Base is a database that provides relevant, specific information for an LLM to retrieve at query time. Knowledge can include domain-specific or business-specific information, ensuring the details surfaced to models are both correct and accurate.Create a Knowledge Base
 AI Studio
- API & SDK
Use the button in a chosen Project and select Knowledge Base > Internal.Press Create Knowledge. The following modal appears: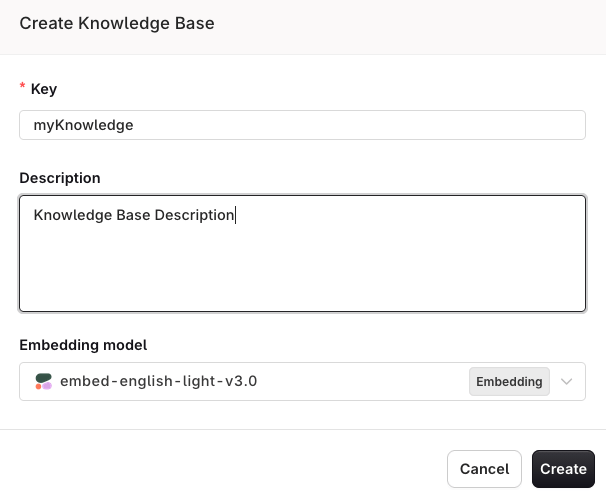
Datasource and Chunking
A source represents a document loaded within the Knowledge Base. Documents are parsed and split into chunks that models search and retrieve at query time.Create a Datasource
- AI Studio
- API & SDK
Select Add Source to upload a document. Supported formats: TXT, PDF, DOCX, CSV, XML.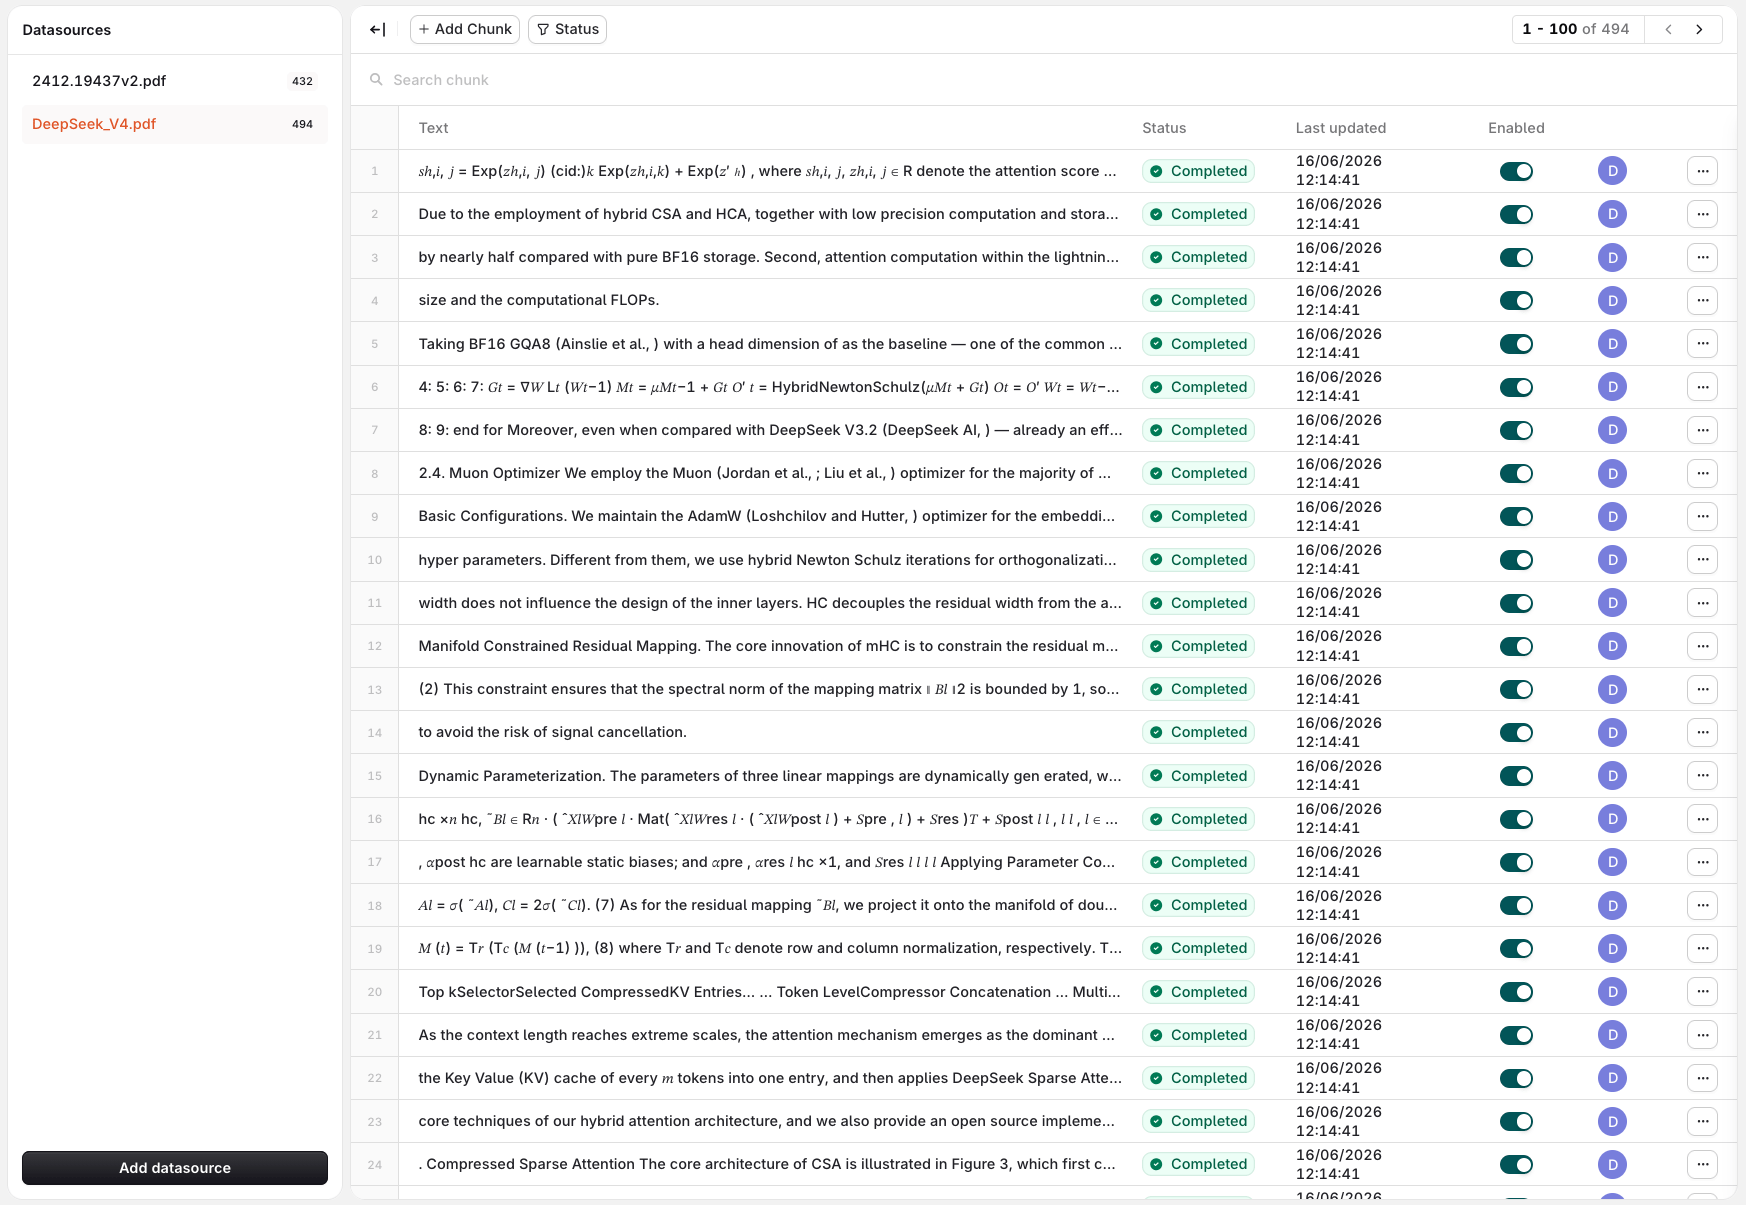
Add Chunks to a Datasource
- API & SDK
Use the Create chunk API to manually add chunks to a datasource.
View Datasource Chunks
- API & SDK
Use the List all chunks API to inspect chunks in a datasource.
Chunk Strategy
- AI Studio
- API & SDK
When using the AI Studio, you only have access to the following chunk strategies. For more options, see the API & SDK tab.
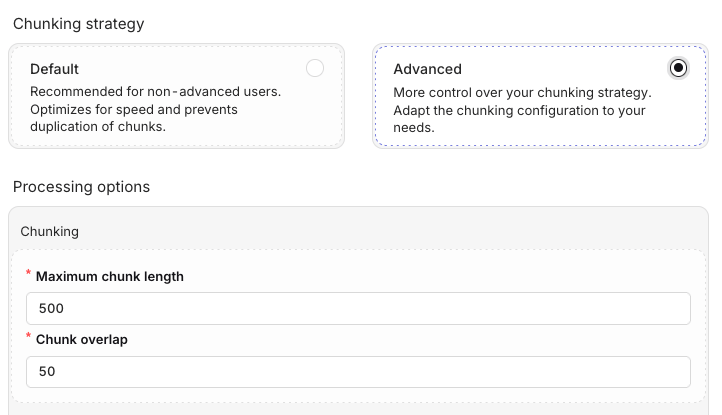
Default
Default
Automatically set chunk and preprocessing rules. Recommended for unfamiliar users.
Advanced
Advanced
Maximum Chunk Length: Defines the maximum size of each chunk. Larger size means more information per chunk.Chunk Overlap: Defines the number of characters overlapping neighboring chunks. Higher values increase redundancy between chunks but improve the likelihood that relevant information is returned to models.
Chunk Metadata
Each chunk in a Knowledge Base can carry a metadata object: a set of key-value pairs that describe the chunk’s origin, topic, or any custom attribute relevant to your use case. Metadata lets you store all your content in a single Knowledge Base while still scoping retrieval to exactly the right subset of chunks at query time. Common use cases:- Multi-tenant RAG: tag chunks by
client_idto isolate results per customer. - Source filtering: filter by
filetypeorsourceto restrict results to PDFs, support tickets, or a specific data feed. - Topic scoping: tag chunks by
topicorcategoryand filter queries to stay on a single subject.
- AI Studio
- API & SDK
Open a chunk from the datasource view to access the Edit Chunk panel. The panel has three sections:
- Text: the chunk content.
- Metadata: a JSON editor pre-filled with the current metadata, or
{}if none has been set. - Enabled: toggle to enable or disable the chunk.
Data and PII Cleanup
- AI Studio
- API & SDK
Modify the data loaded within your sources to clean or anonymize it. Toggle on each cleanup option within the Data Cleanup panel.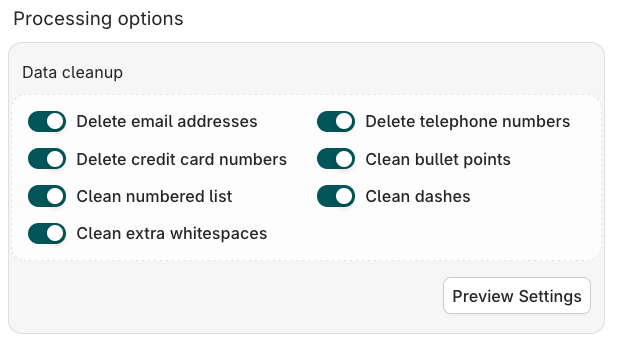
| Option | Description |
|---|---|
| Delete email addresses | Removes email addresses from chunk content |
| Delete credit card numbers | Removes credit card numbers from chunk content |
| Delete telephone numbers | Removes phone numbers from chunk content |
| Clean bullet points | Normalizes bullet point formatting |
| Clean numbered list | Normalizes numbered list formatting |
| Clean dashes | Removes or normalizes dash characters |
| Clean extra whitespaces | Removes excess whitespace from chunk content |
Embedding Models
An embedding model is a machine learning tool that transforms complex, high-dimensional data into simpler, numerical values that machines can understand, enabling semantic search. Configure which embedding model to use to query the Knowledge Base from the Knowledge Settings panel.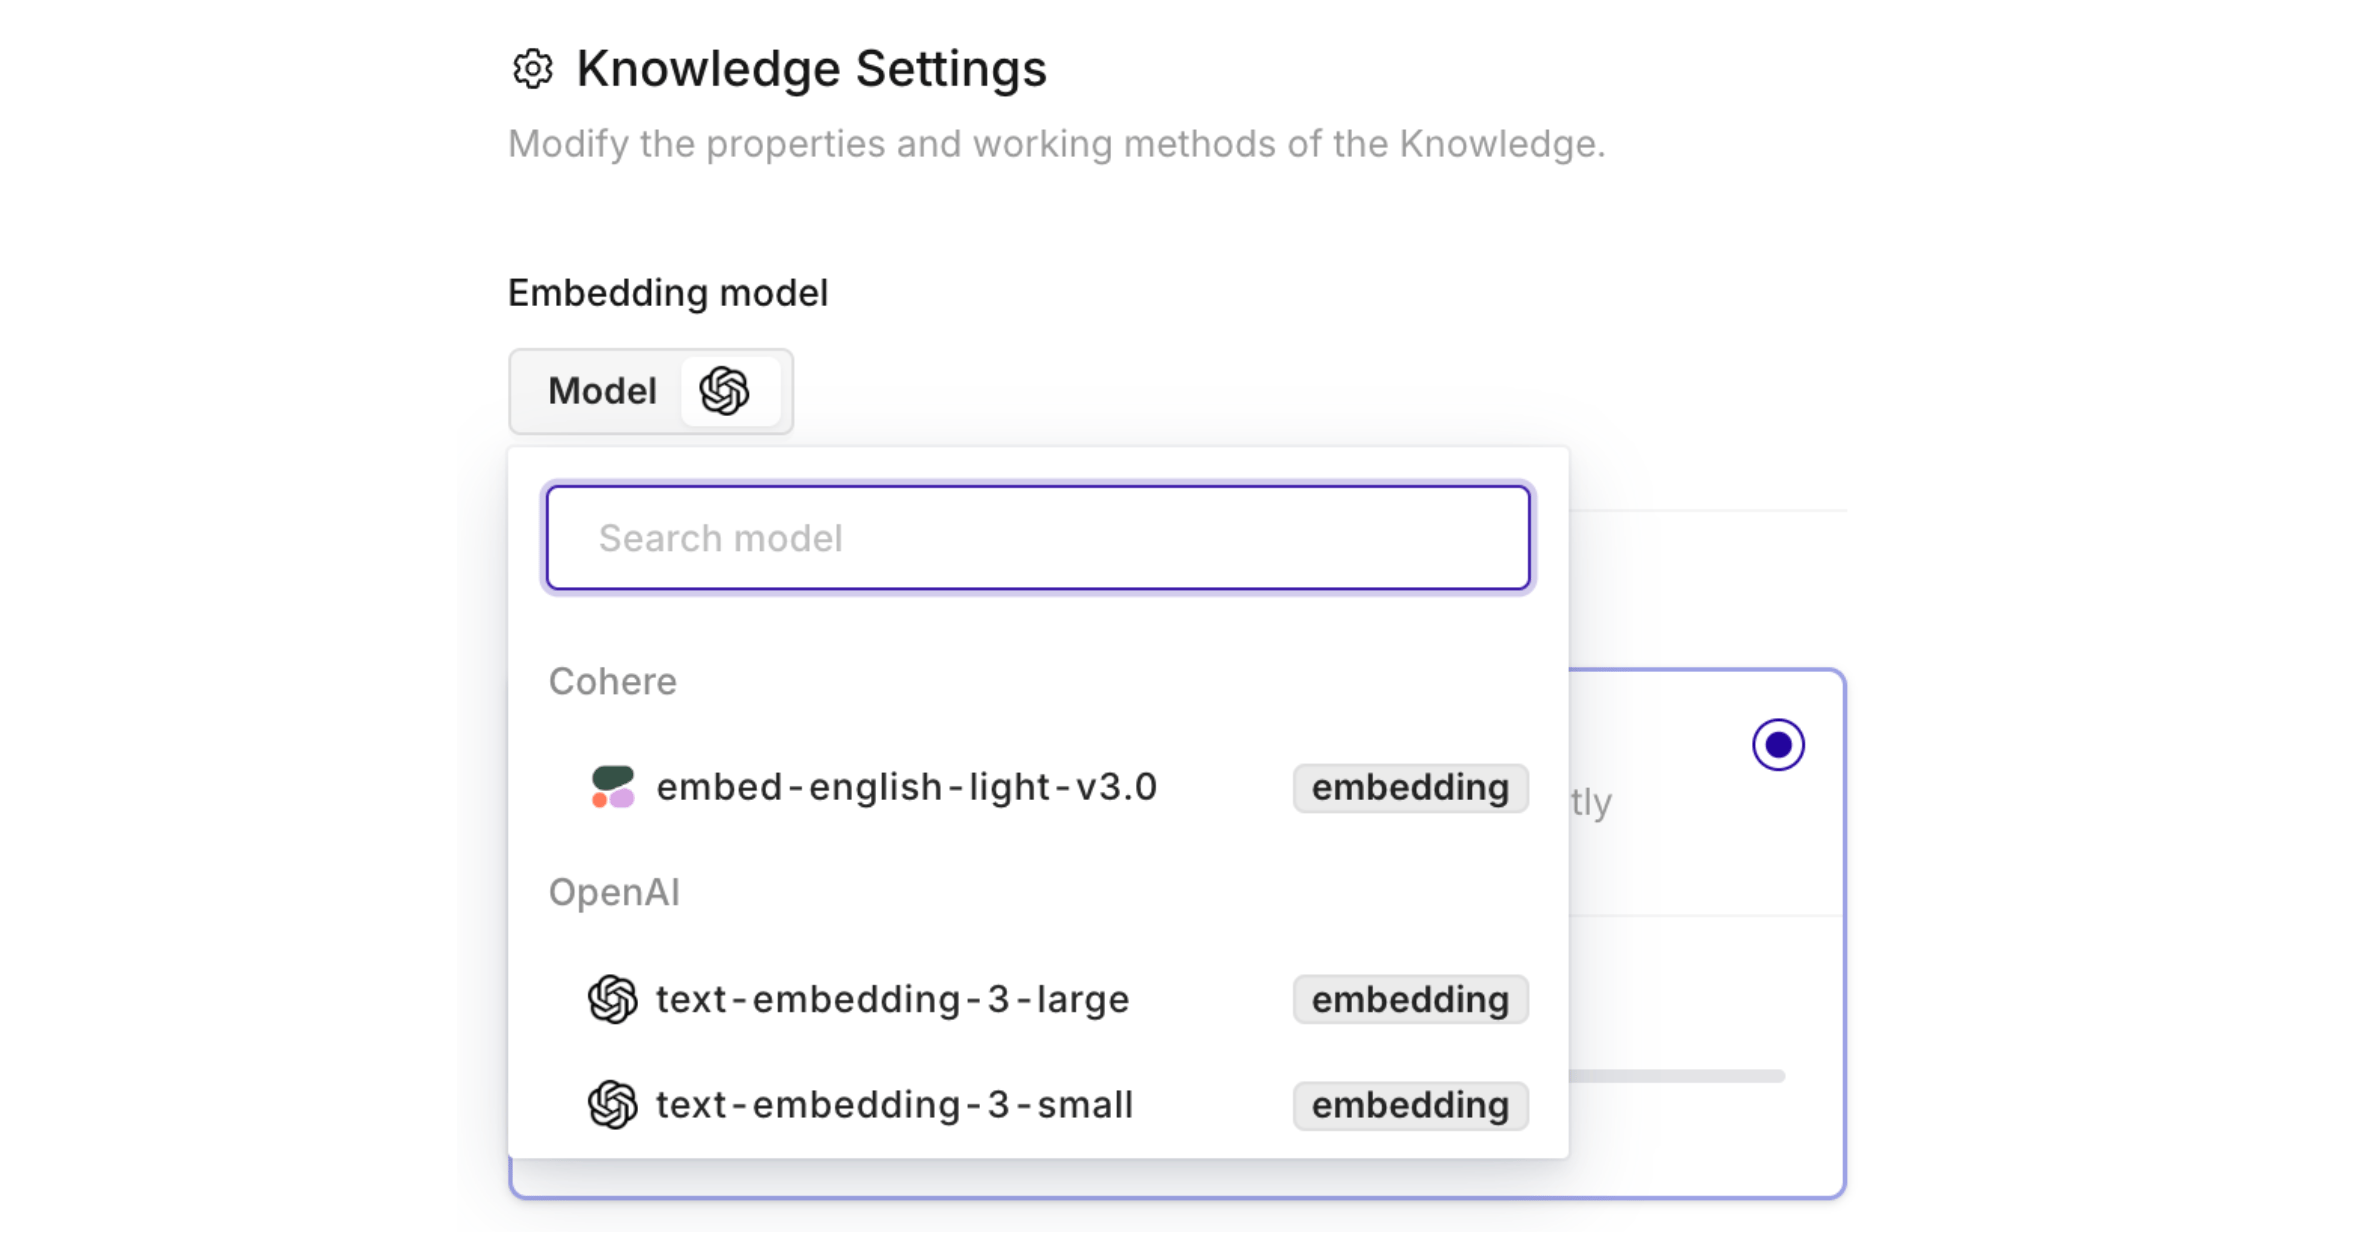
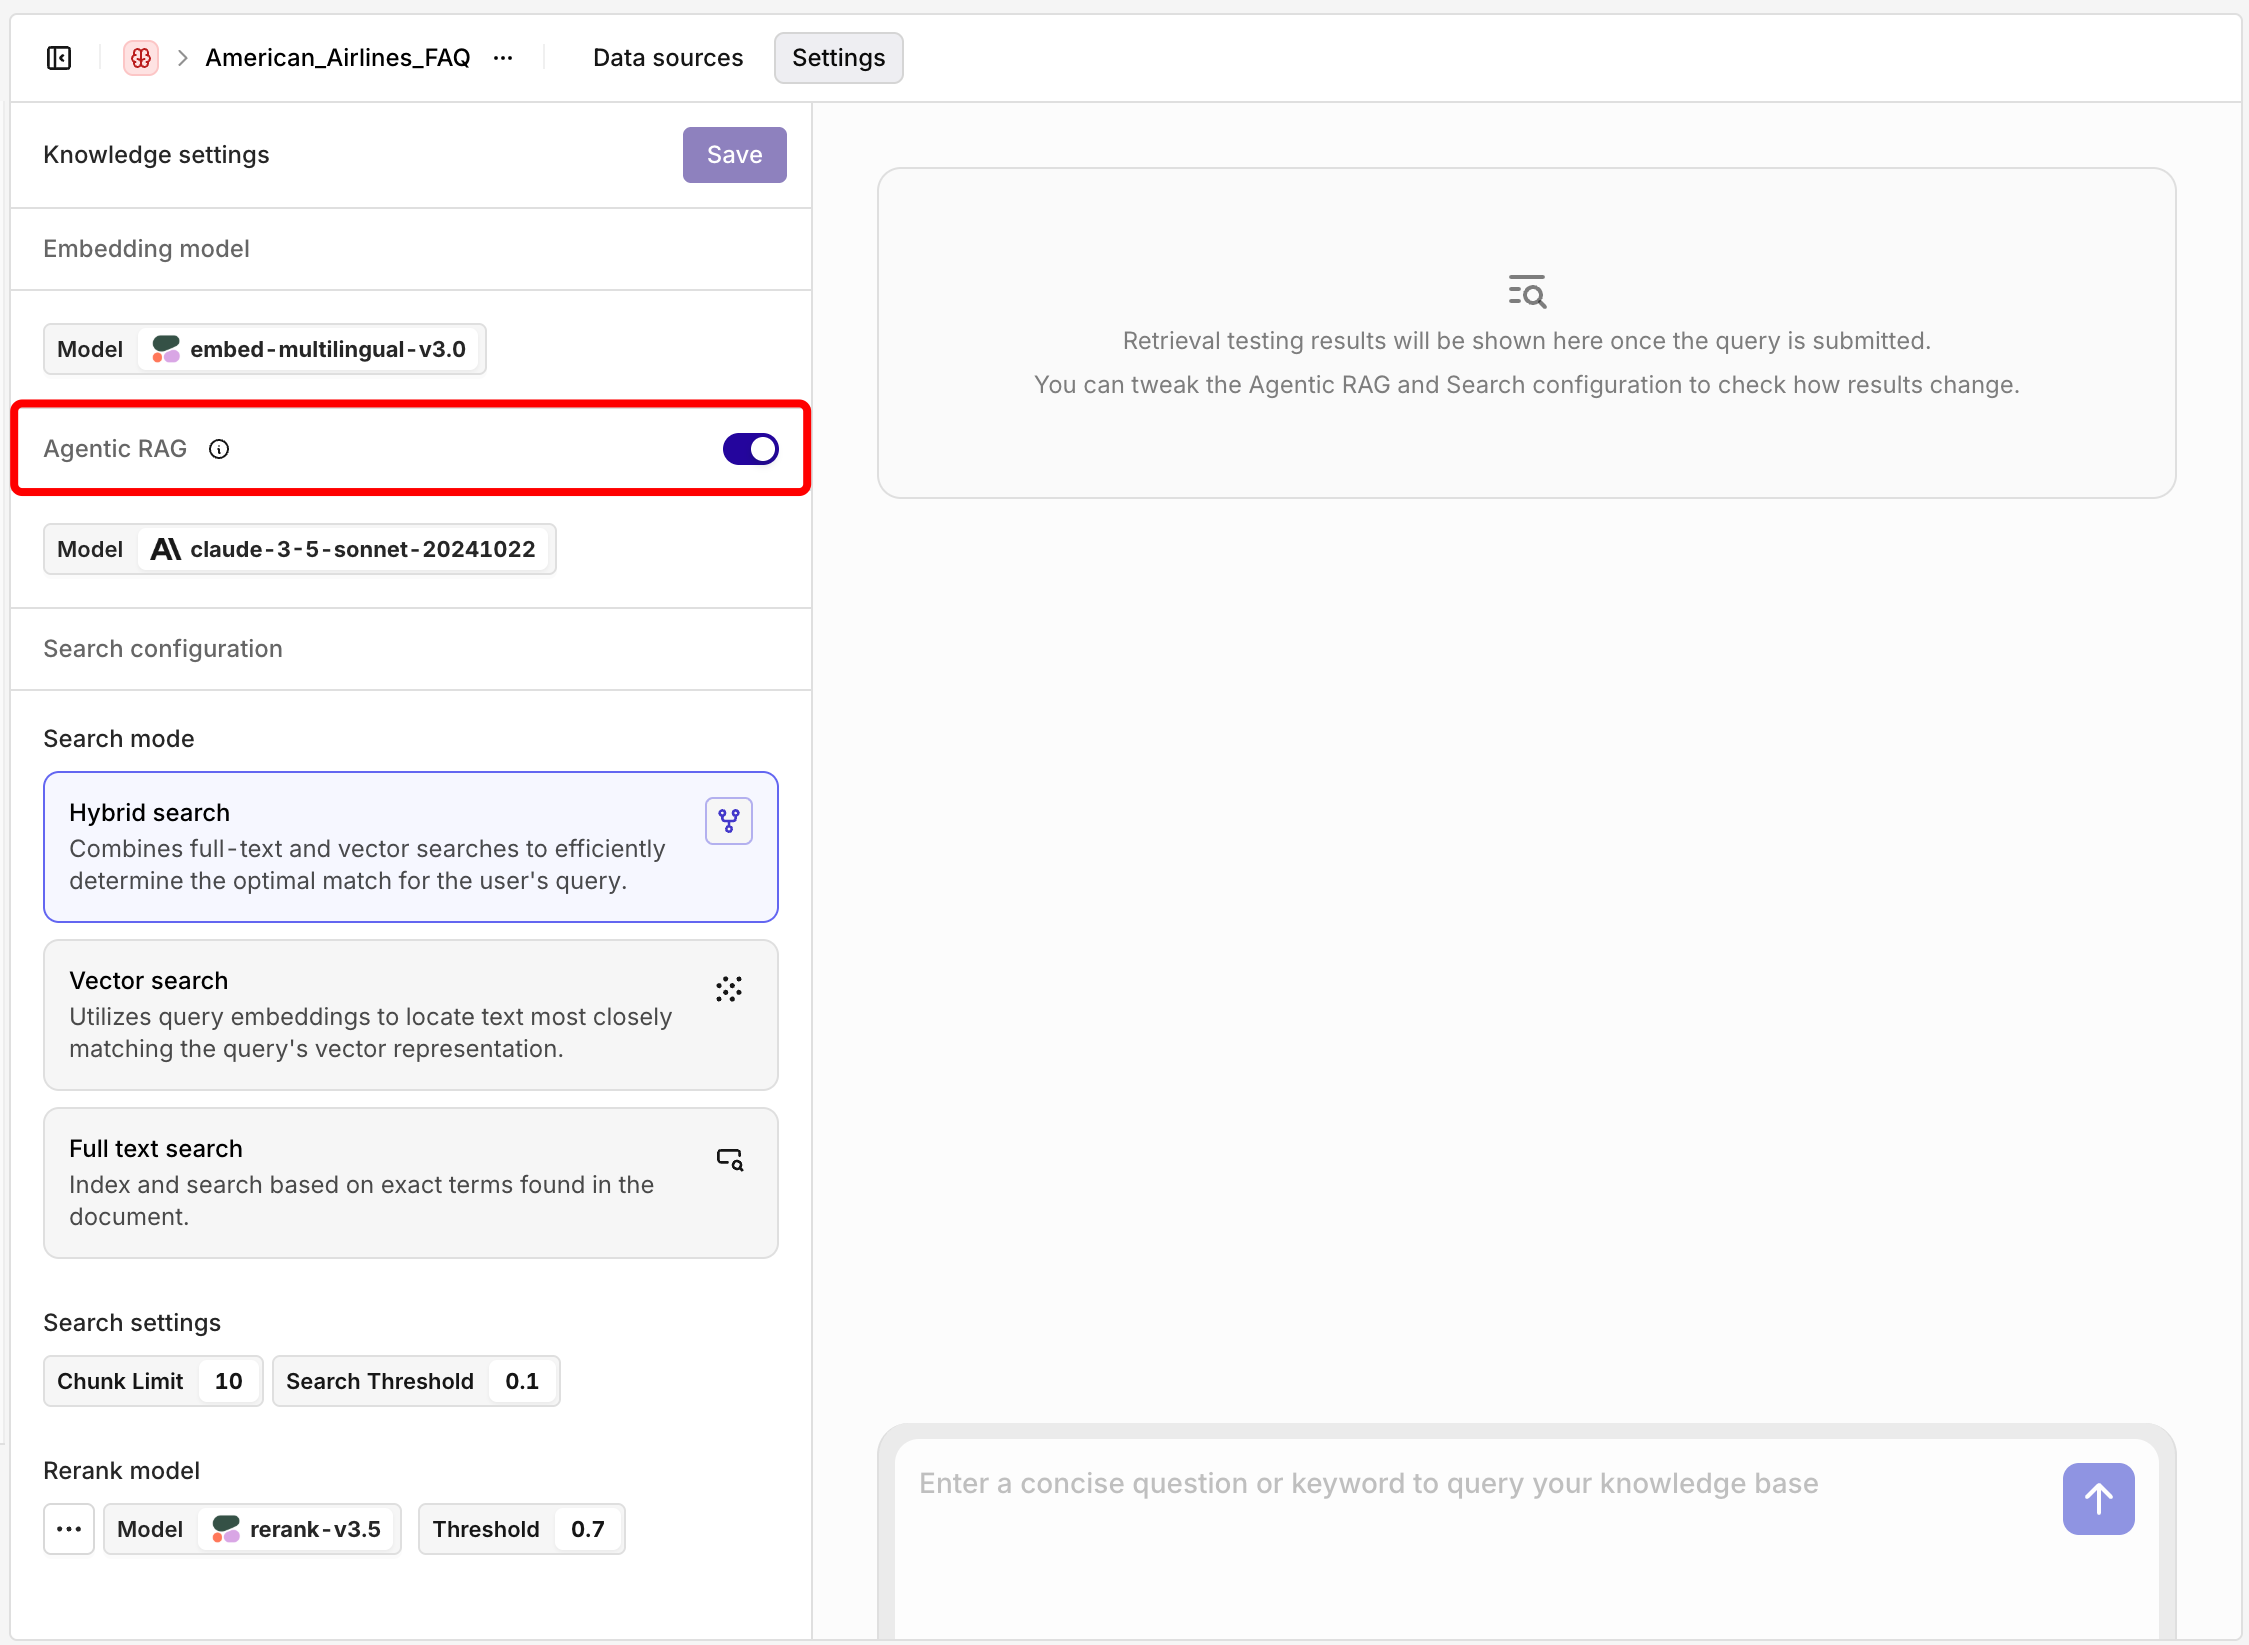
Agentic RAG
Incorporates AI agents into the RAG pipeline to orchestrate its components and perform additional actions beyond simple information retrieval, overcoming the limitations of a non-agentic pipeline. Enable the Agentic RAG toggle in Knowledge Settings, then select a Model to use. The chosen model drives two actions:- Document Grading: ensures only relevant chunks are retrieved.
- Query Refinement: rewrites the query if needed to improve retrieval quality.
Example: Query Refinement
Example: Query Refinement
See the screenshot below on how the input query gets refined.Input query: 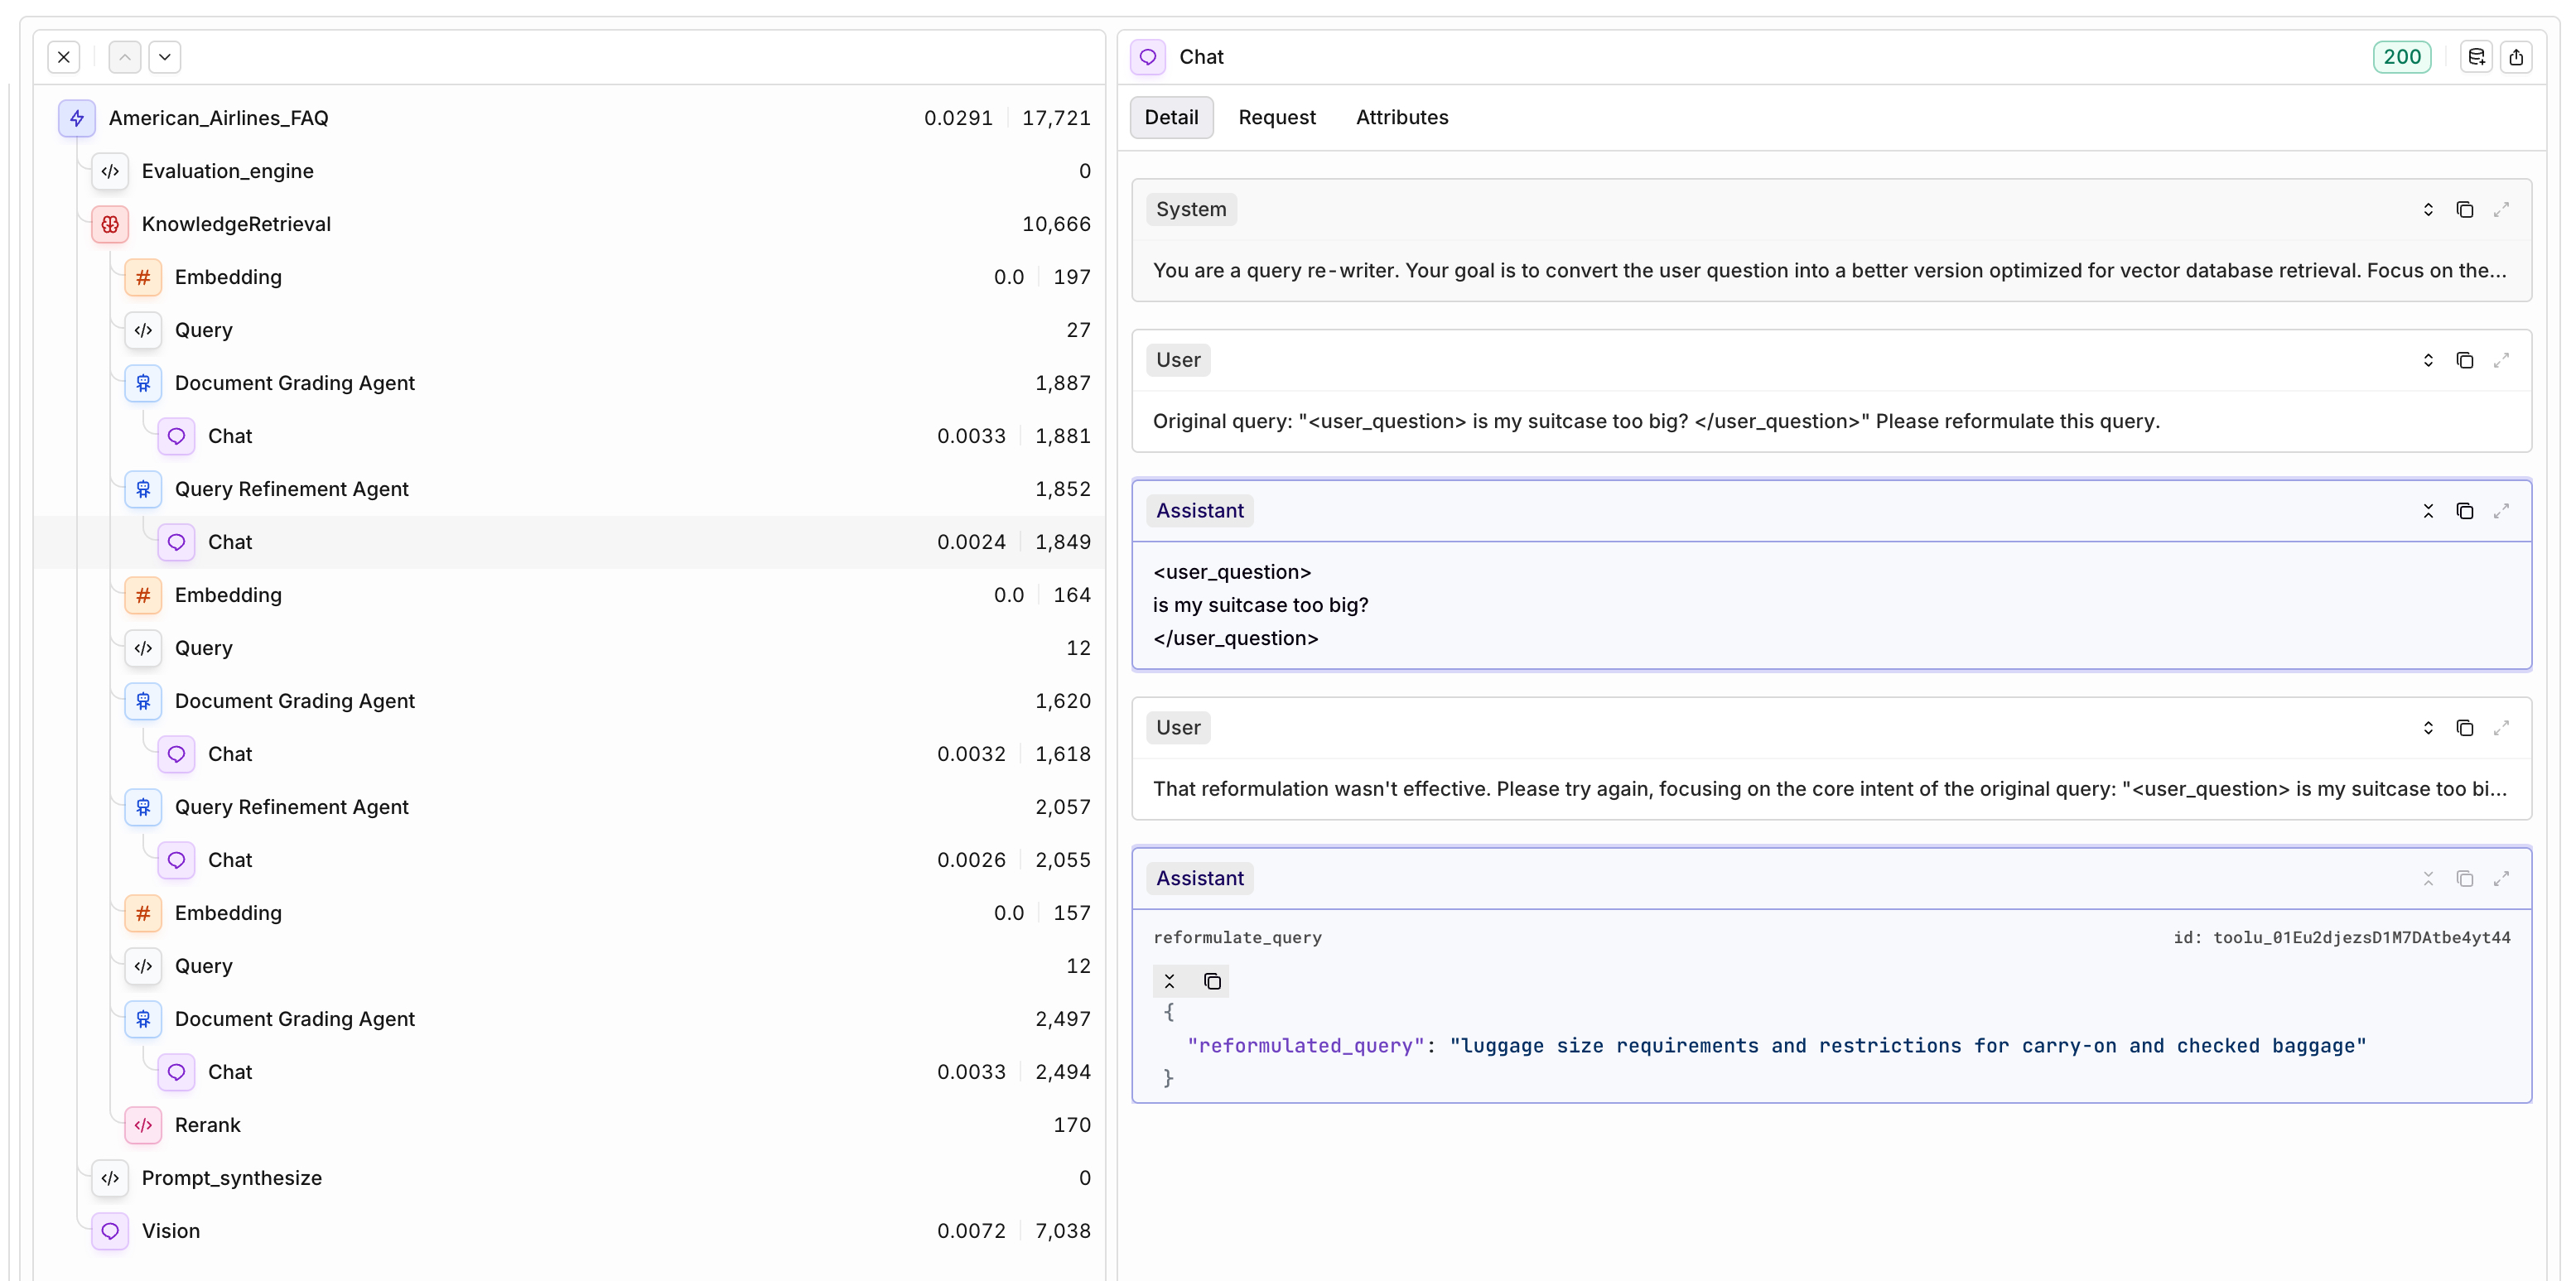
is my suitcase too big? is reformulated to luggage size requirements and restrictions for carry-on and checked baggageSearch Modes
Different Search modes are available for Information to be found in Knowledge Bases:Vector Search
Vector Search
Vector search is the fastest method of searching through a database built with your Knowledge Sources. The system takes the user query and looks for the text segments most similar to their vector representations.The search returns the preprocessed chunks from the sources most similar and relevant to the user’s query.
Keyword Search
Keyword Search
Keyword Search retrieves relevant results by indexing the entire content and searching for segments containing the words from the user’s query.
Hybrid Search
Hybrid Search
Hybrid search uses both Vector and Keyword search, then combines results and returns the most relevant chunks to the model.
Chunk limit
Chunk limit
Sets the number of chunks most similar to the user’s question to return.
Threshold
Threshold
Controls the relevance of results on a scale from 0 to 1. Results scoring below the threshold are excluded from retrieval.The closer to 1, the more relevant and narrow the results will be.
Rerank Model
Reranking invokes a model that analyzes your initial query and the results fetched by the Knowledge Base search. The model scores and ranks the chunks by similarity to the user query, ensuring the most relevant results are returned.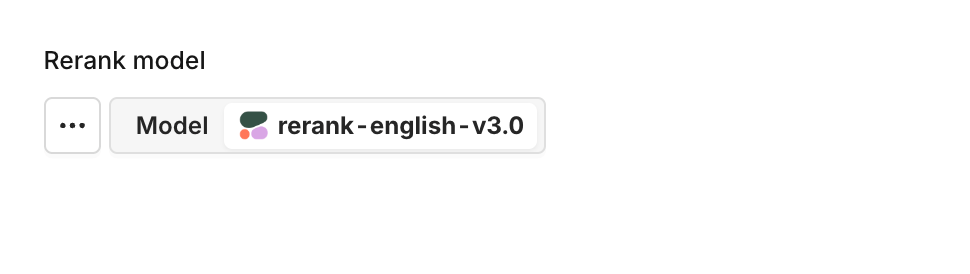
Search a Knowledge Base
Once your Knowledge Base is populated, you can query it in several ways.- AI Studio
- API & SDK
 MCP
MCP
Test via the Studio
Test via the Studio
Test your Knowledge Base search directly in the AI Studio using the built-in search panel.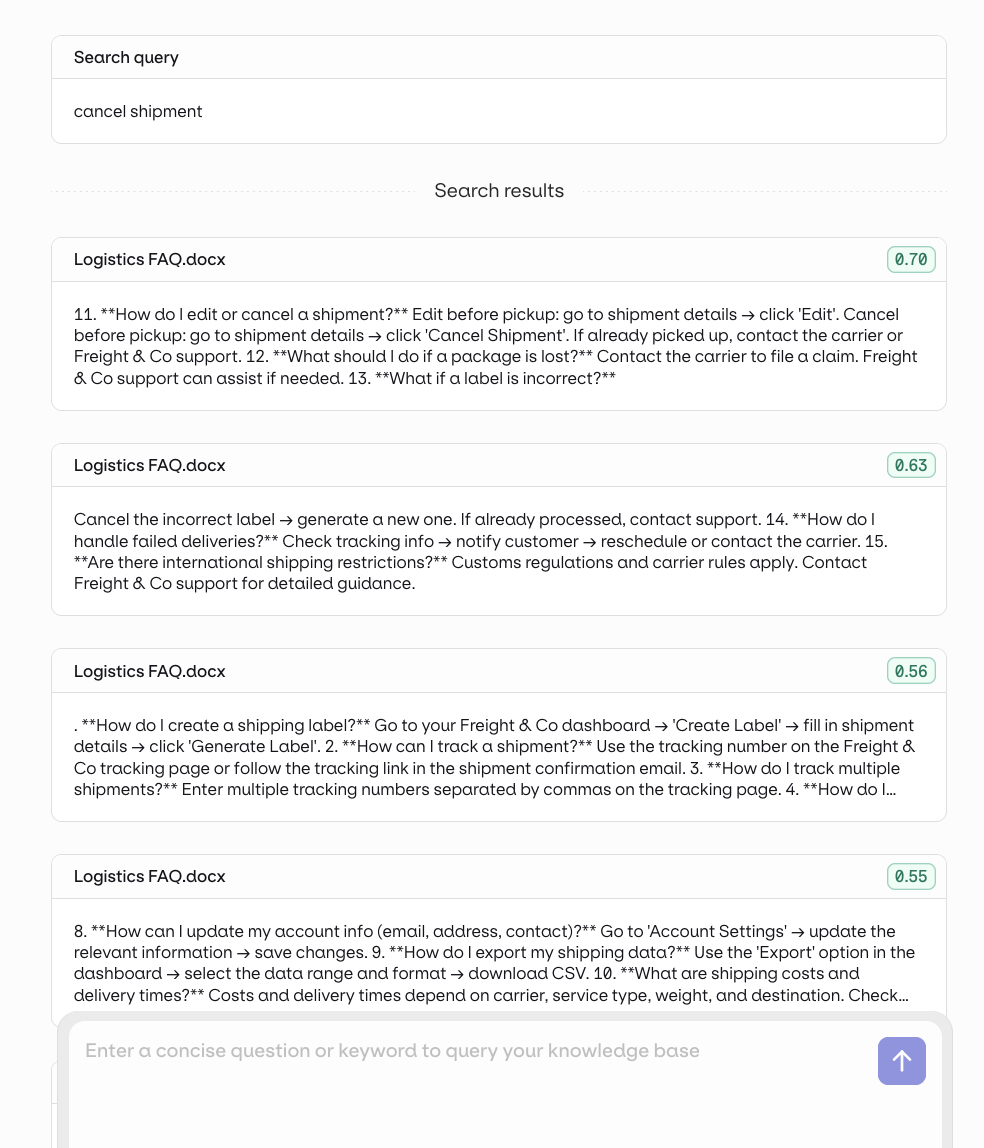
Integrate to a Deployment
Integrate to a Deployment
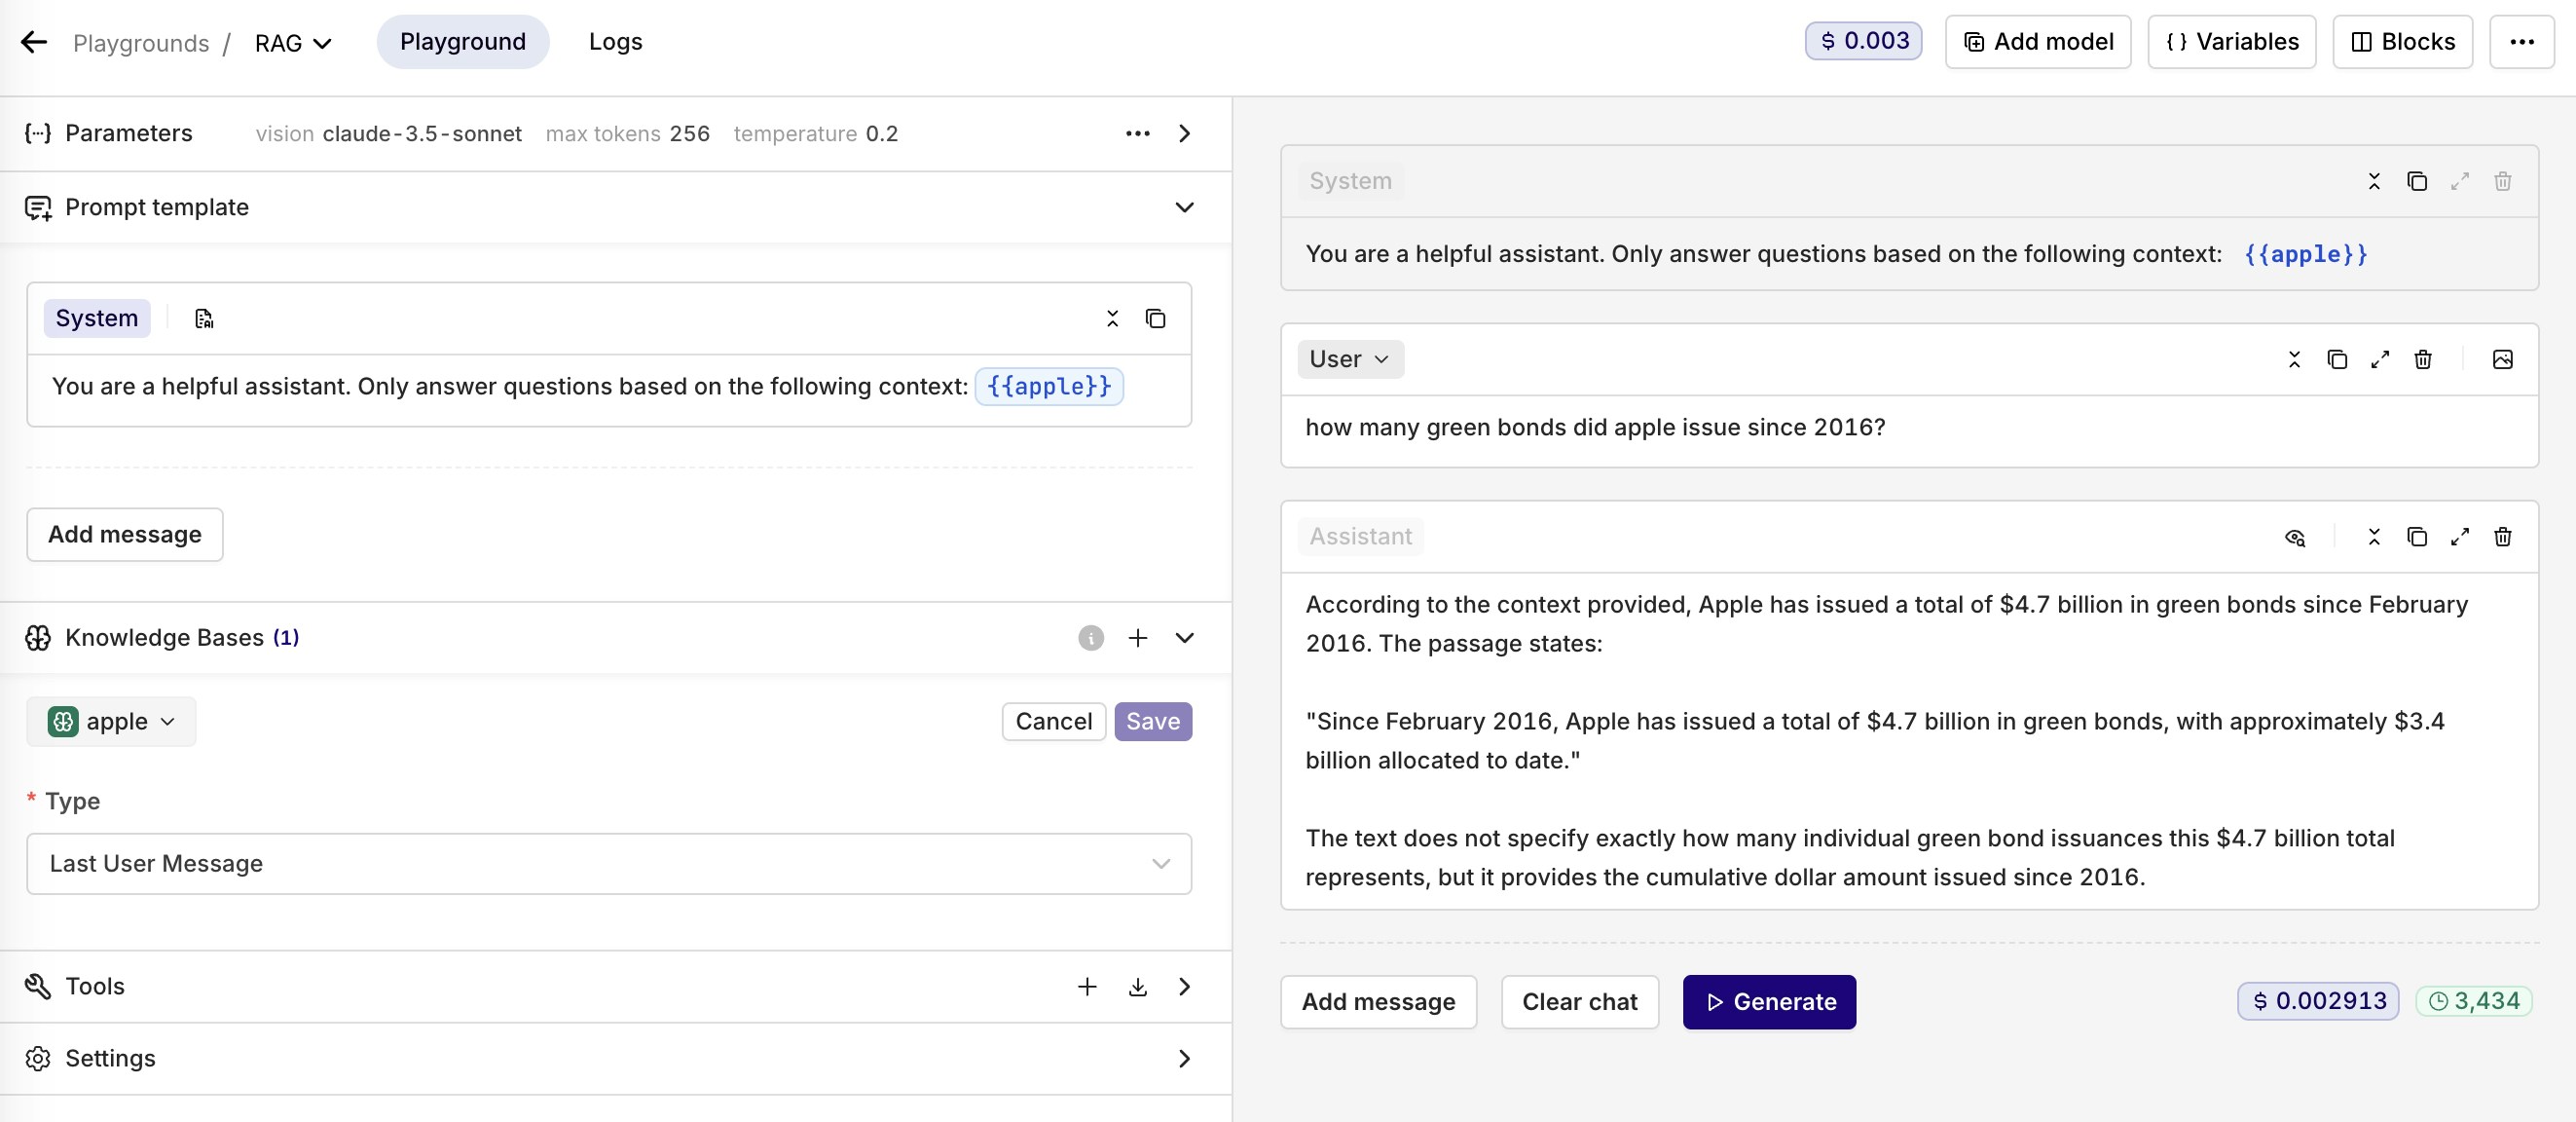
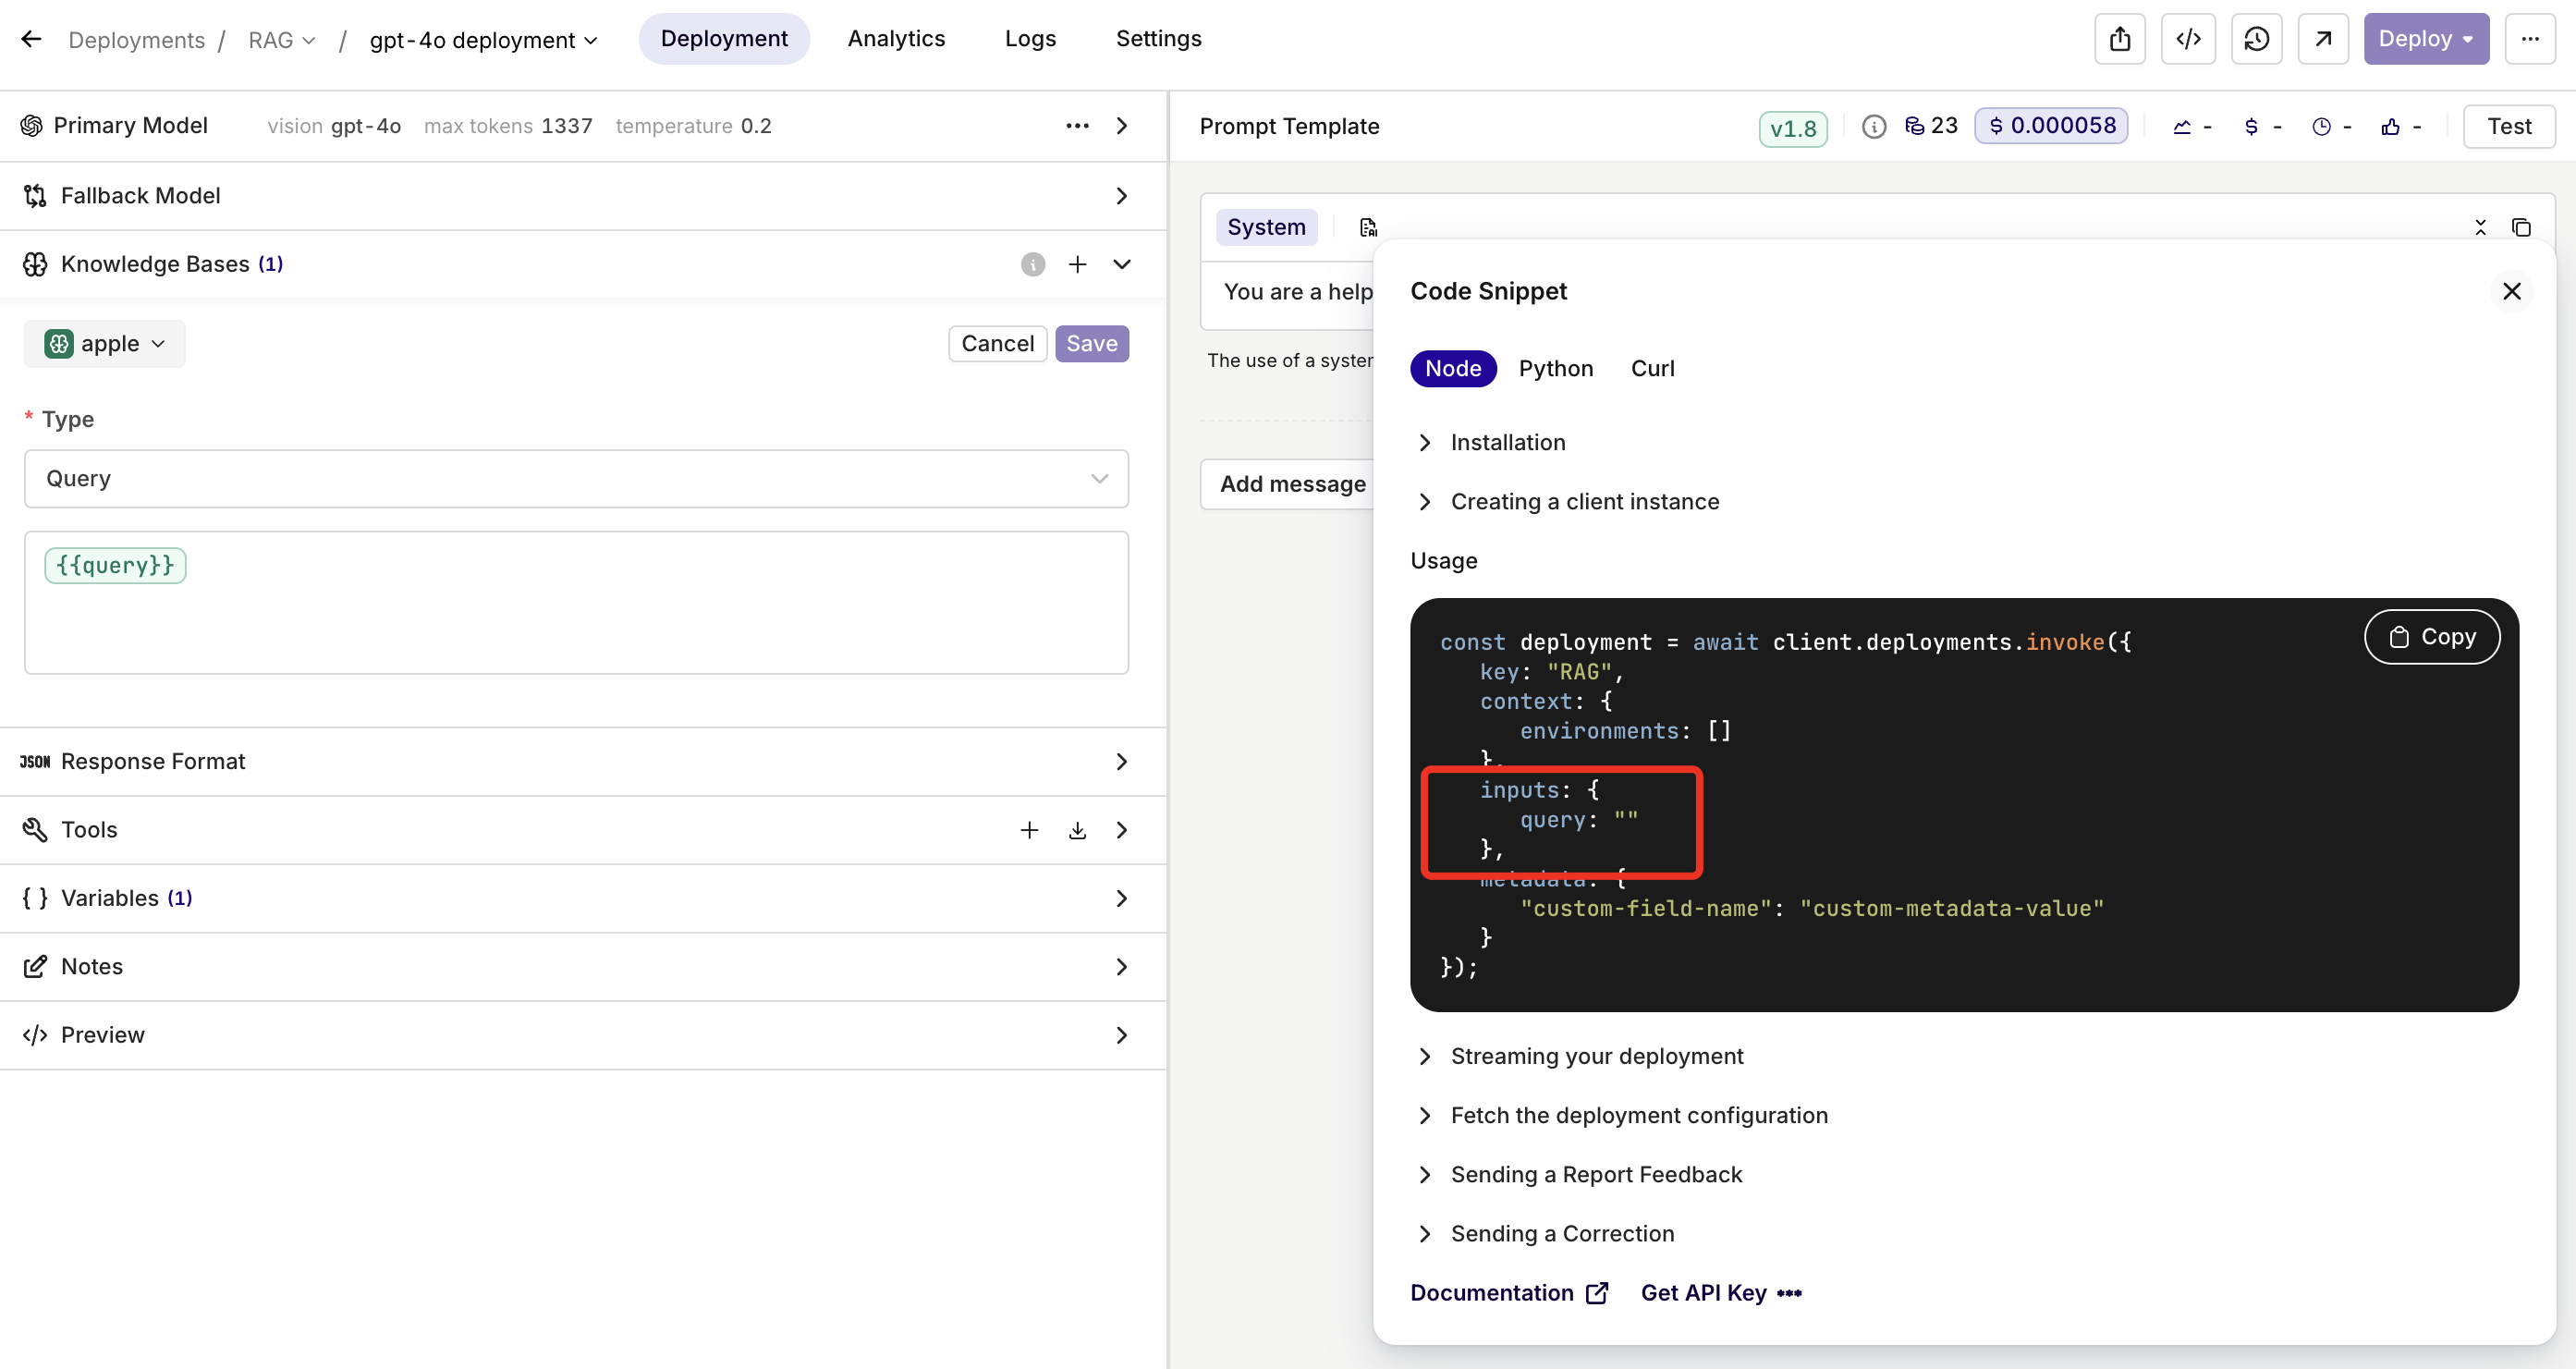
Attach a Knowledge Base to a Deployment to automatically retrieve relevant chunks on every call.
- Open the Deployment’s configuration and go to Knowledge Bases.
- Select Knowledge Base and choose your Knowledge Base.
- Set the query type:
- Last User Message: the user’s latest message is used as the search query automatically.
- Query: use a predefined query. You can make it dynamic with an input variable such as
{{query}}.
- Reference the retrieved chunks in your prompt with the
{{knowledge_base_key}}syntax. If not explicitly referenced, the chunks are appended to the end of the system message.
To learn more, see Using a Knowledge Base in a Deployment.
Integrate to an Agent
Integrate to an Agent
Add a Knowledge Base as context to an Agent. Unlike Deployments, the Agent only queries the Knowledge Base when it determines it is necessary, using the
query_knowledge_base tool automatically.- In the Agent configuration, go to the Context section and click Add context.
- Select your Knowledge Base.
- In the Agent’s Instructions, explicitly tell it to use the Knowledge Base. For example:
“First useretrieve_knowledge_basesto see what knowledge sources are available, then usequery_knowledge_baseto find relevant information before answering.”
To learn more, see Knowledge Bases with Agents.
Use in Prompts
Use in Prompts
To add a Knowledge Base in a Prompt, open the Knowledge Base tab in the Configuration screen and select Add a Knowledge Base.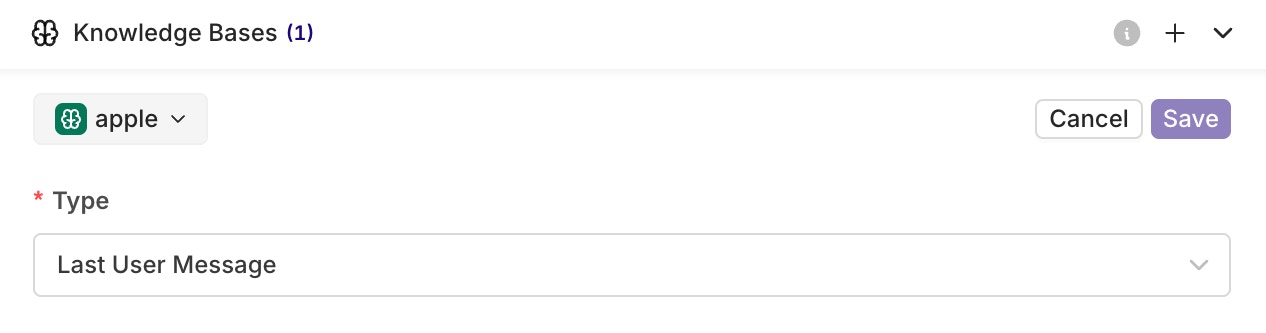

{{key}} syntax in your prompt, where key is the key of your Knowledge Base.See knowledge base retrieval in a complete application. Read our cookbook Multilingual FAQ Bot.
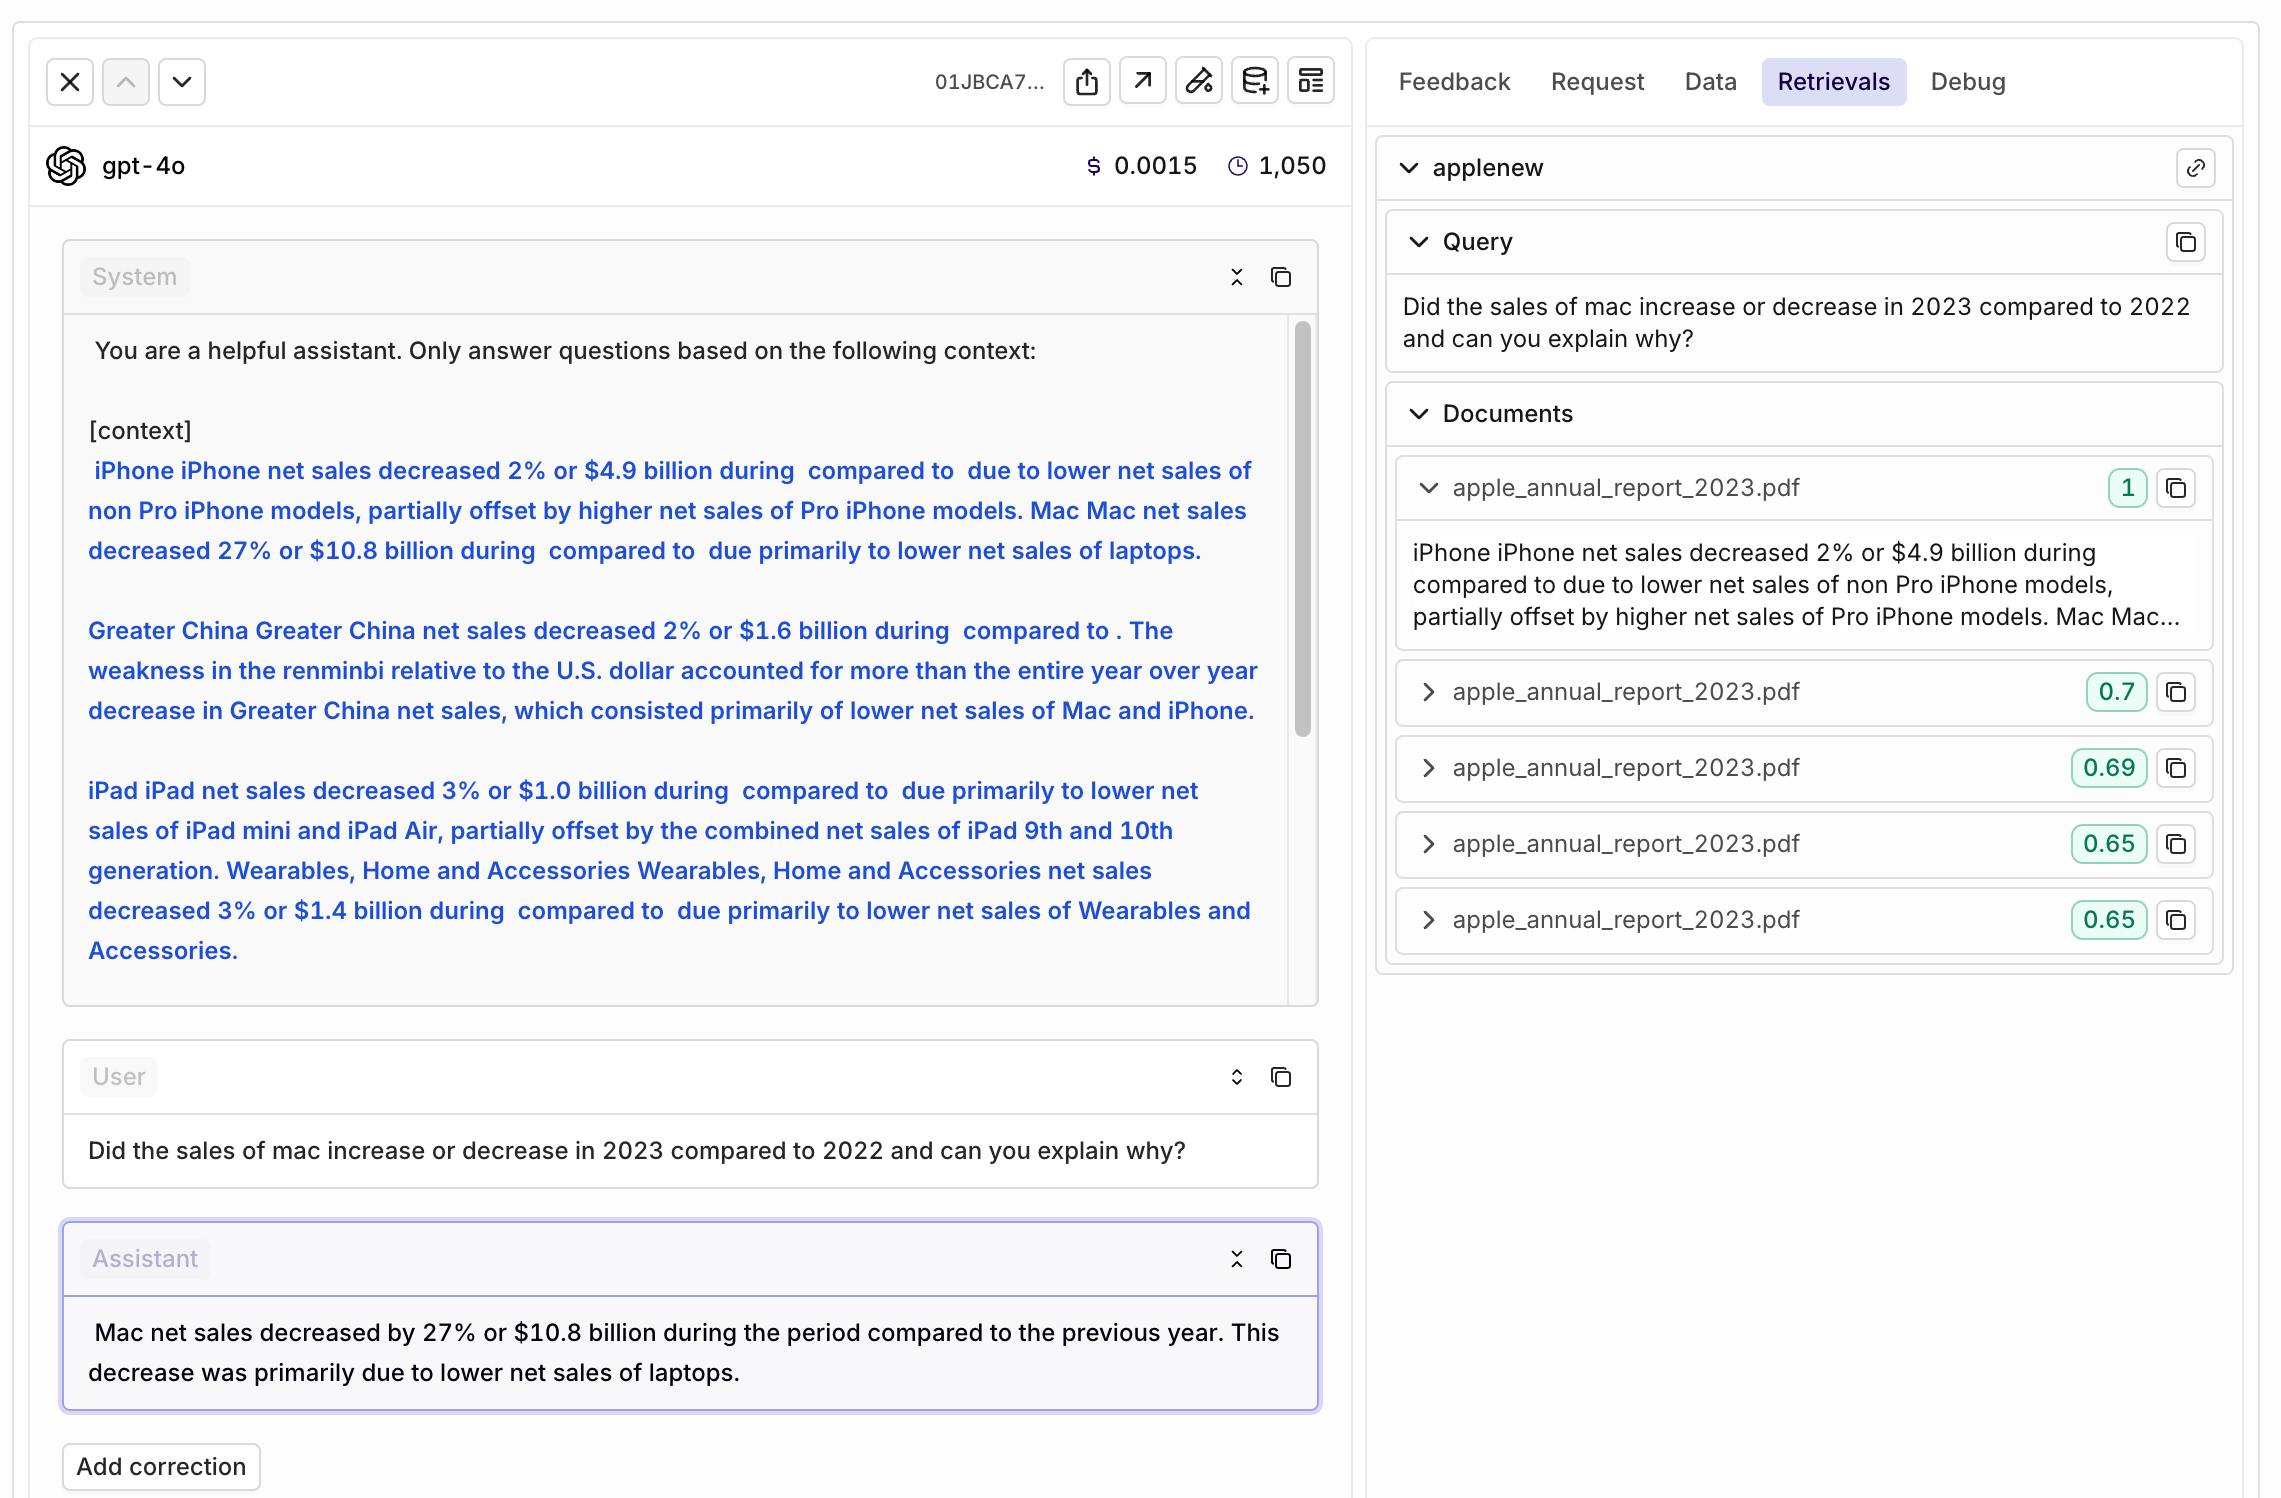
Retrieval Traces and Logs
When using a Knowledge Base within Playground, Experiment, Deployment, or Agent, traces are generated containing details of how Knowledge Bases were accessed.- Traces
- Logs
To find Traces, go to the Traces tab in the AI Studio.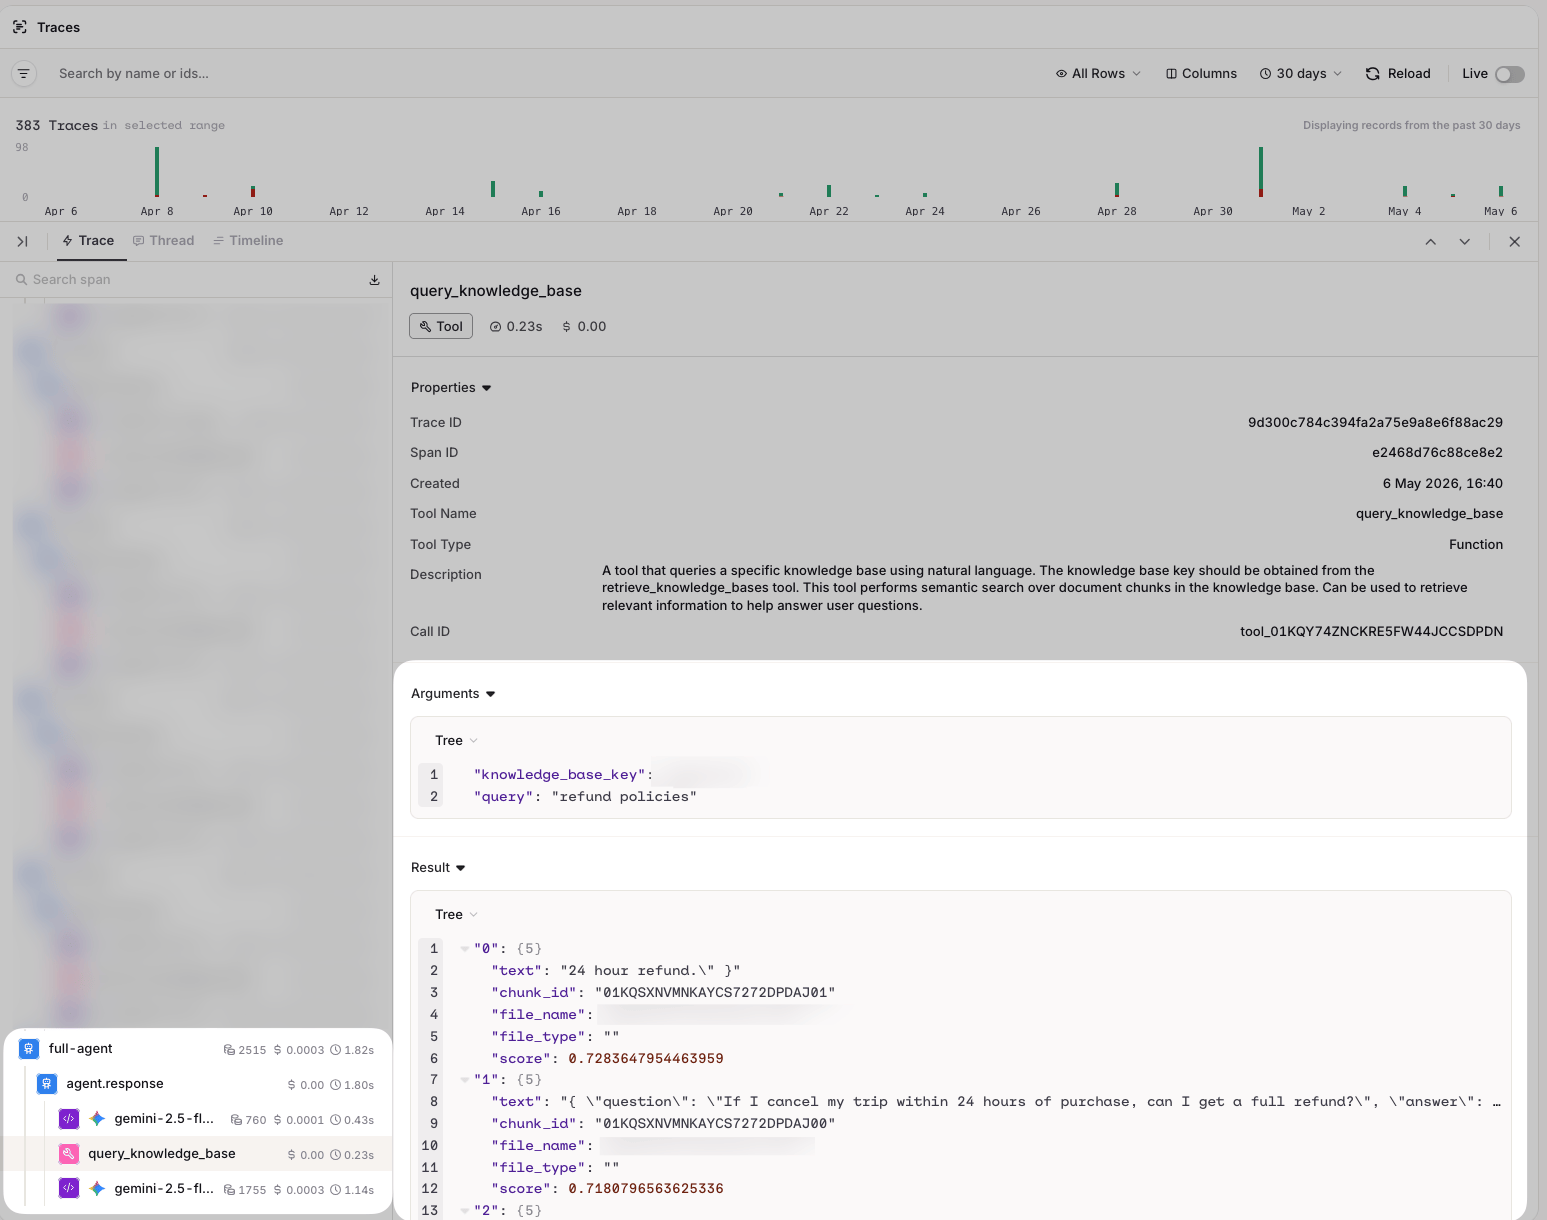
- Query: the query used to retrieve relevant chunks.
- Documents: the retrieved chunks, ordered by relevance score.
External Knowledge Bases
To connect to an external Knowledge Base, click the button on the desired Project and select Knowledge Base > External.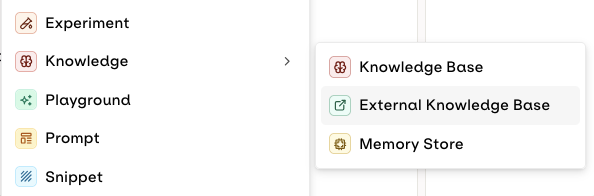

| Field | Description | Example |
|---|---|---|
| Key | Unique identifier, alphanumeric with hyphens/underscores | external_kb |
| Description | Description of the knowledge base | External Knowledge Base |
| Name | Display name | External Knowledge Base Name |
| API URL | URL to search the knowledge base, must be HTTPS | https://api.example.org/search |
| API Key | Authentication API key. Orq.ai will use Bearer Authentication to call your API. | <API_KEY> |
orq.ai includes the API Key in the
Authorization: Bearer <API_KEY> header when calling your endpoint.API keys are encrypted using workspace-specific keys (AES-256-GCM).
API Payloads
Example payloads for the request and response expected from your external API:Request Payload
Request Payload
Response Payload
Response Payload
The API must respond like a standard Knowledge Base search. See our Search API for the expected payload format.
Example Implementations
Python Implementation
An Example Python Server for External Knowledge Base
Python Implementation
An Example Python Server for External Knowledge Base
Get the Code
Clone the Python example Server
Node.js Implementation
An Example Node Server for External Knowledge Base
Node.js Implementation
An Example Node Server for External Knowledge Base
Get the Code
Clone the Node example Server
Integrate Vector Database Providers
Orq.ai supports providers like Weaviate and Pinecone, as both platforms expose REST APIs that conform to the expected payload format.Troubleshoot Common Errors
| Scenario | Error Message |
|---|---|
| HTTP instead of HTTPS | ”External knowledge base URL must use HTTPS protocol” |
| Local/private IP | ”External knowledge base URL cannot point to local network” |
| API unreachable | ”Failed to verify external knowledge base connectivity” |
| API timeout (>50s) | “External API request timed out” |
- Verify your API endpoint is publicly accessible via HTTPS.
- Check your API logs for incoming requests from orq.ai IP addresses.
- Verify your firewall/security groups allow inbound HTTPS traffic.
- Verify the API key is correct and has not expired.
- Check that your API expects Bearer authentication in the
Authorizationheader. - Confirm your API key has the necessary permissions to perform searches.
- Verify your API returns the expected response format (see Response Payload above).
- Check that
scores.search_scorevalues are between 0 and 1. - Test with different
thresholdvalues (lower threshold = more results). - If using reranking, ensure both
search_scoreandrerank_scoreare provided. - Verify your external vector database has sufficient indexed documents.
- Monitor your external API response times.
- Consider implementing caching for frequently searched queries.
- Optimize your vector database indexes.
- Check if your external API is rate limiting requests.
Configure your External Knowledge Base
Datasource configuration is not accessible within External Knowledge Bases, as data is hosted outside of Orq.ai.
- Agentic RAG
- Search retrieval parameters: Chunk Limit, Search Threshold
- Rerank Model
Your External Knowledge Base is connected:
- Use it just like any other Knowledge Base. See Search a Knowledge Base.
- Your knowledge base can also be used with Agents. See Connect Knowledge Bases.
- Your API is called at runtime when the model needs to perform a search.
Memory Stores
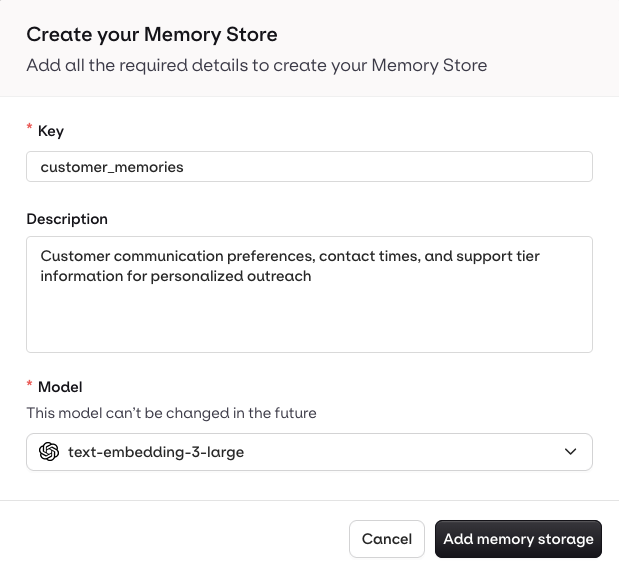
Memory Stores provide persistent storage for agent memories, allowing agents to retain and retrieve information across conversations and sessions. Unlike Knowledge Bases, Memory Stores are entity-scoped: each Memory within a store is tied to a specific entity (a user, session, or any object you define), enabling personalized, per-entity recall. Only long-term memory is currently supported: stored information persists indefinitely with no automatic expiration. To use a Memory Store with an Agent, see Connect Memory Stores.Architecture
| Concept | Description |
|---|---|
| Memory Store | Top-level container organizing all memories for a use case |
| Memory | An entity within the store (e.g., a specific user, customer, or session) |
| Memory Document | The actual content item stored within a Memory, embedded for semantic search |
Create a Memory Store
- AI Studio
- API & SDK
Head to a Project, use the button, and select Knowledge > Memory Store.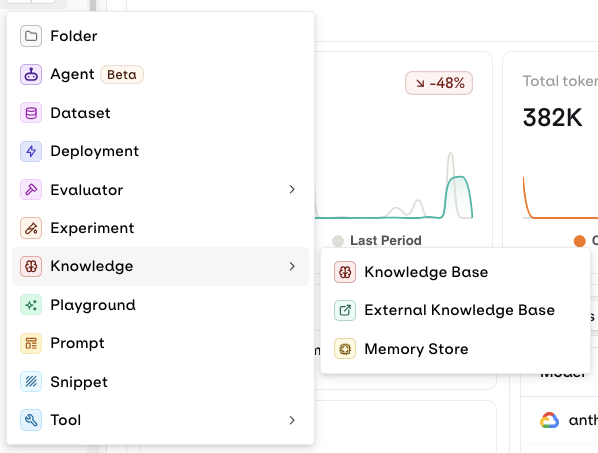
Manage Memories and Documents
A Memory represents a specific entity within a Memory Store, identified by anentity_id. Each Memory holds Documents: the actual text content embedded for semantic search.
- AI Studio
- API & SDK
Create an EntityOnce a Memory Store is created, select Add Entity, enter an ID for the entity, and press Save.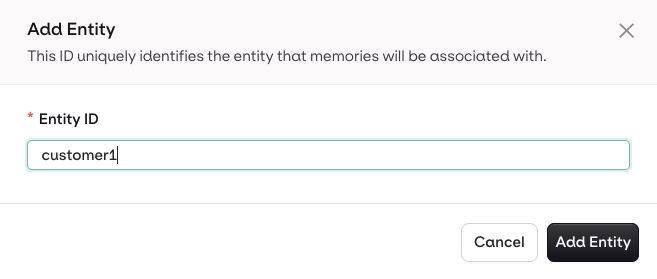
Memories are best managed dynamically through the API. See the API & SDK tab for programmatic access.
Best Practices
Entity ID strategy: Use consistent, unique identifiers. Prefix by type (e.g.,user_123, session_456) and keep IDs stable across your system.
Descriptions: Write exhaustive Memory Store descriptions. Agents use them to identify the correct store to query.
Organization: Create separate stores for different contexts (customers, products, sessions). Use descriptive keys.
Metadata: Use tags for filtering and categorization, not for storing large text content. Keep data types consistent per field.
See Memory Stores powering real agent applications. Read our cookbooks Multi-Agent HR System and Chat History.